Are you facing the challenge of attaching something securely to the side of a new concrete wall? Whether it’s a shelf, a fence post, or a heavy fixture, knowing the right way to anchor into fresh concrete can save you time, money, and frustration.
In this guide, you’ll discover simple, step-by-step methods that anyone can follow—even if you’re not a pro. Keep reading, and you’ll gain the confidence to make your project strong and lasting from the very start.

Credit: structuraldetails.com
Choosing The Right Anchor
Choosing the right anchor for a new concrete wall is important for a strong hold. The anchor must fit the wall type and the load it will carry. A poor choice can cause damage or failure. This guide helps you pick the best anchor for your project.
Types Of Anchors For Concrete Walls
There are several anchors designed for concrete walls. Expansion anchors work by expanding inside the hole. Sleeve anchors have a metal sleeve that grips the wall tightly. Wedge anchors use a wedge that tightens as you screw it in. Drop-in anchors are set flush and hold bolts inside. Each type serves different needs and loads.
Factors To Consider Before Selection
Check the weight your anchor must support. Consider the thickness and hardness of the new concrete wall. Think about the environment—wet or dry areas need special anchors. Also, decide if you want a permanent or removable anchor. Proper size and depth of the hole matter for safety. These factors guide you to the right anchor choice.
Gathering Necessary Tools And Materials
Before you start anchoring to the side of a new concrete wall, gather all the necessary tools and materials. Having everything ready helps you work faster and safer. It also prevents interruptions. Knowing what you need makes the job smoother and more efficient.
Essential Tools For Anchoring
Start with a hammer drill to make holes in the concrete. Use a masonry bit sized for your anchors. A wrench or socket set will tighten the anchors securely. A tape measure helps mark exact spots. A pencil or marker is useful for marking drilling points. Safety glasses protect your eyes from dust and debris. Work gloves keep your hands safe and comfortable. A vacuum or brush cleans dust from drilled holes.
Materials Checklist
Choose the right anchors for your project. Sleeve anchors work well for medium loads. Wedge anchors hold heavy items firmly. Concrete screws are good for light to medium jobs. Use anchors made for concrete, not wood or drywall. Have extra anchors in case of mistakes or weak spots. Use a level to ensure your installation is straight. A sealant can protect holes from moisture if needed.
Preparing The Concrete Wall
Preparing the concrete wall is an important first step before anchoring anything to it. A clean and well-marked surface ensures strong and safe anchors. Proper preparation helps avoid mistakes and weak spots. It saves time and effort in the long run.
Cleaning The Surface
Start by removing dirt, dust, and loose debris from the concrete wall. Use a stiff brush or broom to sweep the surface thoroughly. Any oil or grease spots should be cleaned with a mild detergent and water. Let the wall dry completely before moving to the next step. A clean surface allows anchors to hold better and last longer.
Marking Anchor Points
Measure carefully to decide where to place your anchors. Use a pencil or chalk to mark the exact spots on the concrete wall. Double-check the measurements to avoid errors. Marking helps you drill holes in the right places. It keeps the project organized and ensures the anchors are evenly spaced.

Credit: posthugger.com
Drilling Holes In New Concrete
Drilling holes in new concrete walls is a key step for anchoring securely. Concrete is tough and dense, so proper drilling ensures strong hold and prevents damage. Taking care during this process saves time and effort later.
Using the right tools and methods helps create clean, accurate holes. This section covers how to pick the best drill bit and drilling techniques for precise results.
Choosing The Right Drill Bit
Select a masonry drill bit designed for concrete. It has a strong carbide tip for cutting hard material. Size the bit to match your anchor’s diameter. Too small, and the anchor won’t fit. Too large, and the hold weakens.
Check the drill bit’s length. It must reach the full depth of the anchor. A short bit leads to shallow holes and poor grip. Use bits with flutes that remove dust efficiently. This keeps the hole clean during drilling.
Drilling Techniques For Precision
Mark the spot clearly before drilling. Use a pencil or tape for accuracy. Hold the drill steady and perpendicular to the wall. This prevents angled holes that weaken the anchor.
Start drilling at low speed to create a small guide hole. Increase speed gradually as the bit penetrates deeper. Apply firm, even pressure without forcing the drill. Let the bit do the work.
Pause occasionally to pull out the bit and clear dust. This avoids overheating and bit damage. Keep the drill straight throughout the process. Clean the hole of debris before inserting anchors.
Installing Anchors Properly
Installing anchors properly ensures strong support on a new concrete wall. It prevents damage and keeps your fixtures safe. Follow clear steps to set anchors securely. Use the right tools and materials for best results.
Inserting Expansion Anchors
First, drill a hole in the concrete with a hammer drill. The hole size must match the anchor size. Clean the hole from dust with a brush or air blower. Insert the expansion anchor into the hole fully. Tap gently with a hammer if needed. Tighten the anchor bolt slowly. This causes the anchor to expand and grip the concrete tightly. Check that the anchor is firm before hanging anything.
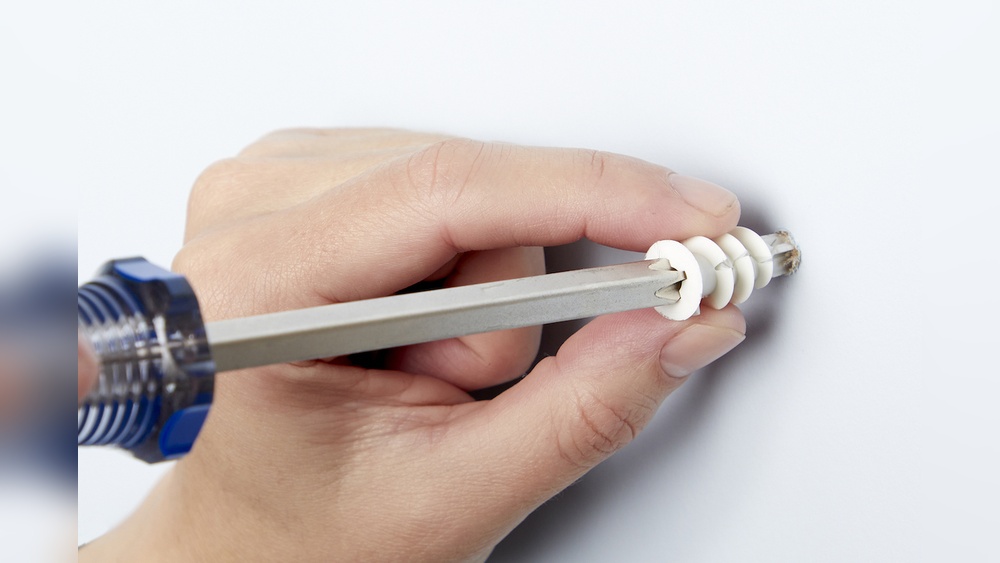
Using Sleeve And Wedge Anchors
Drill a hole that fits the sleeve or wedge anchor diameter. Remove all dust and debris from the hole. Push the anchor into the hole until the washer and nut touch the surface. Tighten the nut steadily with a wrench. The sleeve or wedge expands inside the hole. This expansion locks the anchor in place. Confirm the anchor holds tightly by testing with slight force.

Credit: diy.stackexchange.com
Securing Fixtures To The Wall
Securing fixtures to a new concrete wall needs care and the right tools. Proper anchoring ensures safety and long-lasting support. This section explains how to attach brackets and supports firmly. It also covers checking the stability once fixed. Follow these steps to keep your fixtures steady and safe.
Attaching Brackets And Supports
Start by choosing the right anchors for your fixture type. Mark the spots on the concrete where you will drill. Use a hammer drill with a masonry bit for clean holes. Insert anchors fully into the drilled holes. Align the bracket or support with these anchors. Screw the bracket tightly to hold it in place.
Tightening And Testing Stability
After attaching, tighten all screws carefully but do not overtighten. Check if the bracket moves or feels loose. Apply light pressure to test its hold. If there is any wobble, tighten screws more or replace anchors. Repeat the test until the fixture feels solid and secure. This ensures the fixture will stay fixed over time.
Safety Tips And Best Practices
Anchoring to the side of a new concrete wall requires care and attention. Safety is the top priority. Follow best practices to avoid accidents and ensure strong, lasting results. Proper preparation and cautious work habits protect you and your project.
Protective Gear Recommendations
Wear safety goggles to protect your eyes from dust and debris. Use gloves to guard your hands from sharp tools and rough surfaces. A dust mask helps prevent inhaling harmful particles. Wear sturdy boots with good grip to avoid slips. Use ear protection if you work with loud tools. Always dress in long sleeves and pants to protect your skin.
Avoiding Common Mistakes
Do not rush drilling; this can cause cracks or weak anchors. Check the wall for hidden pipes or wires before drilling. Use the correct drill bit size to match anchor requirements. Avoid over-tightening anchors, which can damage the concrete. Clean dust from holes before inserting anchors for better grip. Follow manufacturer instructions carefully for each anchor type.
Frequently Asked Questions
How Do You Anchor To The Side Of New Concrete Wall?
To anchor to a new concrete wall, drill holes using a hammer drill. Insert anchors or bolts, then tighten securely. Use appropriate anchors for concrete to ensure strong hold and durability.
What Tools Are Needed For Anchoring In Concrete Walls?
You need a hammer drill, masonry bit, anchors, bolts, a wrench, and a hammer. Safety gear like gloves and goggles is also essential.
Which Anchors Work Best For New Concrete Walls?
Sleeve anchors, wedge anchors, and epoxy anchors work well. Choose based on load requirements and wall thickness for optimal strength and stability.
How Deep Should Holes Be For Concrete Anchors?
Drill holes at least 1 inch deeper than the anchor length. This ensures proper seating and prevents debris from affecting the hold.
Conclusion
Anchoring to the side of a new concrete wall is simple with the right steps. Choose the correct anchor type for your project. Drill carefully and clean the hole before inserting the anchor. Tighten bolts just enough to hold firmly.
Take your time and follow instructions closely. This approach ensures strong and lasting support. Now, you can attach fixtures safely and confidently.