Are you tired of struggling with loose screws and holes that just won’t hold? Knowing how to drill for a wall anchor can make all the difference when you want to hang shelves, pictures, or heavy decorations securely.
But if you’ve ever felt unsure about where to start or worried about damaging your walls, this guide is exactly what you need. Keep reading, and you’ll learn simple steps that anyone can follow to get a strong, reliable hold every time.
Your walls—and your belongings—will thank you.
Choosing The Right Wall Anchor
Choosing the right wall anchor is key to a secure hold. The correct anchor matches the wall type and the weight of the item you want to hang. Picking the wrong anchor can cause damage or failure.
Understanding the different types of anchors helps you decide quickly. Also, knowing your wall’s material ensures the anchor fits well. Weight capacity is crucial to keep your items safe on the wall.
Types Of Wall Anchors
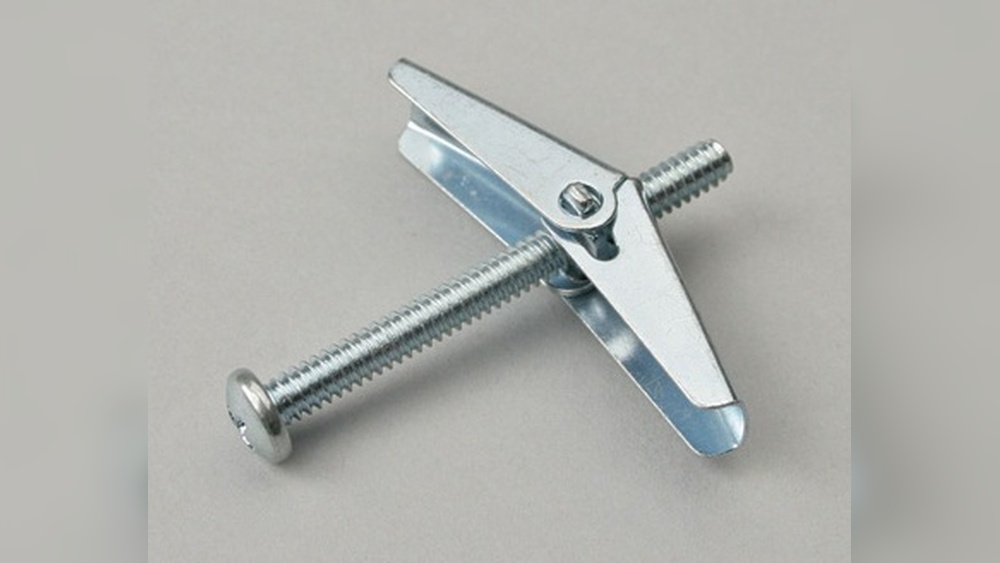
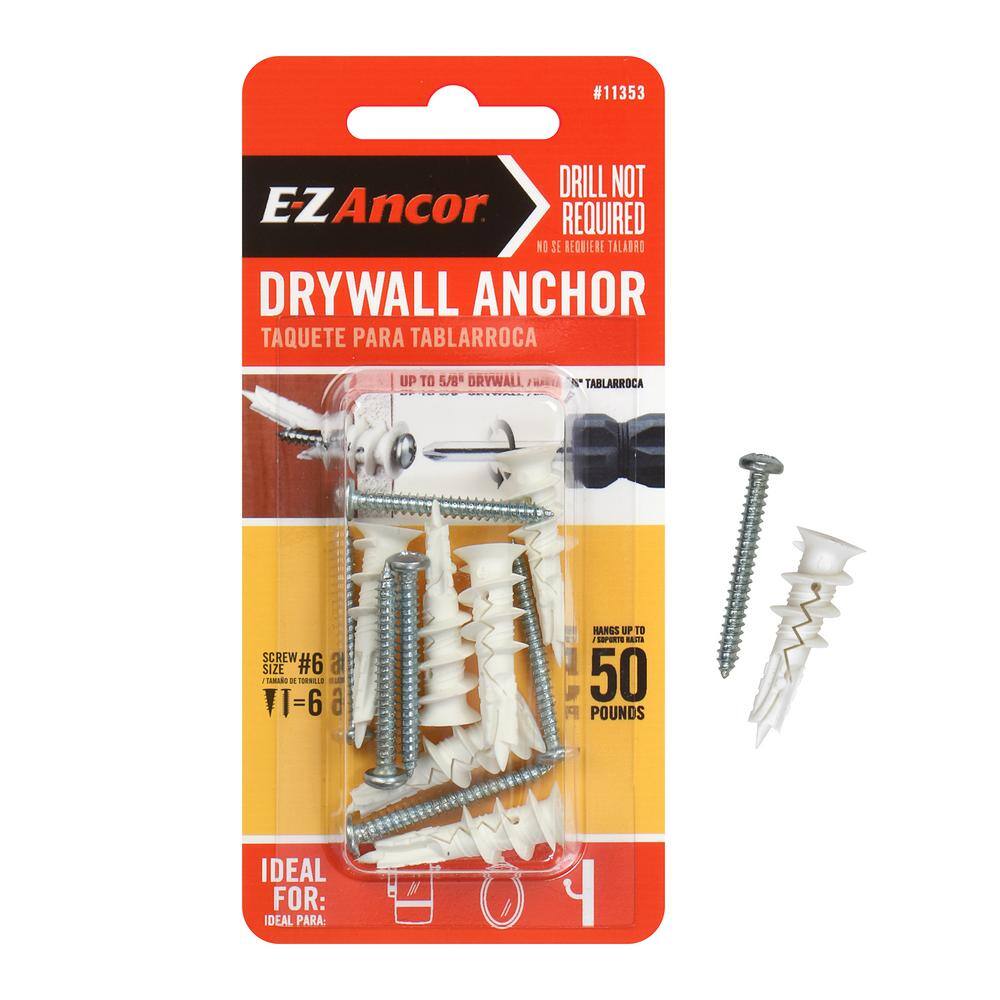
Plastic expansion anchors are common for light loads. They spread out inside the wall after drilling. Metal anchors, like molly bolts, hold heavier weights. Toggle bolts have wings that open behind the wall for strong support. Each type works best in certain situations.
Selecting Based On Wall Material
Drywall needs anchors that expand or toggle behind it. Concrete or brick walls require anchors that drill into hard surfaces. Hollow walls need anchors that grip the inside cavity. Match the anchor type to your wall for the best hold.
Weight Capacity Considerations
Check the anchor’s weight limit before buying. Light anchors hold small pictures or decorations. Medium anchors support shelves or curtain rods. Heavy anchors are for large mirrors or cabinets. Always choose an anchor with a higher rating than your item’s weight.
Gathering Necessary Tools
Gathering the right tools makes drilling for a wall anchor easier. It helps you work safely and get the best results. Preparing your tools before starting saves time and avoids mistakes.
Drill And Drill Bits
Choose a drill that feels comfortable in your hand. A cordless drill is best for easy movement. Pick drill bits that match the size of your wall anchor. Use a masonry bit for concrete or brick walls. Wood and metal walls need different bits. Check the drill bit’s condition. A sharp bit drills cleaner holes.
Measuring Tools
Use a tape measure to find the exact spot for the anchor. A pencil helps mark the drilling point clearly. A level ensures your marks are straight. Accurate measurements stop anchors from being off-center. Small errors can cause big problems later.
Safety Gear
Wear safety goggles to protect your eyes from dust and debris. Use gloves to guard your hands from sharp edges. Hearing protection helps if your drill is loud. Work in a well-ventilated area to avoid dust buildup. Safety gear keeps you safe and comfortable.
Preparing The Wall
Preparing the wall is a crucial step before drilling for a wall anchor. It helps ensure a strong hold and avoids damage to your wall. Taking time to prepare saves effort and materials later.
Locating Studs And Marking
Start by finding the studs behind the drywall. Studs provide solid support for your anchors. Use a stud finder or tap the wall to listen for a solid sound. Mark the spot with a pencil. Accurate marking prevents drilling into weak spots.
Checking For Obstacles
Look for wires, pipes, or cables inside the wall. These can cause serious damage if drilled into. Use a wire detector or carefully review building plans. Avoid areas with hidden obstacles. Safety is the top priority.
Cleaning The Surface
Remove dust, dirt, and grease from the wall. A clean surface helps the anchor stick better. Wipe the area with a damp cloth and let it dry. Clean walls make drilling easier and more precise.
Credit: comunisostenibili.eu
Drilling The Hole
Drilling the hole is a key step for installing a wall anchor. It needs focus and care. The hole must be the right size and depth. This ensures the anchor fits tightly. A good hole keeps the anchor strong and secure.
Choosing Drill Bit Size
Select a drill bit that matches the anchor size exactly. Too small a bit will make the anchor hard to insert. Too large will cause a loose fit. Check the anchor package for the recommended bit size. Use a sharp bit to get a clean hole.
Drilling Technique Tips
Mark the spot clearly before drilling. Hold the drill steady and straight. Start drilling slowly to avoid slipping. Apply gentle pressure, letting the drill do the work. Drill to the depth suggested on the anchor instructions. Clean out dust from the hole with a brush or vacuum.
Avoiding Common Mistakes
Do not force the drill or push too hard. Avoid drilling at an angle; this weakens the anchor hold. Don’t use a drill bit that is worn or dull. Avoid drilling too shallow or too deep. Check for electrical wires or pipes inside the wall before drilling.
Installing The Wall Anchor
Installing the wall anchor is a key step in securing objects to your wall. It provides extra strength and holds screws firmly in place. This process prevents damage and ensures your items stay mounted safely. Follow these simple steps to install your wall anchors correctly.
Inserting Different Anchor Types
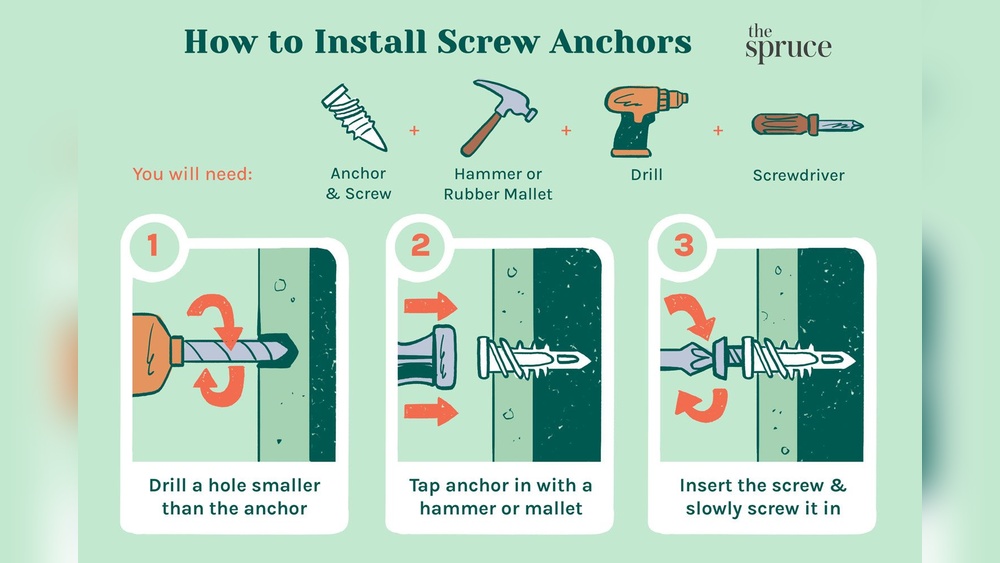
Wall anchors come in various types like plastic, metal, and toggle anchors. Plastic anchors fit into pre-drilled holes and expand when you insert a screw. Metal anchors often require a small tap with a hammer before screwing. Toggle anchors open behind the wall for strong support. Choose the right anchor based on your wall and object weight. Insert the anchor gently but firmly into the hole. Avoid forcing it to prevent damage.
Ensuring Proper Fit
The anchor must fit snugly inside the hole. A loose anchor will not hold the screw well. Use a drill bit size that matches the anchor’s diameter. Check that the anchor sits flush with the wall surface. If it sticks out, the screw won’t tighten properly. A well-fitted anchor provides better grip and support for your items.
Testing Stability
After inserting the anchor, test its strength before hanging objects. Push and pull the anchor gently to check for movement. If it feels loose, remove and try a larger anchor or hole. Insert the screw slowly to avoid stripping the anchor. A stable anchor ensures your wall-mounted items stay secure over time.
:max_bytes(150000):strip_icc()/how-to-use-and-discard-anchor-screws-1822671_01_3222-d91010bb83f841aa8c626ff057e8f318.jpg)
Credit: www.thespruce.com
Securing Fixtures
Securing fixtures to a wall anchor is a key step in many home projects. It ensures the item stays in place safely and lasts a long time. Properly attaching the fixture protects your walls and avoids damage. Follow these simple steps to secure your fixture firmly and neatly.
Aligning The Fixture
Place the fixture exactly where you want it on the wall. Check that the holes match the drilled anchors. Hold the fixture steady to avoid shifting. Correct alignment makes tightening easier and prevents damage.
Tightening Screws Correctly
Use a screwdriver or drill with a proper bit size. Turn screws slowly and evenly to avoid stripping. Tighten until the fixture feels firm but do not over-tighten. Over-tightening can crack the wall or damage the anchor.
Final Inspection
Check the fixture for any movement or wobbling. Make sure screws are flush and secure in the wall. Test the fixture by gently pulling or pushing it. A solid fixture means your job is done well.
Troubleshooting Issues
Drilling for wall anchors is usually simple. Still, some issues can happen during the process. Problems like loose anchors, oversized holes, or wall cracks need quick fixes. Fixing these problems helps keep your wall strong and safe.
Dealing With Loose Anchors
Loose anchors can make your item fall down. First, remove the anchor gently. Check if the hole is too big or rough inside. Use a bigger anchor size or a different type for better grip. You can also fill the hole with wood filler or epoxy before re-inserting the anchor. Let the filler dry completely to hold the anchor tight.
Fixing Oversized Holes
Oversized holes are common when the drill bit is too large. To fix this, fill the hole with a strong filler like spackle or wood putty. Let it dry fully. Then, drill a new, smaller hole carefully. Use the correct drill bit size for your anchor. This keeps the anchor secure and your wall intact.
Handling Cracks And Damage
Cracks appear if you drill too close to a wall edge or with too much force. Stop drilling immediately to avoid more damage. Repair small cracks with wall putty or plaster. For large cracks, use a patch kit or call a professional. Always let repairs dry well before adding anchors. This prevents further wall damage and holds anchors firmly.

Credit: thediyplaybook.com
Frequently Asked Questions
What Size Drill Bit Is Needed For Wall Anchors?
Use a drill bit that matches the anchor’s diameter. Check the anchor packaging for exact size. This ensures a secure fit and proper wall support.
How Deep Should I Drill For A Wall Anchor?
Drill to the anchor’s full length, usually about 1 to 1. 5 inches deep. This depth allows the anchor to fit snugly and hold weight properly.
Can I Drill Into Any Wall Type For Anchors?
No, drilling depends on wall material. Drywall, plaster, and masonry require different anchors and drill bits. Choose the right anchor for your wall type.
Should I Use A Hammer Or Drill For Wall Anchors?
Always use a drill to create the hole. A hammer can damage the wall and anchor. Drilling ensures a clean, precise hole.
Conclusion
Drilling for a wall anchor is simple with the right steps. Choose the correct drill bit size first. Drill a straight hole without pushing too hard. Insert the anchor gently to avoid damage. Tighten screws carefully to hold items securely.
These tips help your wall anchor stay strong. Practice makes the process easier over time. Start small and build your confidence today.