Are you tired of struggling with your ceiling fan’s light switch? Imagine controlling both your fan and its light with just one easy setup.
Connecting a light switch to your ceiling fan might seem tricky, but with the right steps, you can do it yourself—saving time and money. In this guide, you’ll discover simple, clear instructions that anyone can follow. Keep reading, and soon you’ll enjoy full control over your fan and light without any hassle.
Ready to make your space more comfortable and convenient? Let’s get started!

Credit: diy.stackexchange.com
Tools And Materials Needed
Before connecting a light switch to a ceiling fan, gather the right tools and materials. This step saves time and makes the job safer. Using proper tools helps avoid mistakes and ensures a smooth installation.
Prepare everything in one place. Check each item carefully to confirm it works well. This list covers all essentials for the task.
Basic Tools
- Screwdriver (flathead and Phillips)
- Wire stripper
- Voltage tester
- Needle-nose pliers
- Drill with bits
- Electrical tape
Materials Required
- Ceiling fan with light kit
- Light switch (single-pole or dual switch)
- Electrical wires (14/3 or 12/3 gauge)
- Wire nuts
- Electrical box
- Mounting brackets and screws
Safety Gear
- Insulated gloves
- Safety goggles
- Dust mask
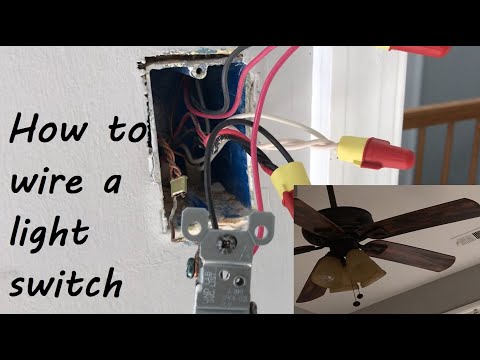
Credit: www.youtube.com
Safety Precautions
Safety is the top priority when connecting a light switch to a ceiling fan. Electrical work can be dangerous without proper care. Following safety steps protects you and your home from harm.
Before starting, always prepare your workspace. A safe environment reduces risks and makes the job easier.
Turn Off Power At The Circuit Breaker
Switch off the power to the room you will work in. Do not just use the wall switch. Use the circuit breaker panel to cut power completely. Test with a voltage tester to confirm power is off.
Use Proper Tools And Equipment
Choose insulated tools designed for electrical work. Avoid makeshift tools or damaged equipment. Use a sturdy ladder to reach the ceiling fan safely. Wear rubber-soled shoes to reduce electric shock risk.
Check Wiring And Components
Inspect all wires for damage or wear before connecting. Replace frayed or old wires. Ensure the light switch and ceiling fan parts match your home wiring. Use wire connectors made for electrical use.
Follow Manufacturer Instructions
Read the ceiling fan and switch manuals carefully. Follow their wiring diagrams step by step. Do not guess or skip steps. Manufacturer guides help avoid wiring mistakes and safety hazards.
Identifying Wires
Before connecting a light switch to a ceiling fan, identifying wires is crucial. Each wire has a specific role in the circuit. Understanding these wires helps ensure a safe and correct installation. This step avoids electrical hazards and equipment damage.
Live Wire
The live wire carries electricity from the power source. It is usually colored black or red. This wire controls the power flow to the fan and light. Always handle it with care and turn off the power before touching.
Neutral Wire
The neutral wire completes the electrical circuit. It usually has white insulation. This wire carries electricity back to the panel. It balances the flow and prevents electrical shocks.
Ground Wire
The ground wire protects against electrical faults. It is often green or bare copper. This wire directs excess electricity into the earth. It helps keep you safe during short circuits.
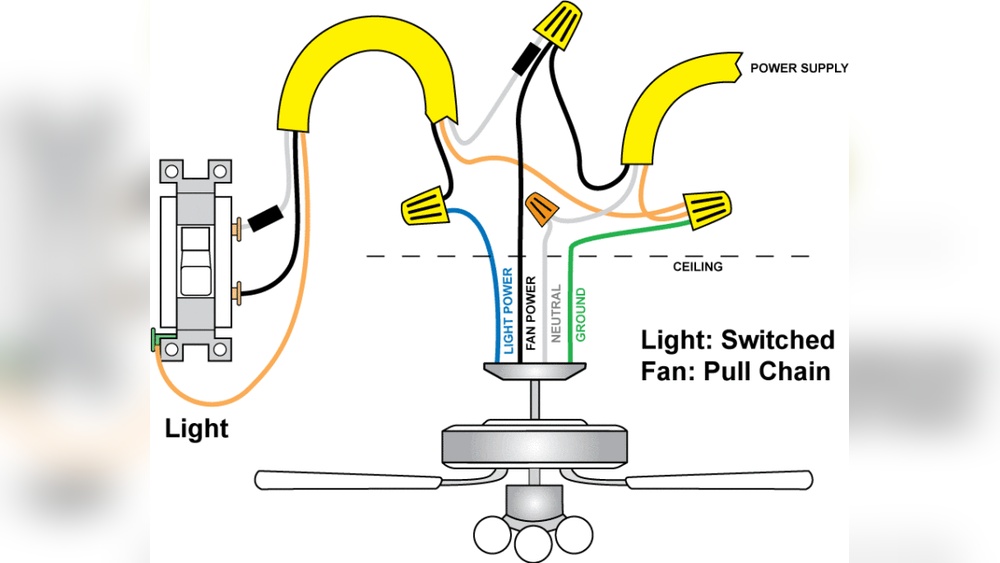
Fan And Light Wires
The fan and light have separate wires for control. The fan wire is often black or blue. The light wire is usually blue or red. Knowing these helps connect the switch correctly to each function.
Turning Off Power
Turning off power is the first step before connecting a light switch to a ceiling fan. It keeps you safe from electric shock. Always treat electricity with respect. Even a small mistake can cause injury or damage.
Before starting, locate the circuit breaker that controls the fan’s power. Switching it off cuts electricity to the wires you will work on. Double-check that the power is really off. This precaution avoids accidents.
Locate The Circuit Breaker
Find your home’s electrical panel. Look for the breaker labeled for the ceiling fan or the room. If labels are missing, turn off the main breaker to cut power to the whole house. This method is safe but affects all electrical devices.
Use A Voltage Tester
After switching off the breaker, use a voltage tester. Touch the tester to the wires in the switch box. No light or beep means the power is off. Always test twice to confirm safety before touching wires.
Inform Others In The Home
Let everyone know you are working with electricity. Ask them not to turn the breaker back on. This step prevents accidental power restoration during your work. Safety is teamwork.
Wiring The Switch
Wiring the switch is a crucial step to control your ceiling fan and light properly. It involves connecting several wires safely and correctly. Pay close attention to each wire and follow the instructions carefully. This ensures your fan and light work without issues.
Connecting The Live Wire
Start by identifying the live wire, usually black or red. This wire carries power from the breaker to the switch. Connect the live wire to the switch’s input terminal. Make sure the connection is tight and secure. Loose connections can cause flickering or electrical problems.
Connecting Fan And Light Wires
Next, find the wires for the fan and the light. The fan wire is typically blue, while the light wire is black. Attach each wire to its own output terminal on the switch. This setup allows you to control the fan and light separately. Double-check the colors before connecting.
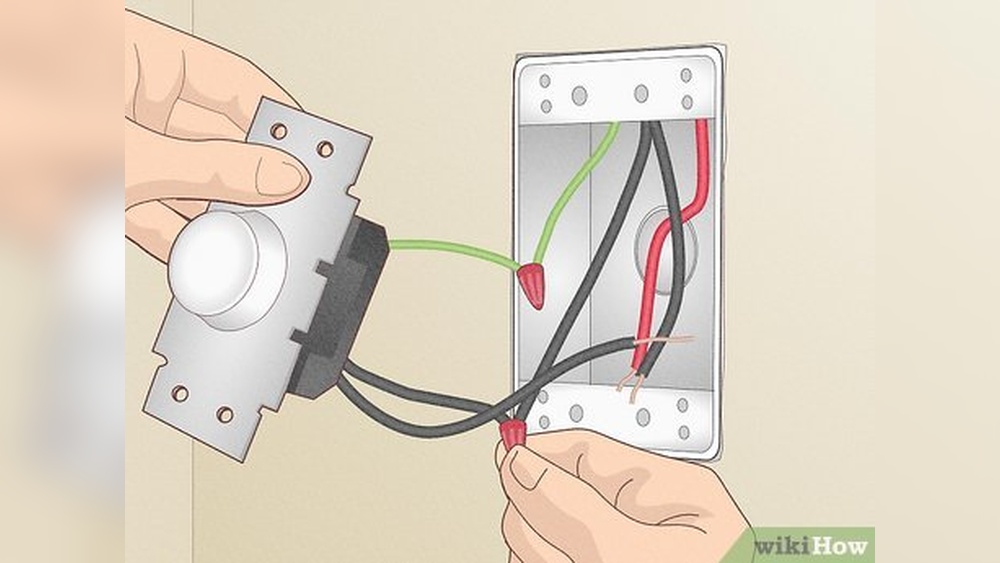
Securing Wire Connections
After connecting all wires, use wire nuts to cover the bare ends. Twist the wire nuts clockwise until they are tight. Wrap electrical tape around the wire nuts for extra safety. Push the wires carefully into the switch box. Secure the switch to the wall plate firmly.

Credit: www.homedepot.com
Mounting The Switch
Start by turning off the power to avoid accidents. Connect the switch wires to the fan’s power wires carefully. Secure the switch in the wall box and test the fan to ensure it works properly.
Choose The Right Location
Pick a spot on the wall near the fan or light fixture. The switch should be easy to reach. Avoid places that block furniture or doors. Keep the switch at a comfortable height for all users.
Prepare The Wall Box
Turn off power from the circuit breaker. Remove any old switch or cover plate. Use a voltage tester to confirm no power flows. Make sure the wall box is clean and ready for the new switch.
Attach The Switch To The Box
Connect the wires to the switch terminals. Match the wire colors correctly: usually black to brass, white to silver. Tighten screws firmly to hold wires in place. Push the switch gently into the box without pinching wires.
Secure The Switch Plate
Place the switch cover over the switch. Align the screw holes carefully. Screw the plate in without overtightening. The plate should sit flush against the wall.
Testing The Setup
Testing the setup is a key step after connecting the light switch to your ceiling fan. It helps ensure everything works safely and correctly. Take your time during this phase. Check each function and connection carefully. This prevents future problems and keeps your home safe.
Turn On The Power
Start by turning the power back on at the circuit breaker. This restores electricity to the switch and fan. Watch for any sparks or unusual sounds. If you see or hear anything odd, turn off the power immediately. Safety first.
Test The Light Switch
Flip the light switch to the ON position. The ceiling fan’s light should turn on smoothly. If it doesn’t, check the wiring connections again. Sometimes a loose wire can cause the light not to work. Make sure everything is tight and secure.
Check The Fan Operation
Use the fan control switch or pull chain to start the fan. The fan blades should spin without wobbling or noise. Test all speed settings to confirm they work properly. If the fan does not start, recheck the wiring and connections.
Verify Both Functions Work Together
Switch the light and fan on and off several times. Both should respond immediately and correctly. Make sure the light and fan work independently if designed that way. This test confirms your wiring setup is correct and safe.
Troubleshooting Common Issues
Troubleshooting common issues helps fix problems quickly. Connecting a light switch to a ceiling fan can seem tricky. Some errors happen often and have simple solutions. Knowing these can save time and stress.
Check The Power Supply
First, confirm the power is on. Test the circuit breaker and switch. Sometimes, the breaker trips without obvious signs. Use a voltage tester to check the wires. No power means the fan and light won’t work.
Inspect The Wiring Connections
Loose or wrong wiring causes many problems. Turn off the power before checking wires. Ensure each wire matches the instructions. Tighten all wire nuts and connections. Wrong connections can stop the fan or light from working.
Test The Light Switch
A faulty switch can block power flow. Use a multimeter to test switch continuity. Replace the switch if it does not work. A good switch lets you control the fan and light easily.
Verify The Ceiling Fan Wiring
Fans often have separate wires for fan and light. Make sure to connect both properly. Check the fan manual for correct wiring colors. Incorrect wiring can stop one part from working.
Look For Obstructions In The Fan
The fan blades may stop spinning if something blocks them. Check for loose parts or debris. Tighten screws and clean the fan. Clear obstructions to restore smooth fan operation.
Frequently Asked Questions
How Do I Connect A Light Switch To A Ceiling Fan?
To connect a light switch to a ceiling fan, first turn off the power. Then, run a separate wire from the switch to the fan’s light fixture. Connect the wires correctly: live to live, neutral to neutral, and ground to ground.
Test the switch after wiring.
Can I Control Fan And Light Separately With One Switch?
Yes, you can control the fan and light separately using two switches or a dual switch. Each switch controls either the fan or the light independently. This requires separate wiring for the fan motor and light kit, allowing individual operation for convenience and energy savings.
What Tools Do I Need To Connect A Light Switch To A Fan?
You need a screwdriver, wire strippers, electrical tape, voltage tester, wire nuts, and a drill. These tools help safely connect wires, secure the switch, and verify power is off. Proper tools ensure a safe, efficient, and professional installation process for your ceiling fan switch.
Is It Safe To Connect A Ceiling Fan Light To A Wall Switch?
Yes, it is safe if done correctly. Always turn off the power before working. Use proper wiring techniques and ensure connections are secure. If unsure, consult a professional electrician to avoid risks like electrical shock or fire hazards during installation.
Conclusion
Connecting a light switch to a ceiling fan can be simple and safe. Follow the steps carefully and check your work twice. Always turn off power before starting any wiring. Use the right tools and materials for best results. This guide helps you control your fan and light from one switch.
Enjoy the convenience and comfort in your home. Stay safe and take your time during the process. You can do this with patience and care.