
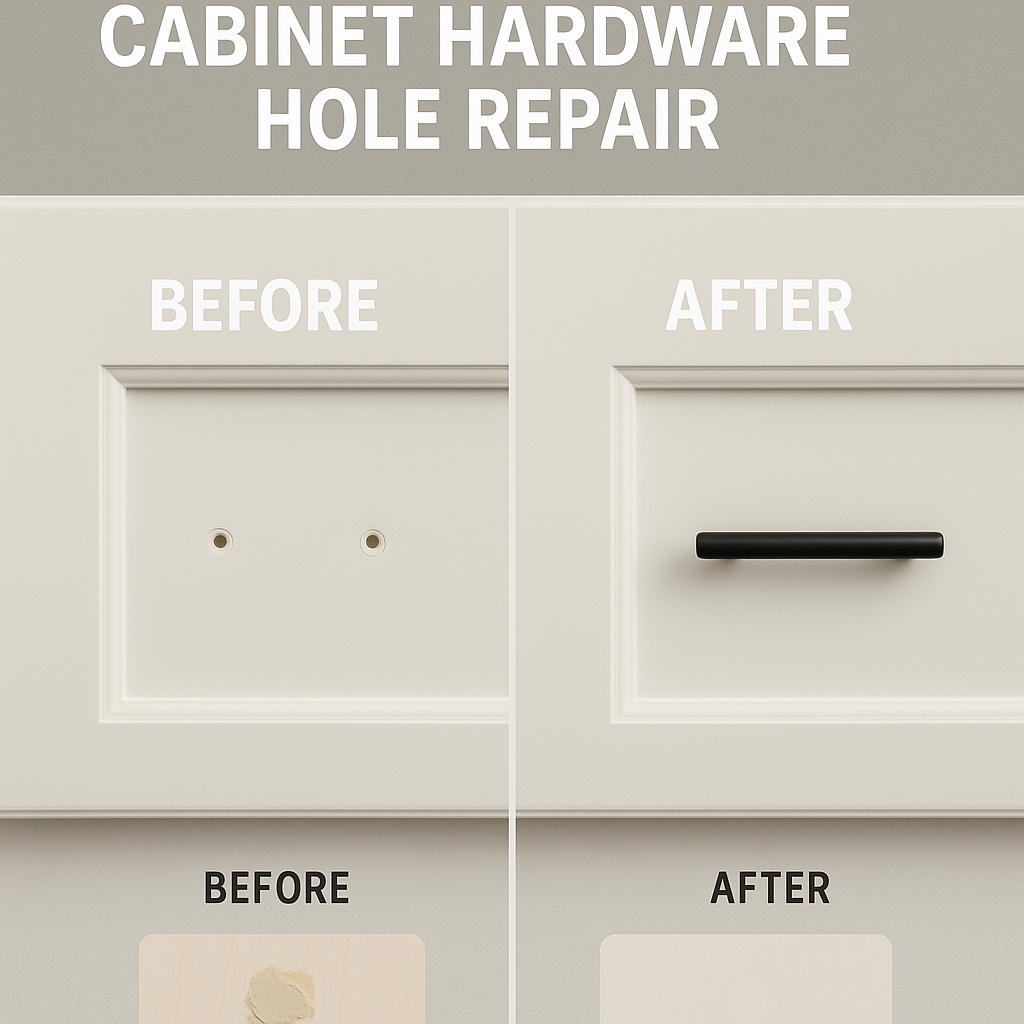
Are your cabinet doors showing old, unwanted holes from hardware that no longer fits? You’re not alone—and fixing those holes doesn’t have to be a headache.
Whether you’re upgrading your cabinet handles or repairing a stripped screw hole, knowing the right steps can save you time, money, and frustration. In this guide, you’ll discover simple, proven methods to fill and fix cabinet hardware holes so your cabinets look smooth and flawless again.
Ready to transform your cabinets with easy DIY tricks? Let’s dive in and get those holes repaired like a pro!
Tools And Materials Needed
Fixing cabinet hardware holes requires specific tools and materials. Having the right items ready ensures a smooth repair process. This section lists all essentials needed to fix holes effectively. Preparing in advance saves time and effort during the repair.
Wood Filler Or Putty
Choose wood filler that matches your cabinet color. It fills holes and smooths the surface. Putty works well for smaller holes and cracks. Both dry quickly and sand easily for a clean finish.
Sandpaper
Use fine-grit sandpaper, around 220 grit, for best results. Sanding smooths the filled area and blends it with the cabinet surface. Sand gently to avoid damaging the surrounding wood.
Putty Knife Or Spatula
A putty knife helps spread wood filler evenly. It allows you to push filler deep into holes. Use a flexible spatula for precise application and smooth edges.
Wood Glue And Toothpicks Or Matchsticks
Wood glue and toothpicks help fill stripped screw holes. Insert glued toothpicks into the hole until full. Snap off the excess and let glue dry before sanding.
Drill And Drill Bits
A drill creates clean holes for new hardware screws. Choose drill bits matching screw size. Drilling may be necessary after filling and sanding the hole.
Cloth Or Brush
Use a clean cloth or brush to remove dust after sanding. Keeping the area clean helps paint or stain stick better. This step improves the final look of the repair.
Cleaning The Area
Cleaning the area is the first step to fix cabinet hardware holes. Dirt, dust, and grease can stop fillers from sticking properly. A clean surface helps repair materials bond well.
Take time to remove all dirt around the hole. Use gentle cleaning methods to avoid damage. Clean surfaces make repair smoother and more durable.
Remove Dust And Loose Particles
Use a soft brush or cloth to wipe away dust and flakes. Clear out any loose wood or paint pieces. This prevents bumps under the filler.
Clean With Mild Soap Solution
Mix mild soap with warm water. Dip a cloth in the solution and gently wipe the area. Avoid soaking the wood to prevent swelling or warping.
Dry The Surface Completely
After cleaning, let the area dry fully. Use a dry cloth to speed up drying. A dry surface ensures fillers set properly.
Filling Small Holes
Filling small holes in cabinet hardware is a simple way to restore a smooth surface. These holes often appear after removing old handles or knobs. Properly filling them keeps cabinets looking neat and ready for new hardware. The process requires the right materials and attention to detail.
Using Wood Filler Or Putty
Choose wood filler or putty designed for small holes. Apply a small amount directly into the hole using a putty knife or your finger. Press firmly to fill the entire space. Let it dry fully according to product instructions. After drying, sand the area gently with fine-grit sandpaper. This creates a smooth finish that blends with the cabinet surface.
Matching Cabinet Colors
Color matching is key for a clean repair. Use wood filler or putty that matches your cabinet’s color. If the filler is lighter, apply a matching stain or paint after sanding. Test colors on a hidden area first. Blend edges carefully to avoid visible patches. This step ensures the repair looks natural and almost invisible.
Credit: www.woodworkerexpress.com
Repairing Stripped Screw Holes
Repairing stripped screw holes in cabinet hardware is a common fix in home improvement. Stripped holes cause screws to lose grip, making hardware loose or wobbly. Fixing these holes restores strength and ensures your cabinet handles stay tight. Two simple methods use everyday items to fill and secure these holes quickly. Both are easy, cost-effective, and require no special tools.
Toothpick And Wood Glue Method
This method uses toothpicks and wood glue to fill stripped screw holes. Start by applying wood glue inside the hole. Insert several toothpicks tightly into the hole until it is full. Break off the toothpicks flush with the cabinet surface. Allow the glue to dry completely for a strong hold. Once dry, gently sand the area smooth if needed. Reinsert the screw carefully, and it should hold firmly.
Using Wooden Matchsticks
Wooden matchsticks work like toothpicks but are slightly thicker, giving extra support. Dip a few matchsticks in wood glue and pack them into the stripped hole. Make sure the hole is filled tightly. Snap off the excess matchsticks with a utility knife or scissors. Let the glue dry fully before sanding smooth. The matchsticks create a solid base for the screw to grip. This method is ideal for larger or more damaged holes.
Fixing Larger Holes
Larger holes in cabinet hardware require a stronger fix than simple filler. These holes often appear from repeated hardware use or mistakes during installation. Fixing them properly restores cabinet strength and looks clean. The repair process involves making the hole uniform and filling it with a solid material. This way, new hardware fits tightly and holds well. Below are two key steps to repair larger holes effectively.
Drilling Uniform Holes
Start by drilling the damaged hole to a consistent size. Use a drill bit that matches the size of the wooden dowel you plan to insert. This makes the hole smooth and even. Avoid making the hole bigger than needed. A uniform hole helps the dowel fit tightly. Always drill straight and steady to keep the hole aligned with the cabinet surface. Clean out any dust or debris from the hole before moving to the next step.
Inserting Wooden Dowels
Apply wood glue inside the drilled hole. Insert a wooden dowel that matches the hole size. Push it in firmly until it sits flush with the cabinet surface. Wipe away any extra glue that oozes out. Let the glue dry completely, usually for a few hours or overnight. After drying, sand the dowel smooth so it blends with the cabinet. This creates a solid base for new hardware screws. Re-drill a pilot hole in the dowel before attaching the hardware.
Sanding And Smoothing
Sanding and smoothing are key steps when fixing cabinet hardware holes. These steps ensure a clean, even surface ready for painting or staining. A well-prepared surface hides repairs and restores the cabinet’s look.
After filling the holes with wood filler or putty, allow it to dry completely. Dry filler is easier to sand and shapes better to the cabinet’s surface. Skipping this step can cause rough patches or unevenness.
Sanding With The Right Grit
Start sanding with medium-grit sandpaper, like 120 grit. This removes excess filler and shapes the surface. Next, use fine-grit sandpaper, around 220 grit, to smooth the area. Fine sanding creates a soft, seamless finish.
Using A Sanding Block Or Sponge
Use a sanding block or sponge for even pressure. Hand sanding with a block prevents gouges or dips. A sponge can follow curves better, ideal for rounded cabinet edges. Sand gently to avoid removing too much filler.
Checking For Smoothness
Run your fingers over the repaired area after sanding. The surface should feel flat and uniform. Light catches can reveal bumps or holes. If needed, add more filler and sand again until perfectly smooth.
Cleaning Before Painting
Remove dust with a soft brush or cloth after sanding. Dust affects paint adhesion and finish quality. Clean surfaces help paint stick better and look professional. Use a damp cloth to wipe away fine dust particles.
Staining And Painting
Staining and painting play key roles in fixing cabinet hardware holes. After filling the holes with wood filler or putty, the area needs a finish that matches the cabinet. This step helps hide the repair and restore the cabinet’s look. Proper staining or painting ensures the patch blends with the surrounding wood or paint. It also protects the repair from wear and moisture. Taking time with color matching and blending makes the repair less visible and more durable.
Color Matching Tips
Choose a stain or paint that closely matches your cabinet’s color. Test small amounts on a hidden spot first. Wood changes color as it dries, so check after drying. Use a brush or cloth to apply stain evenly. For paint, pick a finish that matches the cabinet, such as matte or glossy. Mix colors if needed to get the right shade. Keep your strokes light and even to avoid blotches.
Blending Repairs Seamlessly
Blend repaired spots into the cabinet surface for a smooth look. Lightly sand the edges of the patched area before staining or painting. Apply thin coats, letting each dry fully before the next. Use a small brush to feather the edges into the surrounding finish. Avoid heavy layers that stand out. Wipe off excess stain quickly to prevent dark spots. Repeat until the patch matches the cabinet perfectly.
Credit: www.reddit.com
Reinstalling Hardware
Reinstalling hardware on cabinets requires care and precision. Proper steps ensure the hardware fits well and stays secure. This process prevents future damage and keeps your cabinets looking neat. Follow these simple methods to fix and reinstall cabinet hardware effectively.
Drilling New Pilot Holes
Start by marking the exact spot for the new holes. Use a pencil for precise placement. Choose a drill bit smaller than your screws. Drill slowly to avoid splitting the wood. Pilot holes guide screws and prevent wood from cracking. Clean dust from holes before inserting screws.
Ensuring Secure Screw Grip
Check the hole depth before screwing in hardware. Use screws that match the hole size and length. Tighten screws evenly to avoid stripping. If holes are loose, fill them with wood filler or toothpicks and glue. Let filler dry fully, then redrill pilot holes. This creates a tight grip for screws and holds hardware firmly.
Preventing Future Damage
Preventing future damage to cabinet hardware holes helps maintain cabinet strength and appearance. Small mistakes during installation can cause cracks or loose hardware. Taking simple steps ensures screws stay tight and cabinets stay beautiful longer.
Proper care also reduces the need for frequent repairs. It saves time and money in the long run. Focus on two key areas: screw installation and hardware choice. Both play a big role in preventing holes from widening or hardware from loosening.
Proper Screw Installation
Start by choosing the correct screw length. Too long screws can damage the cabinet back. Too short screws may not hold hardware firmly. Use a screwdriver, not a drill, to control the force. Over-tightening can strip the hole or crack the wood.
Pre-drill holes slightly smaller than the screw size. This prevents wood from splitting. Insert screws straight, not at an angle. Check tightness regularly and adjust if needed. Replace stripped screws with a larger size or use wood filler to fix holes.
Choosing The Right Hardware
Select hardware designed for cabinet thickness and weight. Heavy knobs or handles need stronger screws and mounting plates. Lightweight hardware may not hold well on thick doors without extra support. Match hardware style to cabinet type for better fit and stability.
Use hardware with smooth edges to avoid wood damage during use. Consider materials that resist rust and wear. This keeps screws and holes secure over time. Avoid cheap hardware that bends or loosens easily.

Credit: rainonatinroof.com
Frequently Asked Questions
Can You Fill Cabinet Hardware Holes?
Yes, you can fill cabinet hardware holes using wood filler, putty, or wood glue with toothpicks. Sand smooth after drying. For large holes, apply a wood patch first. Finish by painting or staining to match the cabinet surface.
How To Fix Screw Holes In Kitchen Cabinets?
Clean the hole, apply wood glue, and insert toothpicks or matchsticks tightly. Snap flush, let dry, then reinsert the screw. For larger holes, drill out, glue a dowel, sand smooth, paint, and re-drill for a secure fit.
What Is The 1/3 Rule For Cabinet Hardware?
The 1/3 rule for cabinet hardware means placing handles one-third from the drawer or door edge. This ensures balanced, ergonomic, and visually pleasing hardware placement.
What Is The Best Filler For Screw Holes?
The best filler for screw holes is wood filler or wood putty matching your cabinet’s color. Use toothpicks and wood glue for stripped holes. For larger holes, insert a dowel with glue, sand smooth, then repaint or stain for a seamless finish.
Conclusion
Fixing cabinet hardware holes is simpler than it seems. Start by cleaning the damaged area thoroughly. Use wood filler or putty to fill small holes neatly. For bigger holes, add a wood patch first. Let the filler dry completely before sanding it smooth.
Match the stain or paint to your cabinet color for a seamless look. This process restores both function and appearance quickly. With patience and the right tools, your cabinets will look great again. Try these steps to keep your kitchen or furniture looking fresh and sturdy.


