Are you ready to tackle that old filing cabinet and give it a fresh new look? Removing filing cabinet hardware might seem tricky at first, but with the right steps, you can do it quickly and safely.
Whether you want to replace worn handles, clean up the cabinet, or prepare it for a makeover, knowing how to remove the hardware is the first essential step. In this guide, you’ll discover simple, clear instructions that make the process smooth and stress-free.
Keep reading, and you’ll gain the confidence to handle your filing cabinet like a pro!
Credit: www.safeandvaultstore.com
Types Of Filing Cabinet Hardware
Filing cabinets contain various hardware parts that help drawers open and close smoothly. Knowing the types of hardware helps in removing them safely. Each part has a unique role and removal method. Understanding these can save time and prevent damage.
Drawer Slides And Runners
Drawer slides and runners guide the drawer in and out. They usually consist of two parts: one attached to the drawer and one to the cabinet. Slides can be ball-bearing or roller types. Removing them may require releasing clips or unscrewing. Proper handling avoids bending or breaking the tracks.
Retaining Clips And Levers
Retaining clips and levers hold the drawer on the slides. They prevent the drawer from falling out. Clips are often plastic or metal and snap into place. Levers may need to be pressed or lifted to release the drawer. These parts require gentle pressure to avoid snapping.
Screw-secured Components
Some hardware parts are secured with screws. These screws attach slides, handles, or stops to the cabinet or drawer. Use the right screwdriver size for removal. Keep screws in a safe place for reassembly. Avoid stripping screw heads by turning slowly and steadily.

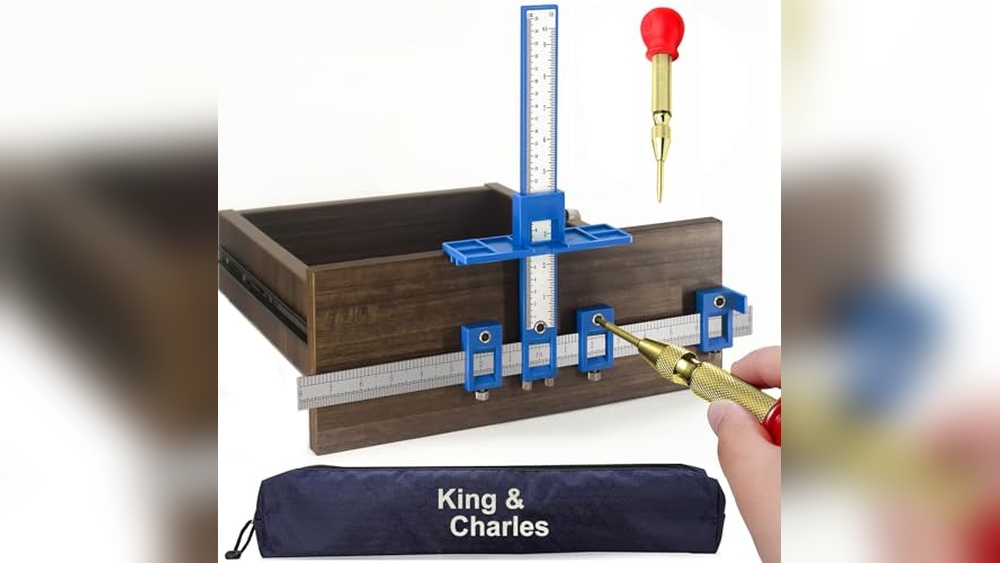
Credit: www.amazon.com
Tools Needed For Removal
Removing filing cabinet hardware requires a few essential tools. These tools help you work safely and efficiently. Having the right tools makes the job easier and faster. Below are the tools you need for the removal process.
Basic Hand Tools
A screwdriver set is the most important tool. Use both flathead and Phillips screwdrivers. Most hardware screws fit one of these types. A wrench or adjustable pliers help with nuts and bolts. A putty knife can lift paint or adhesive around hardware. Keep a small hammer handy to tap loose stubborn parts. A flashlight helps you see screws in dark corners. Gloves protect your hands from sharp edges.
Optional Power Tools
An electric screwdriver or drill speeds up screw removal. Use a drill with screwdriver bits for better control. A cordless drill works best for mobility. A rotary tool can cut through rust or paint if hardware is stuck. Use these power tools carefully to avoid damaging the cabinet. They are not necessary but save time on tough hardware.
Preparing The Cabinet
Before removing the hardware from your filing cabinet, proper preparation is crucial. This step ensures safety and makes the removal process smoother. Taking time to get the cabinet ready prevents damage and saves effort.
Start by clearing out everything inside the drawers. Removing all items helps avoid spills or accidents. It also makes the drawers lighter and easier to handle.
Emptying The Drawers
Open each drawer and take out all the files, papers, and supplies. Place them in a safe spot nearby. Check every drawer to ensure nothing is left inside. Empty drawers reduce weight and prevent items from falling out during removal.
Extending Drawers Fully
Pull each drawer out completely to access the hardware. Extend the drawer slowly to avoid damage. Some drawers have stops or clips that hold them in place. Locate and release these clips carefully. Fully extended drawers give clear access to screws and handles for removal.

Credit: davidshaulingkc.com
Removing Drawers With Release Tabs
Removing drawers with release tabs is a straightforward way to access your filing cabinet’s interior. These tabs help secure the drawer and prevent it from sliding out accidentally. Knowing how to find and handle these tabs makes drawer removal safer and easier. Follow these simple steps to remove your filing cabinet drawers without damage.
Locating Release Tabs
Open the drawer completely. Look inside along the sides of the drawer. You will see small plastic or metal tabs on the drawer slides. These tabs are usually near the front or middle of the slides. They may be colored or clear, but they stand out from the metal rails. Identifying these tabs is key to releasing the drawer safely.
Disengaging Tabs Safely
Press or lift the release tabs gently. Use your fingers or a flat tool for better grip. Avoid using too much force to prevent breaking the tabs. Both sides of the drawer slides usually have tabs. Press or lift them at the same time. This action frees the drawer from the cabinet frame.
Pulling Out The Drawer
Once the tabs are disengaged, slowly pull the drawer straight out. Keep your hands on both sides to keep it balanced. Do not tilt or force the drawer as it may damage the slides. If it feels stuck, check the tabs again. Smooth pulling helps avoid damage to the cabinet and drawer.
Handling Drawers Without Visible Tabs
Handling drawers without visible tabs can seem tricky at first. Many modern filing cabinets hide their hardware for a sleek look. This design often uses friction or hidden levers to secure the drawer. Knowing how to identify and use these mechanisms helps you remove drawers safely. Avoid forcing the drawer to prevent damage. Follow these simple steps to manage drawers with no obvious release tabs.
Identifying Friction Release Mechanisms
Some drawers rely on friction to stay in place. They do not use visible tabs or levers. You might notice the drawer feels tight when opening. This tightness comes from friction locks inside the slides. To remove the drawer, gently pull it out while applying slight upward or downward pressure. This action reduces friction and frees the drawer from the track. Check both sides for resistance before pulling harder.
Using Push-in Levers Or Clips
Look closely for small push-in levers or clips along the drawer sides. These are often hidden inside the drawer slides. Press these levers inward with your fingers or a flat tool. This releases the lock holding the drawer in place. Hold the lever while you pull the drawer out smoothly. Both sides usually have these clips, so press them simultaneously. This method prevents damage to the hardware.
Lifting And Tilting To Disengage Rollers
Many filing cabinet drawers use rollers to glide smoothly. These rollers lock the drawer when fully closed. To remove the drawer, lift the front slightly while pulling outward. Tilting the drawer up or down helps the rollers clear the track stops. Move slowly to avoid breaking the rollers or track. Once the rollers clear the stops, the drawer should slide out easily. This technique works well for drawers without obvious release tabs.
Dealing With Screw-secured Hardware
Removing hardware secured by screws is a common step in taking apart a filing cabinet. Many filing cabinets have handles, label holders, or other pieces attached with screws. Knowing how to handle these screws carefully makes the process smooth and avoids damage to the cabinet or hardware.
Work slowly and use the right tools. This section explains how to find these screws and remove them safely.
Locating Fixing Screws
Look closely at the hardware on your filing cabinet. Screws are usually visible on the front or inside edges of the handles and fixtures. Some screws hide under caps or small covers. Use a flat tool to gently pry off these covers if needed.
Check both sides of the hardware. Sometimes screws attach from the back or inside the drawer. Shine a light inside the drawer to find any hidden screws. Mark the locations so you don’t miss any during removal.
Removing Screws Without Damage
Use a screwdriver that fits the screw head perfectly. This prevents stripping the screw and damaging the hardware. Turn screws slowly and steadily in a counterclockwise direction.
If a screw feels stuck, apply a drop of penetrating oil. Let it sit for a few minutes before trying again. Avoid using too much force. Gently rocking the screwdriver can help loosen tight screws.
Keep screws safe after removal. Place them in a small container to avoid losing them. Handle hardware pieces carefully to prevent scratches or dents during removal.
Removing Drawer Slides
Removing drawer slides is an important step in taking out filing cabinet hardware. Drawer slides allow the drawer to move smoothly in and out. Knowing how to remove them helps you repair, replace, or clean the cabinet properly.
Drawer slides usually have two parts: one attached to the drawer and one attached to the cabinet. Removing them carefully keeps the hardware intact and prevents damage.
Sliding Drawer To Position
Start by pulling the drawer out slowly. Stop when you feel resistance or reach the drawer’s stopping point. This position lets you access the slide mechanism easily. Avoid forcing the drawer beyond this point to prevent breaking the slides or cabinet.
Some drawers have release clips or levers on the sides. These clips hold the drawer in place. Press or lift these clips gently on both sides. This action releases the drawer from the slide. Hold the drawer firmly while doing this to avoid dropping it.
Detaching Internal And External Runners
Drawer slides consist of internal runners attached to the drawer and external runners fixed inside the cabinet. After sliding the drawer to the correct position, check for screws or clips holding the runners together.
Use a screwdriver to remove any screws securing the runners. Keep the screws safe for reassembly. If clips hold the runners, press or lift them carefully to detach the runners.
Once detached, pull the drawer slides apart. Remove the internal runner from the drawer. Then unscrew or unclip the external runner from the cabinet. Handle all parts gently to avoid bending or damaging the metal tracks.
Tips To Avoid Damage
Removing filing cabinet hardware requires care to prevent damage. Small mistakes can cause scratches, bends, or broken parts. Taking time and using the right methods protects your cabinet and hardware. Follow these simple tips for safe removal and keep everything in good shape.
Avoiding Forced Removal
Never pull or pry hardware with too much force. Forcing parts can break screws, strips, or the cabinet surface. Use the correct tools like screwdrivers or pliers that fit well. If a part feels stuck, check for hidden screws or clips. Applying gentle pressure helps release hardware without damage.
Handling Fragile Components Carefully
Many filing cabinet parts are delicate. Handles, knobs, and slides can bend or crack easily. Hold these components gently while removing. Place small parts on a soft surface to avoid scratches. Keep screws and clips in a container to prevent loss. Careful handling extends the life of your hardware.
Reassembling And Testing
After removing and cleaning your filing cabinet hardware, reassembling and testing are crucial steps. Proper reattachment ensures the cabinet works smoothly. Testing confirms everything fits and moves as it should. These steps prevent future problems and extend the cabinet’s life.
Reattaching Hardware
Start by aligning the hardware with the original holes. Use the screws you removed earlier. Tighten screws evenly to avoid misalignment. Check that handles, locks, or slides sit flush against the surface. Avoid overtightening to prevent damage. Reinstall any clips or stops that secure the hardware. Double-check all parts are firmly attached. This step ensures stability and smooth operation.
Testing Drawer Functionality
Open and close the drawer several times. Notice any sticking or unusual noises. If the drawer sticks, loosen screws slightly and adjust. Check that the drawer slides smoothly and locks properly. Test all drawers to confirm consistent performance. Smooth movement shows correct hardware installation. If problems persist, review the hardware alignment again. Proper testing guarantees your filing cabinet works well every day.
Frequently Asked Questions
How Do You Remove A Drawer With No Visible Release?
Fully extend the drawer and check for hidden release tabs or levers on both sides. Press or lift them to release. If none appear, gently lift and pull the drawer to clear track stops. Avoid forcing it to prevent damage.
How Do You Remove Filing Cabinet Drawers Without Tabs?
Fully extend the drawer and pull until resistance. Slightly lift or wiggle it while pulling to release rollers or friction slides. Check sides for hidden levers or clips to push or lift for disengagement. Avoid forcing to prevent damage.
How To Remove Lock Cylinder From File Cabinet?
To remove a lock cylinder from a file cabinet, open the drawer fully. Locate and unscrew the retaining clip or nut behind the lock. Pull the cylinder straight out from the front. If stuck, gently wiggle while pulling to release it from the lock housing.
How To Remove Drawers With Metal Glides And No Levers On The Bottom?
Fully extend the drawer until it stops. Slightly lift and wiggle the drawer while pulling to release metal glides. Avoid forcing to prevent damage.
Conclusion
Removing filing cabinet hardware does not have to be difficult. Follow the steps carefully and work patiently. Use the right tools to avoid damage. Check for clips, screws, or levers before pulling hard. Take your time to prevent breaking parts.
With practice, the process becomes easier and quicker. Keep these tips in mind for your next filing cabinet project.