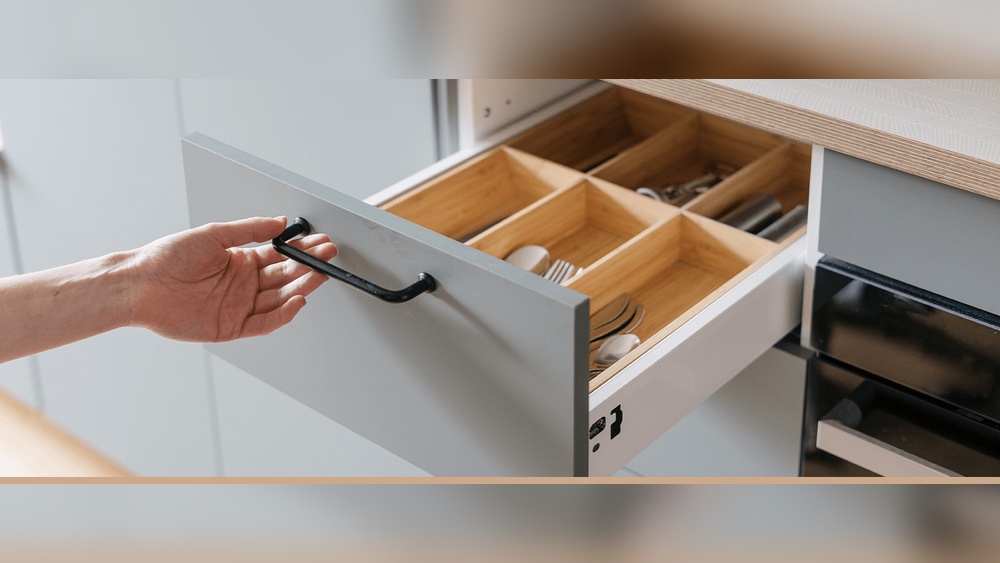
Are you tired of struggling to install cabinet hardware perfectly every time? You’re not alone.
Getting handles and knobs aligned just right can be frustrating and time-consuming. But what if there was a simple tool that could make the job faster, easier, and more precise? That’s where a jig comes in. You’ll discover how to use a jig for cabinet hardware to save yourself headaches and achieve professional-looking results.
Keep reading, and you’ll learn step-by-step tips that will transform your DIY skills and give your cabinets a flawless finish.

Credit: www.homedepot.com
Choosing The Right Jig
Choosing the right jig makes cabinet hardware installation easier and more accurate. A good jig helps place screws and holes in the right spots. This saves time and avoids mistakes. Picking the correct jig depends on the type of hardware, the material of the jig, and its size.
Types Of Cabinet Hardware Jigs
There are several jigs for different hardware types. Handle jigs help place drawer pulls and handles evenly. Knob jigs guide where to drill holes for knobs. Some jigs work for both knobs and handles. Choose a jig that matches your hardware style for best results.
Material And Build Quality
Jigs come in plastic, metal, or wood. Metal jigs are strong and last longer. Plastic jigs are lighter and easy to carry. Wood jigs can be custom-made but may wear out faster. Pick a jig made from sturdy material for precise and lasting use.
Jig Size And Compatibility
Check the jig size against your cabinet dimensions. Some jigs fit only certain drawer widths. Others adjust to different sizes. Make sure the jig matches your cabinet size and hardware placement needs. A compatible jig makes installation smooth and accurate.
Credit: www.apartmenttherapy.com
Preparing Your Workspace
Preparing your workspace is the first step to use a jig for cabinet hardware. A clean and organized area helps you work faster and avoid mistakes. You need to set up everything before starting the installation. This ensures smooth progress and better results.
Taking time to prepare the workspace also keeps your tools safe and handy. It reduces distractions and makes the task easier to manage.
Gathering Tools And Materials
Collect all tools before you begin. You will need a drill, screwdriver, measuring tape, pencil, and the jig. Also, have your cabinet hardware ready. Check if the screws fit the holes. Having everything nearby saves time and effort during the job.
Ensuring Proper Lighting
Good lighting is important for accuracy. Work in a bright room or use a portable lamp. Light helps you see markings clearly and avoid errors. Avoid shadows that can hide marks or holes. Bright light keeps your eyes comfortable and focused.
Marking Cabinet Doors And Drawers
Mark the spots for hardware carefully. Use a pencil and measuring tape for exact placement. Follow the jig instructions for consistent marks. Double-check measurements before drilling. Clear and correct marks make installation easier and improve the final look.
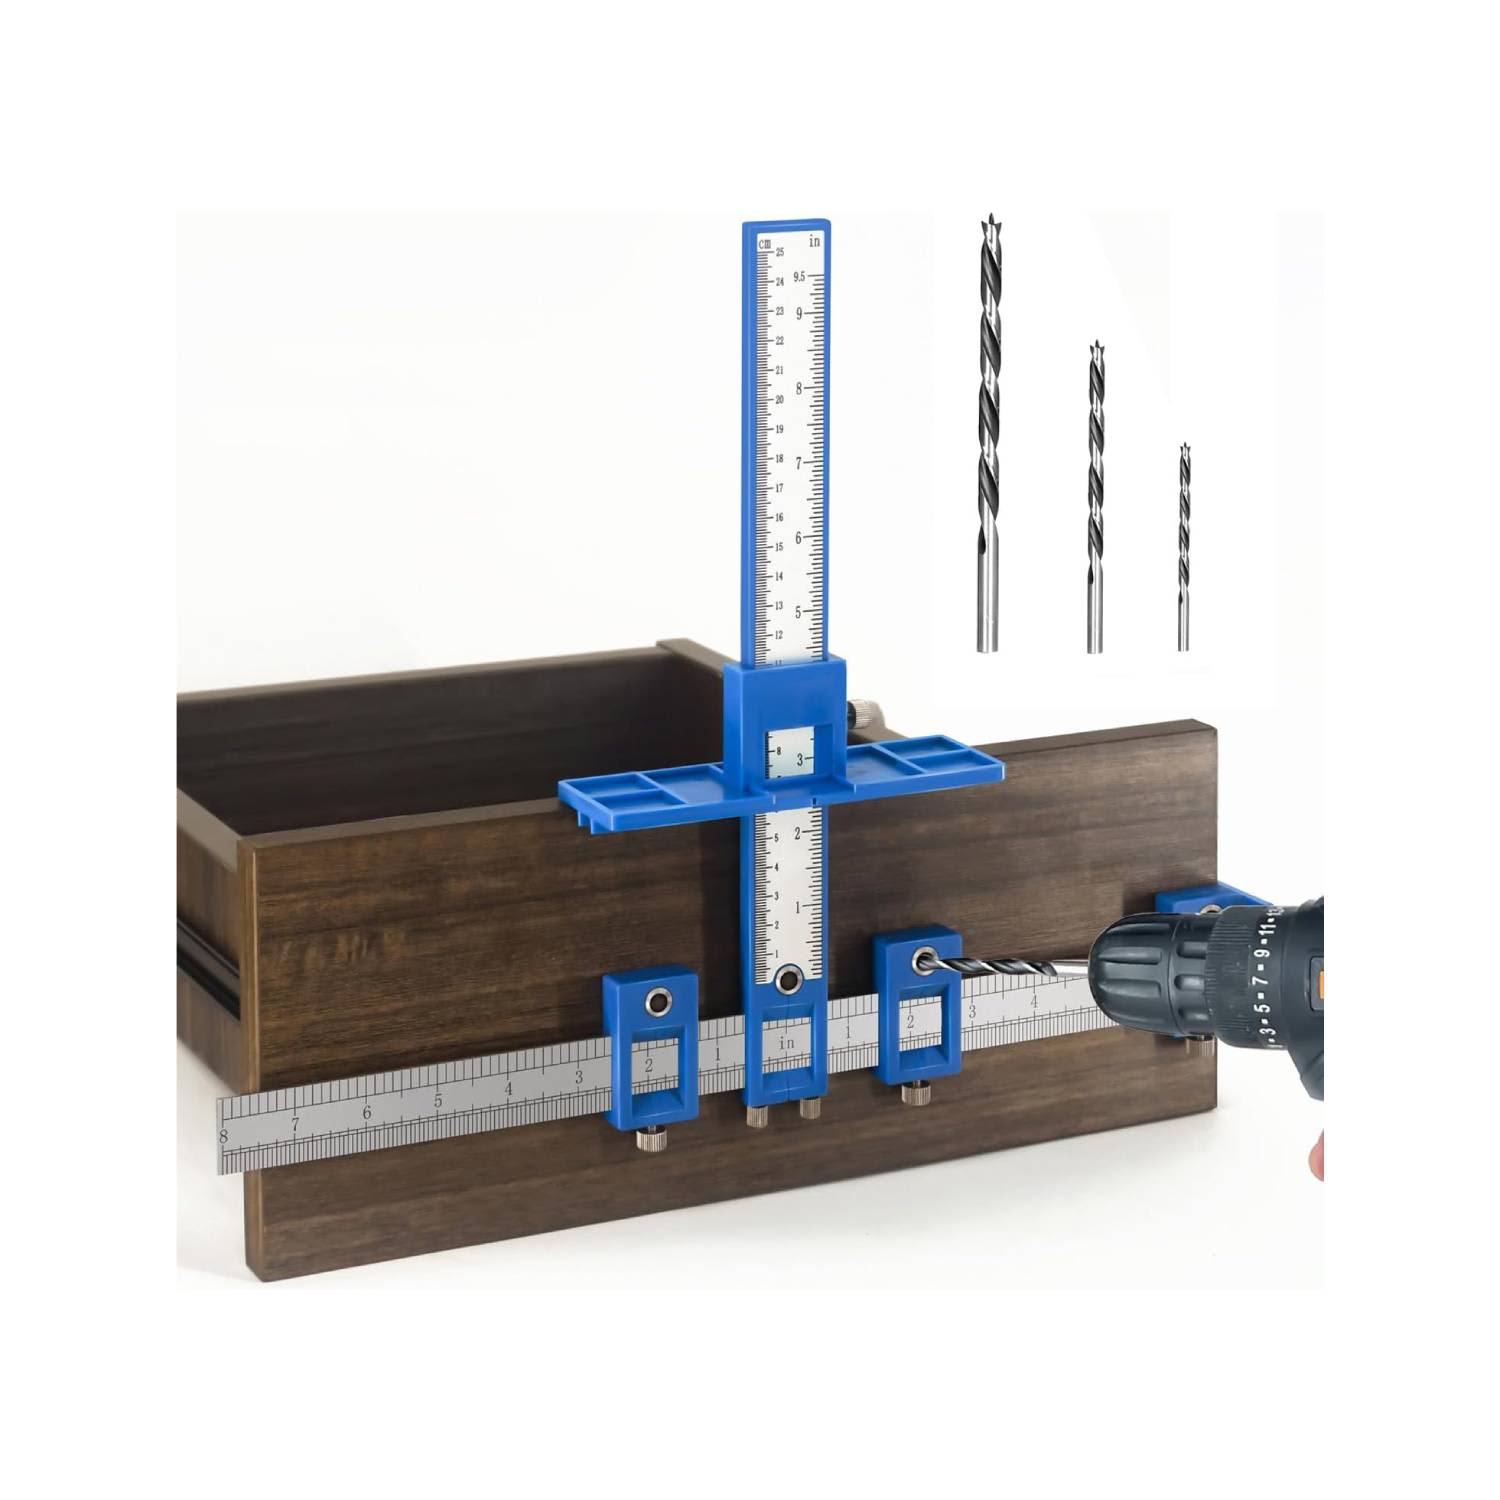
Setting Up The Jig
Setting up the jig is the first step for accurate cabinet hardware installation. A properly set jig ensures perfect hole placement. This saves time and avoids mistakes. Follow clear steps to adjust, align, and secure the jig before drilling.
Adjusting For Hole Spacing
Check the hardware package for hole spacing size. Most handles need a specific distance between holes. Loosen the jig’s adjustment screws to set this distance. Slide the jig’s holes until they match the needed spacing. Tighten screws to lock the jig in place.
Aligning The Jig On The Cabinet
Place the jig flat on the cabinet face. Use the edge of the cabinet as a guide. Align the jig so the holes are centered on the drawer or door. Double-check the vertical and horizontal position. Proper alignment avoids crooked hardware.
Securing The Jig In Place
Hold the jig firmly to keep it steady. Use clamps if possible for extra stability. Some jigs have built-in stops to rest against edges. This helps prevent movement during drilling. A secure jig means clean, precise holes every time.
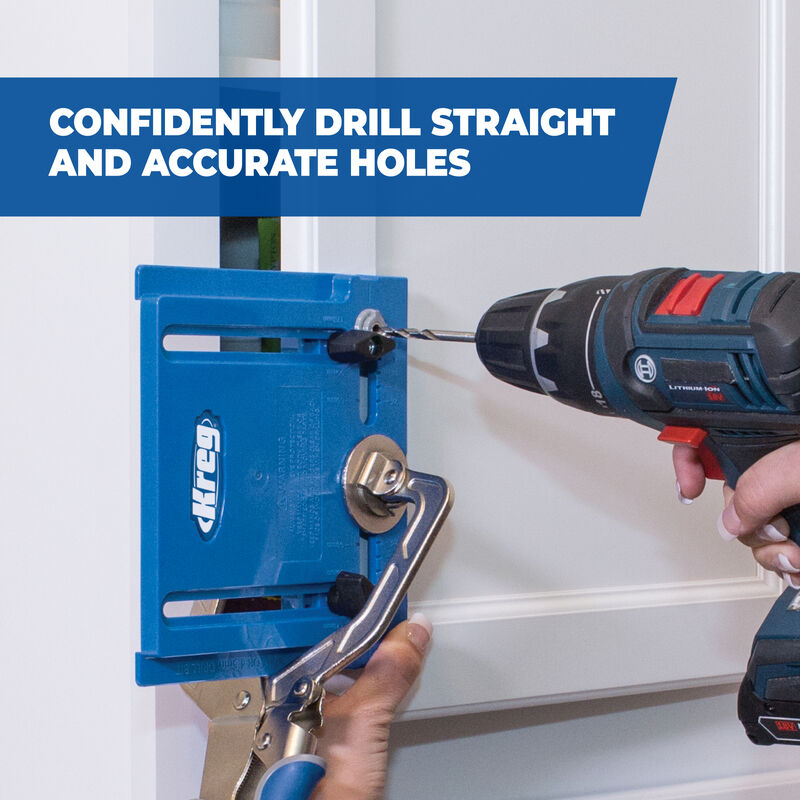
Drilling Holes With Precision
Drilling holes with precision is key to installing cabinet hardware properly. Using a jig helps guide the drill, making holes accurate and consistent. Accurate holes prevent misaligned handles and screws, saving time and frustration. Follow these tips to drill with confidence and neat results.
Choosing The Right Drill Bit
Select a drill bit that matches the screw size for your hardware. Use a bit slightly smaller than the screw’s diameter. This ensures screws fit tightly without splitting the wood. Sharp bits cut cleaner holes and reduce splintering. Replace dull bits to maintain clean, precise holes.
Maintaining Drill Stability
Hold the drill steady and perpendicular to the surface. Use the jig to keep the drill bit in the correct position. Apply steady, gentle pressure while drilling to avoid slipping. Keep your hands firm but relaxed for better control. A stable drill produces straight, even holes every time.
Avoiding Common Drilling Mistakes
Do not rush the drilling process. Drilling too fast can cause splintering or overheating. Avoid tilting the drill bit, which leads to uneven holes. Mark the drilling points clearly on the jig before starting. Check for obstacles behind the drilling surface to prevent damage.
Installing Cabinet Hardware
Installing cabinet hardware with a jig makes the process easier and more precise. The jig helps position holes for screws accurately. This ensures that handles and knobs align perfectly on your cabinets. Follow the steps carefully for a professional look.
Inserting Screws And Handles
Place the cabinet door or drawer flat on a surface. Align the jig over the marked spots. Drill holes through the jig guides for screws. Insert screws from the inside of the cabinet. Attach the handle or knob on the outside. Hold it steady while tightening the screws.
Checking Alignment And Fit
Look at the hardware from different angles. Make sure it sits straight and even. Check that the handle moves freely without wobbling. Confirm the holes are centered on the drawer or door. Adjust if the hardware feels loose or crooked. Proper fit improves both function and style.
Tightening Hardware Securely
Use a screwdriver to tighten screws firmly. Avoid overtightening to prevent damage to the cabinet. Stop when the handle feels secure and stable. Check each piece of hardware for firmness. Tight hardware lasts longer and feels solid.
Credit: www.kregtool.com
Tips For Consistent Results
Consistent results make cabinet hardware installation smooth and professional. Small mistakes can cause misaligned handles or uneven holes. Using a jig helps, but following some key tips ensures precision every time.
Using Templates For Multiple Cabinets
Templates save time and keep holes uniform across cabinets. Create a paper or plastic template to mark drilling spots. Use the same template on every cabinet door or drawer. This method reduces errors and speeds up your work.
Double-checking Measurements
Always measure twice before drilling. Check distances between holes and edges carefully. Confirm the jig is set correctly for each cabinet. Taking a moment to verify prevents costly mistakes and repairs later.
Cleaning And Maintaining The Jig
Keep your jig clean from dust and debris. Wipe it down after each use to avoid buildup. Lubricate moving parts if needed to maintain smooth operation. A well-kept jig works more accurately and lasts longer.
Frequently Asked Questions
What Is A Jig For Cabinet Hardware Installation?
A jig is a tool that guides drilling holes for cabinet hardware. It ensures precise, consistent placement of handles or knobs. Using a jig saves time and prevents mistakes during installation. It is essential for professional-looking cabinet hardware setups.
How Do I Use A Jig For Cabinet Handles?
Place the jig on the cabinet door or drawer front. Align it properly using the marks or guides. Drill holes through the jig’s holes to ensure accurate hardware placement. Attach the handles securely afterward. Repeat for consistent results.
Can A Jig Improve Cabinet Hardware Alignment?
Yes, a jig ensures perfect alignment of cabinet hardware. It prevents uneven or crooked handle placement. This results in a cleaner, more professional appearance. Using a jig reduces errors and saves time during installation.
What Types Of Jigs Are Best For Cabinets?
Common types include adjustable jigs, template jigs, and multi-hole jigs. Adjustable jigs fit different cabinet sizes and hardware types. Template jigs offer pre-measured holes for specific hardware. Choose a jig based on your cabinet and hardware needs.
Conclusion
Using a jig makes installing cabinet hardware much easier. It helps you place screws in the right spot every time. This saves time and avoids mistakes. You get a neat, professional look on your cabinets. Anyone can use a jig, even beginners.
Just follow simple steps and measure carefully. Your kitchen or bathroom will look better with neat hardware. Try a jig on your next project for good results. Practice a bit, and you will get faster. Small tools can make big jobs simple.