
Removing deck boards with hidden fasteners can feel tricky if you don’t know the right steps. But what if you could do it without damaging your deck or struggling with stubborn screws?
In this guide, you’ll discover simple, effective methods to take out those boards quickly and safely. Whether you’re fixing a damaged plank or upgrading your deck, knowing how to handle hidden fasteners will save you time and frustration. Keep reading, and you’ll learn the insider tips that make the whole process easier than you ever imagined.
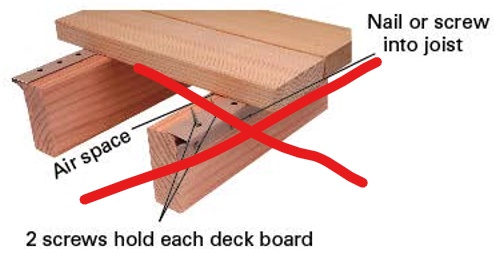
Credit: www.novausawood.com
Tools And Materials Needed
Removing deck boards with hidden fasteners needs the right tools and materials. Having everything ready makes the work easier and faster. Missing one tool can slow you down or damage the deck. This section lists the essential tools, safety gear, and replacement parts you need.
Essential Tools
Start with a pry bar to lift the boards gently. Use a drill with the correct bit to remove fasteners. A rubber mallet helps to tap boards loose without damage. A tape measure checks board size for replacements. A putty knife can help to loosen stuck fasteners. Keep a screwdriver set for different screw heads. A utility knife is useful to cut any seal or paint. A hammer might be needed for stubborn nails or fasteners.
Safety Gear
Wear safety glasses to protect your eyes from flying debris. Use gloves to protect your hands from splinters and sharp edges. Knee pads make working on the deck floor more comfortable. A dust mask guards against inhaling dust or old paint. Sturdy shoes help avoid foot injuries from dropped tools or boards. Ear protection is important if you use power tools often.
Replacement Parts
Have extra deck boards of the same material and size ready. Stock up on hidden fasteners that match your deck system. Keep a few screws or nails for securing boards if needed. Wood filler or sealant helps fix small holes or cracks. Sandpaper smooths rough edges on new or old boards. Paint or stain matches the deck’s finish after replacement.
Preparing The Deck
Preparing the deck is the first step before removing boards with hidden fasteners. It helps make the process safer and easier. Taking time to get ready prevents damage to the wood and tools. Follow simple steps to prepare the deck well.
Clearing The Area
Remove all furniture, plants, and objects from the deck. Clear the space around the boards you want to remove. This gives you room to work and stops accidents. A clean deck area helps you see fasteners clearly.
Inspecting The Boards
Look closely at the deck boards for damage or wear. Check for cracks, splits, or loose boards. This shows which boards need removal or repair. Noticing weak spots helps avoid breaking boards during removal.
Locating Hidden Fasteners
Hidden fasteners are often hard to see at first. Use a flashlight or move the boards slightly to spot them. They may be clips or screws under the board edges. Knowing where fasteners are saves time and effort when removing boards.
Removing Hidden Fasteners
Removing hidden fasteners from deck boards requires care and the right approach. These fasteners are designed to be invisible, which makes removal tricky. Knowing how to identify and handle them helps protect your deck and tools.
Identifying Fastener Types
Hidden fasteners come in different shapes and sizes. Some use clips that fit between boards, while others have screws or nails that are not visible. Look closely at the deck edges to spot small gaps or clips. Understanding the type helps choose the right removal method.
Using The Right Removal Tool
Using the correct tool makes removing hidden fasteners easier. A pry bar or a special fastener removal tool works well. Avoid using sharp tools that can damage the wood. Gently lift the board near the fastener to release it without breaking the board.
Tips For Avoiding Damage
Work slowly to avoid cracking or splintering the deck boards. Apply steady pressure when prying up boards. Support the board to keep it from bending too much. Keep tools clean and in good condition to prevent slipping and damage.
Lifting Deck Boards
Lifting deck boards with hidden fasteners requires care and the right approach. These fasteners are designed to keep the deck smooth and clean, making board removal a bit tricky. Patience and the correct tools help protect the boards and fasteners. Follow clear steps to lift boards without damage.
Starting Points For Removal
Begin at a corner or edge of the deck. Corners give better access to the fasteners. Use a flat pry bar or a special hidden fastener tool. Gently insert the tool under the board near the fastener clip. Avoid forcing the tool too deep to prevent board damage.
Safe Board Removal Techniques
Lift boards slowly and evenly. Apply steady pressure to loosen the clips. Work your way along the board’s length. Keep the board as flat as possible to avoid cracking. If the board resists, stop and check for extra fasteners or nails.
Handling Stubborn Boards
Stubborn boards may have dirt or rust on fasteners. Use a lubricant spray on clips to ease removal. Tap gently with a rubber mallet to loosen the board. Avoid using metal hammers that can damage wood. Take breaks to prevent rushing and breaking boards.
Cleaning And Inspecting
Cleaning and inspecting deck boards after removing them is very important. It helps keep your deck safe and looking good. You must remove dirt and check each board for damage. Careful inspection also prepares the boards for reinstallation. This step saves time and money later.
Removing Debris
Start by clearing away dirt, leaves, and dust. Use a soft brush or broom for this job. Make sure to clean between the boards too. A vacuum can help remove small particles. Clean boards allow you to see any problems clearly. This step prevents dirt from causing damage later.
Checking For Damage
Look closely at each board for cracks or splits. Check for signs of rot or mold. Tap the boards gently to listen for hollow sounds. Soft spots mean the wood is weak. Also, inspect the hidden fasteners for rust or wear. Replace any damaged parts before reinstalling.
Preparing For Reinstallation
After cleaning and inspecting, let the boards dry well. Sand rough areas to smooth the surface. Apply a wood preservative if needed. Arrange the boards in the order you plan to reinstall them. This makes the process faster and easier. Proper preparation helps your deck last longer.

Credit: www.greenzone-wpc.com
Replacing Or Reinstalling Boards
Removing deck boards with hidden fasteners is only part of the process. Replacing or reinstalling these boards is just as important. Proper replacement ensures your deck looks smooth and stays strong. It also keeps the hidden fastener system working well for years.
Selecting Replacement Boards
Choose boards that match your deck’s material and size. Look for wood or composite boards that fit the existing space. Check for color and texture to keep the deck uniform. Avoid warped or damaged boards as replacements.
Reattaching With Hidden Fasteners
Use the same type of hidden fasteners as before. Slide the fasteners into the groove of the board carefully. Secure the fasteners to the joists with screws. Make sure fasteners hold the board firmly without gaps.
Ensuring Proper Alignment
Align each board tightly next to the others. Keep the spacing consistent for a neat look. Check the board edges for evenness along the deck’s length. Use a level to confirm the surface is flat and smooth.
Maintenance Tips
Maintaining your deck with hidden fasteners keeps it safe and beautiful. Simple care routines prevent damage and reduce repair needs. Follow these maintenance tips to protect your investment and enjoy your deck longer.
Regular Inspections
Check your deck boards and fasteners every few months. Look for loose or damaged boards. Spot signs of rust or wear on fasteners. Early detection helps fix small problems quickly. Use a flashlight to see hidden fasteners clearly. Tighten any loose screws or clips you find.
Preventing Fastener Issues
Keep fasteners clean and dry to avoid rust. Remove leaves and dirt from deck gaps. Avoid using harsh chemicals that can damage fasteners. Use a sealant around fasteners to stop water from entering. Replace any fasteners that show signs of corrosion. Use the right tools to avoid stripping screws.
Extending Deck Lifespan
Apply a quality sealant to protect deck boards. Clean the deck surface regularly to prevent mold and mildew. Avoid standing water on the deck by ensuring proper drainage. Replace damaged boards promptly to prevent further issues. Use protective pads under furniture to avoid scratches. Regular care keeps your deck strong and looking great.

Credit: www.youtube.com
Frequently Asked Questions
How Do Hidden Fasteners Work On Deck Boards?
Hidden fasteners clip the deck boards to joists without visible screws. They provide a clean look and secure attachment. These fasteners fit between boards and lock them in place, preventing movement and maintaining spacing. This method avoids surface damage and enhances deck aesthetics.
What Tools Are Needed To Remove Deck Boards With Hidden Fasteners?
You need a pry bar, drill with screwdriver bit, and possibly a specialized removal tool. A rubber mallet helps loosen boards gently. Safety gloves and eye protection are also recommended. Proper tools ensure safe and efficient removal without damaging the boards.
Can Deck Boards Be Reused After Removing Hidden Fasteners?
Yes, deck boards can often be reused if removed carefully. Avoid damaging the edges or surfaces during removal. Inspect boards for cracks or warping before reuse. Reusing boards saves cost and supports sustainable decking practices.
How To Prevent Damage When Removing Hidden Fasteners?
Use gentle prying motions and appropriate tools to avoid splintering. Apply steady pressure near fastener points to loosen boards. Avoid forcing boards to prevent cracking. Proper technique preserves both boards and fasteners for reuse.
Conclusion
Removing deck boards with hidden fasteners can be simple with the right steps. Take your time and use the proper tools to avoid damage. Carefully lift each board without forcing it. This method helps keep your deck strong and looking good.
Practice patience and stay safe while working. Soon, you will handle deck repairs with confidence and ease.
