Have you ever struggled with buttons that fall off or tricky closures that don’t hold well? Snap fasteners could be the simple, durable solution you need.
Learning how to sew on snap fasteners is easier than you think, and once you master it, your clothes and projects will look neat and last longer. In this guide, you’ll discover step-by-step tips that make the process quick and foolproof.
Ready to transform your sewing skills and add a professional touch to your work? Keep reading to find out how!
Choosing Snap Fasteners
Choosing the right snap fasteners is important for your sewing project. The snap fasteners must fit the fabric and purpose. Picking the right type, material, and size helps your project last longer. It also makes the sewing process easier and the finished item look better.
Types Of Snap Fasteners
Snap fasteners come in several types. Sew-on snaps have holes for stitching. They suit thick fabrics and heavy use. Prong snaps have metal prongs that pierce the fabric. These work well on leather or denim. There are also plastic snaps, which are light and good for baby clothes or light fabrics.
Materials And Sizes
Snap fasteners are made from metal or plastic. Metal snaps are strong and durable. They suit jackets and bags. Plastic snaps are softer and lighter. They are good for shirts and baby items. Sizes vary from very small for delicate fabrics to large for heavy materials. Choose a size that matches your fabric weight and use.
Gathering Tools And Materials
Starting a sewing project with snap fasteners requires having the right tools and materials ready. Preparing these items ensures the process goes smoothly. It saves time and avoids frustration during sewing. Gather all essentials before you begin. This section explains what tools and materials you need.
Essential Sewing Tools
Needles designed for hand sewing are a must. Choose sharp, strong needles that can pierce fabric easily. Thread should match the fabric color. Polyester thread is strong and works well. Small scissors help cut thread neatly. A thimble protects your finger when pushing the needle through thick fabric. Snap fasteners themselves come in pairs. Make sure the snaps fit your project’s fabric thickness.
Additional Helpful Items
A pair of pliers helps press snap fasteners firmly in place. Marking tools like tailor’s chalk or fabric pencils guide snap placement. A measuring tape or ruler ensures snaps are aligned evenly. A small seam ripper is handy to fix mistakes. A pincushion keeps needles and pins organized. A piece of scrap fabric is useful for testing your technique first.
Preparing Fabric
Preparing the fabric is an important step before sewing on snap fasteners. It helps the snaps stay secure and look neat. Taking time to prepare the fabric makes your project stronger and longer-lasting.
Marking Snap Positions
Start by deciding where the snaps will go. Use a fabric pencil or tailor’s chalk to mark the spots. Place the marks evenly for a balanced look. Check the alignment carefully before sewing. Clear marks guide you and prevent mistakes.
Reinforcing Fabric
Snap fasteners put pressure on fabric. Thin or stretchy fabric can tear easily. Add a small piece of interfacing or fabric behind the snap area. This extra layer supports the fabric and holds the snap firmly. Sew the interfacing on before attaching the snaps. Reinforcement keeps your project strong over time.

Credit: www.youtube.com
Attaching Snap Fasteners By Hand
Attaching snap fasteners by hand is a simple skill. It gives you control over your sewing project. You need some basic tools and patience. This method works well for small repairs and crafts. Follow the steps carefully for a neat finish.
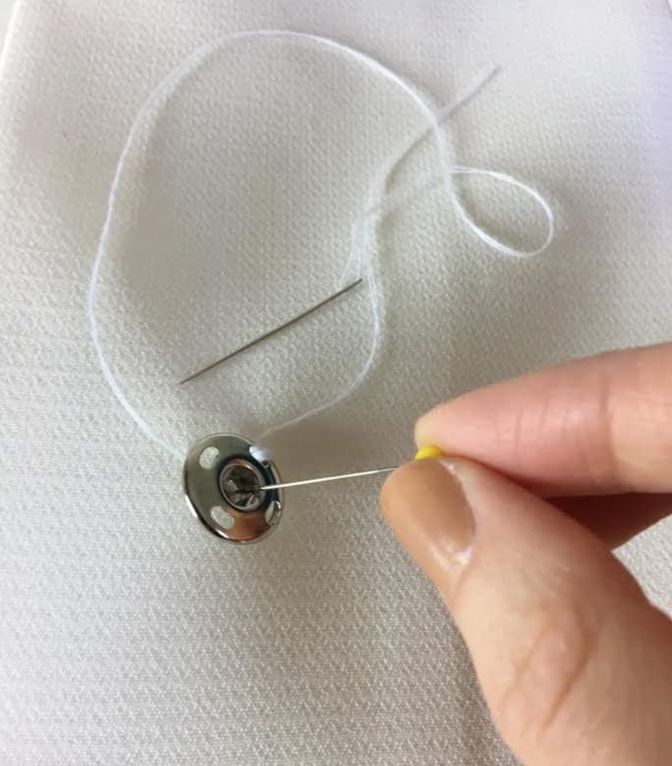
Threading The Needle
Choose a strong thread matching your fabric. Cut a piece about 18 inches long. Thread the needle and pull the thread through. Tie a small knot at the end. This knot stops the thread from slipping out.
Sewing The Male Part
Place the male part of the snap on the fabric. Hold it firmly in place. Push the needle through one hole of the snap. Pull the thread tight but not too tight. Sew around all the holes with small stitches. Make sure the snap stays steady. Tie a knot at the end to secure it.
Sewing The Female Part
Align the female part on the opposite fabric side. Match it with the male part for proper closure. Sew through the holes as done before. Keep your stitches tight and even. Check that the snap parts close smoothly. Finish by knotting the thread securely.
Using Snap Fastener Pliers
Using snap fastener pliers makes sewing snaps quick and neat. These pliers hold snap parts tight and press them together. They work well on fabrics and leather. The process is simple but needs care to avoid damage. Follow the steps to set up and install snaps correctly.
Setting Up The Pliers
First, clean the pliers. Remove dirt and dust from the jaws. Check if the jaws fit the snap size. Some pliers come with different jaw sizes. Choose the right one for your snap fasteners. Attach the jaws securely to the pliers. Hold the pliers firmly to test the grip. Make sure the jaws align perfectly.
Installing Snaps With Pliers
Place the snap parts on the fabric. Position the socket part on top. Put the stud part below the fabric. Align the snap parts carefully inside the pliers’ jaws. Squeeze the handles slowly and firmly. Press until the snap parts join tightly. Avoid pressing too hard or too soft. Check the snap by opening and closing it. Repeat for all snap fasteners needed.

Credit: www.youtube.com
Testing The Snap Closure
Testing the snap closure is a key step after sewing snap fasteners. It ensures the snaps work well and hold fabric parts firmly. This step helps avoid loose or misaligned snaps that can cause frustration later.
Checking Alignment
Check if both snap parts line up perfectly before closing them. Misaligned snaps will not close properly or may wear out quickly. Press the snaps together gently to see if they match. Adjust the sewing if one side sits higher or lower than the other.
Ensuring Secure Attachment
Pull the snap gently after closing to test its strength. The snap should hold firmly without coming apart easily. If it feels loose, reinforce the stitches around the snap. Secure snaps keep your garment or project looking neat and working well.
Troubleshooting Common Issues
Troubleshooting common issues with snap fasteners saves time and frustration. Sewing snaps seems easy, but small problems can occur. Knowing how to fix these keeps your project neat and functional. Below are common problems and simple solutions.
Loose Snaps
Loose snaps do not hold fabric firmly. This often happens when the snap is not sewn tightly. Tighten your stitches around the snap base. Use strong thread and sew several times through the holes. Check the snap parts fit well before sewing. Replace snaps that are bent or worn out.
Misaligned Fasteners
Misaligned fasteners do not close properly. Mark both sides of the fabric carefully before sewing. Use pins or chalk to keep snaps in place. Sew one snap first, then fold fabric to match the other snap. Adjust placement if needed. Take time to align snaps for a clean finish.
Credit: www.doinaalexei.com
Care Tips For Snap Fastened Items
Snap fasteners add convenience to clothing and accessories. Taking care of items with snaps helps them last longer. Proper care keeps the snaps working well and looking good.
Washing Guidelines
Always close snap fasteners before washing. This prevents damage to the snaps and fabric. Use a gentle cycle with cold water. Avoid bleach or harsh detergents. Hand washing works best for delicate items. Let the item air dry to keep snaps intact. Avoid high heat from dryers as it can weaken snaps.
Maintenance Advice
Check snaps regularly for looseness or damage. Tighten or replace loose snaps quickly. Use pliers carefully to avoid breaking them. Clean snaps with a soft cloth to remove dirt. Avoid soaking snaps in water for long. Store snap fastened items flat or hung to keep shape. Keep snaps dry to prevent rust on metal parts.
Frequently Asked Questions
How Do You Sew Snap Fasteners By Hand?
To sew snap fasteners by hand, use a needle and strong thread. Attach the socket and stud pieces carefully. Sew through the holes multiple times for durability. Ensure the fastener aligns properly for smooth snapping.
What Tools Are Needed For Sewing Snap Fasteners?
You need snap fasteners, a needle, strong thread, scissors, and fabric chalk. Optionally, use pliers or a snap-setting tool to secure snaps firmly. These tools help you attach snaps accurately and securely.
Can Snap Fasteners Be Sewn On Thick Fabrics?
Yes, snap fasteners can be sewn on thick fabrics. Use a heavy-duty needle and strong thread. Sew slowly to avoid breaking needles. Ensure the snap parts are suitable for thick material for a secure fit.
How To Prevent Snap Fasteners From Loosening?
To prevent loosening, sew snaps tightly with multiple stitches. Use strong thread and avoid excessive force when snapping. Reinforce snaps if used frequently to maintain durability and function over time.
Conclusion
Sewing on snap fasteners is simple with the right steps. Take your time and sew carefully for a strong hold. Practice on scrap fabric to build your confidence. Choose the right size and type of snaps for your project. Proper sewing keeps your clothes and crafts secure and neat.
Enjoy adding snaps to your projects with ease and skill. Keep practicing, and sewing snaps will become second nature.