Are you looking to brighten up your space with LED lights and want to control them easily with a light switch? Connecting LED lights to a switch might seem tricky, but it’s simpler than you think.
In this guide, you’ll discover step-by-step how to do it safely and efficiently. By the end, you’ll have full control over your LED lighting, making your room more comfortable and stylish. Ready to get started? Let’s dive in and make your lighting setup work perfectly for you.
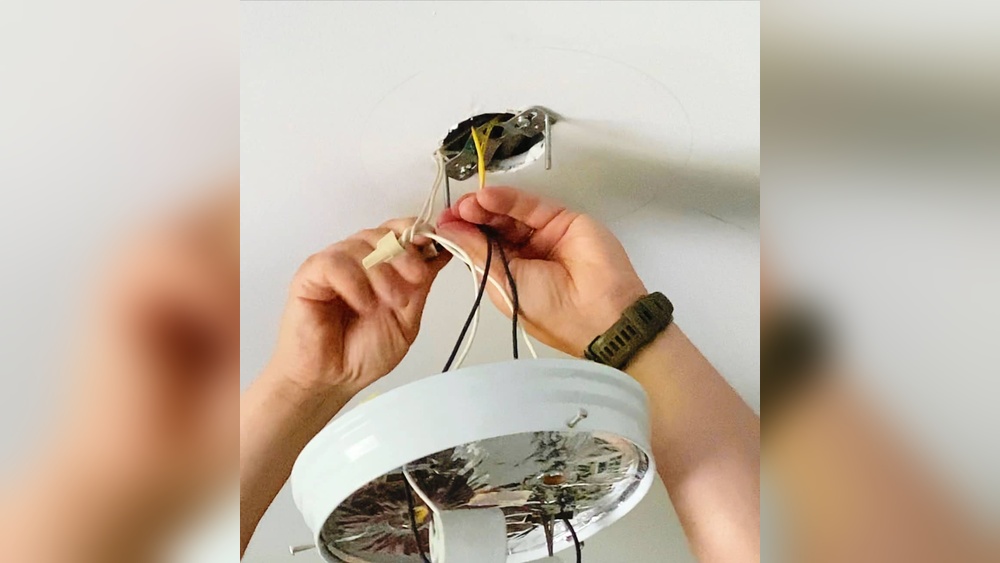
Credit: mardomdecor.com
Tools And Materials Needed
Connecting LED lights to a light switch needs the right tools and materials. Having these ready makes the job easier and safer. This section covers what you need before starting your project.
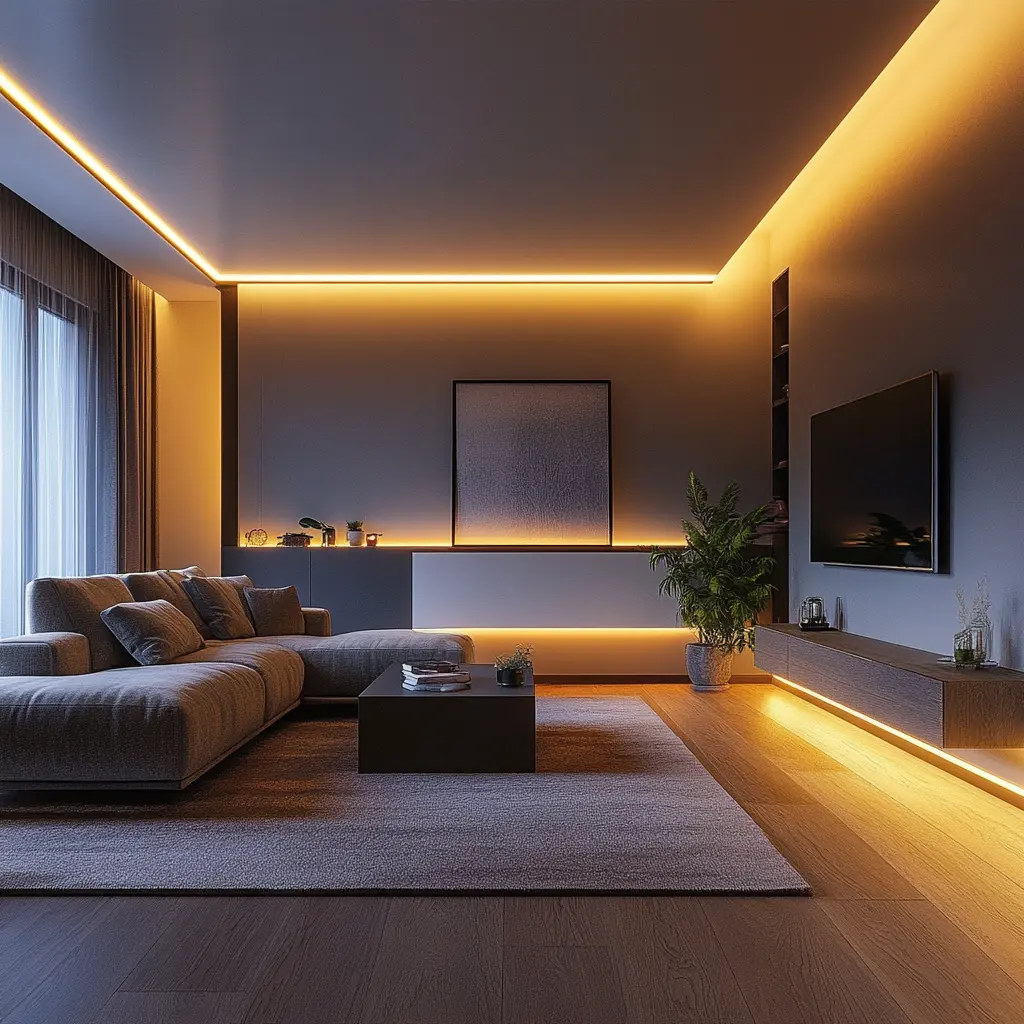
Types Of Led Lights
LED lights come in many forms. Strip lights are flexible and easy to install. Bulb-shaped LEDs fit standard sockets. Panel lights offer wide, even lighting. Choose the type that fits your space and needs.
Selecting The Right Switch
Not all switches work well with LED lights. Use switches made for low power loads. Dimmer switches must support LED bulbs. A simple on/off switch works for basic setups. Picking the right switch helps avoid flickering or damage.
Essential Tools
Gather these tools before you start. A screwdriver set is vital for opening switch boxes. Wire strippers help prepare the wires safely. Use a voltage tester to check power is off. Electrical tape secures wire connections. A drill may be needed for mounting. These tools keep your work safe and smooth.
Preparing The Work Area
Preparing the work area is the first step to connect LED lights to a light switch. A clean, organized space helps you work safely and efficiently. Clear the area around the switch and light fixture. Make sure you have enough light to see what you are doing. Gather all tools and materials before starting. This preparation reduces errors and speeds up the process.
Turning Off The Power
Always turn off the power before working with electrical wiring. Find the circuit breaker that controls the light switch. Switch it off to cut the electricity. Use a voltage tester to confirm the power is off. This step prevents electric shock and injuries. Never skip turning off the power.
Safety Precautions
Wear insulated gloves to protect your hands from shocks. Avoid working in wet or damp areas. Keep tools dry and in good condition. Use a sturdy ladder if you need to reach high places. Do not touch wires with bare hands. Follow these safety rules to stay safe during the project.
Wiring Basics For Led Lights
Wiring LED lights to a light switch requires basic knowledge of electrical wiring. Understanding how to connect wires safely helps avoid damage and ensures the lights work properly. This section covers the essentials of LED wiring and wire types.
Knowing the basics makes the installation process easier and safer. It also helps you troubleshoot problems quickly.
Understanding Led Wiring
LED lights use low voltage and need a compatible power source. They often require a driver to convert standard electricity into the correct voltage. The wiring must connect the LED light, driver, and switch correctly.
The positive and negative wires must be matched to avoid damage. The switch usually controls the flow of electricity to the LED light. Proper wiring stops flickering and ensures consistent light output.
Identifying Wire Types
Different wires serve different purposes in LED wiring. The main types are live (hot), neutral, and ground wires. Live wires carry power to the light. Neutral wires complete the electrical circuit.
Ground wires provide safety by directing electricity away during faults. Wires come in different colors for easy identification: black or red for live, white for neutral, and green or bare for ground. Using the right wire type is important for safety and function.
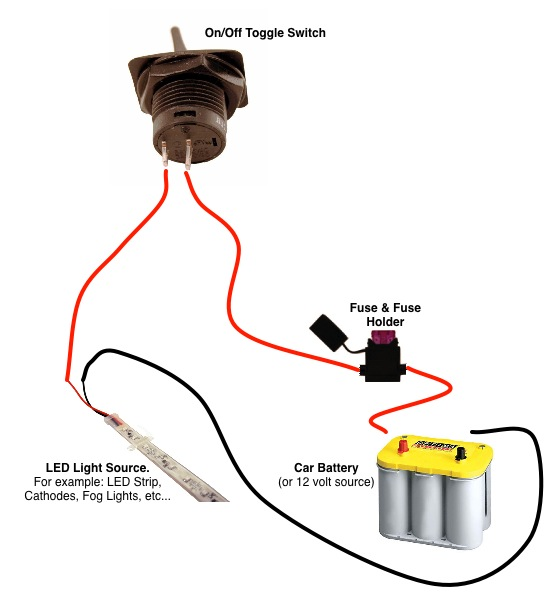
Credit: www.oznium.com
Step-by-step Wiring Process
Connecting LED lights to a light switch is simple with clear steps. This guide breaks down the wiring process. Follow each step carefully for a safe and working setup. Understanding the wiring helps avoid mistakes and saves time.
Connecting The Switch To Power Source
Turn off the main power before starting. Locate the power source wires in your wall. Identify the live (hot) wire, usually black or red. Connect this wire to the switch’s input terminal. Use a screwdriver to tighten the terminal screws. Ensure the connection is firm and secure.
Wiring The Led Lights
Run wires from the switch to the LED lights. Connect the switch’s output terminal to the LED’s positive wire. LED lights usually have red for positive and black for negative. Attach the negative wire to the power source’s neutral wire, often white. Keep wire lengths short to avoid voltage drop.
Securing Connections
Use wire nuts or connectors to join wires safely. Wrap each connection with electrical tape for extra safety. Check that no bare wire is exposed. Push all wires neatly into the electrical box. Finally, mount the switch and attach the cover plate securely.
Testing The Setup
Testing the setup is an important step after connecting LED lights to a light switch. This process ensures the lights work correctly and the wiring is safe. Taking time to test helps avoid future problems and keeps your home safe.
Restoring Power
Start by turning the main power back on at the circuit breaker. Make sure all switches are in the off position before restoring power. This prevents sudden surges that can damage the LED lights. After power is back, check the wiring connections for any signs of loose wires or sparks.
Checking Light Functionality
Flip the light switch to the on position. The LED lights should illuminate immediately without flickering. Test the switch several times to confirm consistent operation. If the lights do not turn on, double-check the wiring and switch connections. Proper function means your setup is complete and safe to use.
Troubleshooting Common Issues
Maintaining LED lights helps them last longer and work better. Proper care avoids problems and saves money. Small checks and safe replacements keep your lights bright and efficient.
Regular Inspection
Check LED lights often for any signs of damage. Look for flickering, dim spots, or color changes. Clean dust or dirt from the bulbs and fixtures. Tighten loose connections to avoid electrical issues. Early detection helps fix problems before they grow.
Replacing Components Safely
Always turn off the power before replacing any part. Use the right replacement bulbs and parts for your LED setup. Avoid touching the bulbs with bare hands to prevent damage. Follow the manufacturer’s instructions carefully. Dispose of old components in a safe way.

Credit: www.youtube.com
Frequently Asked Questions
How Do I Safely Connect Led Lights To A Light Switch?
Turn off the power at the circuit breaker first. Use a voltage tester to ensure no electricity flows. Connect the LED light wires to the switch terminals securely. Follow wiring diagrams and local electrical codes to avoid hazards.
What Tools Are Needed To Connect Led Lights To A Switch?
You need a voltage tester, wire strippers, screwdrivers, electrical tape, and wire connectors. These tools ensure safe and secure connections. Proper tools help prevent damage and ensure your LED lights work effectively.
Can I Connect Multiple Led Lights To One Switch?
Yes, you can connect multiple LED lights to one switch. Ensure the switch and wiring support the total wattage. Use proper connectors and follow electrical standards for safe operation.
What Wire Colors Connect Led Lights To A Switch?
Typically, black or red wires are live (hot), white is neutral, and green or bare is ground. Connect the live wire from the switch to the LED light’s live wire. Always confirm wire colors with a tester.
Conclusion
Connecting LED lights to a light switch is simple and useful. Always turn off power before starting any work. Use the right tools and follow safety steps carefully. Double-check your wiring before turning the power back on. This helps avoid mistakes and keeps you safe.
With a bit of patience, you can brighten any room easily. Enjoy your new lighting setup that you installed yourself. It feels good to fix things on your own. Keep learning and trying small projects like this one.