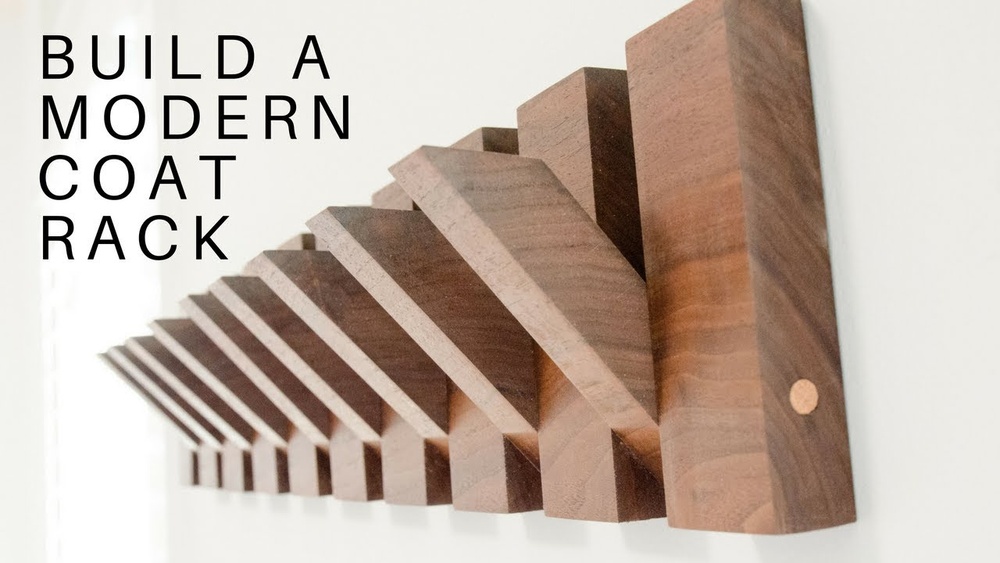
Looking for a simple way to keep your space neat and organized? Building a switchboard wall hook might be exactly what you need.
It’s a smart, practical solution that helps you hang keys, cables, or small tools right where you can see them. You don’t have to be a pro to create one—you just need a few basic materials and some easy steps.
In this guide, you’ll discover how to make a sturdy, stylish switchboard wall hook that fits perfectly in your home or workspace. Ready to clear the clutter and add a touch of order? Let’s get started!
Materials Needed
Preparing the wall is the first important step in building a switchboard wall hook. It ensures your hook is strong and safe to use. Proper preparation also helps avoid damage to the wall and any hidden wiring. Take time to do this part well for the best results.
Selecting The Location
Choose a spot on the wall that is easy to reach and fits your needs. Make sure the area is flat and clear of obstacles. Avoid places near doors or windows where the hook might get in the way. Pick a location that supports the weight of the hook and items you plan to hang.
Cleaning And Marking
Clean the wall surface using a damp cloth to remove dust and dirt. A clean wall helps the hook stick better and lasts longer. After cleaning, use a pencil to mark where you want to place the hook. Measure carefully to keep your marks even and straight. These marks guide you during installation.
Checking For Wiring
Use a stud finder with a wire detection feature to scan the wall. This helps find any hidden electrical wires or pipes. Avoid drilling or nailing where wires are present to prevent accidents. Double-check your marks and move them if needed to stay safe.
Credit: www.etsy.com
Preparing The Wall
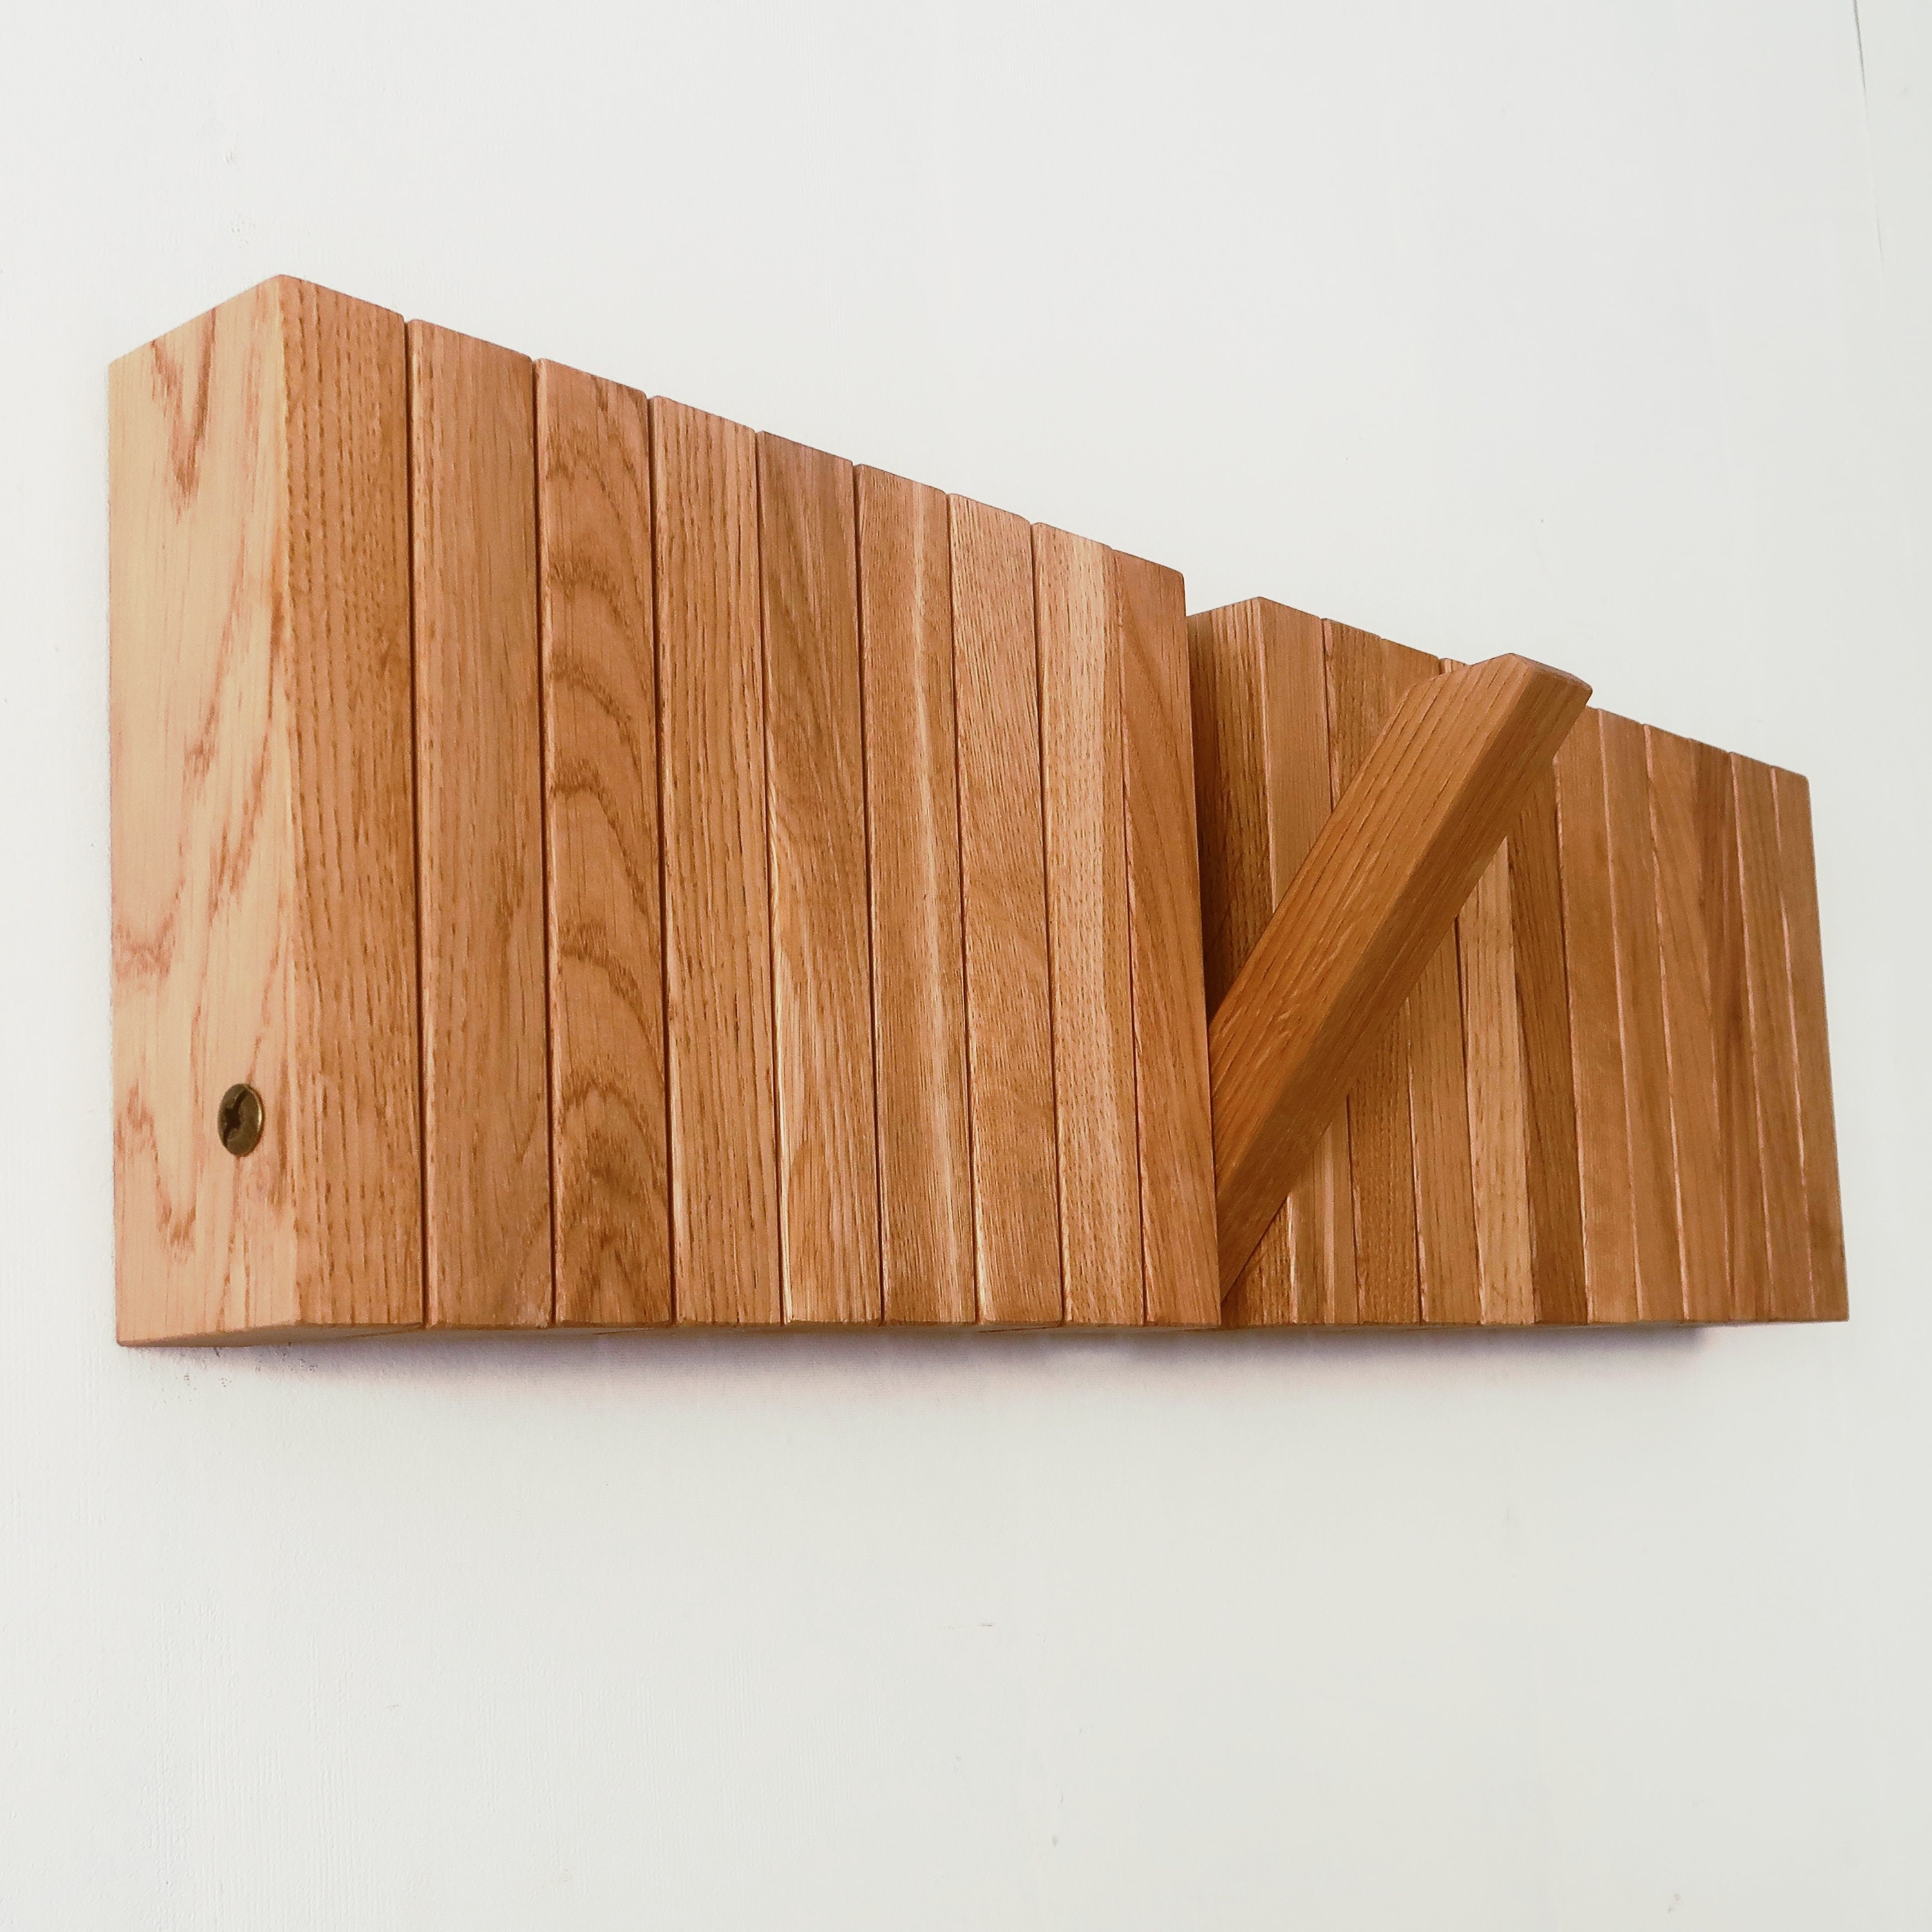
Installing the switchboard is the key step in building your wall hook. A well-installed board will hold hooks firmly and keep your items safe. This section guides you through mounting the board, securing it, and making sure it is level.
Mounting The Board
Choose the right spot on your wall. Hold the switchboard against the wall. Mark where the screws will go. Use a pencil to make small marks. This helps keep the board steady during installation.
Securing With Screws
Pick screws that fit the wall type. Drill small holes at the marks. Place wall anchors if needed for extra strength. Screw the board tightly, but do not over-tighten. The board must stay firm without cracking.
Leveling Tips
Use a level tool to check the board. Place it on top of the board. Adjust the board slightly before final tightening. A level board looks neat and works better. Recheck after securing the screws to ensure balance.
Installing The Switchboard
Final checks are crucial after building your switchboard wall hook. They ensure your work is strong, safe, and ready to use. Skipping these steps can cause problems later. Take your time to carefully review each part of the installation. This makes sure everything fits well and works as it should.
Inspecting Installation
Look closely at the wall hook and switchboard. Check for loose screws or parts. Make sure the hook is straight and firmly attached. Confirm the switchboard is flush against the wall without gaps. Visual inspection helps find small mistakes early.
Adjustments If Needed
Make changes if you spot any issues. Tighten loose screws and shift the hook for better alignment. Use a level tool to check if it is even. Fix any unevenness or instability before moving on. Small fixes improve the hook’s durability.
Safety Verification
Test the hook’s strength by gently pulling it. Ensure it holds weight without wobbling or bending. Check the switchboard’s wiring is neat and secure. Confirm no wires are exposed or loose. Safety verification protects your home and users from harm.

Credit: www.multimet.com.pl
Attaching The Wall Hook
Maintaining your switchboard wall hook keeps it strong and safe for daily use. Simple care helps avoid damage and extends its life. Regular checks ensure the hook works well over time.
Cleaning The Hook
Dust and dirt can build up on the hook. Wipe it gently with a soft cloth to keep it clean. Avoid harsh chemicals that may damage the finish. A mild soap solution works well for stubborn spots. Dry the hook fully after cleaning to prevent rust.
Tightening Screws
Screws can loosen with use. Check all screws regularly to keep the hook stable. Use a screwdriver to tighten any loose screws. Do not overtighten as it may strip the screw holes. Tight screws keep the hook safe for holding items.
Preventing Damage
Do not overload the hook with heavy items. Follow the weight limit to avoid bending or breaking. Avoid hanging sharp objects that may scratch the surface. Position the hook away from direct sunlight to prevent fading. Proper use keeps your switchboard wall hook in top shape.

Credit: www.youtube.com
Frequently Asked Questions
What Materials Are Needed To Build A Switchboard Wall Hook?
You need wood or metal, screws, hooks, a drill, and a measuring tape. Quality materials ensure durability and safety. Choose based on your wall type and style preference for best results.
How Do I Attach A Switchboard Wall Hook Securely?
Use a drill to make pilot holes, then insert wall anchors if needed. Screw the hook firmly into place. Ensure it is level and stable to hold weight safely.
Can I Customize The Design Of My Switchboard Wall Hook?
Yes, you can paint, stain, or add decorative elements. Choose hook styles and colors that match your room decor. Customizing enhances both functionality and aesthetics.
How Much Weight Can A Switchboard Wall Hook Hold?
Weight capacity depends on materials and installation. Properly installed hooks can hold between 10 to 30 pounds. Always check hook specifications for safe usage.
Conclusion
Building a switchboard wall hook is simple and practical. Follow each step with care and patience. Choose the right materials for strength and safety. Take your time to measure and drill accurately. This project adds useful storage to any room.
Enjoy the satisfaction of making something by hand. Keep your tools organized and workspace clean. Try this project to improve your home’s function today.


