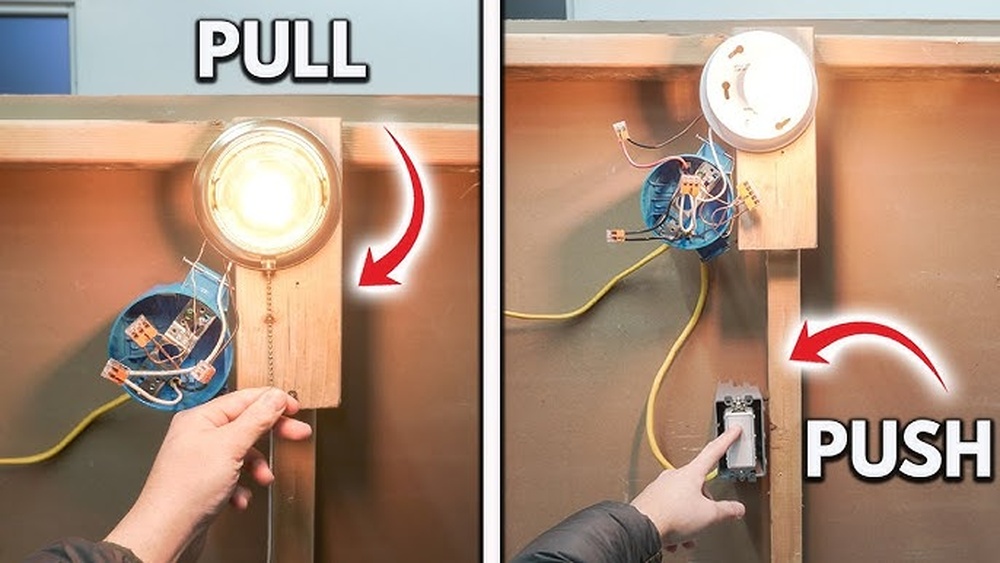
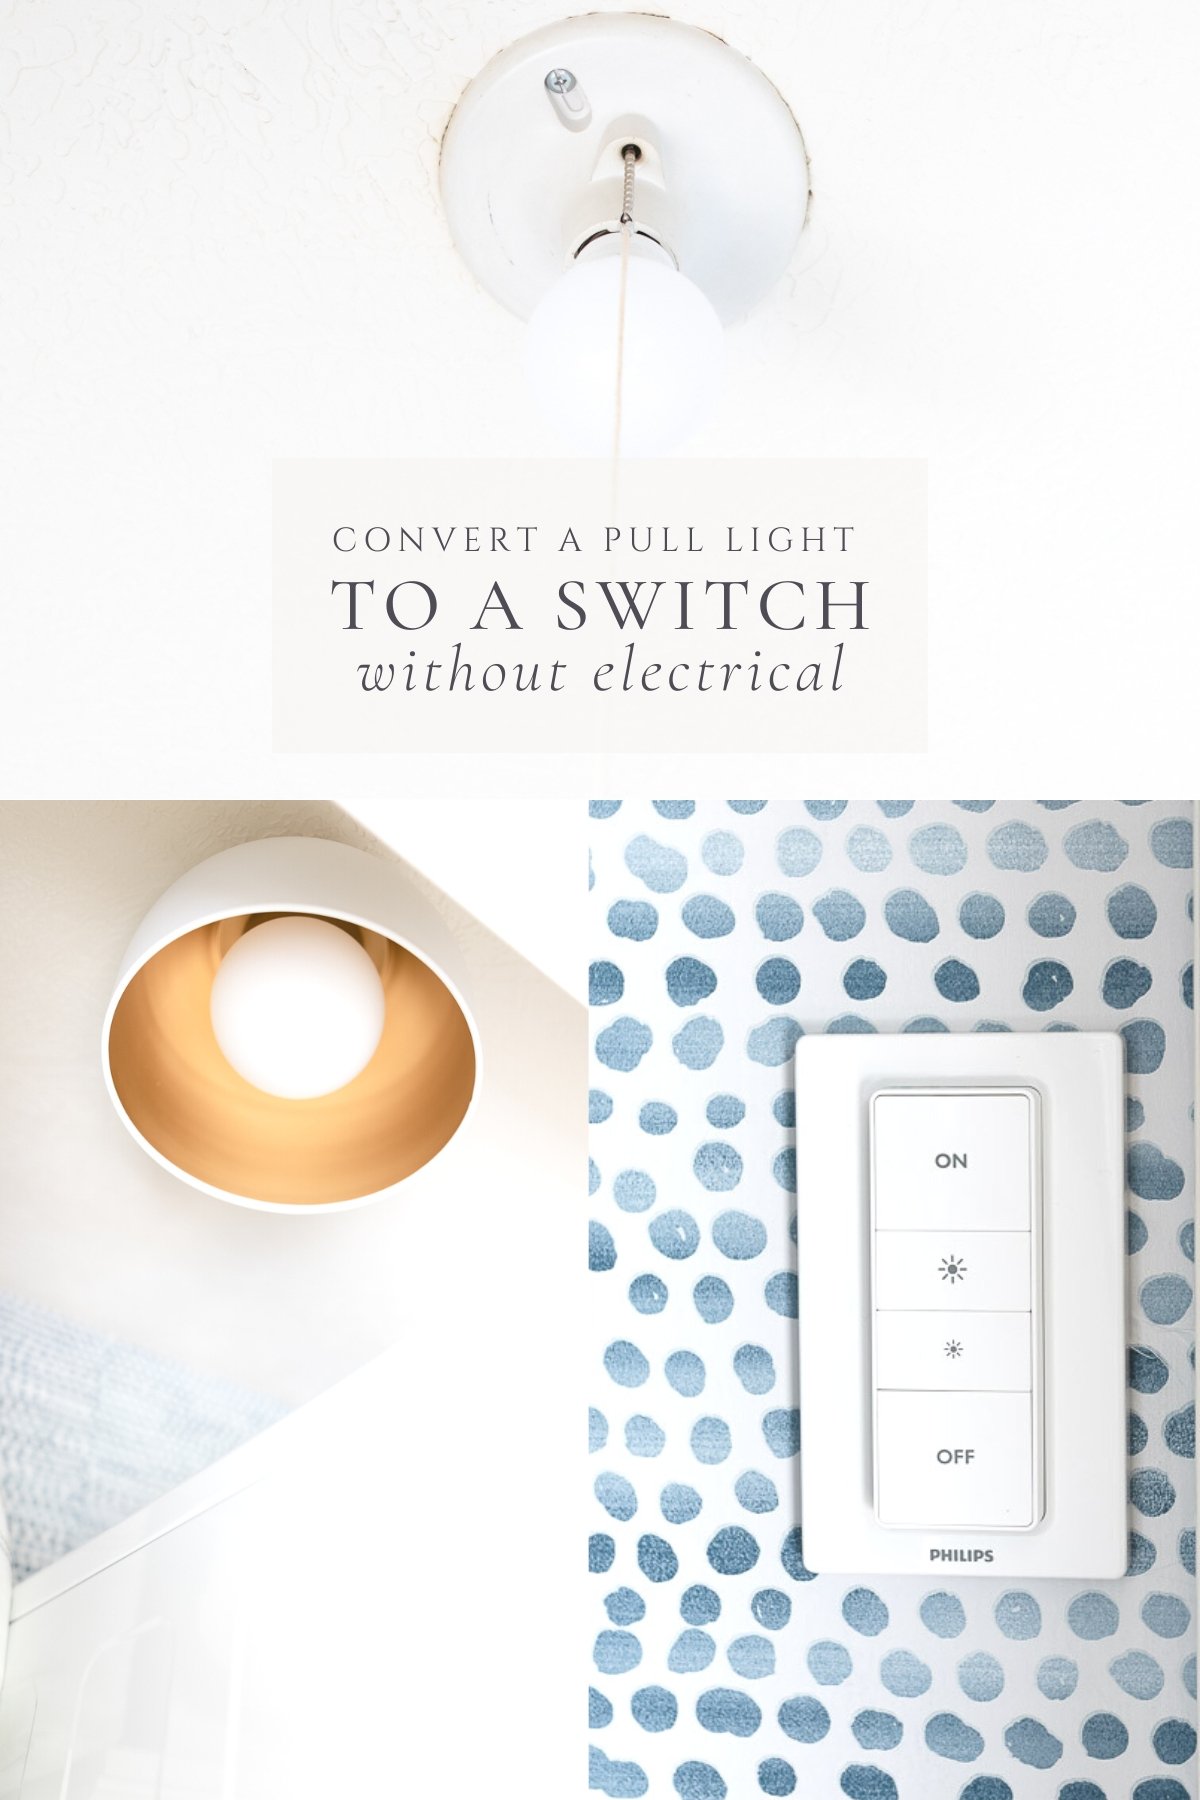
Are you tired of fumbling with a pull chain light every time you want to turn it on or off? Imagine how much easier it would be to have a simple wall switch controlling that light instead.
Converting your pull chain light to a switch isn’t as tricky as it sounds, and you don’t need to be an expert electrician to do it. You’ll discover easy, step-by-step instructions that can save you time and frustration. Keep reading, and you’ll soon enjoy the convenience and safety of a switch-operated light in your home.
Tools And Materials Needed
Basic tools like a screwdriver, wire stripper, and voltage tester are needed. Materials include a new wall switch, electrical tape, and wire nuts. Safety gear such as gloves and goggles is helpful too.
Basic Tools Required
Start with simple tools. A screwdriver is essential to remove the light fixture. Use a wire stripper to prepare the wires for connection. A voltage tester helps ensure safety by checking if wires are live. Pliers assist in twisting wires together securely. These tools form the core of your work.
Electrical Materials Needed
You will need a standard wall switch to replace the pull chain. Electrical wire, usually 14/2 gauge, connects the switch to the light. Wire nuts are important to join wires safely and prevent shorts. An electrical box holds the switch firmly in the wall. These materials create a safe and functional setup.
Safety Equipment
Safety glasses protect your eyes from dust and debris. Insulated gloves reduce the risk of electric shock. A flashlight or headlamp helps if the room is dark. Always turn off power at the breaker before starting. Safety gear keeps the process secure and stress-free.
Safety Precautions
Safety is the most important part of converting a pull chain light to a switch. Electrical work can be risky without the right care. Taking safety steps helps avoid shocks and accidents.
Follow these precautions strictly. They protect you and your home during the project.
Turn Off Power At The Circuit Breaker
Always switch off power before starting. Find the correct breaker and turn it off. Use a tester to confirm no power is running to the light fixture.
Use Insulated Tools
Work only with tools that have insulated handles. This reduces the chance of electric shock. Never use damaged or metal-only tools near wires.
Wear Safety Gear
Wear rubber-soled shoes and safety glasses. Gloves made for electrical work add extra protection. These prevent injuries from sharp wires or sparks.
Check For Loose Or Damaged Wiring
Inspect wires carefully. Replace any that are frayed or cracked. Loose wires can cause shorts or fires. Secure all connections before finishing.
Follow Local Electrical Codes
Know your local rules for electrical work. Use the correct wire size and switch type. Meeting code keeps your installation safe and legal.
Ask For Help If Unsure
Call a professional electrician if you feel confused. It is safer than guessing. Mistakes can be costly and dangerous.
Turn Off Power
Before starting any electrical work, always turn off the power. This step keeps you safe from electric shocks. It also prevents damage to your home’s wiring.
Turning off power is easy but very important. You need to locate the right switch or breaker first. This stops electricity flow to the light fixture you want to change.
Locate The Circuit Breaker
Find your home’s main electrical panel. This panel holds all the circuit breakers. Look for the breaker that controls the light you will work on.
Switch Off The Correct Breaker
Flip the breaker switch to the “off” position. This cuts power to the pull chain light. Double-check by testing if the light turns off.
Use A Voltage Tester
Use a voltage tester to confirm no electricity flows. Test the wires connected to the light fixture. If no power is detected, it is safe to proceed.
Remove The Pull Chain Fixture
Removing the pull chain fixture is the first step to convert a pull chain light to a switch. This step clears the way for installing a wall switch. It involves turning off power, detaching the fixture, and preparing the wiring.
Take your time. Safety matters most.
Turn Off The Power
Find the correct circuit breaker in your home panel. Switch it off to stop electricity flow. Use a voltage tester to confirm the power is off. Never skip this step.
Remove The Light Cover And Bulb
Take off the light bulb carefully. Then remove the fixture’s glass cover or shade. This gives better access to the pull chain mechanism.
Unscrew The Pull Chain Fixture
Locate the screws holding the fixture to the ceiling or wall. Use a screwdriver to remove them. Support the fixture with one hand as you unscrew.
Disconnect The Pull Chain Wiring
Look for the wires connected to the pull chain switch. Usually, two wires connect to it. Loosen the wire nuts or screws to free the wires.
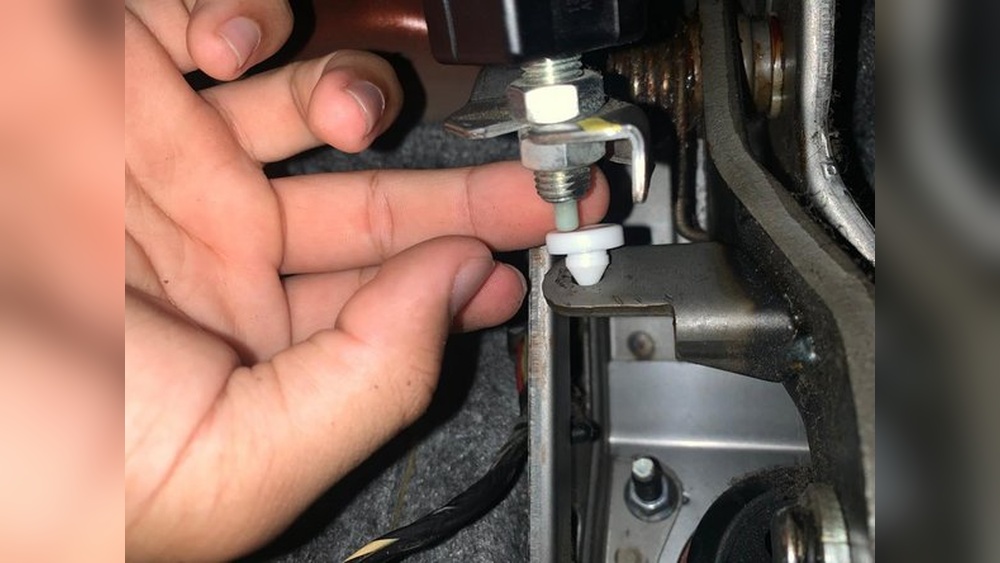
Remove The Pull Chain Switch
Pull out the small switch attached to the fixture. It may be clipped or screwed in place. Take it out gently to avoid wire damage.
Identify Wiring Setup
Identifying the wiring setup is the first step to convert a pull chain light to a switch. Knowing how your current wiring works keeps you safe and helps make the switch correctly. This step involves checking the wires inside the light fixture and the wall.
Before touching any wires, turn off the power at the circuit breaker. This prevents shocks and accidents. Use a voltage tester to make sure no electricity flows to the fixture.
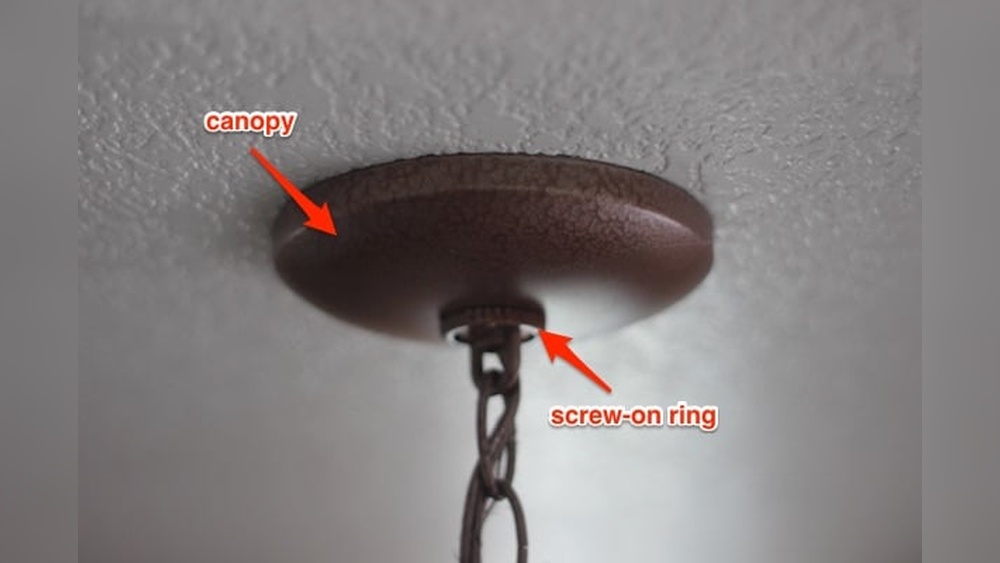
Locate The Light Fixture Wiring
Remove the light fixture cover carefully. Look inside for wires connected to the pull chain. Usually, you will see a black (hot), white (neutral), and a bare copper or green (ground) wire.
The pull chain often interrupts the hot wire. This means the chain acts like a switch, opening and closing the circuit.
Check For Wall Switch Wiring
Check the wall switch box linked to the light. Sometimes, the light has no wall switch, only the pull chain. In that case, you will find only wires for the light fixture.
If a wall switch exists, note the wire colors and how they connect. This helps know how to add or replace the switch.
Identify Wire Functions
Use a wiring diagram or label wires to know their roles. Black wires usually carry power. White wires return current to the panel. Ground wires protect from electric shock.
Correctly identifying these wires avoids mistakes during installation.

Credit: www.youtube.com
Install The Switch Box
Installing the switch box is a key step in changing a pull chain light to a wall switch. It holds the new switch and protects the wiring. Proper installation ensures safety and ease of use.
This step requires careful work with electrical parts. Turn off the power at the circuit breaker before starting. Use a voltage tester to confirm the power is off.
Choose The Right Location For The Switch Box
Select a spot near the light fixture or at a convenient place on the wall. The box should be easy to reach and not hidden behind furniture. Mark the spot clearly before cutting.
Cut The Drywall Opening
Use a drywall saw to cut a hole for the switch box. Follow the marked lines carefully. The hole must fit the box snugly to avoid gaps.
Run Electrical Cables To The Box
Guide the electrical cables from the light fixture to the new box location. Leave enough cable length inside the box to connect the switch easily. Secure cables with cable clamps to prevent movement.
Mount The Switch Box
Insert the box into the drywall opening. Use screws or mounting brackets to fix it firmly. The box should sit flush with the wall surface for a clean look.
Connect Wires To The Switch
Start by turning off the power to avoid shocks. Connect the wires from the light fixture to the switch terminals securely. Double-check all connections before restoring power.
Identify The Wires
Start by turning off the power at the circuit breaker. Safety first. Check the wires coming from the ceiling box. Usually, you will see a black (hot), white (neutral), and a green or bare copper (ground) wire. The black wire carries electricity to the light. The white wire returns electricity back to the panel. The ground wire protects you from shocks. Knowing these wires helps connect the switch correctly.
Prepare The Switch
Take your new switch and look at the terminals. Most switches have two brass screws and one green screw. The brass screws connect to the black wires. The green screw is for the ground wire. Use a screwdriver to loosen the screws slightly before attaching wires. This step makes wiring easier and safer.
Connect The Black Wires
Attach the black wire from the ceiling box to one brass screw on the switch. Connect the black wire going to the light fixture to the other brass screw. Tighten the screws to hold the wires firmly. This connection controls the flow of electricity to the light.
Attach The Ground Wire
Connect the ground wire from the ceiling box to the green screw on the switch. If the switch does not have a green screw, connect the ground wire to the metal box if it is grounded. This step is crucial for safety and prevents electrical shocks.
Handle The Neutral Wire
In many cases, the white neutral wires stay connected together and do not attach to the switch. Twist these wires together with a wire nut. Do not connect the neutral wire to the switch unless the switch requires it. Leaving neutrals connected ensures the circuit works properly.
Secure And Test
Push the wires gently back into the box. Screw the switch into place. Attach the switch cover plate. Turn the power back on at the breaker. Test the switch by turning the light on and off. If it works, you have connected the wires correctly.
Credit: julieblanner.com
Mount The Switch And Fixture
Mounting the switch and fixture is a key step in converting a pull chain light to a switch. Proper installation ensures safety and functionality. Take your time to position everything correctly.
Follow clear steps to attach the switch and secure the fixture. This process does not require advanced tools or skills. Basic tools and careful attention will do the job.
Prepare The Mounting Area
Turn off the power at the circuit breaker. Remove the pull chain fixture carefully. Check the electrical box for damage or loose wires. Make sure the area is clean and clear for installation.
Choose a spot on the wall near the fixture. Use a pencil to mark the location. Cut an opening for the switch box with a drywall saw. Insert the box and secure it with screws. The box should fit snugly and not move.
Attach The Switch
Connect the electrical wires to the switch terminals. Match wire colors: black to black, white to white, and ground to ground. Tighten the screws firmly. Push the wires back into the box carefully. Screw the switch into the box, ensuring it is level.
Mount The Light Fixture
Follow the manufacturer’s instructions for your fixture. Attach the fixture base to the electrical box. Use screws to secure it tightly. Connect the fixture wires to the house wires. Match colors correctly. Tuck wires into the box neatly. Attach the light cover or shade as needed.
Restore Power And Test
After wiring the new switch, restoring power is the next step. This lets you check if the switch works correctly. Testing ensures safety and function before finishing the project.
Turn The Circuit Breaker Back On
Locate your home’s main electrical panel. Find the breaker for the room you worked in. Flip the breaker switch to the ON position. This restores power to the light fixture and switch.
Test The New Wall Switch
Flip the switch up and down. Check if the light turns on and off. Try multiple times to confirm consistent operation. Listen for any strange sounds or flickering.
Check For Safety And Proper Function
Look for sparks or unusual heat near the switch. Use your hand to feel if the switch stays cool. Ensure the light stays on steadily without flicker. If anything seems wrong, turn off power and recheck wiring.

Credit: www.wikihow.com
Troubleshooting Common Issues
Troubleshooting common issues is key when converting a pull chain light to a switch. Small problems can stop the project from working right. Knowing how to fix these issues saves time and frustration.
Some issues happen often during or after the conversion. They include wiring mistakes, switch problems, or power supply troubles. This guide helps identify and solve these problems fast.
Checking The Power Supply
First, make sure the power is off before starting. Use a voltage tester to see if wires carry current. No power means the switch or wiring could be faulty. Confirm the breaker or fuse is on and working.
Inspecting The Wiring Connections
Loose or wrong wiring causes the light not to work. Check all wire nuts and terminals tight. Match wires by color: black to black, white to white, ground to ground. Correct any crossed or disconnected wires carefully.
Testing The New Switch
Sometimes the new switch is defective. Use a multimeter to test the switch’s continuity. The switch should show a closed circuit when on. Replace the switch if it does not work properly.
Verifying The Light Fixture
The light fixture itself might be the problem. Test the bulb in a different socket to be sure. Look for signs of damage on the fixture. Replace the bulb or fixture if needed.
Ensuring Proper Grounding
Ground wires protect from electric shocks. Make sure the ground wire connects to the switch and fixture. Poor grounding may cause the switch to fail or spark. Fix grounding issues immediately for safety.
Frequently Asked Questions
How Do I Convert A Pull Chain Light To A Wall Switch?
To convert, first turn off power at the breaker. Remove the pull chain fixture. Install a switch box and connect wires from the light to the switch. Finally, mount the switch and restore power. Always follow electrical codes and safety guidelines.
What Tools Are Needed For This Conversion?
You’ll need a screwdriver, wire stripper, voltage tester, electrical tape, wire nuts, and a wall switch. A drill may help for installing the switch box. These tools ensure safe and effective conversion of your pull chain light.
Is It Safe To Convert A Pull Chain Light To A Switch?
Yes, if done correctly. Turn off power before working. Use proper tools and follow local electrical codes. If unsure, consult a licensed electrician to avoid hazards and ensure a safe installation.
Can I Keep The Pull Chain After Conversion?
No, the pull chain mechanism is removed during conversion. The wall switch replaces it as the control method. Removing the chain ensures cleaner wiring and safer operation of the light fixture.
Conclusion
Converting a pull chain light to a switch can make your room easier to use. The process is simple if you follow the right steps carefully. Always turn off the power before starting to stay safe. With basic tools and a little patience, you can finish the job quickly.
This change can improve convenience and modernize your lighting. Take your time and double-check your work. You will enjoy a smooth, easy-to-use light switch every day. Give it a try and see the difference yourself.