Are you tired of cluttered walls and searching for the perfect spot to hang your favorite items? Installing hooks in your wall is a simple way to organize your space and add a touch of style.
But if you’ve never done it before, it might feel tricky or risky. What if the hook falls off or leaves a big hole? Don’t worry—this guide will walk you through easy, step-by-step methods to install hooks securely and confidently.
By the end, you’ll have the skills to hang anything you want without damage or stress. Ready to transform your walls? Let’s get started!

Credit: www.youtube.com
Types Of Wall Hooks
Wall hooks are simple tools that help organize spaces. They hold items like coats, bags, and keys. Choosing the right type of hook depends on the wall surface and the weight of the item.
Different hooks suit different needs. Some hooks stick without holes. Others need screws or nails. Some use magnets for metal surfaces. Understanding these types helps you pick the best hook.
Adhesive Hooks
Adhesive hooks stick directly to walls. They need no drilling or nails. Ideal for smooth surfaces like tiles or glass. Easy to remove without damage. Best for light items like keys or small bags.
Screw-in Hooks
Screw-in hooks require drilling into the wall. They hold heavier items securely. Perfect for hanging coats, bags, or tools. Need a drill and screws for installation. Provide strong and stable support.
Nail-in Hooks
Nail-in hooks use small nails to attach to walls. Suitable for light to medium weight items. Quick and easy to install with a hammer. Works well on drywall or wooden surfaces. Leaves small holes if removed.
Magnetic Hooks
Magnetic hooks attach to metal surfaces without tools. Great for metal doors, cabinets, or appliances. Hold lightweight to medium items. Easy to move and reposition. No wall damage or holes.

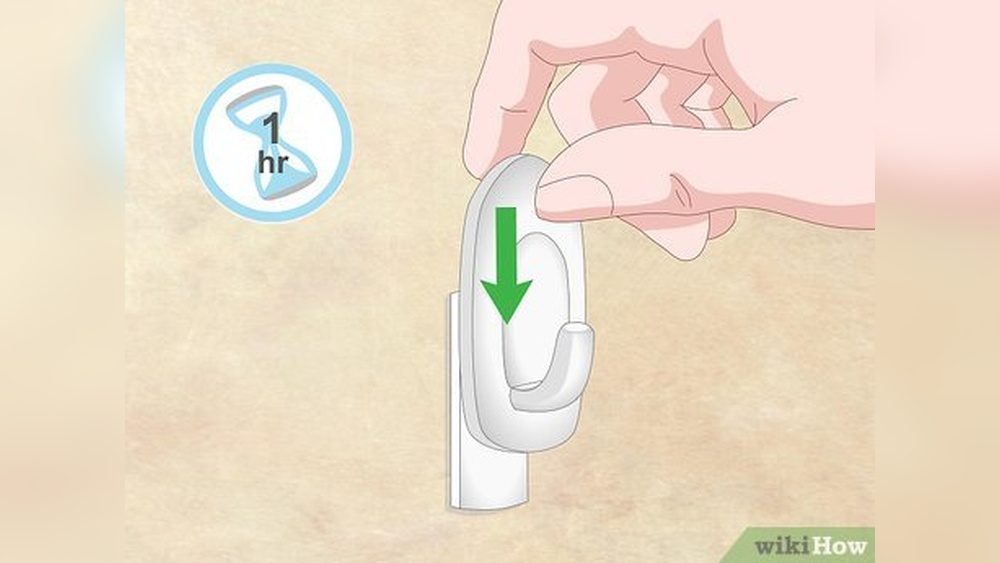
Credit: www.wikihow.com
Choosing The Right Hook
Choosing the right hook makes a big difference in wall mounting. A proper hook holds items safely and lasts longer. Not all hooks work for every wall or object. Picking the right one depends on several factors. These include the wall type, the weight of the item, and the hook’s design. Understanding these helps you select the best hook for your needs.
Considering Wall Material
Walls come in many types like drywall, plaster, brick, or concrete. Each wall needs a specific hook type for strong support. Drywall hooks are lighter and easy to install. For brick or concrete, use heavy-duty hooks or anchors. Knowing your wall material prevents damage and keeps hooks secure.
Weight Capacity
Every hook has a weight limit. Check the weight of the item before buying a hook. Use a hook that can hold more than the item’s weight. This avoids falling or breaking. For heavy items, choose hooks with strong metal and solid anchors.
Hook Design And Purpose
Hooks come in many shapes and sizes. Some hooks hold keys or small items. Others support coats, bags, or shelves. Choose a design that fits the item’s size and shape. A well-designed hook makes hanging easy and looks neat on the wall.
Tools And Materials Needed
Installing hooks in your wall requires the right tools and materials. These help you work safely and get good results. Prepare all items before starting. This saves time and avoids mistakes.
Common Tools
You need a drill to make holes in the wall. A screwdriver helps tighten screws. Use a measuring tape to place hooks evenly. A pencil marks the spots. A level keeps the hook straight. A hammer may be needed for some hooks.
Safety Gear
Wear safety glasses to protect your eyes from dust. Gloves protect your hands from sharp edges. A dust mask stops you from breathing in debris. Use ear protection if the drill is loud. Safety gear keeps you safe during installation.
Hook Installation Kits
Some hooks come with installation kits. These kits have screws, anchors, and instructions. Anchors hold the hook firmly in drywall. Kits save you from buying parts separately. Choose a kit that fits your wall type.
Preparing The Wall
Preparing the wall is the first step to install hooks safely and securely. This step ensures hooks stay in place and do not damage your wall. Proper preparation saves time and effort later.
Cleaning The Surface
Start by cleaning the wall surface where you want to install the hook. Use a damp cloth to remove dust, dirt, and grease. A clean surface helps the hook stick better or hold screws tightly.
Let the wall dry completely before moving to the next step. Avoid using strong chemicals that might damage paint or wallpaper.
Marking The Spot
Decide the exact spot for your hook. Use a pencil to make a small mark on the wall. This mark guides where to drill or stick the hook.
Measure carefully to keep hooks level and evenly spaced. A ruler or tape measure works well for this task.
Checking For Wiring And Pipes
Before drilling, check for hidden wires or pipes inside the wall. Use a stud finder with a wire-detecting feature. This prevents accidents and damage.
Scan the marked spot and surrounding area thoroughly. If you find wires or pipes, choose a different location for your hook.
Installing Adhesive Hooks
Installing adhesive hooks is a quick and simple way to hang items without drilling holes. These hooks stick directly to the wall and hold light to medium weights. They work well on smooth, clean surfaces like tiles, glass, or painted walls. Follow the steps below to ensure your hooks stay secure and last longer.
Surface Preparation
Clean the wall surface thoroughly. Use rubbing alcohol or mild soap and water to remove dirt and grease. Avoid oily or dusty areas. Let the surface dry completely before applying the hook. Smooth surfaces provide the best hold.
Applying The Hook
Peel off the protective backing from the adhesive. Press the hook firmly against the wall. Hold it in place for 30 seconds. Make sure no air bubbles form under the adhesive. Proper pressure helps the hook stick tightly.
Curing Time
Allow the adhesive to set for at least one hour before hanging anything. For best results, wait 24 hours. This curing time strengthens the bond. Avoid pulling or placing heavy items too soon.
Installing Screw-in Hooks
Installing screw-in hooks on your wall is a simple way to hang items securely. These hooks work well for light to medium weight objects. They are easy to install and do not require special tools. Follow these steps to install screw-in hooks properly.
Drilling Pilot Holes
Start by marking the spot where you want the hook. Use a drill with a small bit. Make a pilot hole slightly smaller than the screw’s diameter. This hole helps guide the screw and prevents the wall from cracking. Drill straight and stop at the right depth.
Inserting Anchors
Wall anchors add support for heavier items. Push the anchor gently into the pilot hole. Tap it lightly with a hammer if needed. Anchors keep the hook steady and stop it from pulling out. Use anchors made for your wall type, such as drywall or plaster.
Screwing The Hook
Place the screw-in hook into the hole or anchor. Turn it clockwise by hand to start. Use pliers if the hook is hard to turn. Screw it in until it feels tight and secure. Make sure the hook faces the right direction before finishing.
Installing Nail-in Hooks
Nail-in hooks are simple tools for hanging items on walls. They work well on drywall and wood surfaces. Installing them is quick and requires only a hammer and the hook itself.
These hooks hold light to medium-weight objects. Pictures, small shelves, and decorations stay secure with nail-in hooks. Follow the steps carefully to install them safely and correctly.
Positioning The Hook
Choose the spot where you want to hang your item. Check the wall for studs or solid areas. Avoid placing hooks near electrical wires or pipes. Hold the hook against the wall, aligning the nail point with the spot.
Hammering The Nail
Use a hammer to tap the nail into the wall gently. Start slow to avoid bending the nail or damaging the wall. Keep the hook steady as you hammer. Drive the nail until the hook lies flat against the wall.
Ensuring Stability
Check if the hook feels firm and does not wobble. Gently pull the hook to test its hold. If loose, tap the nail a bit more to secure it. Make sure the hook can support the item’s weight safely.
Testing The Hook’s Hold
Testing the hook’s hold is a key step after installation. It ensures the hook stays secure on the wall. Proper testing prevents accidents and damage to your items. Take time to check the hook’s strength before hanging anything heavy. This step gives confidence that the hook will support your belongings safely.
Weight Testing
Start by gently applying weight to the hook. Use an item similar in weight to what you plan to hang. Hold the weight on the hook for a few seconds. Check if the hook feels stable and firm. If it moves or pulls away, the hold is weak. Try a heavier item only after the lighter one stays secure. This helps avoid sudden falls.
Adjustments And Reinforcement
If the hook shows signs of loosening, make adjustments. Tighten screws or reposition the hook slightly. For added strength, use wall anchors or stronger screws. Reinforce the wall area if needed with patching or extra support. Test again after every change to confirm the hook holds well. Repeat these steps until the hook is fully secure.
Common Mistakes To Avoid
Installing hooks on walls seems simple but many make avoidable errors. These mistakes can cause hooks to fail or damage walls. Knowing what to avoid helps your hooks stay strong and last longer. Below are common mistakes to watch out for during installation.
Overloading Hooks
Hooks have weight limits. Putting too much weight on a hook causes it to bend or fall. Check the hook’s weight rating before use. Use multiple hooks for heavy items to share the load. Overloading not only breaks hooks but can damage your wall.
Ignoring Wall Type
Different walls need different hooks and tools. Drywall, plaster, brick, and tile all require specific anchors. Using wrong anchors makes hooks unstable. Identify your wall type before buying hooks or anchors. This step ensures your hooks hold tight and do not fall out.
Poor Surface Preparation
Clean the wall area before installing hooks. Dust, grease, or paint can prevent hooks from sticking or anchoring properly. Remove dirt with a damp cloth and let it dry. Avoid drilling or hammering into weak or damaged spots. Good surface preparation improves hook strength and durability.
Maintaining Hook Strength
Maintaining the strength of hooks in your wall is key for safety and durability. Strong hooks hold items firmly, preventing falls and damage. Regular care keeps hooks reliable and extends their life.
Regular Inspections
Check your hooks often for any signs of wear or damage. Look for bends, cracks, or rust that weaken the hook. Tighten screws or anchors if they feel loose. Catching problems early helps avoid accidents.
Cleaning Tips
Keep hooks clean from dust and dirt. Use a soft cloth or brush to wipe them down gently. Avoid harsh chemicals that may corrode metal hooks. Clean hooks hold better and last longer.
Replacing Worn Hooks
Replace hooks that show visible damage or weakness. Do not risk using hooks that bend or break easily. Choose hooks that match the weight and type of your items. Fresh hooks ensure your wall stays secure.

Credit: www.nogueiraadv.com.br
Frequently Asked Questions
How Do I Choose The Right Hooks For My Wall?
Select hooks based on wall type and item weight. Use adhesive hooks for light items and screw-in hooks for heavier loads. Always check manufacturer weight limits to ensure safety and durability.
What Tools Are Needed To Install Wall Hooks?
You’ll need a drill, screwdriver, level, measuring tape, and pencil. Anchors and screws are essential for drywall hooks. For masonry walls, use a masonry bit and wall plugs.
Can I Install Hooks On Drywall Without Studs?
Yes, use wall anchors designed for drywall. They provide support and prevent hooks from pulling out. Avoid heavy items unless using proper anchors or locating studs.
How Do I Avoid Damaging Walls When Installing Hooks?
Use appropriate anchors and drill carefully. Measure twice and mark spots before drilling. For light hooks, adhesive options prevent holes and wall damage.
Conclusion
Installing hooks on your wall is simple and quick. Choose the right hook for your needs. Use the correct tools and follow safety steps. Mark the spot carefully before drilling or nailing. Check that the hook is secure before hanging items.
Small efforts bring big results in organizing space. Enjoy your tidy and functional wall. Keep practicing to improve your skills. Hooks add both style and utility to any room. Start your project today and see the difference!