Have you ever noticed your motion sensor light staying on longer than you want or turning off too quickly? Adjusting the time on your motion sensor light switch can save you energy, improve convenience, and give you full control over your lighting.
You’ll learn simple, step-by-step instructions to customize your sensor’s timing to fit your needs perfectly. Keep reading to discover how easy it is to make your motion sensor light work exactly the way you want it to.
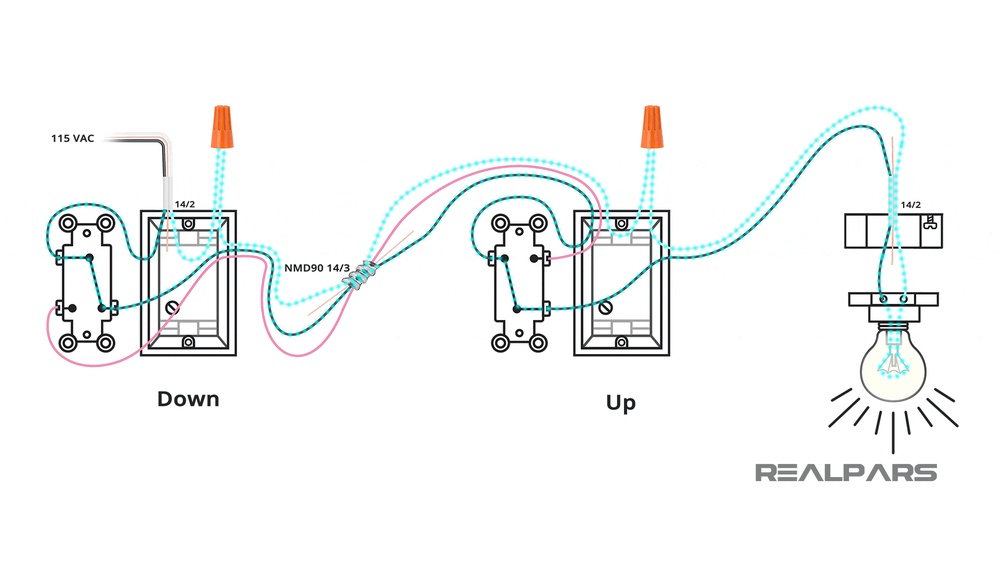
Credit: ashishmehtaastro.com
Tools Needed
Before adjusting the time on your motion sensor light switch, gather the right tools. This helps the task go smoothly and safely. Having tools ready saves time and effort.
Flathead Screwdriver
A flathead screwdriver is essential for removing the switch cover. It fits into the small screws that hold the panel in place. Use it carefully to avoid damage.
Phillips Screwdriver
Some switches use Phillips screws. This screwdriver has a cross shape tip. It helps in loosening or tightening screws securely.
Voltage Tester
Safety first. Use a voltage tester to check if power is off. It avoids electric shocks. Test the wires before touching anything.
Small Flashlight
Sometimes light switches are in dim places. A small flashlight helps you see inside the switch box clearly. It makes the job easier and safer.
Instruction Manual
Keep the switch’s instruction manual handy. It guides you through the correct steps. Manuals often show specific parts and settings to adjust.
Locate The Sensor Settings
Locating the sensor settings is the first step to adjust the time on your motion sensor light switch. These settings control how long the light stays on after detecting movement. Knowing where to find them helps you customize the light to fit your needs.
Most motion sensor switches have a small panel or dial where you can change the time delay. This panel is often hidden behind the switch cover or near the sensor lens. Finding it allows you to make quick and easy adjustments.
Check The Switch Cover
Start by looking at the switch cover. Some models have a removable faceplate. Gently pry it off to reveal the sensor settings inside. Use a flat tool or your fingers to avoid damage.
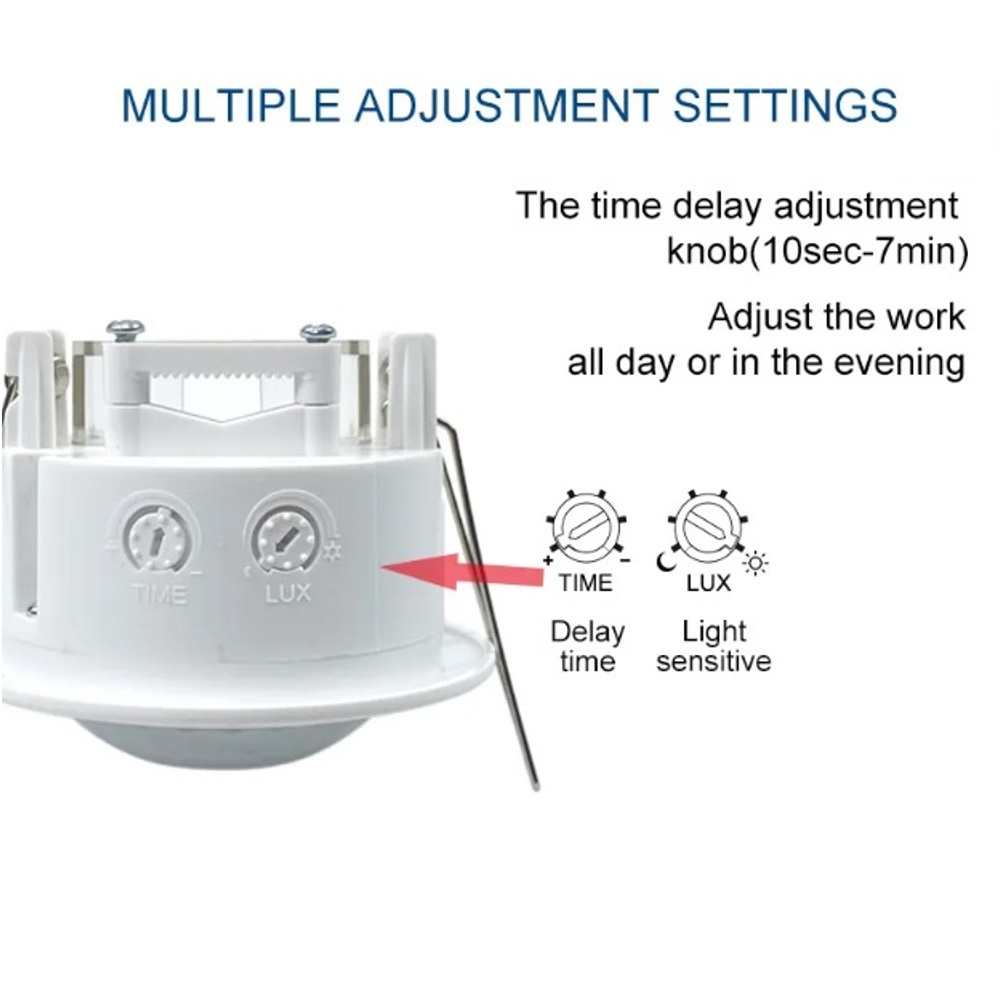
Look For Adjustment Dials Or Buttons
Inside the cover, find the dials or buttons labeled for time settings. They may say “time,” “delay,” or show a clock icon. These controls change how long the light stays on after motion stops.
Read The User Manual
If you cannot find the settings, check the user manual. It provides clear instructions and images. The manual explains where the controls are and how to adjust them.
Use A Flashlight For Better Visibility
Use a flashlight to see inside the switch area clearly. Light helps spot small dials or buttons. It also prevents mistakes when adjusting the settings.
Adjusting The Time Delay
Adjusting the time delay on a motion sensor light switch controls how long the light stays on. This setting helps save energy by turning the light off after a set time. You can make the delay short or long, depending on your needs. Adjusting the time delay is simple and takes just a few steps.
Setting Short Delay
Short delay means the light turns off quickly after no motion is detected. This is useful for areas where you pass through fast, like hallways or closets. Find the time delay dial or button on your sensor. Turn the dial toward the shorter time or press the button to reduce the delay. Test the light by moving away and watching how fast it turns off. Adjust again if needed to get the perfect timing.
Setting Long Delay
Long delay keeps the light on longer after motion stops. This works well in rooms where you stay for a while, like living rooms or kitchens. Locate the time delay control on your sensor switch. Turn the dial toward the longer time or press the button to increase the delay. Check the light by moving away and waiting. Change the setting until the light stays on as long as you want.
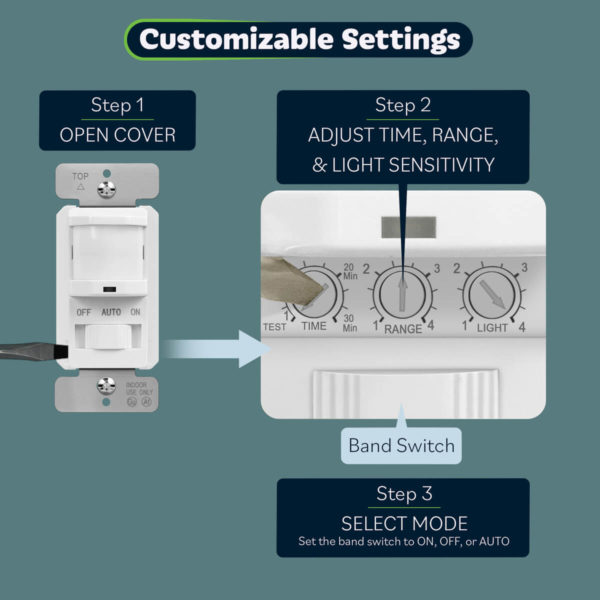
Credit: topgreener.com
Changing Sensitivity Levels
Changing the sensitivity level on a motion sensor light switch controls how it detects movement. Adjusting this setting helps the light respond better to your needs. You can make the sensor more or less sensitive depending on your space.
Setting the right sensitivity avoids false triggers or missed activations. It also saves energy by turning the light on only when needed. Below are simple tips for adjusting high and low sensitivity.
High Sensitivity
High sensitivity means the sensor detects small or distant movements. It turns the light on quickly when it senses motion nearby. This setting works well in dark areas or places with little movement.
Use high sensitivity in hallways or entryways. It helps you see clearly as you walk by. Be careful, though. Too high sensitivity may cause the light to turn on from pets or passing cars.
Low Sensitivity
Low sensitivity requires larger or closer movements to activate the light. It reduces false triggers from small animals or shadows. This setting suits busy areas with frequent motion.
Choose low sensitivity for rooms with pets or outdoor spaces near traffic. It prevents the light from turning on too often. You get better control and save electricity.
Testing The Adjustments
Testing the adjustments on your motion sensor light switch is a key step. This ensures the light stays on the right amount of time. It helps avoid wasting energy or leaving the area dark too soon.
After setting the timer, watch how the light reacts. This process confirms your changes work well with your needs and environment.
Testing In Different Lighting Conditions
Test the sensor during the day and night. Bright sunlight can affect sensor sensitivity. Low light conditions show if the light activates properly. Observe how long the light stays on in both cases. Adjust settings if the light turns off too fast or stays on too long.
Checking Motion Detection Range
Walk within the sensor’s range and watch the light. Move slowly and quickly to test different speeds. Notice if the light turns on consistently. If it misses your movement, increase the detection range. If it activates too often, reduce the range.
Monitoring Timer Duration
Set the timer to a specific duration. Trigger the sensor and time how long the light stays on. Compare this with your set time. Change the timer if the light stays on too short or too long. Repeat the test until you find the perfect timing.
Troubleshooting Common Issues
Motion sensor light switches are handy, but they can sometimes act up. Troubleshooting common issues helps keep your light working right. Most problems come from simple causes. Knowing what to check saves time and effort. Below are two frequent issues and how to fix them.
Light Not Turning Off
Check the time delay setting on your switch. It might be set too long. Adjust the timer to a shorter period. Dirt or dust on the sensor can cause it to stay on. Clean the sensor gently with a soft cloth. Another cause is constant motion in the sensor area. Remove objects that may trigger the sensor. If the light still won’t turn off, reset the switch by turning power off and on.
Light Not Turning On
First, confirm the light bulb is working. Replace it if needed. Check the sensor’s sensitivity setting; it may be too low. Increase the sensitivity to detect motion better. Ensure the switch has power and is wired correctly. Sometimes, the sensor cannot detect motion in cold or very bright areas. Test the sensor in different lighting or temperatures. If problems continue, consult the product manual or contact support.
Safety Tips
Adjusting the time on a motion sensor light switch requires care. Safety should be your top priority. Small mistakes can cause electric shocks or damage. Follow safety tips to protect yourself and your home.
Turn Off The Power
Always switch off the power at the circuit breaker. This stops electricity from flowing to the switch. Never rely on just the wall switch. Use a tester to confirm no power is running.
Use Proper Tools
Use insulated tools made for electrical work. Avoid using metal tools without insulation. This reduces the risk of electric shock. Keep tools dry and clean during work.
Read The Manual
Check the motion sensor light switch manual before adjusting. It has important safety instructions. Follow steps exactly as described. Manuals help avoid errors and accidents.
Work In A Dry Area
Make sure the area is dry before starting. Water and electricity do not mix. Avoid working in wet or damp conditions. This lowers the chance of shock.
Wear Safety Gear
Wear rubber-soled shoes and insulated gloves. This adds a layer of protection. Safety glasses protect eyes from sparks or debris. Dress appropriately for electrical work.
Do Not Rush
Take your time adjusting the settings. Rushing can cause mistakes. Double-check your work before turning power back on. Careful work leads to better results and safety.
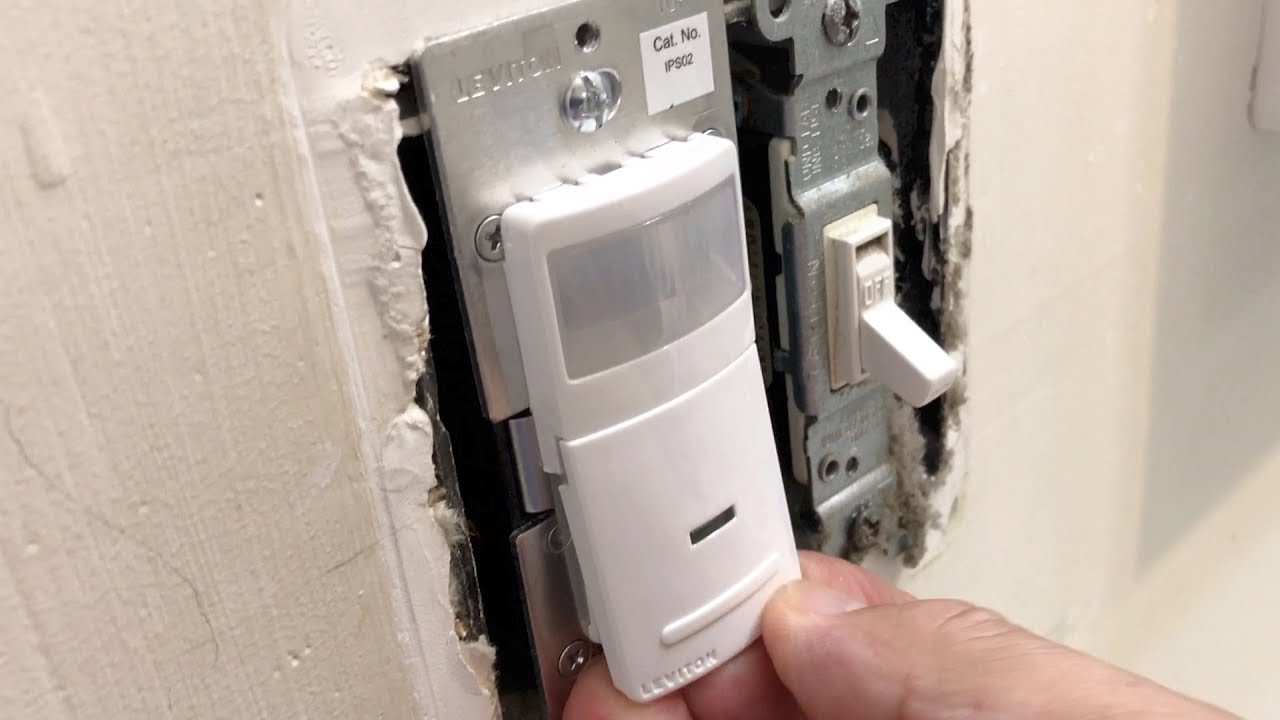
Credit: www.youtube.com
Frequently Asked Questions
How Do I Set The Time Delay On A Motion Sensor Switch?
To set the time delay, locate the adjustment dial on the switch. Turn it clockwise to increase the delay or counterclockwise to decrease it. This controls how long the light stays on after motion stops. Refer to your model’s manual for exact settings.
Can I Adjust Motion Sensor Sensitivity Myself?
Yes, most motion sensor switches have a sensitivity dial. Adjust it to control how much movement triggers the light. Increasing sensitivity detects smaller motions, while lowering it prevents false triggers. Always test after adjusting for optimal performance.
Why Won’t My Motion Sensor Light Switch Adjust Time?
If the time delay won’t adjust, ensure the switch is powered off before changing settings. Check for a locked dial or consult the manual. Faulty wiring or a defective switch could also cause issues and may require professional help.
How Long Should A Motion Sensor Light Stay On?
A typical motion sensor light stays on between 30 seconds and 5 minutes. You can adjust this based on your needs. Longer times save frequent switching, while shorter times save energy when the area is unoccupied.
Conclusion
Adjusting the time on a motion sensor light switch is simple. Just follow the steps carefully. Set the timer to suit your needs and save energy. Test the settings to make sure the light works as expected. Small changes can improve comfort and security around your home.
Take a moment to fine-tune the sensor for best results. Enjoy the convenience of a well-adjusted motion sensor light switch every day.