Hanging a beautiful plant can instantly brighten your space, but attaching a plant hook to a sheetrock wall can feel tricky. You might worry about making holes that crack or won’t hold your plant’s weight.
What if the hook falls down? Don’t worry—you’re in the right place. This guide will show you simple, reliable steps to securely attach a plant hook to your sheetrock wall. By the end, you’ll have the confidence to display your plants safely and stylishly.
Ready to transform your wall? Let’s get started!
Credit: www.amazon.com
Choose The Right Plant Hook
Choosing the right plant hook is important for hanging plants on a sheet rock wall. The right hook keeps your plant secure and prevents wall damage. It also makes hanging easier and safer. Consider the hook’s type, material, and weight capacity before buying.
Types Of Plant Hooks
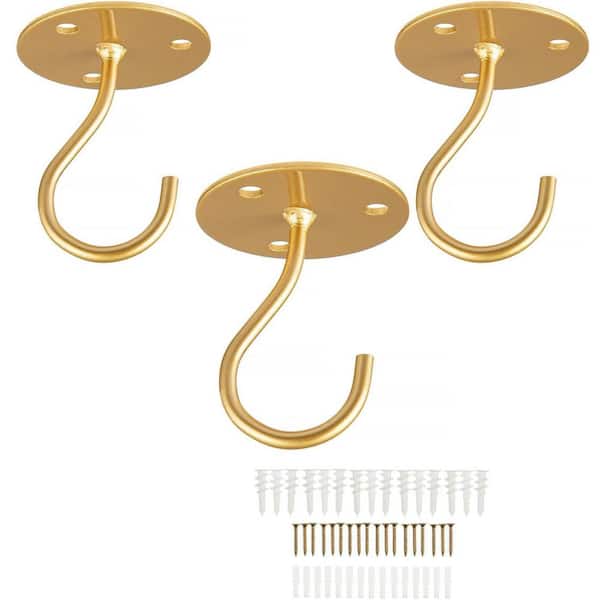
There are many plant hooks for sheet rock walls. Cup hooks are common and easy to use. They screw directly into the wall or anchor. Ceiling hooks are good for hanging plants from above. Adhesive hooks stick to the wall without drilling. Choose a type that fits your plant and wall strength.
Material Considerations
Plant hooks come in different materials. Steel hooks are strong and last long. Plastic hooks are lightweight but less durable. Brass hooks resist rust and look nice. Pick a material that suits your plant’s size and wall conditions. Rust-resistant hooks work well in humid rooms.
Weight Capacity
Every hook has a weight limit. Check the hook’s weight capacity before use. Heavy plants need strong hooks with high weight limits. Light plants can use simple hooks. Using the right capacity prevents hooks from pulling out. This keeps your plant and wall safe.
Gather Necessary Tools
Before attaching a plant hook to a sheet rock wall, gather all the necessary tools. Having the right tools makes the job easier and safer. It helps you avoid mistakes and saves time. Below are the key tools you need for this task.
Drill And Drill Bits
A drill is essential for making holes in the sheet rock. Use the correct drill bit size to match your anchors. A smaller drill bit may break the wall, while a larger one makes the anchor loose. Choose a drill that is easy to handle and has variable speed settings.
Anchors And Screws
Anchors support the weight of the plant hook and prevent the screw from pulling out. Use anchors designed for sheet rock walls. Pair the anchors with screws that fit well and hold the hook firmly. Avoid using screws alone, as they can damage the wall.
Measuring Tape And Pencil
Measure the exact spot for the hook using a measuring tape. Mark the spot lightly with a pencil for accurate drilling. Double-check measurements to keep the hook level and centered. This step ensures a neat and sturdy installation.
Locate The Best Spot On The Wall
Choose a spot on the wall that is strong and can hold weight. Avoid weak or damaged areas to keep the plant secure. Find a place near a stud or use anchors for better support.
Choosing the right place on your sheetrock wall is key to hanging a plant hook safely. The hook must hold the plant’s weight without damaging the wall. Picking the best spot means knowing where the wall is strongest.
Sheetrock, also called drywall, is not very strong on its own. It can break or crack if the hook carries too much weight. The strongest support comes from wall studs, the wooden or metal beams behind the drywall.
Knowing where these studs are helps you place the hook securely. Next, learn how to find studs and mark the best spot.
Finding Studs Vs. Drywall
Studs are the vertical supports inside the wall. They are usually spaced 16 or 24 inches apart. Hooks attached to studs can hold more weight and last longer.
Drywall alone can hold only light objects. Heavy plants need hooks fixed into studs. For lighter plants, drywall anchors may work, but studs are safer.
Finding studs is a smart step before drilling or nailing. It prevents holes in the wrong places and keeps your wall strong.
Using A Stud Finder
A stud finder is a small tool that helps locate studs behind the drywall. It senses changes in density and shows where the stud is.
Hold the stud finder flat against the wall. Slowly move it horizontally until the device signals a stud. Mark that spot.
Move along the wall to find more studs. This tool makes finding studs quick and easy. It helps avoid guesswork and mistakes.
Marking The Position
Once you find a stud, mark the spot clearly with a pencil. Make a small dot where the hook will go.
Measure the height for the hook carefully. Consider the plant size and pot length.
Mark several points if needed. This ensures the hook is straight and balanced.
Clear marks guide where to drill or screw. Accurate marking protects your wall and plant.
Prepare The Wall Surface
Preparing the wall surface is key before attaching a plant hook to sheetrock. A clean and well-prepared wall helps the hook stay secure. Take time to ready the area carefully. This step will make your project easier and safer.
Cleaning The Area
Start by cleaning the spot where you want to place the hook. Use a damp cloth to remove dust and dirt. Dirt can stop the hook from sticking well. Let the wall dry completely before moving on.
Drilling Pilot Holes
Mark the exact spot for the hook. Use a small drill bit to make a pilot hole. This hole guides the screw and prevents the drywall from cracking. Drill slowly and straight to keep the hole neat.
Choosing Anchor Types For Drywall
Select the right anchor for your plant hook. Plastic expansion anchors work well for light loads. For heavier plants, use toggle bolts or metal anchors. The right anchor keeps the hook strong and safe on the sheetrock.
Install The Plant Hook
Installing a plant hook in a sheetrock wall needs care. The hook must hold the weight of the plant safely. Following clear steps helps ensure the hook stays strong and secure. This section explains how to install the plant hook step by step.
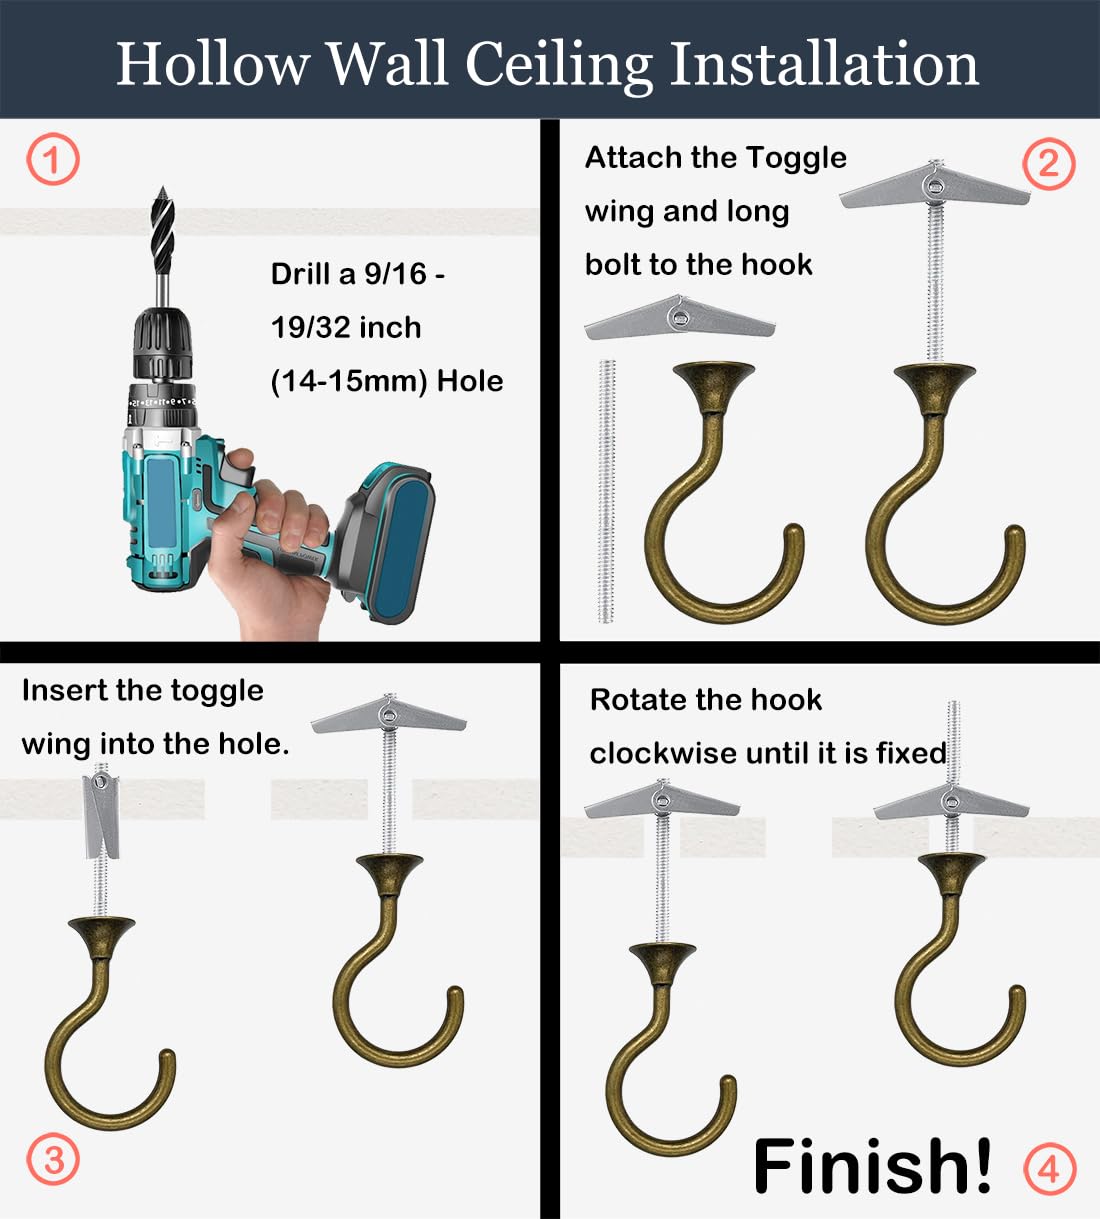
Inserting Anchors
Start by choosing the right wall anchors for sheetrock. Plastic anchors or toggle bolts work well. Drill a hole that fits the anchor size. Gently push the anchor into the hole. Tap it lightly with a hammer if needed. The anchor must fit snugly without moving.
Screwing In The Hook
Place the plant hook into the anchor. Turn the hook clockwise by hand. Use a screwdriver or wrench for extra grip. Tighten the hook until it feels firm. Avoid over-tightening to prevent damage to the wall. The hook should be straight and ready to hold weight.
Ensuring Stability
Test the hook by pulling it lightly. It should not wiggle or loosen. Hang the plant pot carefully and check again. If the hook feels loose, tighten it more. Proper stability keeps your plant safe on the wall. A secure hook lasts longer and supports heavier plants.

Credit: www.amazon.com
Test The Hook’s Strength
Testing the hook’s strength is a key step after attaching it to a sheet rock wall. This ensures the hook can safely hold your plant without falling. A loose or weak hook can cause damage to the wall and your plant.
Check the hook’s grip before hanging your plant. This saves trouble later. The testing process is simple and quick. It helps you confirm the hook is secure and ready to use.
Gradual Load Testing
Start by applying a light load to the hook. Use a small weight or gently pull down on the hook. This shows if the hook holds steady under pressure.
Slowly increase the weight until it matches your plant’s weight. Watch for any movement or loosening. If the hook stays firm, it is ready to hold your plant safely.
Adjusting If Necessary
If the hook moves or feels loose, stop testing. Remove the hook and check the installation.
Reposition the hook or use a stronger anchor if needed. Tighten screws or choose a different spot on the wall. Test again after each adjustment.
Repeat until the hook is solid and secure. This prevents accidents and protects your wall.
Tips For Long-term Use
Attaching a plant hook to a sheet rock wall is easy, but keeping it secure over time needs care. Follow these tips to help your hook stay strong and your wall safe. Small steps make a big difference in long-term use.
Preventing Wall Damage
Choose the right hook size for your plant’s weight. Use anchors made for sheet rock to spread the load. Avoid placing hooks too close together to stop cracks. Do not overload the hook beyond its limit. Use gentle hooks that won’t tear the wall.
Regular Inspection
Check the hook and wall every few months. Look for signs of cracks, looseness, or rust. Tighten screws if they become loose over time. Replace worn anchors before they fail. Keep plants trimmed to reduce extra weight and pull.
Replacing Hooks Safely
Remove old hooks carefully to avoid wall damage. Use a putty knife to fill holes with spackle. Let spackle dry fully before sanding smooth. Choose new hooks designed for sheet rock. Install anchors properly to hold weight safely.
Credit: www.visualsp.com
Frequently Asked Questions
How Do You Hang A Plant Hook On Sheetrock?
To hang a plant hook on sheetrock, use a drywall anchor for support. Drill a pilot hole, insert the anchor, then screw the hook in securely.
What Type Of Anchor Is Best For Sheetrock Hooks?
Plastic expansion anchors or toggle bolts are best for sheetrock. They provide strong support and prevent the hook from pulling out under weight.
Can I Hang Heavy Plants On Sheetrock Walls?
Yes, but use strong anchors like toggle bolts. Ensure the hook and anchor can support the plant’s weight safely.
How Do I Avoid Damaging Sheetrock When Installing Hooks?
Use a drill with the correct bit size and avoid over-tightening screws. Choose the right anchor to distribute weight evenly.
Conclusion
Attaching a plant hook to a sheet rock wall is simple with the right steps. Use anchors to hold the hook firmly in place. Always check the weight of your plant before hanging. Proper tools make the job easier and safer.
Take your time to avoid damage to the wall. Enjoy your new green space with confidence and style.