Changing the keys to your Baldwin deadbolt lock might seem tricky, but it’s easier than you think. Imagine being able to control who has access to your home without calling a locksmith or buying a new lock.
You’re just a few simple steps away from saving money and gaining peace of mind. In this guide, you’ll discover exactly how to rekey your Baldwin deadbolt lock quickly and safely. Ready to take control of your home’s security? Let’s get started.

Credit: www.amazon.com
Tools Needed
Rekeying a Baldwin deadbolt lock requires specific tools. Having the right tools makes the process easier and faster. This section lists the must-have tools and some optional supplies. Prepare them before starting to avoid interruptions.
Essential Tools
- Phillips screwdriver – to remove screws from the lock.
- Flathead screwdriver – helps in prying parts gently.
- Plug follower – pushes the plug out without losing pins.
- Pinning kit – contains new pins for the lock cylinder.
- Key gauge – measures pin sizes accurately.
- New keys – to test the rekeyed lock.
- Tweezers – useful for handling small pins.
Optional Supplies
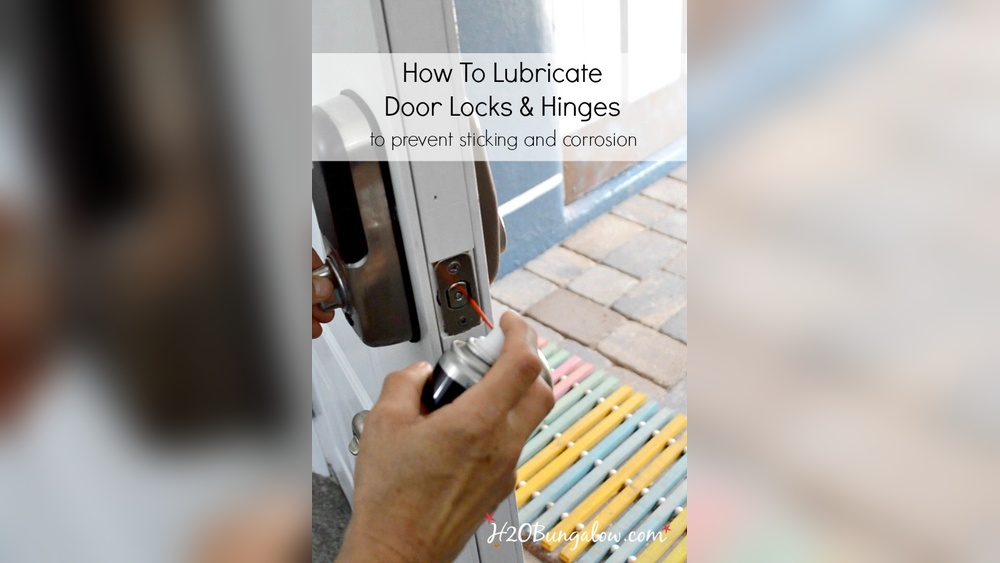
- Lubricant spray – smoothens lock mechanism after rekeying.
- Magnifying glass – helps see tiny pins clearly.
- Small container – keeps pins and screws safe.
- Work mat – prevents tools from rolling away.
- Gloves – protect hands during the process.
Preparing The Lock
Preparing the Baldwin deadbolt lock is the first step to rekey it properly. This step ensures the lock is ready and safe to work on. You need to handle the lock carefully to avoid damage. Taking time here saves effort later.
Focus on removing parts without forcing them. Knowing the lock type helps choose the right tools. Clear workspace and proper lighting make the task easier.
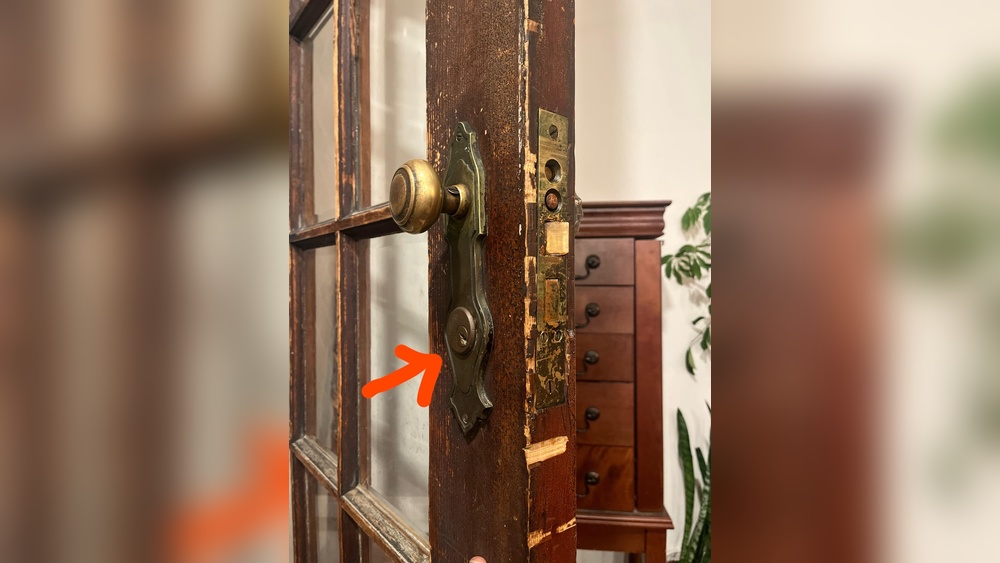
Removing The Deadbolt
Start by locating the screws on the interior side of the lock. Use a screwdriver to remove these screws. Keep them in a safe place; you will need them later.
Pull the interior and exterior parts of the lock apart gently. The deadbolt should slide out smoothly. Avoid using too much force, or the lock may break.
Once the deadbolt is out, clean the area. Remove any dust or debris. This keeps the lock parts working well after reassembly.
Identifying The Lock Type
Look at the lock’s brand and model number. Baldwin deadbolts come in various types. Knowing the type helps find the correct rekey kit.
Check for markings on the lock cylinder. These marks show the lock’s keyway style. Different keyways need different tools and pins.
Use the lock type information to prepare the right pins and tools. This step prevents mistakes during rekeying and ensures a perfect fit.
Disassembling The Cylinder
Disassembling the cylinder is the first step in rekeying your Baldwin deadbolt lock. This step lets you access the internal parts. You will remove the plug and pins inside. Handle all parts carefully to avoid damage. Keep tools and small parts organized during the process.
Removing The Retaining Clip
Start by locating the retaining clip on the back of the cylinder. Use a small flathead screwdriver or clip removal tool. Gently pry the clip off the cylinder. Take your time to avoid bending the clip. Place the clip in a safe spot for reassembly. The clip holds the plug firmly inside the cylinder.
Extracting The Plug
After removing the clip, insert the key into the lock. Turn the key slightly to align the pins. Use a plug follower tool to push the plug out. Push slowly to prevent pins from falling out. Keep the plug and pins together for easy reinstallation. Now, you can access the pins for rekeying.

Credit: www.homedepot.com
Replacing The Pins
Replacing the pins is a key step in rekeying a Baldwin deadbolt lock. This process lets the lock work with a new key while keeping the old lock hardware. You need to remove old pins and put new ones that match the new key cuts. Precision is important for smooth lock operation.
Matching Pins To New Key
Start by examining the new key’s cuts. Each cut has a depth that tells which pin size to use. Use a pinning chart or guide to find the right pin for each cut. Insert pins that match the new key’s pattern exactly. This ensures the lock cylinder turns properly with the new key.
Organizing Pin Sizes
Arrange pins by size before putting them into the lock cylinder. Use a clean surface and separate pins into groups. This makes the process faster and reduces mistakes. Keep pins in order from smallest to largest. This helps you place the correct pin in each chamber easily.
Reassembling The Lock
Reassembling the Baldwin deadbolt lock is an important step in the rekeying process. It requires care to make sure all parts fit perfectly. A smooth reassembly ensures the lock works well and stays secure.
Follow each step slowly. Pay attention to the details. This will help avoid mistakes and save time later.
Inserting The Plug
Start by placing the plug back into the cylinder. Align the plug so the pins fit inside properly. Do not force it; the plug should slide in smoothly.
Make sure the keyway faces the correct direction. Check that the pins stay in place inside the plug. If the pins fall out, the lock will not work correctly.
Reattaching The Retaining Clip
Once the plug is in place, secure it with the retaining clip. This clip holds the plug firmly inside the cylinder. Use a small tool or your fingers to snap the clip into its groove.
Check that the clip fits tightly. A loose clip can cause the plug to move or fall out. After attaching, test the plug by turning it with the key. It should rotate smoothly without sticking.
Credit: www.homedepot.com
Testing The Rekeyed Lock
Testing the rekeyed Baldwin deadbolt lock is an important step to ensure everything works smoothly. This process confirms that the new key fits well and turns the lock correctly. Proper testing helps avoid future lock problems and keeps your home secure.
Checking Key Functionality
First, insert the new key into the lock. Turn it slowly to check for smooth movement. The key should rotate easily without sticking. Try locking and unlocking several times. This ensures the pins align properly with the new key cuts. Also, test the key from both sides of the door if possible.
Adjusting Pins If Needed
If the key feels tight or won’t turn, the pins may need adjustment. Remove the cylinder and inspect the pins inside. Replace or shift pins to match the key’s grooves. Reassemble the lock and test the key again. Repeat until the key moves smoothly without resistance. Proper pin adjustment guarantees reliable lock function.
Tips For Diy Security
Rekeying a Baldwin deadbolt lock can improve home security. Doing it yourself saves money and gives control over your locks. Simple tips help make the process safer and easier. These tips focus on choosing the right key and maintaining your deadbolt for long-lasting use.
Choosing The Right Key
Pick a key that fits the lock smoothly. Avoid keys that are too thick or thin. A good key reduces wear on the lock pins. Use keys made from durable materials like brass. Avoid cheap keys that break or bend easily. Duplicate keys should come from trusted locksmiths only. Test the new key several times before finishing the rekeying process. Smooth key operation helps prevent lock jams and damage.
Maintaining Your Deadbolt
Regular care keeps your deadbolt working well. Clean the lock with a dry cloth to remove dust and dirt. Avoid using oil-based lubricants; they attract grime. Instead, apply graphite powder inside the lock for smooth action. Check the screws and tighten them if loose. Inspect the strike plate to ensure proper alignment. A well-maintained deadbolt lasts longer and stays secure. Simple maintenance prevents costly repairs later.
Frequently Asked Questions
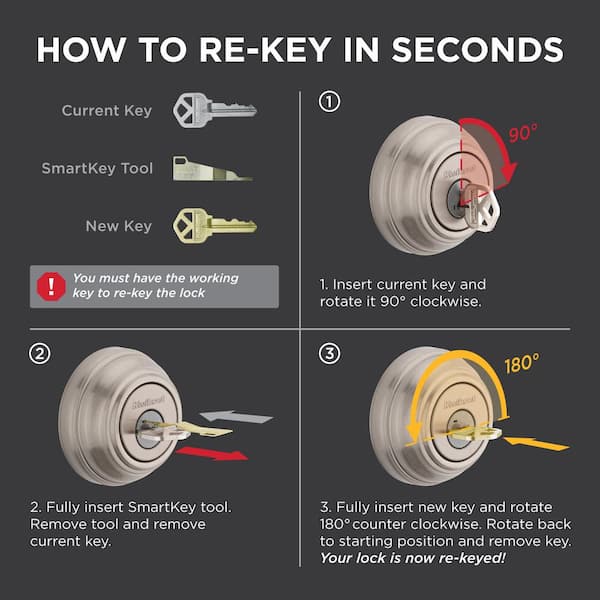
How Do I Rekey A Baldwin Deadbolt Lock?
To rekey a Baldwin deadbolt, remove the lock cylinder first. Use a rekeying kit to replace the pins with new ones matching your new key. Reassemble the lock and test the new key to ensure smooth operation.
What Tools Are Needed To Rekey Baldwin Deadbolt?
You need a screwdriver, a Baldwin rekeying kit, and a follower tool. These help remove the cylinder and replace the pins. Having a clean workspace is also essential for an efficient rekeying process.
Can I Rekey Baldwin Locks Myself?
Yes, rekeying Baldwin locks is a DIY task if you have the right tools. Follow the instructions carefully to avoid damaging the lock. If unsure, consult a professional locksmith for assistance.
How Long Does It Take To Rekey A Baldwin Deadbolt?
Rekeying a Baldwin deadbolt typically takes 15 to 30 minutes. Time varies based on experience and tool availability. Proper preparation speeds up the process effectively.
Conclusion
Rekeying a Baldwin deadbolt lock is simple and saves money. With the right tools, anyone can do it at home. Follow each step carefully to avoid mistakes. Changing your lock keeps your home safe and secure. Take your time and double-check your work.
This skill helps protect your family and belongings. Try it yourself and gain confidence in home security.