Have you ever wished you could control an outlet with a simple flip of a light switch? Imagine turning your lamp, fan, or even holiday lights on and off without reaching for the plug every time.
It’s easier than you think, and you don’t need to be an expert electrician to do it. In this guide, you’ll learn step-by-step how to run an outlet from a light switch safely and effectively. By the end, you’ll have a smart, convenient setup that makes your daily life a little bit simpler.
Ready to take control of your home’s power? Let’s dive in.

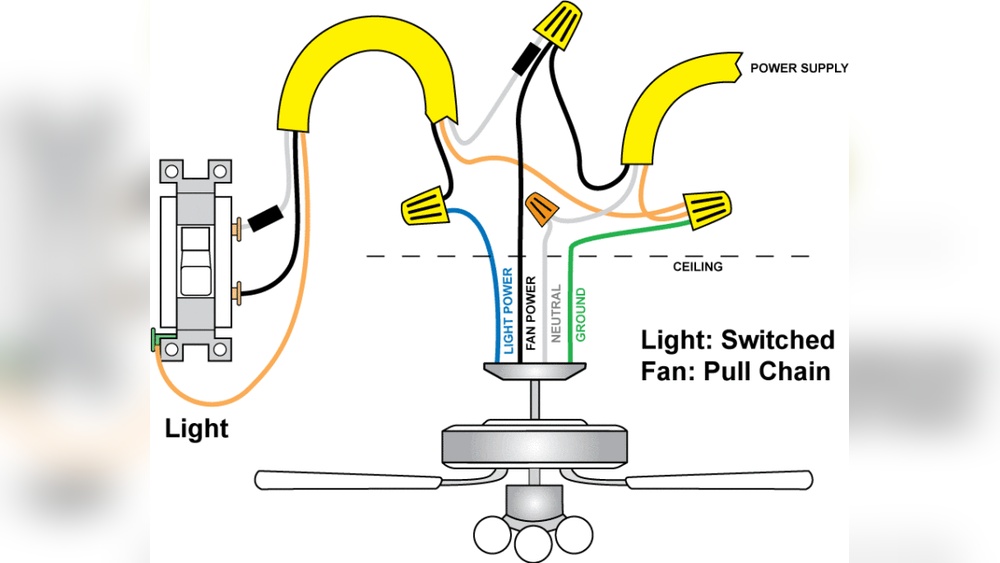
Credit: www.do-it-yourself-help.com
Tools And Materials Needed
Running an outlet from a light switch needs the right tools and materials. Having these ready makes the job easier and safer. This section lists what you need before starting.
Essential Tools
- Screwdriver set (flathead and Phillips)
- Wire stripper and cutter
- Voltage tester
- Needle-nose pliers
- Drill with bits
- Fish tape or wire puller
- Electrical tape
- Measuring tape
Required Materials
- Electrical outlet (receptacle)
- Outlet cover plate
- Romex cable or suitable wiring
- Wire connectors (wire nuts)
- Switch box (if adding a new one)
- Electrical box for the outlet
- Circuit breaker (if needed)

Credit: diy.stackexchange.com
Safety Precautions
Working with electricity can be dangerous. Safety is the top priority before starting any project. Taking the right steps helps avoid shocks or other accidents. Follow these safety precautions carefully to protect yourself.
Power Shutoff
Turn off the power at the circuit breaker. This stops electricity flow to the switch and outlet. Never trust the switch position alone. Always confirm the power is off before touching wires.
Use Of Voltage Tester
Use a voltage tester to check wires. It shows if electricity is still present. Test all wires in the switch box. Only start work when the tester shows no voltage.
Protective Gear
Wear safety gloves made for electrical work. They protect against shocks and cuts. Use safety glasses to guard your eyes. Keep tools insulated to avoid electric contact.
Locate The Light Switch Wiring
Locating the light switch wiring is the first step to running an outlet from a light switch. This helps to understand how the electrical system works in your home. Knowing the wiring allows you to connect the outlet safely and correctly. Take your time to carefully find and identify the wires behind the switch.
Removing The Switch Cover
Start by turning off the power to the switch at the breaker. This prevents any risk of electric shock. Use a screwdriver to remove the screws holding the switch cover. Gently pull the cover off to reveal the switch and wiring. Keep the screws safe for reinstallation later.
Identifying Wires
Inside the switch box, you will see several wires. Usually, there is a black (hot) wire, a white (neutral) wire, and a green or bare copper (ground) wire. The black wire carries power to the switch. The white wire completes the circuit back to the panel. The ground wire is for safety. Use a voltage tester to confirm the power is off before touching any wires.
Plan The Outlet Installation
Planning the outlet installation is the first step to a safe and effective setup. Careful planning ensures the outlet works well and meets your needs. This stage involves choosing the best location for the outlet and checking if your circuit can handle the extra load.
Proper planning avoids problems like overload or inconvenient outlet placement. Take time to think about these details before starting the installation.
Choosing Outlet Location
Select a spot near the light switch for easy wiring. The outlet should be accessible and useful for your needs. Avoid placing it too close to water sources or heat.
Think about what devices you will plug in. Make sure the location fits your daily use. Also, consider the wall space and any furniture nearby.
Assessing Circuit Capacity
Check the current circuit capacity before adding an outlet. Each circuit has a limit on how much electricity it can handle. Adding an outlet might overload the circuit if you are not careful.
Look at your circuit breaker or fuse box to find the circuit rating. Calculate the total load of all devices connected. Ensure the new outlet will not cause an overload or trip the breaker.
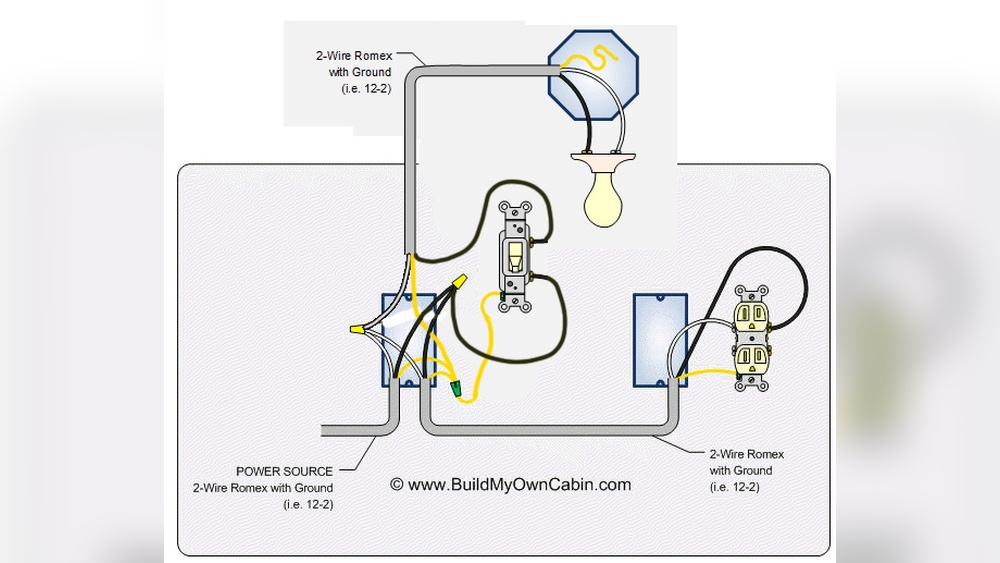
Wiring The Outlet
Wiring the outlet is a key step in running an outlet from a light switch. It involves connecting three main wires to the outlet: hot, neutral, and ground. Each wire has a special role in making the outlet work safely and correctly. Follow these steps carefully to ensure the wiring is done right.
Connecting Hot Wire
The hot wire carries electricity to the outlet. It is usually black or red. Connect this wire to the brass-colored screw on the outlet. Make sure the wire is tight and secure to avoid loose connections.
Connecting Neutral Wire
The neutral wire completes the electrical circuit. It is usually white. Attach this wire to the silver-colored screw on the outlet. Secure the wire properly to keep the flow of electricity stable.
Ground Wire Connection
The ground wire protects against electrical shock. It is usually green or bare copper. Connect it to the green screw on the outlet. This connection helps keep the outlet safe for use.
Mounting The Outlet
Mounting the outlet correctly is a key step in running an outlet from a light switch. It ensures safety and proper function. This process involves installing the outlet box and securing the outlet firmly in place. Proper mounting prevents electrical hazards and keeps the outlet stable.
Installing The Outlet Box
Start by choosing the right outlet box for your wall type. Plastic boxes work well for drywall, while metal boxes suit wood or metal studs. Mark the spot on the wall where you want the outlet. Cut the opening carefully using a drywall saw.
Insert the outlet box into the hole. For old work boxes, use the built-in clamps to secure the box to the drywall. For new work boxes, attach the box directly to the stud. Make sure the box sits flush with the wall surface for a clean look.
Securing The Outlet
After installing the box, connect the wires to the outlet terminals. Match the wire colors to the correct terminals: black to brass, white to silver, and green or bare copper to the ground screw. Push the wires neatly into the outlet box.
Mount the outlet by screwing it into the box’s mounting holes. Tighten the screws until the outlet is secure but do not overtighten. Attach the outlet cover plate to finish. Check the outlet for stability before restoring power.
Testing The Outlet
Testing the outlet is a key step after wiring it from a light switch. It ensures the outlet works safely and correctly. This step protects you from electrical hazards. It also confirms your work is done right. Follow clear methods to check the outlet’s power and function.
Restoring Power
Before testing, restore power to the circuit. Turn the breaker back on in your electrical panel. Make sure the switch controlling the outlet is in the ON position. This allows electricity to flow to the outlet. Never test without power. It helps you verify if wiring is correct.
Using A Circuit Tester
Use a circuit tester to check the outlet’s voltage and wiring. Insert the tester’s probes into the outlet slots. A light or sound from the tester shows power presence. Check for proper voltage level, usually around 120 volts. Test all outlet slots to confirm correct wiring. If the tester shows no power, recheck wiring or breaker. This tool helps catch mistakes and keeps you safe.

Credit: www.youtube.com
Troubleshooting Tips
Troubleshooting is key when running an outlet from a light switch. Problems can stop your outlet from working safely. Knowing common issues saves time and helps fix them fast.
Common Wiring Issues
Loose wires cause many problems. Check all wire connections in the switch and outlet boxes. Tighten any loose screws holding wires. Use a voltage tester to find if wires have power. Wrong wire placement can stop the outlet from working. Make sure the hot, neutral, and ground wires are connected correctly. Avoid mixing neutral and hot wires.
Outlet Not Working
Test the outlet with a device or tester. No power means a wiring or switch problem. Check if the light switch controls the outlet power. A broken switch can block electricity flow. Replace the switch if it does not work. Also, reset any tripped circuit breakers. Look for blown fuses that cut power to the outlet. Ensure the outlet itself is not faulty. Swap it with a new one to test.
Frequently Asked Questions
How Do I Connect An Outlet To A Light Switch?
To connect an outlet to a light switch, turn off power first. Run a wire from the switch to the outlet. Connect the switch to control the outlet’s power. Ensure proper grounding and follow local electrical codes for safety.
Can I Control Multiple Outlets With One Switch?
Yes, you can control multiple outlets with one switch. Use a junction box to split power to each outlet. Make sure the switch is rated for the total load. Always follow electrical safety standards when wiring multiple outlets.
What Tools Are Needed To Wire An Outlet From A Switch?
You need a screwdriver, wire stripper, voltage tester, electrical tape, and wire nuts. Also use a drill if new holes are required. Safety gear like gloves and goggles is recommended. Proper tools ensure safe and efficient wiring.
Is It Safe To Wire An Outlet From A Light Switch?
Wiring an outlet from a light switch is safe if done correctly. Always turn off power before starting. Use proper wiring techniques and materials. Follow local electrical codes and consider hiring a licensed electrician for complex jobs.
Conclusion
Running an outlet from a light switch can save space and add convenience. Always turn off power before starting any work. Use the right tools and follow safety rules closely. Double-check your connections to avoid problems later. This project can be simple with careful steps and patience.
You can control devices easily with a switch nearby. Take your time and ask for help if unsure. Safety comes first in every electrical task. Enjoy your new outlet setup once finished.