Have you ever wondered how to replace a light switch safely and quickly? Whether your switch is old, faulty, or you just want to upgrade your home, knowing how to do it yourself can save you time and money.
In this guide, you’ll discover simple steps that anyone can follow—even if you’re not an expert. By the end, you’ll feel confident to handle this common home project on your own. Keep reading to learn exactly what you need to do to replace your light switch without hassle.
:max_bytes(150000):strip_icc()/how-to-replace-a-light-switch-1824670_07_newswitch_40431-69f2872f4a734dc89e3c2bed8711fc69.jpg)
Credit: www.thespruce.com
Safety First
Safety is the top priority when replacing a light switch. Electricity can be dangerous. Taking proper steps keeps you safe and avoids accidents. Follow these simple safety tips before starting your project.
Turn Off Power
First, locate your home’s circuit breaker panel. Switch off the breaker that controls the light switch. This stops electricity flow to the switch. Double-check by trying the switch. The light should not turn on. Never skip turning off the power.
Use A Voltage Tester
Next, use a voltage tester to confirm no electricity flows. Touch the tester to the switch wires. The tester shows if power is still present. If it does, do not proceed. Wait until the power is fully off. This tool protects you from electric shocks.

Credit: www.wikihow.com
Gather Tools And Materials
Before replacing a light switch, gather all needed tools and materials. Having everything ready saves time and avoids frustration. It ensures the job goes smoothly and safely.
List Of Essential Tools
Start with a screwdriver, preferably flathead and Phillips. A voltage tester is crucial to check power is off. Wire strippers help prepare wires for connection. Needle-nose pliers make twisting wires easier. Electrical tape secures wire nuts and exposed wires. Wire nuts connect wires safely and firmly. A flashlight or headlamp is useful for dark spaces. Finally, a new light switch completes the list.
Choosing The Right Switch
Select a switch that fits your needs and style. Standard switches work for most rooms. Dimmer switches control light brightness. Three-way switches control lights from two locations. Make sure the switch matches your home’s voltage and wiring. Check the switch’s size to fit the wall box. Pick a switch with a finish that matches your decor. Proper choice avoids complications and extra trips to the store.
Remove The Old Switch
Removing the old switch is the first step to replace it safely. Turn off the power at the circuit breaker. This prevents electric shocks during the process.
Work slowly and carefully. Make sure you understand each step before moving on.
Unscrew The Cover Plate
Use a screwdriver to remove the screws holding the cover plate. Keep the screws in a safe place for later use. Gently pull the cover plate away from the wall. This reveals the switch and wires underneath.
Disconnect Wires
Note the position of each wire. Take a photo or mark them for reference. Loosen the screws on the switch terminals. Carefully pull the wires away from the switch. Avoid touching the wire ends together. The wires may still carry a charge.
Prepare The New Switch
Preparing the new switch is an important step before installation. This step ensures the switch works safely and correctly. Understanding the parts and how to connect the wires helps avoid mistakes. It also saves time during the replacement process.
Take a close look at the switch and its terminals. Knowing where each wire goes makes installation easier and safer.
Identify Terminals
New switches have different terminals for wires. Usually, there are two brass or copper screws and one green screw. The green screw is for the ground wire. The other screws connect to the live wires. Some switches have labels like “Line” or “Load.” These show where to attach the wires. Check the switch carefully and match the terminals to the wires you removed.
Attach Wires Correctly
Wrap each wire around the correct terminal screw. The wire should go clockwise for a tight connection. Tighten the screws firmly but do not over-tighten. The ground wire goes to the green screw. Live wires go to the brass or copper screws. Make sure no wire strands are loose or touching each other. Proper connection prevents electrical problems and ensures the switch works well.
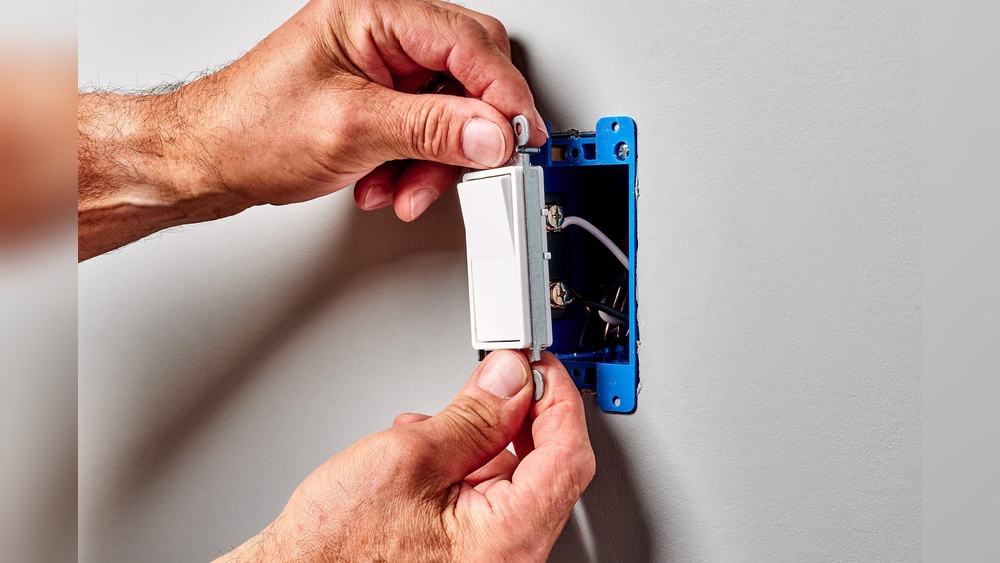
Install The New Switch
Installing the new switch is the final step in replacing a light switch. It involves attaching the switch to the wall and making sure it fits well. This step needs care to ensure safety and proper function.
Secure The Switch
Start by placing the new switch into the electrical box. Align the screw holes with the box holes. Use a screwdriver to tighten the screws. Do not overtighten; the switch should be firm but not cracked. Check that the switch is straight and flush with the wall. This helps the switch look neat and work smoothly.
Replace The Cover Plate
After securing the switch, put the cover plate back on. Line up the screw holes of the plate with the switch. Use a screwdriver to fasten the cover plate screws. Tighten them until the plate is snug against the wall. Avoid overtightening to prevent cracks. The cover plate protects the wiring and gives a clean finish.
Test The Installation
Testing the installation is a crucial step after replacing a light switch. It ensures the switch works properly and safely. Take your time to carefully check each part before finishing the job. This step helps avoid any electrical problems or hazards.
Restore Power
Turn the circuit breaker back on. This restores power to the switch and light fixture. Use caution and stand clear of the switch panel while doing this. Make sure the area is dry and safe before restoring power.
Check Switch Operation
Flip the switch up and down several times. The light should turn on and off smoothly. Listen for any unusual sounds or feel for resistance. If the switch works properly, the installation was successful. If not, turn off the power and check your wiring again.
Troubleshooting Tips
Troubleshooting a light switch replacement can save time and effort. It helps find simple problems before deeper fixes. Check the switch and wiring carefully to spot errors. Testing basic issues first avoids damage or accidents.
Common Issues
The switch does not turn on the light. Loose wires often cause this problem. Tighten all wire connections inside the switch box. A tripped breaker or blown fuse can stop power flow. Reset the breaker or replace the fuse if needed.
Sometimes the light flickers or works only sometimes. This can mean a bad switch or loose wiring. Replace the switch if tightening wires does not help. Use a voltage tester to check if power reaches the switch.
When To Call A Professional
Call an electrician if you see burnt wires or smell burning. Sparks or smoke from the switch box need urgent help. Complex wiring setups or multiple switches may require expert skills. If unsure about any step, a professional can ensure safety.
Working with electricity can be dangerous. A licensed electrician prevents risks and ensures work meets code. Always prioritize safety over saving money or time.
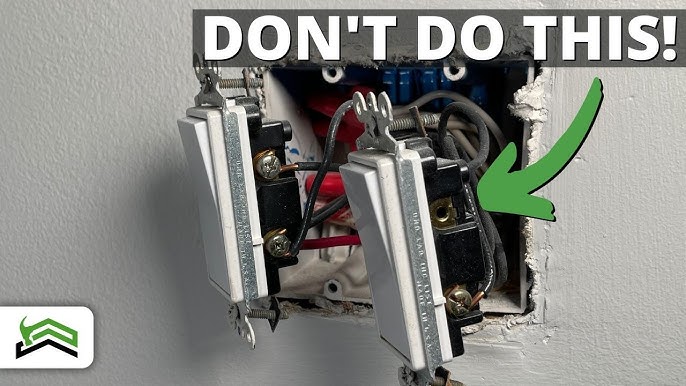
Credit: www.youtube.com
Frequently Asked Questions
How Do I Safely Turn Off Power Before Replacing A Switch?
Always switch off the circuit breaker controlling the switch. Test the switch with a voltage tester to confirm no power flows. This prevents electrical shocks and ensures safe handling during replacement.
What Tools Do I Need To Replace A Light Switch?
You need a flathead screwdriver, voltage tester, wire stripper, and a new switch. These tools help you safely remove the old switch and install the new one correctly.
How Do I Identify Wires On A Light Switch?
Typically, black or red wires are hot, white is neutral, and green or bare is ground. Use a voltage tester to confirm wire functions before disconnecting any wires.
Can I Replace A Light Switch Without An Electrician?
Yes, if you follow safety steps and understand wiring basics, you can replace it yourself. However, consult a professional if unsure or if local codes require it.
Conclusion
Replacing a light switch can be simple and safe. Always turn off the power first. Take your time and follow each step carefully. Use the right tools to avoid problems. Test the new switch before closing the wall plate. A well-done job improves your home’s safety and comfort.
Don’t rush, and ask for help if unsure. With practice, this task becomes easier and quicker. You can handle small repairs like this with confidence.

