Have you ever wondered how hard it really is to change a light switch? You might think it’s a job only for electricians, but the truth could surprise you.
Changing a light switch is one of those home tasks that sounds tricky but can be done safely and quickly if you know the right steps. You’ll discover exactly what’s involved, how much effort it takes, and what you need to watch out for.
By the end, you’ll feel confident deciding if this is something you can tackle yourself or if you should call a pro. Ready to find out how simple—or challenging—this task really is? Keep reading.

Credit: www.youtube.com
Tools Needed
Changing a light switch does not require many tools. Having the right tools makes the job easier and safer. This section lists the basic tools needed for this task. Each tool plays an important role in the process.
Screwdriver
A screwdriver is essential. Most light switches use screws to hold the cover plate and switch in place. A flathead or Phillips screwdriver works well. Check your switch type before starting.
Voltage Tester
A voltage tester helps ensure safety. It checks if electricity is off before touching wires. This tool prevents electric shocks. Never skip this step.
Wire Strippers
Wire strippers remove the insulation from wires. This is necessary when connecting the new switch. They help avoid damaging the wire inside.
Needle-nose Pliers
Needle-nose pliers help bend and hold wires. They make it easier to connect wires to the switch terminals. These pliers fit into small spaces.
Electrical Tape
Electrical tape insulates wire connections. It keeps wires safe and secure. Use it to cover exposed wires after installation.
Safety Precautions
Changing a light switch might seem easy, but safety must come first. Electricity can be dangerous. Taking the right precautions protects you from shocks and accidents. Simple steps can keep you safe and make the job smoother.
Turn Off The Power
Always switch off the power at the breaker box before starting. This stops electricity from flowing to the switch. Test the switch with a voltage tester to be sure no current is present. Never skip this step.
Use The Right Tools
Use tools with insulated handles. These protect you from electric shocks. Avoid metal tools without insulation. Keep your tools organized to avoid mistakes and accidents.
Wear Safety Gear
Wear rubber-soled shoes to reduce shock risk. Use safety glasses to protect your eyes from sparks or debris. Avoid loose clothing that can catch on wires or tools.
Work In A Dry Area
Make sure the area is dry. Water and electricity do not mix. Avoid working in wet or damp places. Dry your hands and tools before touching wires or switches.
Follow Wiring Instructions
Read the switch’s wiring guide carefully. Connect wires to the correct terminals. Wrong wiring can cause short circuits or fires. Double-check each connection before finishing.
Turning Off Power
Turning off power is the first and most important step in changing a light switch. It keeps you safe from electric shocks. Always treat electrical work with care and respect. Even a small mistake can cause serious injury.
Before you start, make sure the power is completely off. This step may seem easy but is critical for your safety. Never skip it.
Locate The Circuit Breaker
Find the main electrical panel in your home. It is usually in the basement, garage, or a utility room. Open the panel door to see the circuit breakers. Each switch controls power to a part of your home.
Switch Off The Correct Breaker
Identify the breaker that controls the light switch you want to change. It might be labeled or you may need to test. Flip the breaker switch to the off position. This cuts power to the switch area.
Double Check Power Is Off
Use a voltage tester or a simple light bulb tester. Touch the tester to the wires in the switch box. If it shows no power, it is safe to proceed. Never assume power is off without testing.
Removing The Old Switch
Removing the old light switch is the first step to a new installation. It needs care and attention to do it safely. This section guides you through the process clearly and simply.
Always turn off the power before touching any wires. This helps avoid shocks or injuries. Use a voltage tester to be sure the power is off.
Gather The Right Tools
Start by getting a screwdriver, voltage tester, and flashlight. These tools make the job easier and safer. Have a container ready for screws and small parts.
Remove The Switch Cover Plate
Use a screwdriver to take off the cover plate. It usually has two screws, one on top and one at the bottom. Keep the screws safe for reassembly.
Unscrew The Old Switch
Next, unscrew the switch from the electrical box. Pull it out gently to see the wires behind. Do not force it to avoid damage.
Disconnect The Wires
Note how the wires connect to the switch. Loosen the screws holding the wires or remove them from push-in slots. Keep the wires from touching each other.
Identifying Wiring
Identifying wiring is a key step in changing a light switch. It helps you know which wires connect to the switch and which do not. This knowledge makes the task safer and easier. Understanding wiring types and colors is important before starting any work on the switch.
Understanding Wire Colors
Wire colors show their purpose. Black or red wires usually carry power. White wires often act as neutral. Green or bare wires are for grounding. Knowing these colors helps avoid mistakes and keeps the process safe.
Checking For Power
Turn off the power at the breaker box first. Use a voltage tester to check wires. The tester tells if a wire has electricity. Never touch wires without testing. This step prevents electric shocks.
Identifying The Line And Load Wires
The line wire brings power into the switch. The load wire sends power to the light. Knowing which wire is which is important. Label the wires to keep track during work. This prevents confusion and errors.
Using A Wiring Diagram
A wiring diagram shows how wires connect. It helps you understand the setup clearly. Diagrams are found in switch packaging or online. Use them to double-check your wiring before proceeding.

Credit: www.wikihow.com
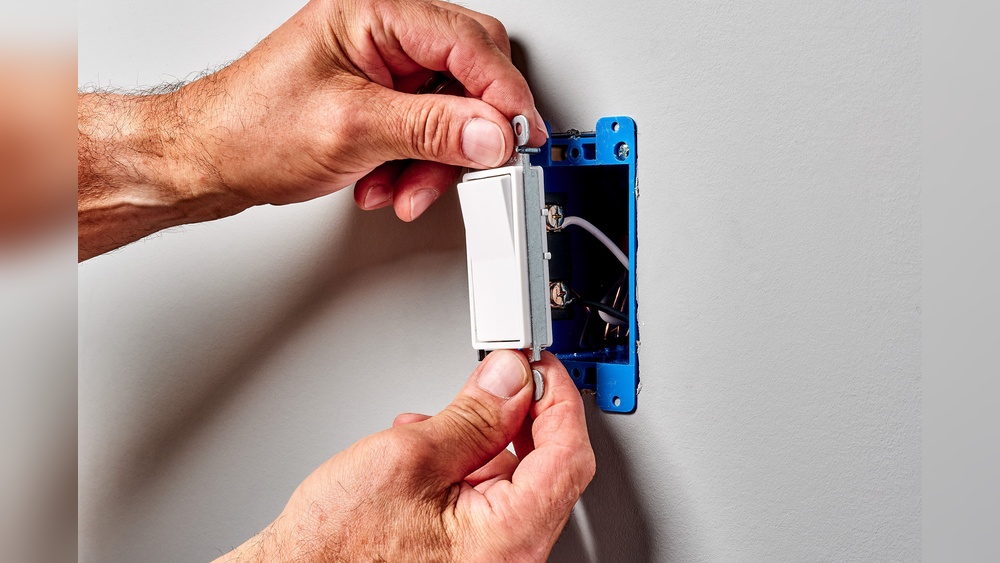
Installing The New Switch
Installing the new switch is the key step in changing a light switch. It requires care and attention to ensure everything works safely. This part is not difficult but must be done right to avoid problems later.
After removing the old switch, the new one goes in its place. Connecting the wires correctly is very important. The switch should fit snugly and securely in the wall box. Tightening the screws holds the wires and switch in position.
Identifying The Wires
Look at the wires coming out of the wall. Usually, there are three: live, neutral, and ground. The live wire carries electricity, the neutral wire completes the circuit, and the ground wire protects from shocks. Match these wires to the terminals on the new switch.
Connecting The Wires
Attach each wire to the right terminal on the switch. Use a screwdriver to tighten the screws. Make sure no wire strands are loose or touching others. Secure connections prevent sparks and ensure the switch works well.
Mounting The Switch
Push the switch gently into the wall box. Align the screw holes with the box. Fasten the switch with screws but do not overtighten. The switch should stay firm and flush with the wall surface.
Testing The Switch
Testing the light switch is a key step before replacing it. It helps find problems and keeps you safe. Simple tests can show if the switch works or needs fixing.
Using A Voltage Tester
Start with a voltage tester to check power. Turn off the circuit breaker first. Remove the switch cover carefully. Touch the tester to switch wires. A light or beep means power is present. No signal means no power or a broken switch.
Checking The Switch Function
Flip the switch on and off. Watch if the connected light turns on and off. If the light does not respond, the switch may be faulty. Sometimes, loose wires cause the problem.
Testing With A Multimeter
Use a multimeter for a detailed test. Set it to measure resistance or continuity. Connect the leads to the switch terminals. Flip the switch; the reading should change. No change means the switch is bad and needs replacement.
Common Mistakes To Avoid
Changing a light switch seems simple but many make mistakes. These errors can cause safety risks or damage. Avoiding common mistakes saves time and keeps your home safe.
Always Turn Off The Power
Never start without turning off the power at the breaker box. Leaving power on risks serious electric shock. Use a tester to check if wires are dead before touching.
Don’t Mix Up Wires
Identify wires carefully. Mixing hot, neutral, or ground wires causes short circuits or switch failure. Label wires before removing the old switch for easy re-connection.
Use The Right Tools
Using wrong tools can damage wires or the switch. Use a screwdriver that fits screws well. Wire strippers help remove insulation without cutting the wire.
Secure Wire Connections Firmly
Loose wires can spark or cause flickering lights. Tighten screws firmly but avoid over-tightening which can break wires. Make sure no bare wire is exposed.
Don’t Forget The Ground Wire
Ground wires protect against electric shock. Forgetting to connect it reduces safety. Always attach the ground wire to the green screw or grounding point.
When To Call A Professional
Changing a light switch may seem simple at first. Yet, some situations need a professional’s help. Knowing when to call an electrician keeps you safe and avoids bigger problems. This section explains clear signs that show it is time to get expert help.
Signs Of Electrical Problems
Flickering lights or buzzing sounds near the switch are warning signs. These often mean wiring issues inside the wall. Loose wires can cause sparks or fires. A professional can check and fix these safely.
Old Or Damaged Wiring
Homes with old wiring need special care. Worn-out wires may not fit new switches well. The risk of shorts or shocks rises. Electricians know how to handle old systems properly.
Complex Switch Types
Some switches control multiple lights or use dimmers. These require more wiring knowledge. Incorrect installation can cause damage or poor function. Experts have the tools and skills to install these correctly.
No Experience With Electrical Work
Electricity can be dangerous. Without experience, mistakes can happen easily. A professional understands safety rules and avoids hazards. Calling an expert is wise for peace of mind.
:max_bytes(150000):strip_icc()/how-to-replace-a-light-switch-1824670_07_newswitch_40431-69f2872f4a734dc89e3c2bed8711fc69.jpg)
Credit: www.thespruce.com
Frequently Asked Questions
How Difficult Is Changing A Standard Light Switch?
Changing a standard light switch is generally easy for most DIYers. It requires basic tools and safety precautions. Turn off the power first, then replace the switch by disconnecting and reconnecting wires carefully.
What Tools Do I Need To Change A Light Switch?
You will need a screwdriver, voltage tester, wire stripper, and possibly pliers. These tools help safely remove the old switch and install the new one. Always ensure power is off before starting.
How Long Does It Take To Replace A Light Switch?
Replacing a light switch typically takes 10 to 20 minutes. This includes turning off power, removing the old switch, wiring the new one, and testing it. Experience can reduce the time required.
Can I Change A Light Switch Without Electrical Experience?
Yes, if you follow safety steps and instructions carefully. Turn off power at the breaker and use a voltage tester to confirm no current. If unsure, consult a professional electrician.
Conclusion
Changing a light switch is not as hard as it seems. With basic tools and care, anyone can do it safely. Always turn off the power before starting work. Follow simple steps and take your time. Mistakes can cause problems or shocks.
If unsure, ask a professional for help. This small task can save money and boost confidence. Try it yourself and see how easy it can be.