Are you tired of reaching for a light switch that just isn’t in the right spot? Moving a light switch can make your space more convenient and comfortable—whether it’s to avoid awkward angles or to improve your room’s flow.
But how do you do it safely and correctly without calling in a pro? You’ll discover simple, step-by-step instructions to relocate a light switch yourself. By the end, you’ll have the confidence to tackle this project and transform your home exactly the way you want.
Keep reading, and let’s get started!
Tools And Materials Needed
Moving a light switch needs the right tools and materials. This helps keep the job safe and smooth. Using proper equipment makes the process easier and faster. Gather everything before starting to avoid interruptions.
Essential Tools For Relocating A Light Switch
You need some basic tools for this task. A screwdriver set is necessary to remove and attach screws. A voltage tester ensures no electricity runs through the wires. Wire strippers help in preparing the wires for connection. A drill might be required to make new holes in the wall. Pliers assist in bending and cutting wires as needed.
Materials Required To Move A Light Switch
Materials include electrical wires of the right length and type. Use wire nuts to safely connect wires. An electrical box is needed to house the switch in its new place. A new light switch will replace the old one. Electrical tape provides extra safety by covering exposed wire ends.
Safety Gear To Use
Wear safety goggles to protect your eyes from dust or sparks. Gloves keep your hands safe from sharp wires and tools. Use a dust mask if drilling into walls to avoid breathing dust. Having a flashlight helps when working in dark areas.
Safety Precautions
Moving a light switch involves working with electricity. Safety is the top priority. Taking the right steps protects you from shocks and accidents. This section explains key safety rules to follow before and during the process.
Turn Off The Power
Cut the power to the switch at the circuit breaker. Use a tester to confirm no electricity flows. Never start work without ensuring the power is off.
Use Proper Tools
Choose insulated tools designed for electrical tasks. Avoid metal tools without insulation. This reduces the risk of electric shock.
Wear Safety Gear
Wear rubber-soled shoes and gloves. These items provide extra protection against shocks. Keep your clothes close-fitting to avoid snagging.
Check For Hidden Wires
Look inside walls carefully before drilling or cutting. Use a stud finder with a wire detector. Avoid damage to existing electrical wiring.
Work In Dry Conditions
Ensure the area is dry and free from moisture. Water and electricity cause dangerous accidents. If needed, use a fan or wait for the room to dry.
Follow Local Codes
Check your local electrical rules and codes. Compliance ensures safe and legal work. Consult an electrician if unsure about regulations.
Turn Off Power
Turning off the power is the first step in relocating a light switch. It keeps you safe from electric shocks. Always treat electricity with respect. Never skip this step, even if you think the power is off.
Power can come from unexpected places. A switch might still have live wires inside. This can cause serious injury or damage if you touch them.
Locate Your Circuit Breaker
Find the main electrical panel in your home. It is usually in the basement, garage, or utility room. Look for the breaker labeled for the room where you work.
Switch Off The Correct Breaker
Flip the breaker to the off position. This cuts electricity to the light switch. Double-check the label to avoid turning off the wrong circuit.
Test For Power
Use a voltage tester or a non-contact tester on the switch wires. The tester shows if electricity is still present. If the tester signals power, do not touch wires.
Ensure No Power Before Proceeding
Double-check your tester on a known live source first. Then test the switch wires again. Confirming no power prevents accidents during the move.

Credit: www.reddit.com
Remove The Existing Switch
Removing the existing light switch is the first step in relocating it. Safety is the top priority before starting any electrical work. This process requires careful handling and the right tools. Follow the steps below to remove the switch safely and correctly.
Go to your home’s circuit breaker panel. Switch off the breaker that controls the light switch. Use a voltage tester to confirm power is off. Never skip this step.
Remove The Switch Cover Plate
Use a screwdriver to remove the screws on the cover plate. Take off the plate gently. Set it aside safely for reinstallation later.
Unscrew The Light Switch
Locate the screws holding the switch to the electrical box. Remove these screws carefully. Pull the switch out slowly to expose the wiring.
Disconnect The Wires
Note the wire positions before disconnecting. Use a screwdriver to loosen the terminal screws. Detach each wire gently from the switch. Keep the wires separate to avoid confusion.
Inspect The Wiring
Check the wires for any damage or wear. Ensure the insulation is intact. If wires look damaged, plan for repair or replacement.
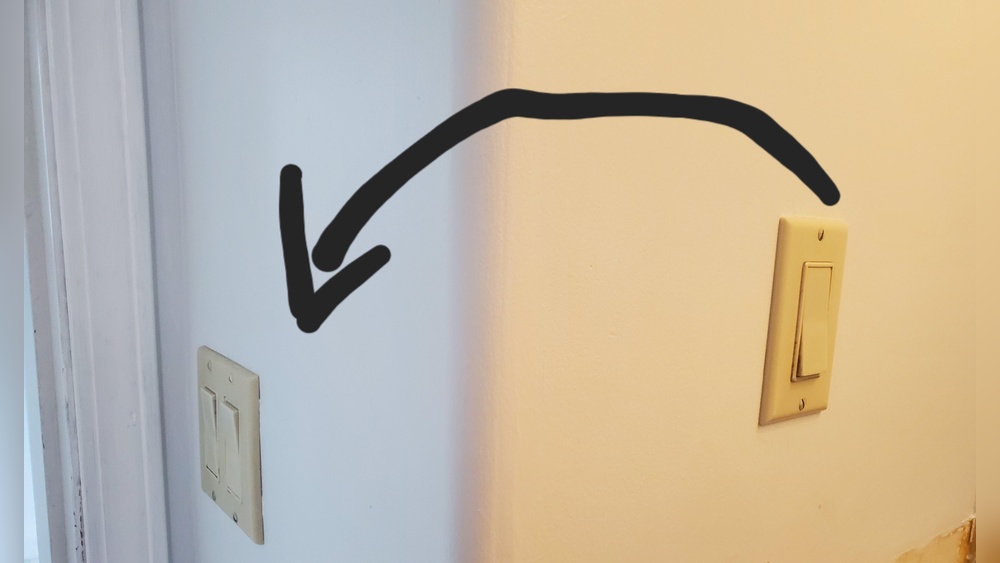
Plan The New Location
Choosing the right place for your new light switch is important. The new spot must be easy to reach and use daily. Think about how you move around the room and where you need light most.
Take time to check walls for wiring and studs. This helps avoid extra work and keeps you safe. Good planning saves time and makes the job easier.
Consider Accessibility And Convenience
Pick a height and spot that feels natural to reach. Usually, light switches go about 48 inches from the floor. Place the switch near the door or where you enter the room.
Avoid spots behind furniture or doors. The switch should not be hard to find in the dark. Think about all family members and guests.
Check For Electrical And Structural Obstacles
Look inside the walls for wires, pipes, or studs. Use a stud finder or call a professional. Avoid drilling into pipes or electrical cables.
Choose a wall space without obstacles to make wiring easier. This also prevents damage and extra repair costs later.
Plan The Wiring Path
Plan how to run wires from the old switch location to the new one. Shorter wiring paths save time and materials. Make sure the wires follow safe and legal routes.
Use cable clips and boxes to protect the wiring. Keep wiring neat and secure inside the walls or surface channels.
Run New Wiring
Running new wiring is the key step in relocating a light switch. It means extending the electrical cables from the power source to the new switch location. This process needs care to ensure safety and proper function. Follow these clear steps to run new wiring correctly.
Turn Off The Power
Always start by turning off the power at the circuit breaker. This prevents shocks or accidents. Use a voltage tester to confirm the wires have no power.
Plan The Wiring Path
Decide the route for the new wire from the old switch to the new spot. Avoid sharp bends and places where wires can get damaged. Mark the path on the wall or ceiling.
Cut Access Holes
Cut small holes in the drywall at the start and end points of the wiring path. These holes let you pull the wire through the wall. Keep them neat and just big enough to reach inside.
Pull The New Cable
Use a fish tape or wire puller to pull the new electrical cable through the wall. Attach the cable securely and pull gently to avoid damage. Leave enough wire length at both ends for connections.
Secure The Wiring
Use wire staples or clips to hold the cable in place along the path. Keep the wire away from heat sources and sharp edges. This prevents damage and keeps everything safe.
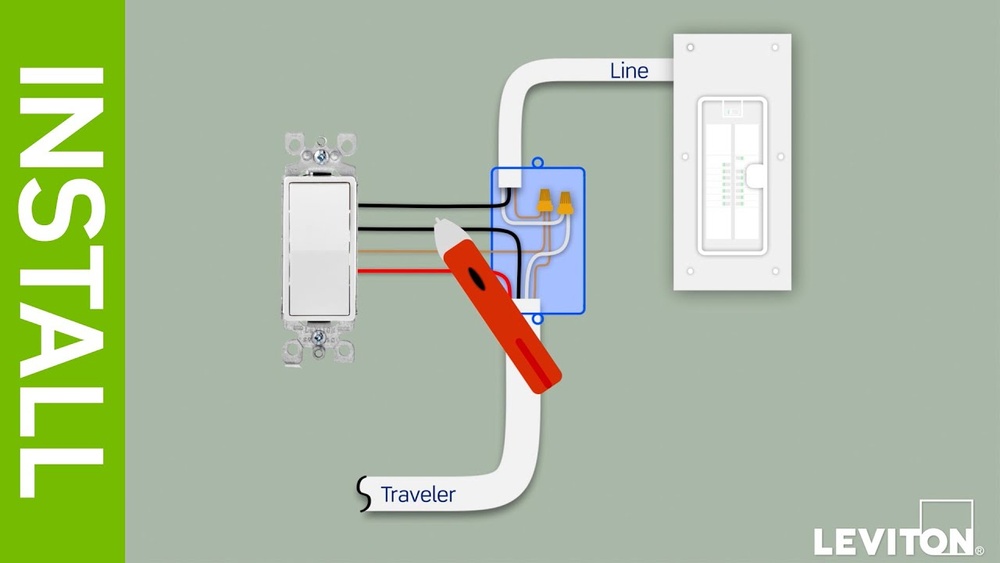
Connect The Wires
Strip the wire ends and connect them to the switch and power source terminals. Match the wire colors correctly: black for hot, white for neutral, and green or bare for ground. Tighten all connections firmly.
Install The Light Switch
Installing the light switch is a key step in relocating it safely. This part involves connecting wires and securing the switch in its new place. Careful work ensures the switch works well and avoids electrical issues.
Turn Off The Power
First, shut off the power at the circuit breaker. This prevents electric shock while working. Use a tester to confirm the power is off before touching wires.
Connect The Wires
Match the wires to the new switch terminals. Usually, black or red wires connect to brass screws. White wires go to silver screws if needed. Secure the wires tight to avoid loose connections.
Attach The Switch To The Box
Push the wires carefully into the electrical box. Align the switch with the mounting holes. Use screws to fasten the switch firmly but do not overtighten.
Install The Switch Cover Plate
Place the cover plate over the switch. Screw it into place gently. This protects the switch and gives a finished look.
Test The Switch
Testing the switch is a key step after relocating it. This step ensures that the switch works correctly and safely. You do not want any problems after finishing the job. A faulty switch can cause electrical hazards or fail to control your light.
Start by checking the wiring connections. Make sure all wires are tight and properly placed. Loose connections can cause the switch to malfunction or spark.
Turn The Power Back On
Before testing, restore power at the circuit breaker. This allows you to see if the switch controls the light as expected. Always be careful when working with electricity.
Use A Voltage Tester
Use a voltage tester to confirm power is flowing to the switch. This tool helps detect live wires safely. It prevents shocks and confirms your wiring is correct.
Operate The Switch
Flip the switch on and off several times. Check if the light turns on and off smoothly. Any flickering or delay may indicate an issue.
Check For Unusual Signs
Look for sparks, buzzing, or heat around the switch. These signs mean there is a problem. Turn off power immediately if you see any of these.
Test The Switch With A Load
Connect the switch to the light or fixture it will control. This simulates real use and confirms proper function. The switch must handle the electrical load safely.
Troubleshooting Tips
Troubleshooting during a light switch relocation can save time and prevent damage. Problems may arise from wiring errors, loose connections, or faulty switches. Careful checking and simple fixes often resolve common issues. Stay patient and follow these tips to ensure a smooth process.
Check The Power Supply
Ensure the power is off before starting any work. Use a voltage tester to confirm no electricity flows to the switch. Double-check the circuit breaker to avoid accidents. Power issues often cause the switch not to work after relocation.
Verify Wiring Connections
Match wires correctly by color and position. Loose or swapped wires can stop the switch from working. Tighten all screws and secure wire nuts. Clear connections prevent flickering or no power at the new switch.
Test The Switch Function
Use a multimeter to test the switch’s continuity. A broken switch will not complete the circuit. Replace the switch if the test shows no continuity. Testing ensures the switch works before final installation.
Inspect The New Location
Check the wall box is suitable for the switch size. Ensure no damage to wires during relocation. Avoid sharp bends that can break wires inside the wall. A proper box and careful handling keep the switch safe and functional.
Look For Grounding Issues
Confirm the ground wire is connected properly. Grounding protects against electrical shocks. A missing ground can cause safety problems and switch malfunction. Secure the ground wire to the green screw or grounding clip.

Credit: www.reddit.com

Credit: www.youtube.com
Frequently Asked Questions
How Do I Safely Turn Off Power Before Relocating A Switch?
Always switch off the circuit breaker before starting. Use a voltage tester to confirm no power flows to the switch. This step prevents electrical shocks and ensures your safety during the relocation process.
What Tools Are Needed To Relocate A Light Switch?
You will need a screwdriver, wire stripper, voltage tester, electrical box, and wire nuts. These tools help you remove the old switch, handle wiring safely, and install the new switch properly.
Can I Relocate A Light Switch Without Rewiring?
Relocating usually requires rewiring to extend or reroute cables. Skipping rewiring can cause poor connections or safety hazards. Proper wiring ensures the switch functions correctly and meets electrical codes.
How Far Can I Move A Light Switch From Its Original Spot?
You can move a switch within the same room or wall cavity easily. Moving it farther may require additional wiring and wall repairs. Always check local electrical codes for distance and installation rules.
Conclusion
Relocating a light switch can improve your room’s layout and convenience. Always turn off the power before starting any work. Use the right tools and follow safety steps carefully. Take your time to avoid mistakes and ensure a good finish.
If unsure, ask a professional for help. A properly moved switch makes your space safer and easier to use. Now, you have the basics to start your project confidently.