Have you ever noticed a sagging floor in your home and wondered how to fix it safely? Knowing how to properly jack up a floor can save you time, money, and a lot of stress.
But if it’s done wrong, it could cause more damage or even be dangerous. In this guide, you’ll learn simple, clear steps to lift your floor correctly and securely. Keep reading, and you’ll gain the confidence to tackle this project like a pro—without feeling overwhelmed or unsure.
Your floor’s stability and your peace of mind are just a few easy steps away.

Credit: www.youtube.com
Preparing The Work Area
Preparing the work area is the first important step to jack up a floor safely. This step ensures the job goes smoothly and avoids accidents. A clean, organized space helps you focus and work faster. It also protects your tools and materials from damage.
Clearing The Space
Remove all furniture and objects from the area. Clear away rugs, boxes, and any debris. This gives you enough room to work freely. A clear space also prevents tripping hazards. Make sure the floor surface is dry and clean.
Gathering Necessary Tools
Collect all tools needed before starting. Common tools include a floor jack, wooden blocks, a level, and a pry bar. Have safety gear like gloves and goggles ready. Check your tools for damage or wear. Proper tools make the job easier and safer.
Checking Structural Integrity
Inspect the floor for signs of damage or weakness. Look for cracks, water damage, or soft spots. Identify the joists and beams that support the floor. Confirm they are strong enough to hold the jack and weight. Address any major damage before jacking up the floor.
Choosing The Right Jack
Choosing the right jack is key to safely lifting a floor. The proper jack supports the weight evenly and prevents accidents. Picking a jack that matches your project needs ensures smooth work and good results. Knowing the types, weight limits, and safety features helps you make the best choice.
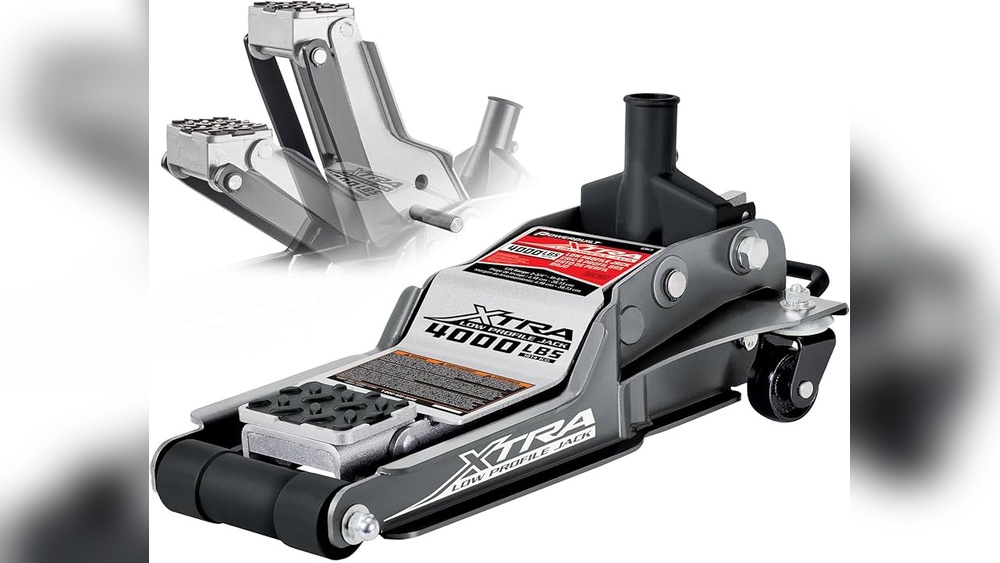
Types Of Jacks
Several jacks work for floor lifting. Bottle jacks are compact and use hydraulic pressure. Floor jacks have wide bases for stability and easy movement. Screw jacks lift slowly but hold steady without power. Choose a jack type that fits your space and job size.
Weight Capacity Considerations
Check the jack’s weight limit before buying. The jack must hold more than the floor’s weight. Overloading a jack causes failure and risk. Calculate the total weight including furniture and materials. Always pick a jack with extra capacity for safety.
Safety Features To Look For
Safety matters most during lifting. Look for jacks with locking mechanisms to hold position. Non-slip bases prevent the jack from slipping on surfaces. Pressure release valves stop sudden drops. Inspect the jack for damage before each use.
Identifying Lift Points
Identifying the correct lift points is crucial for safely jacking up a floor. The right spots provide solid support and prevent damage. Knowing where to place your jack helps you lift evenly and avoid accidents. This section explains how to find and mark those points clearly.
Locating Floor Joists
Floor joists are the main support beams under the floor. They run parallel and hold the floor’s weight. Use a stud finder to locate them through the floor surface. You can also tap the floor and listen for solid sounds. Joists feel harder and less hollow than other areas.
Once found, measure the distance between joists. Most joists are 16 or 24 inches apart. Mark their edges to ensure your jack sits directly on a joist. This prevents the jack from slipping or damaging weak spots.
Avoiding Weak Spots
Weak spots include gaps, cracks, or areas near plumbing and wiring. Avoid placing jacks on these fragile sections. These spots can break or cause injury if lifted. Check the floor for water damage or soft patches. Look under the floor with a flashlight if possible.
Also, avoid lifting near walls or corners. These areas may have less support and can shift when lifted. Stick to the center of the joists for the safest lift points.
Marking Support Areas
Use a pencil or chalk to mark the exact lift points. Mark both edges of the joists clearly. This helps when positioning the jack quickly and accurately. Draw a small box or circle around the spot for better visibility.
Keep your marks visible and clean. This reduces mistakes and saves time during the lifting process. Recheck the marks before you start jacking the floor.
Setting Up The Jack
Setting up the jack properly is the first step to safely raise a floor. This step ensures the jack works well and keeps the floor stable. Taking time here prevents accidents and damage. Follow these simple steps to prepare the jack correctly.
Positioning The Jack
Place the jack under a strong part of the floor. Look for a solid beam or joist to support the weight. Avoid weak or damaged areas. The jack must sit flat on the ground to work well. Check the floor is dry and clean before placing the jack.
Using Support Blocks
Put wooden blocks between the jack and the floor beam. These blocks spread the weight evenly and protect the floor. Use thick, sturdy wood for the blocks. Cut them to fit tightly without gaps. Never use soft or cracked wood as support.
Ensuring Stability
Check the jack stands straight and does not lean. Use a level tool if possible for accuracy. Make sure the ground under the jack is firm. Place extra blocks around the base for added support. Stop if the jack feels unstable or slips.
Executing The Lift
Executing the lift is the most critical step in jacking up a floor. It requires patience and careful control. The goal is to raise the floor slowly and evenly to avoid damage. Each movement matters. Precision keeps the structure safe and sound.
Lifting Slowly And Evenly
Start the lift by turning the jack handle slowly. Avoid quick or jerky motions. Raise the floor a little at a time. Stop often to check the progress. Even lifting prevents cracks and warping. Balance the pressure on all jacks used. Uneven lifting can cause serious problems.
Monitoring Floor Movement
Watch the floor closely while lifting. Look for any signs of cracking or shifting. Use a level or straight edge to check for tilt. Small shifts can lead to bigger issues. Note any unusual sounds or resistance. Adjust the jack or stop if you see problems. Monitoring ensures the floor moves safely.
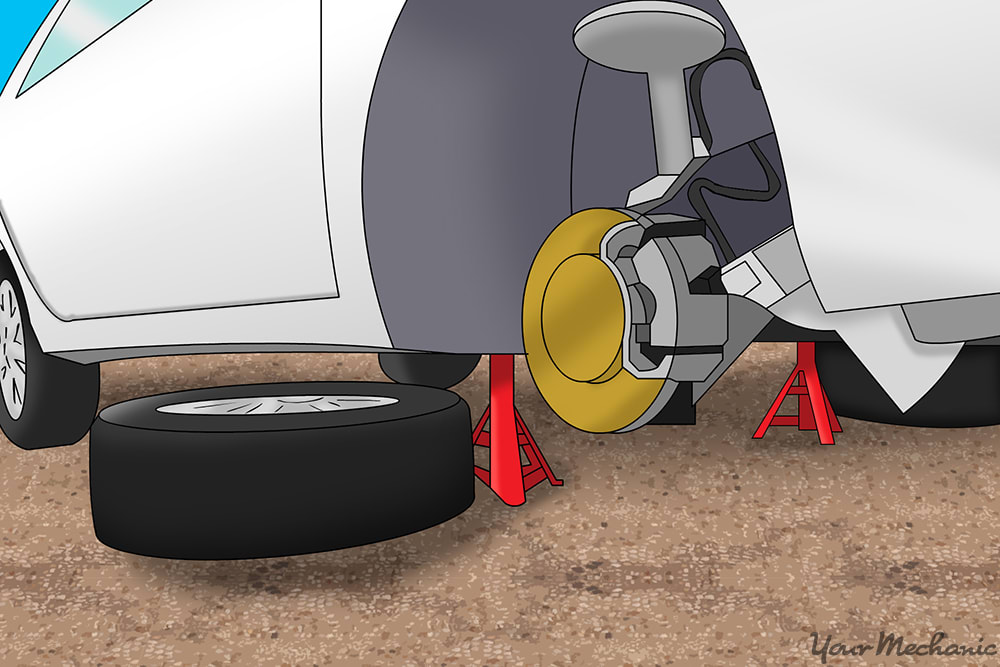
Maintaining Safety Precautions
Wear safety goggles and sturdy gloves before starting. Clear the area of tools and debris. Never place any part of your body under a lifted floor. Use strong, stable supports after lifting. Double-check all equipment for defects. Safety prevents accidents and injuries during the lift.
Credit: www.yourmechanic.com
Securing The Floor After Lifting
Securing the floor after lifting is a critical step in floor jacking. Without proper support, the floor can shift or fall back down. This can cause damage or create safety hazards. Taking the time to secure the floor ensures stability and safety during repairs.
Installing Temporary Supports
Place strong temporary supports under the lifted floor. Use adjustable jack posts or sturdy wooden beams. Position them close to the lifted area for better strength. Make sure the supports rest on a solid base. Tighten the supports carefully to hold the floor firmly in place.
Checking For Levelness
Use a level tool to check the floor’s alignment. Move the level across different spots on the lifted floor. The floor should be even and balanced. Adjust the supports slightly if you find any tilt. A level floor prevents future problems and keeps the structure safe.
Planning Next Steps
After securing and leveling the floor, decide on repairs needed. Identify damaged joists or beams that require replacement. Plan for permanent support installation to maintain floor stability. Make a clear list of materials and tools needed next. Careful planning saves time and avoids mistakes later.
Common Mistakes To Avoid
Jacking up a floor can fix problems and prevent further damage. Many people make mistakes that cause safety risks or worsen the issue. Avoiding these errors helps the job go smoothly and safely.
Overloading The Jack
Using a jack beyond its weight limit is risky. The jack can bend or break suddenly. Always check the jack’s maximum capacity before starting. Use multiple jacks if the floor is heavy. Spread the weight evenly to avoid accidents.
Ignoring Structural Damage
Do not ignore cracks or weak spots in the floor. These problems can worsen while jacking. Inspect the floor carefully for damage first. Repair or reinforce damaged areas before lifting. This prevents collapse or further harm.
Skipping Safety Gear
Safety gear protects you from injury. Wear gloves, goggles, and sturdy shoes. Use a hard hat if needed. Never try to jack a floor without proper protection. Safety gear helps you stay safe and confident during work.

Credit: www.youtube.com
Maintenance And Inspection Tips
Proper maintenance and regular inspection keep your floor jacking safe and effective. Neglect can cause damage or failure. Simple checks prevent costly repairs and hazards. Stay proactive to protect your home’s structure.
Regular Jack Maintenance
Check jacks before each use. Look for rust, cracks, or bent parts. Clean dirt and dust from moving parts. Lubricate screw threads to keep smooth operation. Replace worn or damaged jacks immediately. Store jacks in a dry place to avoid rust.
Inspecting Floor Supports
Examine beams and joists near the jack area. Look for signs of rot, cracks, or warping. Ensure supports sit firmly on solid ground or pads. Confirm no wood has insect damage. Tighten any loose bolts or fasteners.
Signs Of Structural Issues
Watch for new or growing cracks in walls and floors. Notice any uneven or sagging floor sections. Listen for creaking or popping sounds underfoot. Check doors and windows for sticking or gaps. Early detection saves money and keeps you safe.
Frequently Asked Questions
How Do You Safely Jack Up A Floor?
To safely jack up a floor, place a sturdy jack under a strong beam. Lift slowly and check stability. Use wooden blocks to support the raised floor securely. Avoid sudden movements to prevent damage or injury.
What Tools Are Needed To Jack Up A Floor?
You need a hydraulic floor jack or bottle jack, wooden blocks, a pry bar, and a level. Safety gloves and goggles are also recommended. These tools help lift and stabilize the floor properly during the process.
When Should You Jack Up A Sagging Floor?
Jack up a sagging floor when you notice unevenness, creaks, or visible dips. Early intervention prevents structural damage. Addressing sagging floors promptly helps maintain home safety and prevents costly repairs later.
Can Jacking Up A Floor Fix Foundation Issues?
Jacking up a floor can temporarily fix minor foundation issues by leveling the floor. However, it does not replace professional foundation repair. Consult a foundation expert for serious structural problems to ensure long-term safety.
Conclusion
Properly jacking up a floor takes care and attention. Always use the right tools and follow safety steps. Check the floor’s condition before starting the job. Lift slowly and steadily to avoid damage. Keep the area clear and work with a helper if possible.
This simple process can fix many floor problems. Taking your time ensures a safe and strong result. You can maintain your home better with these easy steps. Practice makes the task easier and safer each time.