Are your cabinet doors looking tired or outdated? Changing the hardware is one of the easiest and most affordable ways to give your cabinets a fresh new look.
But if you’re unsure how to put new hardware on cabinet doors, don’t worry—you’re about to learn simple steps that anyone can follow. Imagine opening your cabinets and feeling proud of the stylish handles or knobs you installed yourself. Keep reading, and you’ll discover how to transform your space quickly and confidently, even if you’ve never done this before.
Your kitchen or bathroom makeover starts here!
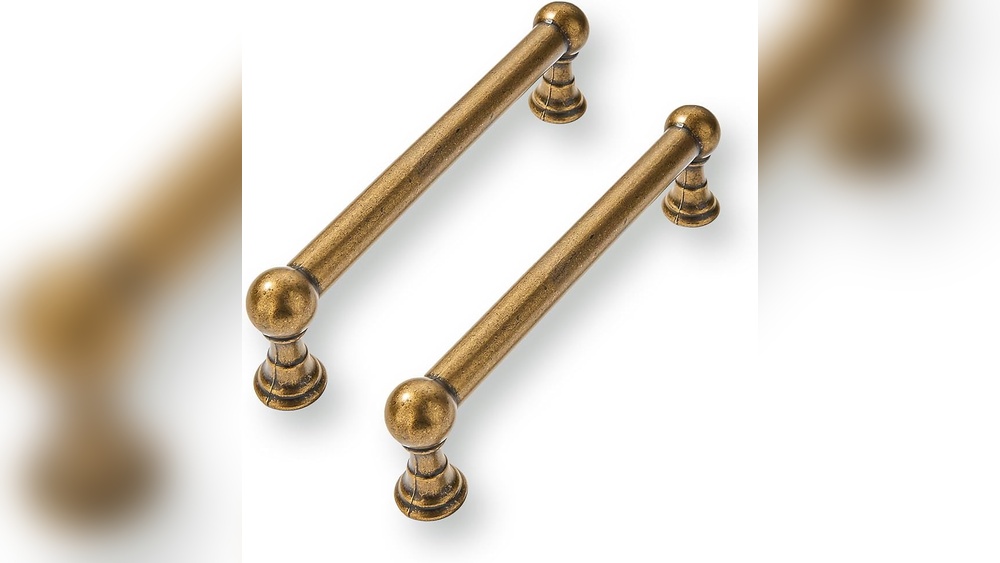
Choosing The Right Hardware
Choosing the right hardware for your cabinet doors changes the look and feel of your space. It is not just about function but also style. The right hardware adds character and makes your cabinets easier to use. Knowing what options are available helps you pick the best fit for your home.
Types Of Cabinet Hardware
Cabinet hardware mainly comes as knobs, pulls, and handles. Knobs are small and simple. Pulls are longer and offer a better grip. Handles usually have two screws and a solid grip. Each type suits different cabinet styles and uses. Think about how you use your cabinets daily.
Selecting Finish And Style
The finish of hardware affects the room’s look. Common finishes include brushed nickel, chrome, bronze, and black. Some finishes match modern spaces, others fit traditional rooms. Choose a style that blends with your cabinet colors and kitchen theme. A good finish also resists scratches and wear.
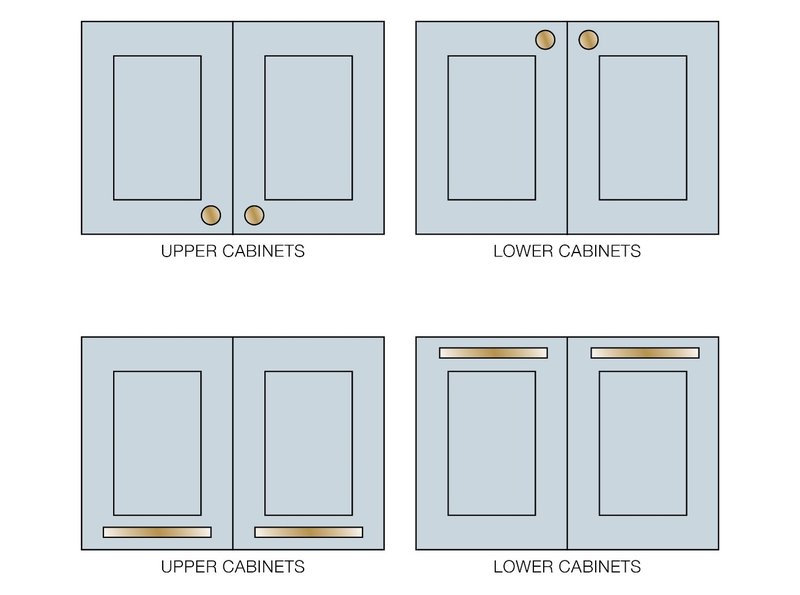
Measuring For Fit
Measure your cabinet doors before buying hardware. Check the distance between screw holes on existing hardware. This helps find pulls or knobs that fit without extra drilling. Measure the cabinet door thickness too. Proper fit ensures easy installation and long-lasting use.
Credit: www.emtek.com
Gathering Tools And Materials
Gathering the right tools and materials makes installing new cabinet door hardware easier. Preparing well saves time and avoids mistakes. You will know what to use and how to stay safe during the process.
Essential Tools
Start with basic tools like a screwdriver and a drill. A tape measure helps to find the exact spot for the hardware. A pencil marks the position. A level ensures the hardware is straight. A drill bit set is useful for making holes.
Hardware Components
Choose the correct handles or knobs for your cabinet doors. Check if screws come with the hardware. If not, buy screws that fit well. Use new mounting plates if your hardware needs them. Keep all parts organized before starting.
Safety Gear
Wear safety glasses to protect your eyes from dust and small chips. Use gloves to avoid splinters and sharp edges. Keep a clean workspace to reduce accidents. Make sure your tools are in good condition before use.
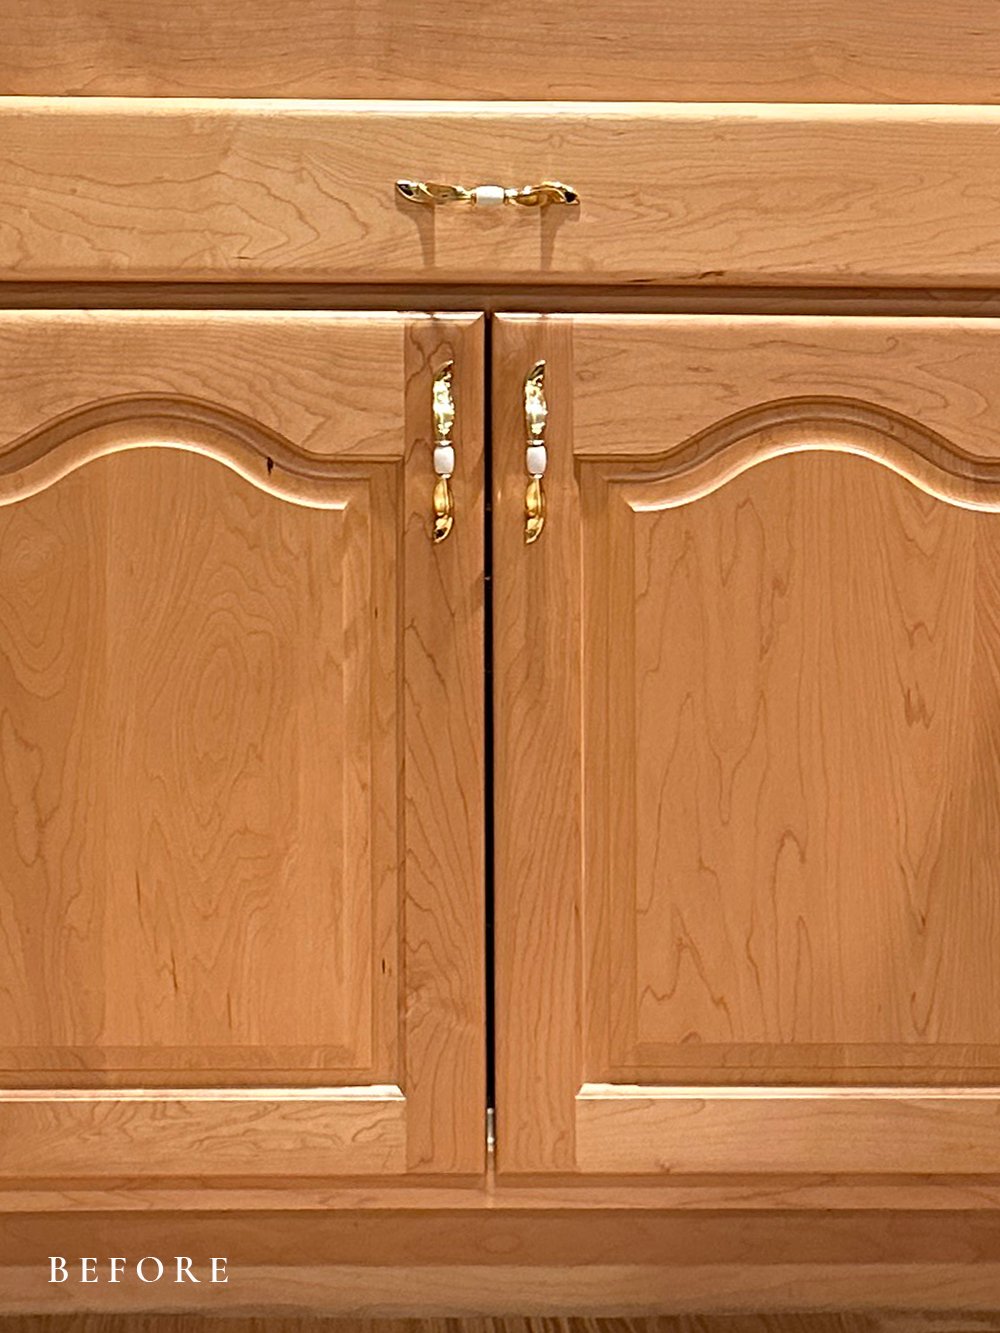
Removing Old Hardware
Removing old hardware from cabinet doors is the first step in updating your kitchen or bathroom. This process clears the way for new handles and knobs. It helps make sure the new hardware fits well and looks good.
Preparing The Workspace
Start by clearing the area around the cabinet doors. Remove items that can get in the way. Lay down a cloth or paper to catch screws or dirt. Have a screwdriver ready. Good lighting helps you see the hardware clearly.
Unscrewing Handles And Knobs
Use the screwdriver to turn the screws holding the handles or knobs. Turn slowly to avoid stripping the screws. Keep the screws in a small container for reuse or disposal. Gently pull the hardware off the door once the screws are loose.
Cleaning The Surface
After removing the hardware, clean the surface well. Use a mild cleaner and a soft cloth. Remove any dirt, grease, or old glue. This step ensures the new hardware sticks properly and looks neat. Let the surface dry before installing new pieces.
Credit: truepositiontools.com
Marking Drill Points
Marking drill points is a key step in adding new hardware to cabinet doors. Precise marks ensure the hardware fits perfectly and looks neat. Taking time at this stage avoids mistakes and wasted effort. Follow clear steps to mark the spots correctly before drilling.
Using Templates
Templates help mark drill points quickly and accurately. Many hardware sets come with paper or plastic templates. Place the template on the door where the hardware will go. Hold it steady and mark the holes with a pencil. This method reduces guesswork and keeps the holes aligned.
Measuring And Aligning
Measure distances carefully for a balanced look. Use a ruler or tape measure to find the center of the door. Mark equal distances from edges to keep hardware straight. Align marks on both doors if working on pairs. Straight alignment improves the cabinet’s overall appearance.
Double-checking Marks
Check your marks twice before drilling. Use a level to ensure horizontal or vertical alignment. Compare marks on both doors to confirm they match. A small error can cause hardware to sit crooked. Confirming marks saves time and avoids damage.
Drilling Holes Safely
Drilling holes in cabinet doors requires care and attention. Mistakes can cause cracks or misaligned hardware. Safety and precision matter most during this step. Follow simple tips to drill clean, exact holes for new hardware. Protect your cabinets and get the best results.
Choosing The Right Drill Bit
Pick a drill bit that fits the screw size. Use a bit made for wood if your doors are wooden. A sharp bit drills smoothly and reduces splintering. Avoid bits that are too large or too small. Correct size means less damage and a secure fit.
Drilling Techniques
Mark the hole spot clearly with a pencil. Use a center punch or nail to make a small dent. This prevents the drill bit from slipping. Hold the drill steady and start slowly. Increase speed once the bit grips the wood well.
Avoiding Damage
Place a scrap wood piece behind the door to prevent splinters. Drill straight and avoid angled holes. Stop drilling as soon as you break through the wood. Clean the hole edges with sandpaper to avoid roughness. Take your time; rushing causes mistakes.
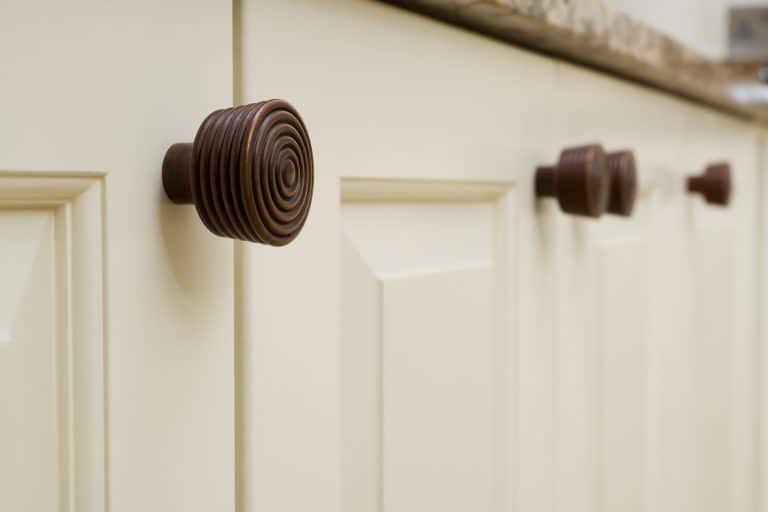
Installing New Hardware
Installing new hardware on cabinet doors is a simple way to refresh your kitchen or bathroom. It changes the look and feel instantly without much effort. This process needs some basic tools and a bit of patience. Follow these steps to ensure your new handles and knobs fit perfectly and work well.
Attaching Handles And Knobs
Start by lining up the new handle or knob with the existing holes. Place the hardware on the door and insert the screws from the inside. Make sure the handle sits straight and matches the door style. This step sets the stage for a neat and secure fit.
Tightening Screws Properly
Use a screwdriver to tighten the screws firmly. Avoid over-tightening as it can strip the holes or damage the door. Tight screws keep the hardware from wobbling. Check that the hardware feels solid but do not force the screws too hard.
Testing For Stability
After installation, pull and push the handles gently. They should stay firmly attached without any movement. If the hardware feels loose, tighten the screws a little more. Stable hardware lasts longer and feels better to use every day.
Finishing Touches
After installing new hardware on your cabinet doors, the final steps bring everything together. These finishing touches ensure your cabinets look neat and work well for a long time. Taking time here helps keep your kitchen or room tidy and stylish.
Cleaning Up Residue
Small bits of glue or dust can stick around after installation. Use a soft cloth with warm water to wipe the surfaces. Avoid harsh cleaners that can damage the hardware or cabinet finish. Removing all residue makes the hardware shine and keeps the area clean.
Adjusting Alignment
Check that the handles or knobs sit straight and feel secure. Tighten screws if the hardware moves or feels loose. Slight shifts can happen during use, so adjust as needed. Proper alignment improves how the cabinets open and look.
Maintaining Hardware Longevity
Keep hardware in good shape by cleaning it regularly. Use mild soap and water to avoid wear and tear. Avoid using abrasive pads or strong chemicals. Regular checks for loose screws prevent damage and keep hardware working smoothly.
Credit: roomfortuesday.com
Frequently Asked Questions
How Do I Choose The Right Hardware For Cabinet Doors?
Select hardware that matches your cabinet style and finish. Consider size, functionality, and comfort. Ensure compatibility with door thickness for a perfect fit.
What Tools Are Needed To Install New Cabinet Hardware?
You need a drill, screwdriver, tape measure, pencil, and level. These tools help ensure accurate placement and secure attachment of hardware.
How Do I Measure For New Cabinet Door Hardware?
Measure the distance between existing holes or desired placement points. Use a tape measure and mark drill spots precisely for proper alignment.
Can I Reuse Old Holes When Installing New Hardware?
Yes, if the new hardware matches old hole spacing. Otherwise, fill old holes and drill new ones to ensure a secure fit.
Conclusion
Changing cabinet door hardware can refresh your space fast. Measure carefully and mark spots before drilling. Choose hardware that fits your style and door type. Take your time to avoid mistakes. Small updates make a big difference in any room.
Enjoy your improved cabinets and the new look they bring. Keep practicing to get better with each project. Simple steps lead to great results and satisfaction.