Are you tired of struggling to hang heavy items on your walls without worrying about them falling down? Installing a molly wall anchor can be the simple solution you need.
This small but powerful tool helps you secure shelves, mirrors, and other heavy objects safely and firmly. In this guide, you’ll learn exactly how to install a molly wall anchor step-by-step, even if you’ve never done it before. Keep reading, and you’ll gain the confidence to tackle your next wall project with ease and get the strong hold your items deserve.
Choosing The Right Molly Anchor
Choosing the right molly wall anchor is important for a strong hold. The right anchor keeps your items safe on the wall. It depends on the type of wall and the weight of the object. Understanding different anchors helps you pick the best one. This guide breaks down the key points to consider.
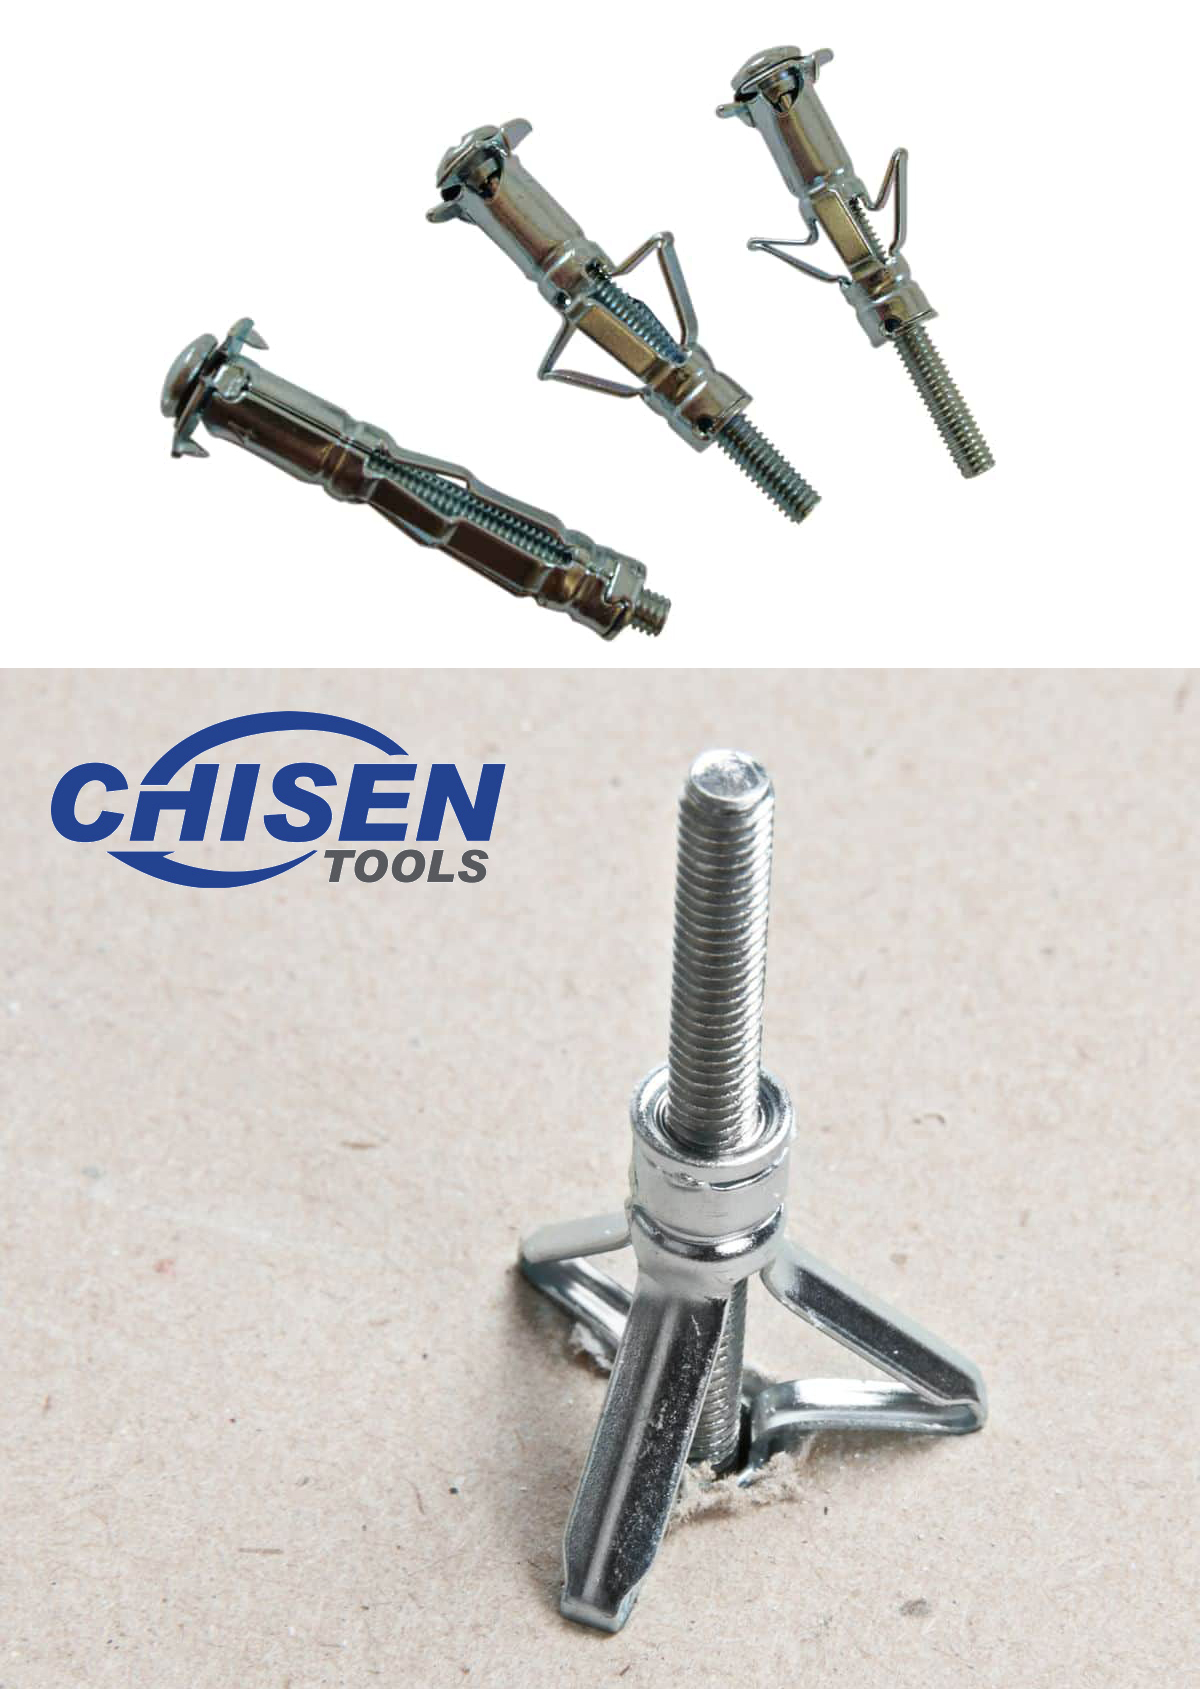
Types Of Molly Anchors
Molly anchors come in several types. Some have metal sleeves that expand inside the wall. Others use plastic sleeves for lighter loads. Some anchors have a flange to stop them from going too far. Knowing the types helps match the anchor to your project.
Weight Capacity And Size
Each molly anchor supports a specific weight. Check the package for weight limits. Choose an anchor that holds more than your item’s weight. Size matters too. Bigger anchors usually hold more weight. Pick the right size to avoid wall damage or failure.
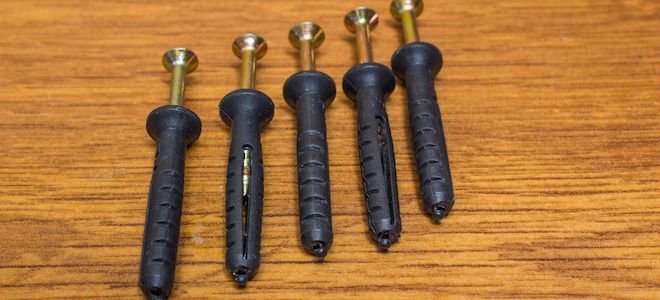
Materials And Wall Compatibility
Molly anchors work best with drywall or plaster walls. Some anchors fit metal or wood studs better. The anchor material affects strength and rust resistance. Metal anchors are strong but may rust. Plastic anchors resist rust but hold less weight. Match the anchor material to your wall type for best results.
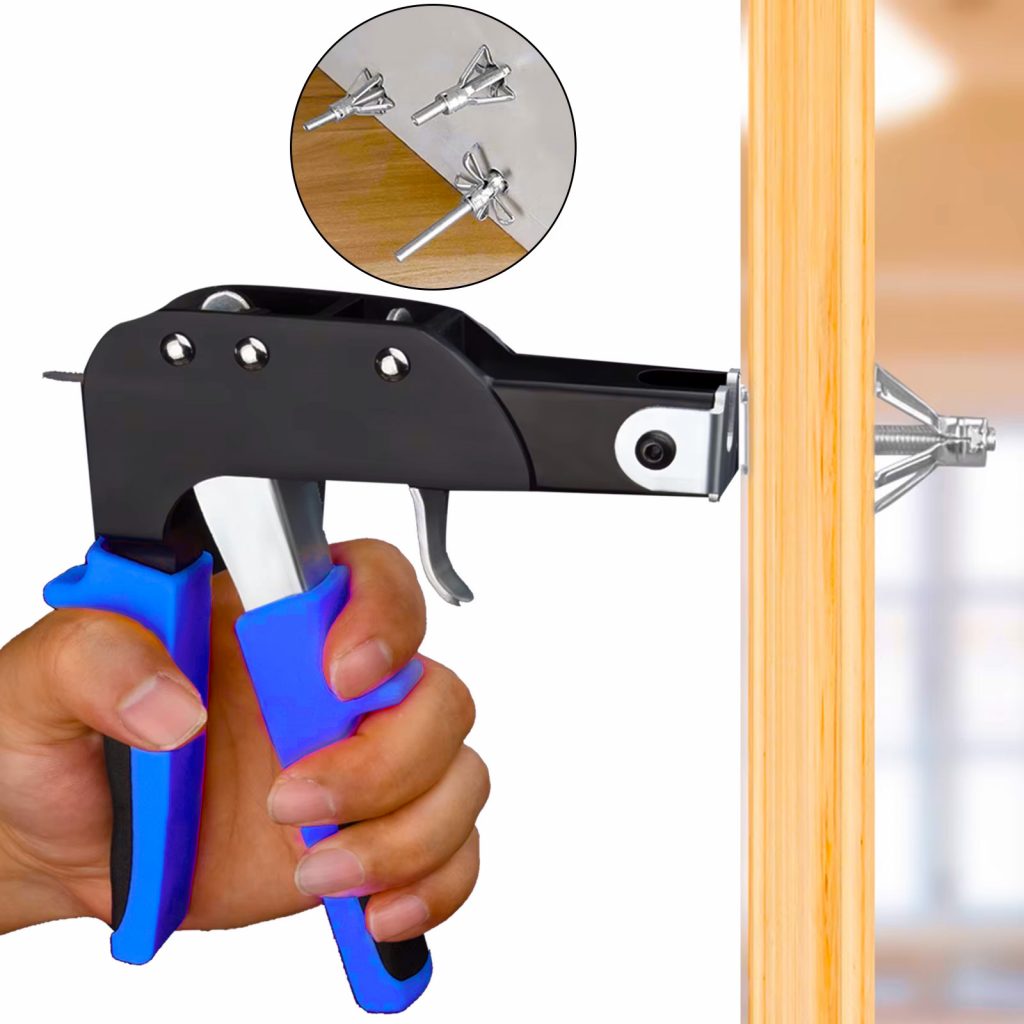
Tools And Materials Needed
Installing a molly wall anchor requires a few basic tools and materials. Having the right items makes the job easier and safer. This section explains what you need before starting.
Drill And Drill Bits
A power drill is needed to make holes in the wall. Choose drill bits that match the anchor size. Use a smaller bit first to make a pilot hole. This helps prevent damage to the wall.
Screwdriver And Screws
A screwdriver is essential for tightening the screws in the anchor. Use a screwdriver that fits the screw head well. This avoids stripping the screw and ensures a tight fit.
Measuring Tape And Pencil
Measure carefully where you want to place the anchor. Mark the spot with a pencil. Accurate marks help keep your work neat and aligned.
Preparing The Wall
Preparing the wall is the first step to install a molly wall anchor correctly. This process helps ensure a strong and safe hold for your fixture. Taking time to prepare the wall carefully will prevent mistakes and save effort later.
Locating The Spot
Find the exact place where you want to install the anchor. Choose a spot on the drywall that can support the object. Avoid weak or damaged areas. A solid location will hold the anchor firmly.
Marking The Drilling Point
Use a pencil to mark the drilling point clearly. Make the mark visible but small. This helps guide the drill accurately. Double-check the position before drilling to avoid errors.
Checking For Obstacles
Look inside the wall for any pipes, wires, or studs. Use a stud finder or a small drill bit to check. Avoid drilling into obstacles to keep safety and prevent damage. Clear space ensures proper anchor installation.
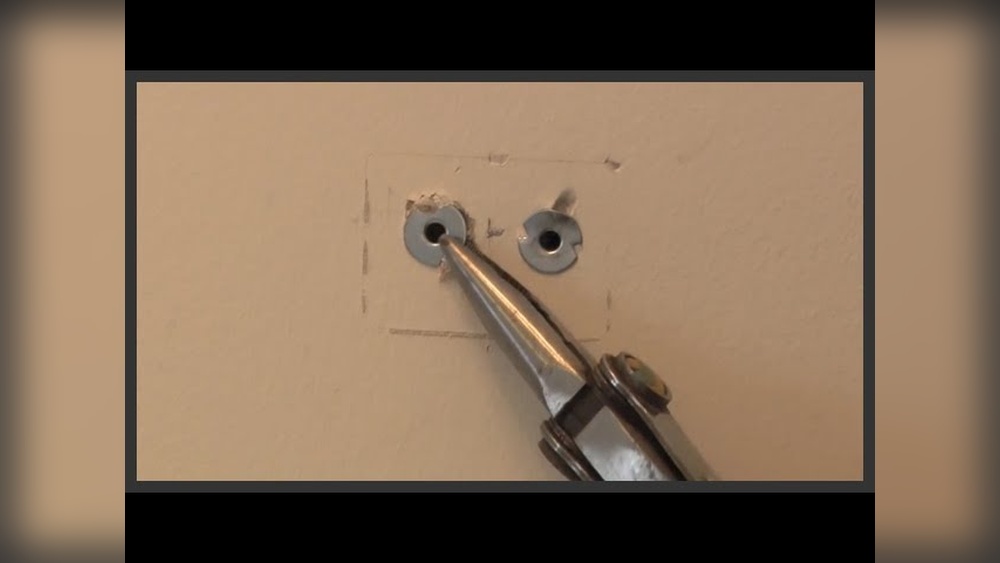
Credit: plierpincer.com
Drilling The Hole
Drilling the hole is a key step when installing a molly wall anchor. It ensures the anchor fits tightly and holds weight properly. Taking time to drill the right hole makes the whole process easier. It also prevents damage to the wall and improves anchor strength.
Selecting The Correct Drill Bit Size
Use a drill bit that matches the molly anchor’s diameter. The hole must be just wide enough for the anchor to fit snugly. Too large a bit makes the anchor loose. Too small a bit can crack the wall or stop the anchor from going in.
Check the anchor package for the recommended drill bit size. Use a new or sharp bit for clean cuts. A dull bit can cause rough holes or wall damage.
Drilling At The Right Depth
Drill the hole to the same length as the anchor. Mark the drill bit with tape to avoid drilling too deep. Too shallow a hole stops the anchor from expanding fully. Too deep a hole makes the anchor unstable.
Hold the drill steady and straight. This helps keep the hole clean and properly shaped. Drilling at an angle can weaken the anchor hold.
Cleaning The Hole
Remove dust and debris from inside the hole before inserting the anchor. Use a small brush, vacuum, or blow air into the hole. Clean holes help the anchor grip better. Dust or loose material can reduce the anchor’s strength.
Take your time cleaning the hole. It improves the overall hold and safety of the installation.
Inserting The Molly Anchor
Inserting the molly wall anchor is a key step for a strong hold. The anchor must go in straight and fit well. This section guides you through placing the anchor correctly.
Aligning The Anchor
Hold the molly anchor so the open end faces out. Line it up with the drilled hole in the wall. Make sure the anchor sits straight and not at an angle. Proper alignment helps the anchor expand correctly inside the wall.
Tapping It Into Place
Use a hammer to gently tap the anchor into the hole. Tap slowly to avoid bending or damaging the anchor. The goal is to insert it flush with the wall surface. Stop tapping once the anchor is fully inside the hole.
Ensuring A Flush Fit
Check if the anchor sits flat against the wall. It should not stick out or be recessed. A flush fit means the anchor is ready for the screw. Adjust by tapping lightly if needed to get a perfect fit.
Expanding The Anchor
Expanding the molly wall anchor is a key step to ensure a strong hold inside the wall. This process allows the anchor to grip tightly behind the wall surface. It prevents the anchor from pulling out under weight or pressure.
Follow these clear steps for expanding the anchor correctly. This ensures your fixture stays safe and secure.
Using The Screwdriver
Start by inserting a screwdriver into the anchor’s screw head. Use a flat or Phillips head screwdriver depending on the screw type. Hold the anchor steady with one hand. Turn the screwdriver slowly with the other hand.
Turning The Screw To Expand
Turn the screw clockwise to expand the anchor inside the wall. As you turn, the metal legs of the anchor open wide behind the drywall. This creates a strong grip that holds the anchor firmly. Stop turning once the anchor feels tight. Avoid over-tightening to prevent damage.
Checking For Secure Fit
After expanding, gently pull on the anchor to check its hold. It should feel solid and not move inside the wall. If loose, tighten the screw a little more. A secure fit means your anchor will support weight safely. Now, you can attach your fixture with confidence.
Attaching Fixtures
Attaching fixtures to a wall using molly anchors is simple and secure. This step holds your items firmly in place. Correct attachment prevents damage and keeps everything steady.
Positioning The Fixture
Place the fixture’s holes exactly over the molly anchor. Align the fixture flat against the wall. Check that it fits well and does not wobble. This setup helps the screws go in smoothly.
Screwing Into The Anchor
Use a screwdriver to turn the screw into the molly anchor. Turn slowly and steadily to avoid stripping the screw. The anchor expands inside the wall for a tight hold. Stop when the fixture feels snug against the wall.
Verifying Stability
Gently pull or wiggle the fixture to check its strength. It should not move or feel loose. A firm fixture means the molly anchor is holding well. If loose, tighten the screw a bit more.
Credit: plierpincer.com
Troubleshooting Common Issues
Troubles with molly wall anchors happen often. Knowing how to fix these issues saves time and effort. Below are common problems and easy ways to solve them.
Anchor Spinning In The Hole
Anchor spinning means it turns but does not tighten. This happens if the hole is too big. Use a smaller drill bit next time. Try pushing the anchor deeper before tightening. If it still spins, replace it with a new one.
Wall Crumbling Or Damage
Wall damage occurs if the hole is too large or the wall is weak. Avoid drilling too wide holes. Use a drill bit size that matches the anchor size exactly. For fragile walls, choose a different anchor type. Clean loose debris from the hole before inserting the anchor.
Anchor Not Expanding Properly
Anchors expand to hold tightly. If they don’t, the screw might be too short or the anchor is defective. Check screw length; it should fit the anchor fully. Insert the screw slowly and firmly. Replace the anchor if it fails to open inside the wall.
Tips For Stronger Support
For strong support, proper use of molly wall anchors is key. These anchors hold heavy items on drywall and hollow walls. Follow simple tips to increase their strength. This ensures your mounted items stay secure and safe.
Using Multiple Anchors
Use more than one anchor for heavy or wide objects. Spread anchors evenly to share the weight. This reduces stress on each anchor and on the wall. It also prevents damage or loosening over time.
Choosing The Right Anchor Size
Select anchors based on the weight and size of your item. Bigger anchors hold more weight and provide better grip. Check the anchor packaging for weight limits. Use anchors that fit snugly in the wall hole.
Regular Inspection And Maintenance
Check anchors regularly to ensure they stay tight. Look for any wobbling or signs of damage. Tighten loose anchors carefully without overdoing it. Replace any worn or damaged anchors promptly to keep support strong.
Credit: www.doityourself.com
Frequently Asked Questions
What Tools Do I Need To Install A Molly Wall Anchor?
You need a drill, drill bit, screwdriver, hammer, and the molly anchor itself. These tools ensure proper installation and secure anchoring.
How Do I Choose The Right Size Molly Anchor?
Select a molly anchor size based on wall thickness and the weight of the object you’re hanging. Check packaging for weight limits.
Can Molly Anchors Be Used In Drywall?
Yes, molly anchors work well in drywall. They expand behind the wall to provide strong support for medium-weight items.
How Much Weight Can A Molly Wall Anchor Hold?
Molly anchors typically hold between 25 to 50 pounds, depending on size and wall material. Always verify weight ratings before use.
Conclusion
Installing a molly wall anchor is simple and useful. It holds items firmly on drywall. Follow each step carefully for best results. Use the right tools to avoid mistakes. Test the anchor’s grip before hanging heavy objects. This method saves you time and effort.
You can hang shelves, mirrors, or decorations safely. Practice makes the process easier and faster. Try it yourself and see the difference. A strong anchor keeps your walls secure and neat.