If you’ve ever needed to hook a chest tube to wall suction, you know it can feel tricky the first time. But don’t worry—getting it right is crucial for your patient’s comfort and safety.
This guide will walk you through each step clearly and simply, so you can feel confident every time you connect that tube. By the end, you’ll have the skills to handle this important task smoothly and effectively. Ready to learn how to do it like a pro?
Let’s get started.
Chest Tube Basics
Understanding chest tubes is important before hooking them to wall suction. Chest tubes help remove air, fluid, or blood from around the lungs. This process allows the lungs to expand properly for breathing. Knowing the basics makes it easier to manage and care for these tubes safely.
Chest tubes come in different types and sizes. Each type serves a specific purpose depending on the patient’s condition. Proper use of chest tubes improves healing and prevents complications.
Purpose Of Chest Tubes
Chest tubes clear unwanted air, fluid, or blood from the chest cavity. This helps the lungs stay fully inflated. Doctors use chest tubes to treat conditions like pneumothorax, hemothorax, or pleural effusion. Removing these substances reduces pressure on the lungs. It improves breathing and reduces pain. Chest tubes also help monitor chest drainage after surgery or injury.
Types Of Chest Tubes
There are several types of chest tubes. Large-bore tubes remove thick fluids or blood. Small-bore tubes are used mainly for air removal. Some tubes have multiple holes along their length for better drainage. The choice depends on what needs to be drained. Tubes also vary in flexibility and length. Proper selection ensures effective treatment and comfort for the patient.
Equipment Needed
Setting up a chest tube to wall suction needs specific equipment. Having the right tools ensures safety and effectiveness. This section covers the main items required for the process.
Chest Tube Set
The chest tube set includes the tube itself and drainage system. It also contains connectors and clamps. The tube must be sterile and appropriate for the patient’s condition. Proper sizing is important to avoid complications.
Wall Suction Setup
Wall suction provides the needed negative pressure. It includes suction tubing and a vacuum regulator. The suction source should be checked to ensure it works correctly. The pressure settings must match medical guidelines.
Safety Gear
Safety gear protects both patient and healthcare worker. Gloves, masks, and eye protection are essential. Using sterile gloves prevents infection. Eye protection guards against fluid splashes. Always wear the proper gear before starting.
Preparing The Site
Preparing the site is a crucial step before hooking a chest tube to wall suction. It ensures the procedure is safe and clean. Proper preparation reduces infection risk and helps the process go smoothly.
Positioning The Patient
Place the patient in a comfortable, semi-upright position. This position helps the chest tube drain fluid or air effectively. Ensure the arm on the affected side is raised above the head. This exposes the area for easy access and lowers discomfort. Keep the patient calm and still during the setup.
Sterile Field Preparation
Clean the skin around the chest tube site with an antiseptic solution. Use circular motions starting from the insertion point outward. Allow the area to dry completely to kill germs. Set up a sterile drape around the site to create a clean workspace. Wear sterile gloves to avoid contaminating the area. All instruments and materials must be sterile before use.

Credit: www.nicunursenatalie.com
Connecting The Chest Tube
Connecting a chest tube to wall suction is a careful process. This step ensures the tube works properly to remove air, fluid, or blood from the chest. Proper connection helps the patient breathe better and prevents complications.
Follow the steps below to connect the chest tube safely and effectively.
Inspecting The Tube
Check the chest tube for any damage or kinks. Look for cracks, holes, or blockages. Make sure the tube is clean and dry. Confirm the tube size matches the patient’s needs. Inspect the connectors for secure fittings. A damaged tube can cause leaks or infection.
Attaching To Drainage System
Connect the chest tube to the drainage system securely. Use the proper adapter or connector. Tighten all connections to avoid air leaks. Position the drainage system below the patient’s chest level. Check the suction settings on the wall unit. Ensure suction is steady but not too strong. Confirm the tube drains fluid or air smoothly into the system.
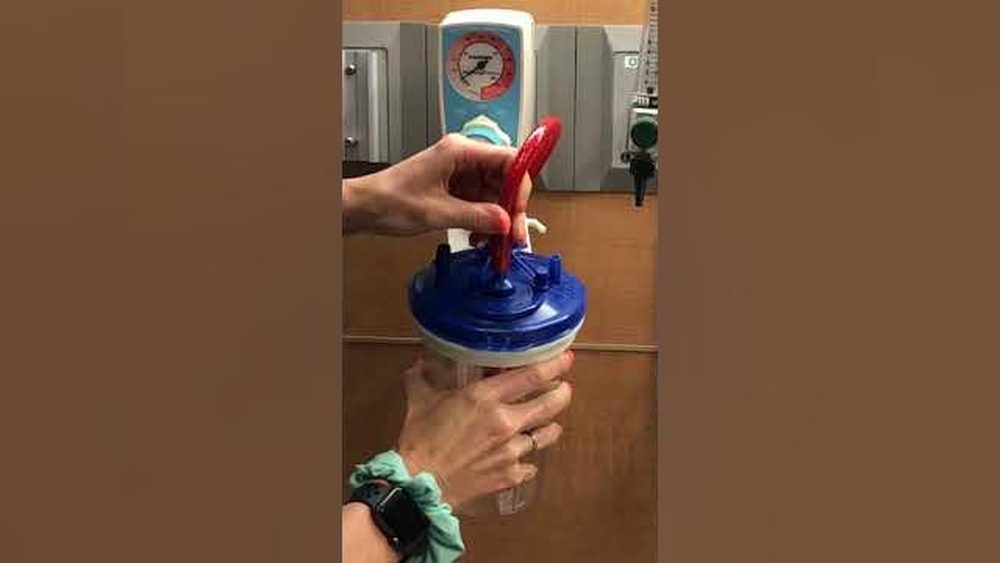
Hooking To Wall Suction
Hooking a chest tube to wall suction is an important step in patient care. It helps remove air, fluid, or pus from the chest cavity. Proper connection ensures the suction works well and the patient feels better quickly.
Follow clear steps to connect the chest tube correctly. This keeps the system safe and effective. Understanding each part of the process makes it easier and safer.
Locating The Suction Port
Start by finding the suction port on the wall unit. It is usually labeled and easy to spot. The port is where you connect the suction tubing. Make sure the port is clean and free of dust.
Connecting Suction Tubing
Take the suction tubing and attach one end to the chest tube device. Connect the other end firmly to the wall suction port. Check the tubing for cracks or kinks before connecting. A tight connection prevents air leaks and maintains suction.
Adjusting Suction Pressure
Set the suction pressure according to the doctor’s orders. Use the control knob on the wall suction unit. Too much pressure can harm the patient. Too little pressure may not remove fluid or air properly. Watch the pressure gauge closely to keep it steady.
Credit: wtcs.pressbooks.pub
Monitoring And Troubleshooting
Monitoring and troubleshooting are key parts of managing a chest tube hooked to wall suction. Careful observation helps avoid complications and keeps the system working well. Early detection of problems ensures quick fixes and better patient safety.
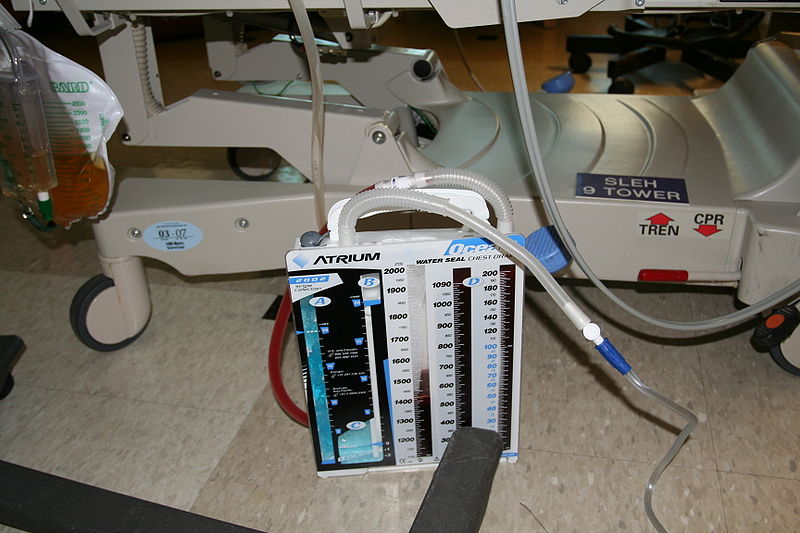
Checking For Air Leaks
Air leaks can cause the chest tube to lose suction. Watch the water seal chamber for continuous bubbling. Small bubbles mean a minor leak, often normal. Large or constant bubbles suggest a serious air leak. Check all connections and tube sites for loose fittings or cracks. Tighten or replace parts as needed. Record any leaks and inform the medical team immediately.
Ensuring Proper Drainage
Drainage should flow steadily and match the patient’s condition. Note the color, amount, and type of fluid in the collection chamber. Sudden changes, like bright red blood or cloudy fluid, need prompt attention. Keep the tubing straight and free of kinks. Make sure the collection chamber stays below the chest level. This helps fluid drain naturally and prevents backflow.
Responding To Alarms
Wall suction devices often have alarms to warn of issues. Common alarms indicate low suction, blockages, or disconnections. Check the suction settings first to confirm they are correct. Inspect the tubing for clots or bends. Reconnect any loose parts. If the alarm keeps sounding, call for help right away. Do not silence alarms without checking the cause.
Safety Precautions
Safety is the top priority when hooking a chest tube to wall suction. Proper precautions protect both the patient and healthcare staff. Following safety steps reduces risks like infection and emergencies. This section covers key safety measures to keep the process safe and effective.
Preventing Infection
Clean hands before touching the chest tube or suction equipment. Use sterile gloves to avoid germs. Disinfect the suction tubing connection points carefully. Keep the chest tube dressing dry and intact. Check the site often for redness or swelling. Replace any dirty or wet dressings immediately. Avoid unnecessary handling of the chest tube. These steps help stop infections from developing.
Handling Emergencies
Be ready for sudden changes in the patient’s condition. Know how to quickly disconnect the suction if needed. Keep emergency tools nearby, like clamps and sterile gauze. Monitor the chest tube drainage closely for blockages or leaks. Report any unusual signs like heavy bleeding or breathing trouble. Stay calm and call for help right away. Acting fast can prevent serious complications.

Credit: www.youtube.com
Frequently Asked Questions
How Do You Connect A Chest Tube To Wall Suction?
First, ensure the suction pressure is set correctly. Attach the chest tube’s drainage system to the suction tubing. Then, connect the suction tubing securely to the wall suction outlet. Check for airtight connections to maintain proper negative pressure and prevent air leaks.
What Suction Pressure Is Ideal For Chest Tubes?
The recommended suction pressure is usually between 20 to 40 cmH2O. This range helps evacuate air or fluid effectively without damaging lung tissue. Always follow specific hospital protocols or physician orders to ensure patient safety and optimal chest tube function.
Why Is Wall Suction Important For Chest Tubes?
Wall suction helps remove air, fluid, or blood from the pleural space. It restores normal lung expansion and prevents complications like pneumothorax. Proper suction maintains negative pressure, aiding in faster patient recovery and reducing the risk of infection.
How To Ensure Chest Tube Suction Is Working Properly?
Monitor for continuous bubbling in the water seal chamber and tidaling with respiration. Check tubing for kinks or disconnections. Verify suction pressure settings and airtight connections to confirm the system functions efficiently and safely.
Conclusion
Hooking a chest tube to wall suction is a key nursing skill. Follow each step carefully to ensure safety and function. Check all connections for tightness and watch for leaks. Monitor the suction pressure as recommended. Stay calm and focused during the process.
Practice helps build confidence and speed. Always prioritize patient comfort and safety. With proper care, chest tube management supports better recovery. Keep learning and stay updated on best practices. This skill protects patients and aids healing. Simple steps make a big difference every time.