Is your brake light not working? It might be time to change your stop light switch.
This small but crucial part ensures your brake lights turn on when you press the pedal. Ignoring it can lead to safety risks and even traffic tickets. Don’t worry if you’ve never done this before—changing a stop light switch is easier than you think.
In this guide, you’ll find simple, step-by-step instructions to fix it yourself and save time and money. Keep reading to learn how to get your brake lights working perfectly again.
Signs Of A Faulty Stop Light Switch
The stop light switch plays an important role in vehicle safety. It controls the brake lights that warn drivers behind you. When this switch stops working, it can cause serious issues. Recognizing the signs early helps avoid accidents and costly repairs.
Common Symptoms
One common symptom is brake lights that never turn on. Another is brake lights that stay on all the time. Sometimes, the cruise control stops working because of this switch. The car may also show strange dashboard warnings. These signs point to a faulty stop light switch.
Safety Concerns
Brake lights warn other drivers when you slow down or stop. Without working brake lights, accidents can happen easily. Drivers behind may not see you braking in time. This increases the chance of rear-end collisions. Fixing the stop light switch keeps you and others safe on the road.
Tools And Materials Needed
Changing a stop light switch requires the right tools and materials. Having everything ready saves time and avoids frustration. This section lists all you need for a smooth process.
Basic Tools
- Flathead screwdriver for prying connectors
- Phillips screwdriver to remove screws
- Socket wrench set for bolts
- Pliers to handle clips and wires
- Flashlight to see in dark areas
- Multimeter to test electrical connections
Replacement Parts
- New stop light switch matching your vehicle model
- Electrical tape to secure wiring
- Zip ties to organize cables
- Contact cleaner to clean connections
Preparing Your Vehicle
Start by parking your vehicle on a flat surface and turning off the engine. Make sure the car is cool before working near the brake pedal. Gather basic tools like screwdrivers and wrenches for the job ahead.
Safety Precautions
Start by parking your vehicle on a flat surface. Engage the parking brake. Switch off the engine and remove the key. Disconnect the car battery to avoid electric shock. Wear safety gloves to protect your hands. Use safety glasses to shield your eyes from dust or debris. Keep a flashlight nearby for better visibility. Clear the area under the dashboard for easy access. Ensure the car is stable before you work underneath.
Locating The Stop Light Switch
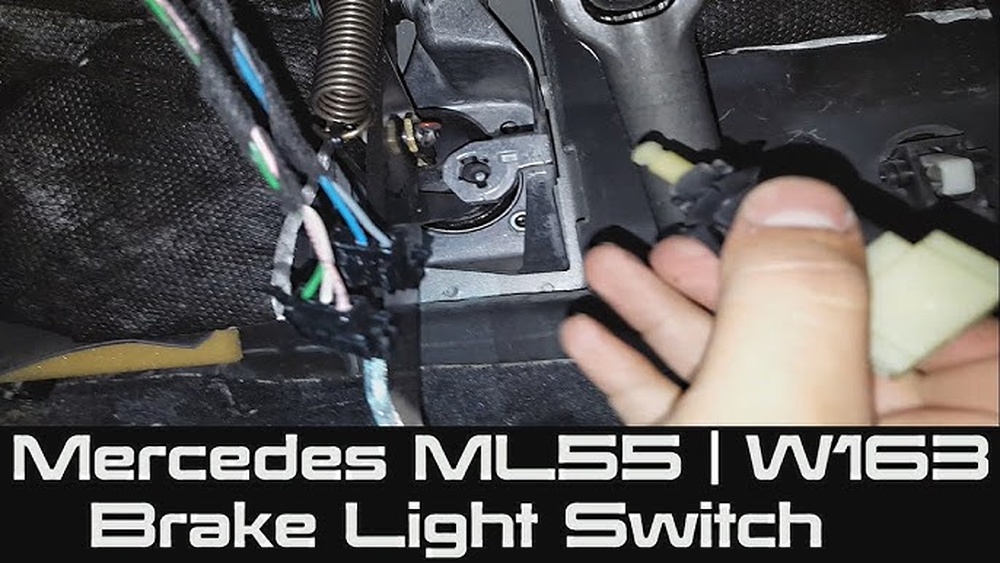
The stop light switch is usually near the brake pedal. Look under the dashboard on the driver’s side. It is a small device attached to the brake pedal arm. The switch has wires connected to it. Use a flashlight to spot it in dark spaces. Check your vehicle manual for exact location details. Identifying the correct switch is crucial before replacement. Mark the switch position for easier reinstallation.
Credit: www.youtube.com
Removing The Old Stop Light Switch
Removing the old stop light switch is the first step to fixing brake light issues. This part often wears out or breaks. Taking it out carefully helps you avoid damage. Follow these simple steps for a smooth removal process.
Safety is key. Work slowly and use the right tools. This guide makes the job clear and easy.
Disconnecting The Battery
Start by disconnecting the car battery. This stops any electrical shocks or shorts. Use a wrench to remove the negative cable first. This cable is usually black. Keep the cable away from the battery to avoid contact.
Accessing The Switch
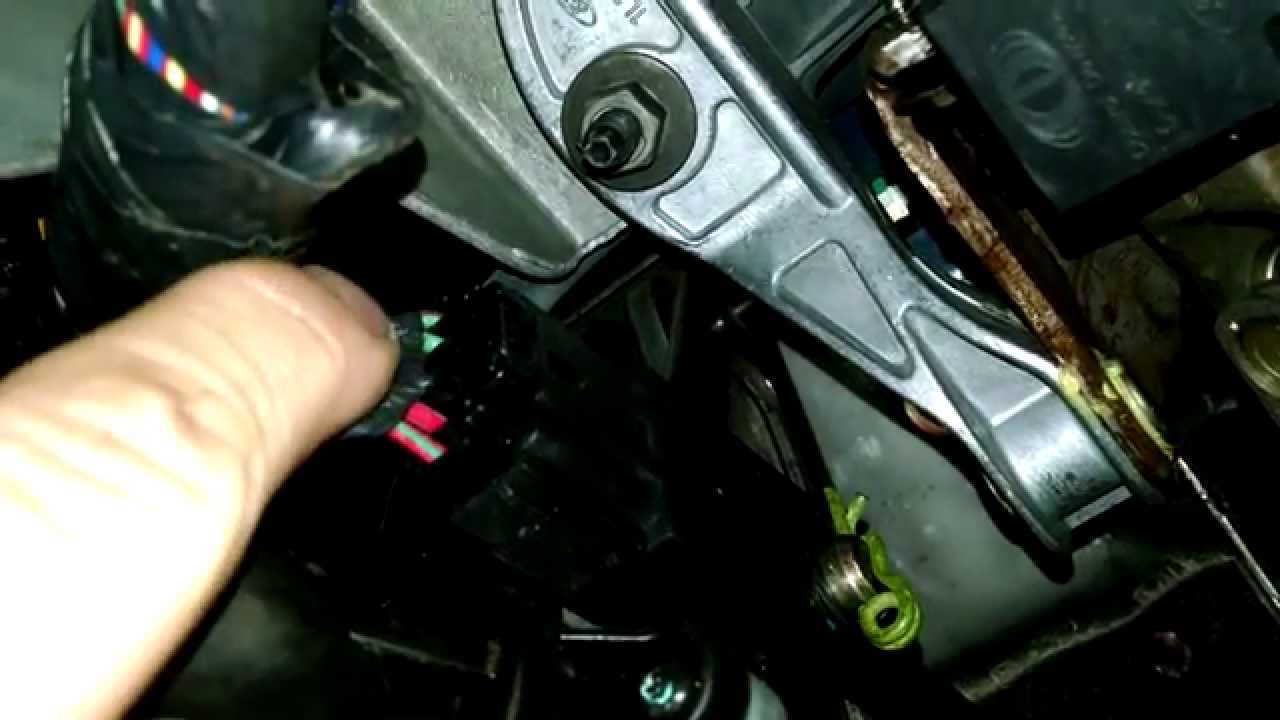
Locate the stop light switch near the brake pedal. It is often attached to a bracket. You may need to move some parts for better access. Use a flashlight to see clearly in tight spaces.
Detaching The Switch
Unplug the wiring connector from the switch carefully. Press the tab and pull the plug out. Use a screwdriver or wrench to remove the screws or nuts holding the switch. Keep these small parts safe for reinstallation.
Installing The New Stop Light Switch
Installing the new stop light switch is a key step in your repair. It ensures your brake lights work correctly. Follow these simple steps carefully for a smooth installation.
Positioning The Switch
Place the new switch where the old one was located. Align it with the brake pedal arm. Make sure it fits snugly without forcing it. The switch should sit firmly to avoid movement.
Securing The Switch
Use screws or clips to fasten the switch in place. Tighten them gently to hold the switch steady. Avoid over-tightening, which can damage the switch or bracket. The switch must not shift when the pedal moves.
Reconnecting Wiring
Attach the wiring harness to the new switch. Push the connector firmly until it clicks. Check that all wires match the original setup. Loose connections can cause the brake lights to fail.
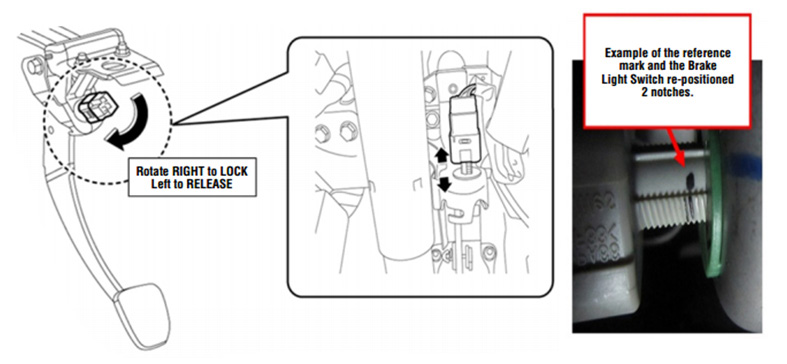
Credit: subaru.oemdtc.com
Testing The New Switch
Testing the new stop light switch is a key step after installation. It ensures the switch works right and your brake lights respond properly. This step helps catch any issues before you finish the job. Proper testing keeps you safe on the road.
Functionality Check
Start by pressing the brake pedal slowly. Watch the brake lights at the back of your car. They should turn on as soon as you press the pedal. Release the pedal and check that the lights turn off. Repeat a few times to confirm consistent operation. Check both brake lights for full brightness. If all lights work, the switch is functioning correctly.
Troubleshooting Tips
If the brake lights do not work, check the switch connection. Make sure the wiring plug is secure and not loose. Test the switch again after securing the connection. If the problem continues, check the fuse related to brake lights. Replace the fuse if it is blown. Another test is to use a multimeter to check switch continuity. No continuity means the switch might be faulty. Replace the switch if needed and test again.
Maintenance Tips For Stop Light Switch
Maintaining the stop light switch ensures your vehicle’s brake lights work safely. Proper care avoids sudden failures and costly repairs. Small actions help keep the switch in good shape.
Regular Inspections
Check the stop light switch regularly for dirt and wear. Look under the dashboard near the brake pedal for any loose parts. Clean the switch gently with a dry cloth to remove dust. Test the brake lights often to confirm they light up. Early spotting of problems saves time and money.
Preventive Measures
Avoid pressing the brake pedal too hard or fast. Use smooth, steady pressure to protect the switch. Keep the area around the switch free from moisture and spills. Replace worn brake pedals or parts to stop extra stress on the switch. Regular car servicing helps catch issues early.

Credit: www.ebay.com
Frequently Asked Questions
What Is A Stop Light Switch In A Car?
A stop light switch activates brake lights when the brake pedal is pressed. It signals other drivers you are slowing or stopping. It also interacts with systems like cruise control and ABS.
How Do I Know If My Stop Light Switch Is Faulty?
Signs include brake lights not illuminating or staying on continuously. You may experience cruise control failure or difficulty shifting gears. Check the brake pedal for unusual resistance or looseness.
Can I Change The Stop Light Switch Myself?
Yes, changing the stop light switch is a simple DIY task. It usually involves locating the switch near the brake pedal, unplugging the old switch, and installing a new one. Always disconnect the battery first for safety.
How Long Does It Take To Replace A Stop Light Switch?
Replacing a stop light switch typically takes 15 to 30 minutes. It depends on the vehicle model and your mechanical experience. Most switches are easily accessible under the dashboard.
Conclusion
Changing a stop light switch is simple with the right steps. Start by disconnecting the battery for safety. Remove the old switch carefully, then install the new one. Test the brake lights before finishing. A working stop light switch keeps you safe on the road.
Take your time and follow each step closely. This small fix saves money and avoids bigger car problems. Now, you can drive with confidence and peace of mind.