Have you ever wished your lights could turn off by themselves after you leave a room? Adding a timer to your light switch can save you money on electricity and make your home smarter and more convenient.
In this guide, you’ll learn exactly how to install a timer on your light switch, step by step. Whether you want to reduce energy waste or add extra security to your home, this simple upgrade will make a big difference.
Keep reading, and you’ll be able to do it yourself quickly and safely.
Choosing The Right Timer Switch
Choosing the right timer switch is key to making your light timer work well. The right switch saves energy and adds convenience. It also fits your needs and matches your light fixture. Understanding types, compatibility, and features helps you pick the best one.
Types Of Timer Switches
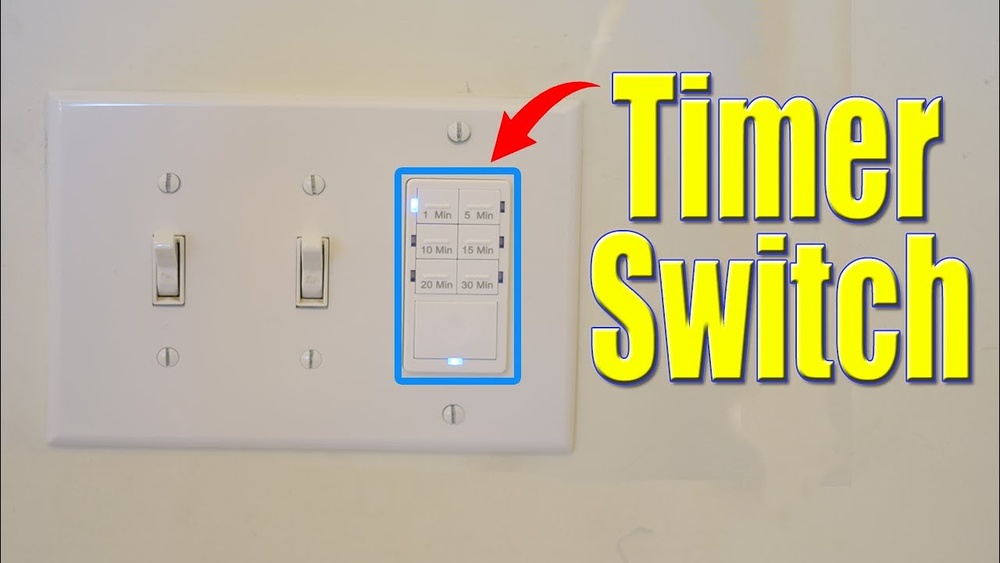
There are several types of timer switches. Mechanical timers use a dial to set time. Digital timers let you program exact on and off times. Some have countdown features. Choose a type that fits your routine and comfort with technology.
Compatibility With Your Light Fixture
Not all timer switches fit every light fixture. Check if your timer works with LED, incandescent, or fluorescent bulbs. Look for voltage and wattage limits. Some switches only work on single-pole circuits. Make sure your home wiring supports the timer switch.
Features To Consider
Look for features that make life easier. A backup battery keeps settings during power cuts. Some timers offer multiple programs for weekdays and weekends. Manual override lets you turn lights on or off anytime. Choose simple controls if you want easy use.
Gathering Necessary Tools And Materials
Before starting to add a timer to a light switch, gather all the necessary tools and materials. Having everything ready makes the process smooth and safe. Missing tools or parts can cause delays and frustration. Prepare your workspace and double-check your supplies.
Basic Tools Required
Start with basic tools like a screwdriver set. Both flathead and Phillips screwdrivers are useful. A voltage tester is essential to check power before working. Wire strippers help remove insulation cleanly. Needle-nose pliers assist in bending and holding wires. A drill may be needed for mounting the timer box.
Safety Equipment
Safety comes first. Use insulated gloves to protect from electric shocks. Safety goggles protect your eyes from dust and sparks. Turn off the circuit breaker before starting any electrical work. Have a flashlight or headlamp ready if lighting is poor. Keep a fire extinguisher nearby for emergencies.
Additional Supplies
Gather extra wire connectors to secure wire joints. Electrical tape helps insulate and hold wires together. The timer switch itself must match your light switch type. Read the timer’s instructions to confirm compatibility. Keep a small container for screws and parts to avoid loss.
Preparing For Installation
Preparing for installation is a key step before adding a timer to a light switch. It ensures safety and smooth work during the process. Taking time to prepare can prevent mistakes and accidents. Follow these simple steps carefully.
Turning Off Power Safely
Start by turning off the power to the switch. Locate your home’s circuit breaker panel. Switch off the breaker that controls the light switch. Use a voltage tester to confirm no power flows to the switch. This step avoids electric shocks and keeps you safe.
Removing The Existing Switch
Remove the switch cover plate using a screwdriver. Unscrew the screws holding the switch in place. Gently pull the switch out from the wall box. Avoid pulling on the wires directly. Keep track of all screws and parts for later use.
Inspecting Wiring
Check the wires connected to the switch. Look for any damage, such as frayed or exposed wires. Ensure wires are properly connected and secure. Identify the line, load, and ground wires. This helps you connect the timer switch correctly.

Credit: www.wikihow.com
Wiring The Timer Switch
Wiring the timer switch is an important step in this project. It controls when the light turns on and off automatically. This process needs careful attention to safety and detail. Follow each step to make sure the timer works well and safely.
Identifying Wires
First, turn off the power at the circuit breaker. Use a voltage tester to confirm no electricity flows. Look at the wires in the switch box. Usually, you will find a live wire, neutral wire, and ground wire. The live wire is often black or red. The neutral wire is white. The ground wire is green or bare copper. Identifying these wires correctly is key to safe installation.
Connecting The Timer Wires
Match the timer wires with the switch wires. The timer usually has three wires: live, neutral, and ground. Connect the timer’s live wire to the live wire in the box. Attach the timer’s neutral wire to the neutral wire in the box. Connect the timer’s ground wire to the ground wire in the box. Use wire nuts to join wires together. Make sure each wire is tightly connected without any loose ends.
Securing Connections
After connecting, check each wire connection. Tug gently on wires to ensure they are secure. Wrap electrical tape around wire nuts for extra safety. Push the wires neatly back into the switch box. Attach the timer switch to the box with screws. Turn the power back on and test the timer switch. Secure connections keep your timer switch safe and reliable.
Mounting The Timer Switch
Mounting the timer switch is a key step in adding a timer to a light switch. This step secures the timer in place and makes it ready for use. Proper mounting helps the timer work safely and look neat on the wall.
Attaching To The Wall Box
Start by aligning the timer switch with the wall box. Use the screws that come with the timer to attach it firmly. Tighten the screws but do not over-tighten. Over-tightening can crack the switch or the wall box. Make sure the timer switch sits flat against the wall.
Installing The Faceplate
After securing the timer switch, place the faceplate over it. The faceplate covers the screws and wires for a clean look. Snap or screw the faceplate into place depending on the model. Check that the faceplate fits snugly without gaps. The timer is now mounted and ready for use.

Credit: theladydiy.com
Testing The Timer Switch
Testing the timer switch is an important step after installation. It ensures the switch works correctly and controls your light as planned. This process helps you catch any issues early. Follow simple steps to check the timer switch’s function and make adjustments if needed.
Restoring Power
Start by turning the power back on at the circuit breaker. This will supply electricity to the timer switch. Check that the breaker is fully on to avoid interruptions. Once power is restored, the timer switch should light up or show a display. This means it is receiving power and ready for use.
Setting The Timer
Next, set the timer according to the manufacturer’s instructions. Usually, this involves adjusting dials or pressing buttons to set on/off times. Test the timer by turning the light on and off with the switch. Watch the light to see if it follows the set schedule. Adjust settings if the light does not turn on or off at the right time.
Troubleshooting Common Issues
If the timer switch does not work, check a few things. Ensure the switch is wired correctly and power is on. Look for loose wires or poor connections. Reset the timer switch by turning power off and on again. Check the timer’s battery if it has one. Replace the battery if the display is blank. Consult the manual for specific error codes or troubleshooting tips. Most issues can be fixed with simple checks and adjustments.
Maintaining Your Timer Switch
Maintaining your timer switch is important to keep it working well. A well-kept timer switch saves energy and adds convenience. Simple care steps help avoid common problems and extend its life.
Regular Checks
Check your timer switch often for any signs of damage. Look for loose buttons or flickering lights. Ensure the switch feels secure on the wall. Clean dust or dirt gently with a dry cloth.
Replacing Batteries If Needed
Some timer switches use batteries for memory or backup. Replace batteries once a year or if the timer stops working. Use the right battery type to avoid damage. Remove old batteries carefully to prevent leaks.
Updating Settings For Seasonal Changes
Adjust your timer settings when seasons change. Days get longer or shorter, so your timer should match. Update the on/off times to save energy and fit your lifestyle. Check settings monthly to keep them accurate.

Credit: www.youtube.com
Frequently Asked Questions
How Do I Install A Timer On A Light Switch?
Turn off power at the breaker first. Remove the switch cover and disconnect wires. Connect the timer switch wires as per instructions. Secure the timer switch and restore power. Test the timer to ensure it works correctly.
What Types Of Timers Work With Light Switches?
Mechanical, digital, and smart timers work with light switches. Mechanical timers are simple and affordable. Digital timers offer precise control. Smart timers connect to Wi-Fi and allow remote operation via apps.
Can I Add A Timer Without Electrical Knowledge?
Basic electrical knowledge is helpful but not mandatory. Follow detailed instructions and safety precautions carefully. If unsure, consult a licensed electrician to avoid risks and ensure proper installation.
Are Timer Switches Compatible With All Light Fixtures?
Most timer switches work with standard incandescent and LED bulbs. Check the timer’s specifications for compatibility with your light type. Some timers may not support CFL or fluorescent lights.
Conclusion
Adding a timer to your light switch saves energy and adds convenience. It helps turn lights off automatically, so you don’t waste power. The steps are simple and can be done with basic tools. Safety is important—always turn off the power before starting.
A timer switch fits most home lights and works well for many rooms. Try it yourself and enjoy the benefits of timed lighting every day. Small changes like this make your home smarter and more efficient.