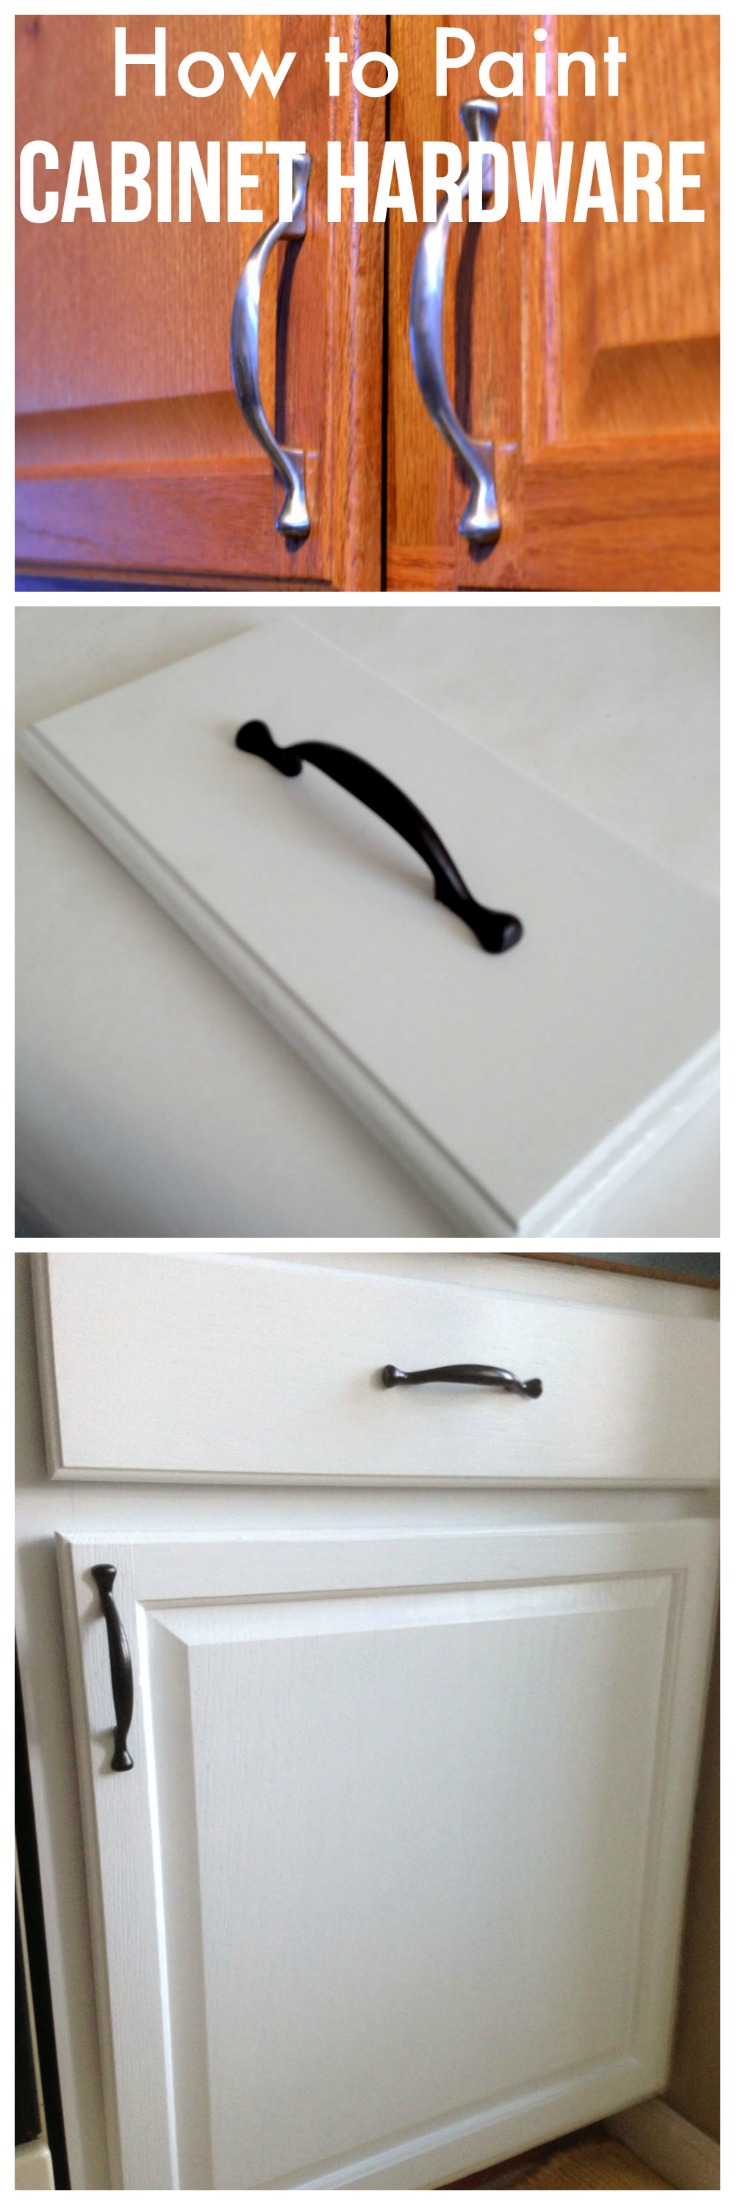
Are your kitchen cabinets looking a bit outdated, but you don’t want to spend a fortune on new hardware? You might be wondering if spray painting your cabinet hardware is a smart and easy solution.
The good news is, yes—you can spray paint kitchen cabinet hardware, and it can give your kitchen a fresh, stylish look without breaking the bank. But before you grab that can of spray paint, there are some important tips and tricks you need to know to get the best results.
Keep reading to discover how you can transform your kitchen hardware like a pro!
Choosing The Right Spray Paint
Choosing the right spray paint is key for refreshing kitchen cabinet hardware. The paint must stick well and resist wear from daily use. Picking the proper type and finish helps the hardware look great and last longer. This section explains the main spray paint options for kitchen hardware.
Types Of Spray Paints For Hardware
Spray paints come in different formulas. Oil-based spray paint offers strong adhesion and durability. It can handle frequent touching and moisture. Water-based spray paint is easier to clean and less smelly. It dries faster but may not last as long. Enamel spray paint creates a hard, glossy coat. It works well for metal hardware. Choose a paint that bonds well with metal surfaces.
Color Options And Finishes
Cabinet hardware paint comes in many colors. Choose shades that match or contrast your cabinets. Matte finishes hide fingerprints and scratches. Glossy finishes add shine and highlight details. Satin finishes give a soft glow without too much shine. Consider the kitchen style when picking paint color and finish. Neutral colors often fit most designs.
Paints Suitable For Kitchen Use
Kitchen hardware faces heat, moisture, and frequent cleaning. Use spray paints labeled for kitchen or outdoor use. These paints resist rust and peeling. Look for paints that dry to a hard, washable surface. Avoid paints that wear off easily or fade in sunlight. Proper paint choice keeps hardware looking fresh longer.

Credit: www.thriftydecorchick.com
Preparing Your Hardware
Preparing your kitchen cabinet hardware properly is key before spray painting. This step ensures the paint sticks well and lasts long. It also helps achieve a smooth, professional finish. Start by removing the hardware carefully. Then clean and degrease each piece. Finally, sand the surface lightly for better paint adhesion.
Removing Cabinet Hardware Safely
Use the right screwdriver to avoid damage. Turn screws slowly and keep them in a safe place. Handle knobs and pulls gently to prevent scratches. Label hardware if needed to match each piece later. Take your time; rushing can cause breaks or lost parts.
Cleaning And Degreasing
Wash hardware with warm, soapy water to remove dirt. Use a soft cloth or brush for stubborn grime. Rinse and dry completely before moving on. Apply a degreaser to remove oils from hands or kitchen use. This step helps paint stick better to metal or plastic.
Sanding For Better Adhesion
Use fine-grit sandpaper or sanding pads to roughen surfaces lightly. Sand all sides evenly but gently to avoid deep scratches. This creates a texture for the paint to hold onto. Wipe off dust with a clean, dry cloth after sanding. Now the hardware is ready for spray painting.
Setting Up Your Workspace
Setting up your workspace is the first step to spray painting kitchen cabinet hardware successfully. A good setup helps you work safely and get a smooth finish. You need space, fresh air, and the right tools. Preparing well makes the job easier and cleaner. Let’s explore how to create the best workspace for this project.
Choosing A Well-ventilated Area
Spray paint releases fumes that can harm your health. Pick an open space like a garage with doors open or an outdoor area. Avoid small rooms without windows. Good airflow stops paint fumes from building up. A fan can help move air if needed. Fresh air keeps you safe and helps the paint dry faster.
Protecting Surrounding Surfaces
Spray paint can easily spread beyond your hardware. Cover nearby surfaces with newspapers, drop cloths, or plastic sheets. Protect floors, counters, and walls from paint spots. Use painter’s tape to secure coverings. This step saves time cleaning and keeps your kitchen neat. Take time to cover everything well before you start.
Gathering Necessary Tools And Materials
Collect all items before you begin. You will need spray paint made for metal or plastic. Have sandpaper or a sanding block to prep the hardware. Gloves protect your hands from paint and dirt. Use a mask for safety against fumes. Also, keep a clean cloth to wipe dust off the pieces. Being ready helps you work smoothly and finish faster.
Spray Painting Techniques
Spray painting kitchen cabinet hardware can give it a fresh new look. Using the right techniques helps you get smooth and even coverage. These tips make your project easier and your results better.
Shaking And Testing The Paint
Shake the spray paint can well before use. This mixes the paint and stops lumps. Test spray on a piece of cardboard first. It helps you see the spray pattern and color. Adjust your spray if the paint comes out too thick or thin.
Proper Distance And Spray Motion
Hold the spray can about 8 to 12 inches from the hardware. Too close causes drips; too far wastes paint. Move your hand in steady, side-to-side motions. Keep the spray even and avoid stopping in one spot. This prevents uneven paint and runs.
Applying Multiple Thin Coats
Apply several thin coats instead of one thick coat. Thin coats dry faster and reduce drips. Wait a few minutes between each coat for drying. This builds a smooth, durable finish. Thin layers also help the paint stick better to metal surfaces.
Drying And Curing
Spray painting kitchen cabinet hardware is a great way to refresh your space. Drying and curing are key steps to get a smooth and lasting finish. Proper care during these stages prevents damage and keeps the paint looking fresh for years.
Optimal Drying Times
Let the paint dry fully before handling the hardware. Drying times vary by paint type and temperature. Usually, wait at least one hour between coats. Avoid rushing this step to stop smudges and uneven surfaces.
Avoiding Dust And Smudges
Keep the painted hardware in a clean, dust-free area. Dust sticks easily to wet paint and ruins the smooth look. Handle pieces gently and wear gloves to prevent fingerprints. Cover hardware with a soft cloth if you need to move it.
Curing For Durability
Curing hardens the paint and makes it last longer. This process can take days or even weeks. Place hardware in a dry, warm spot without direct sunlight. Avoid heavy use until the paint fully cures for the best results.
Credit: createandbabble.com
Reinstalling Cabinet Hardware
Reinstalling cabinet hardware is an important step after spray painting. It gives your kitchen a fresh, updated look. Proper installation ensures the hardware works well and lasts long. Taking time to check and prepare the pieces helps avoid problems later.
Checking For Flaws Before Installation
Look closely at each piece of hardware. Check for paint drips, rough spots, or uneven coating. Sand any imperfections gently with fine-grit sandpaper. Make sure the paint is fully dry to avoid smudging. Flawless hardware looks better and fits more smoothly.
Tools For Reattachment
Gather basic tools like a screwdriver, screws, and a drill if needed. Use the right size screwdriver to prevent stripping screws. Have a level handy to keep handles straight. Keep screws organized to avoid losing them during installation.
Ensuring A Secure Fit
Align the hardware with the original holes. Tighten screws firmly but avoid over-tightening, which can damage the wood. Test each handle or knob to ensure it feels stable. A secure fit keeps your cabinets functional and stylish.
Maintenance Tips For Painted Hardware
Keeping your painted kitchen cabinet hardware looking fresh takes some care. Small steps can help protect the paint and keep the hardware attractive for a long time. Regular maintenance is key to avoid chips and fading.
Cleaning Without Damaging Paint
Use a soft cloth or sponge to clean the hardware. Avoid rough scrubbing or abrasive cleaners. Mild soap and warm water work best. Dry the hardware quickly to stop water marks. Do not soak the hardware for long periods.
Touch-up Techniques
Keep a small amount of the paint used for the hardware. Use a fine brush to fix small chips or scratches. Apply thin layers and let each dry fully. This prevents thick paint buildup and keeps a smooth finish.
When To Repaint
Repaint the hardware if the paint peels or wears away. Fading colors also signal repainting time. Remove the hardware before repainting for better results. Clean and sand lightly before applying new paint.
Common Mistakes To Avoid
Spray painting kitchen cabinet hardware can give your space a fresh look. Avoiding common mistakes ensures a smooth and lasting finish. These errors can cause paint to peel, chip, or look uneven. Pay attention to the details for the best results.
Skipping Preparation Steps
Preparation is the foundation of a good paint job. Clean the hardware thoroughly to remove dirt and grease. Sand the surface lightly to help paint stick better. Ignoring these steps often leads to poor adhesion and peeling paint.
Using Incorrect Paint Types
Not all paints work well on metal or plastic hardware. Use paint designed for metal or multi-surface spray paint. Avoid regular wall paint; it may chip or wear off quickly. Choose paint with a durable finish for kitchen use.
Rushing The Drying Process
Paint needs time to dry and cure properly. Touching or reinstalling hardware too soon can damage the finish. Follow the recommended drying times on the paint can. Patience helps avoid smudges and uneven textures.

Credit: www.youtube.com
Frequently Asked Questions
Can You Spray Paint Kitchen Cabinet Hardware Safely?
Yes, you can safely spray paint kitchen cabinet hardware. Clean and sand the surface first. Use primer and paint designed for metal. Spray in a well-ventilated area for best results. Allow proper drying time between coats for a smooth finish.
What Type Of Paint Works Best For Cabinet Hardware?
Spray paint designed for metal or plastic works best. Look for durable, rust-resistant, and heat-resistant formulas. Specialty paints like enamel or lacquer offer long-lasting finishes. Always use a primer to improve paint adhesion and durability.
How Do You Prepare Hardware Before Spray Painting?
Remove all hardware from cabinets before painting. Clean thoroughly to remove grease and dirt. Sand lightly to create a rough surface for better paint grip. Wipe off dust before applying primer and paint. Proper prep ensures a smooth, lasting finish.
How Long Does Spray Paint Take To Dry On Hardware?
Spray paint typically dries to touch in 15-30 minutes. Full curing can take 24-48 hours depending on paint type and conditions. Avoid handling hardware until completely dry to prevent smudging or chipping.
Conclusion
Spray painting kitchen cabinet hardware can refresh your space quickly. It saves money compared to buying new pieces. Make sure to clean and sand the hardware first. Choose spray paint made for metal for best results. Work in a well-ventilated area to stay safe.
Let each coat dry fully before adding another. This simple project can give your kitchen a fresh look. Small changes often make a big difference. Try it and see how your cabinets shine anew.