Are you looking for a simple way to finish your projects with a professional touch? Learning how to make 2 prong fastener caps can save you time and money while giving your work a neat and polished look.
Whether you’re organizing papers, creating scrapbooks, or working on crafts, these caps are small but powerful tools that hold everything together securely. You’ll discover easy steps to make your own fastener caps quickly, even if you’ve never tried it before.
Keep reading, and you’ll be surprised how simple and useful this skill can be for your next project.
Materials Needed
Gathering the right materials is the first step to making 2 prong fastener caps. Choosing quality items ensures the caps hold strong and last long. The materials must fit the size and style of your project. Prepare everything before starting to avoid interruptions.
Types Of Fastener Caps
Fastener caps come in different shapes and materials. Plastic caps are light and easy to work with. Metal caps offer more durability and a sleek look. Some caps have smooth tops, while others are textured for grip. Pick the type that suits your project’s needs and look.
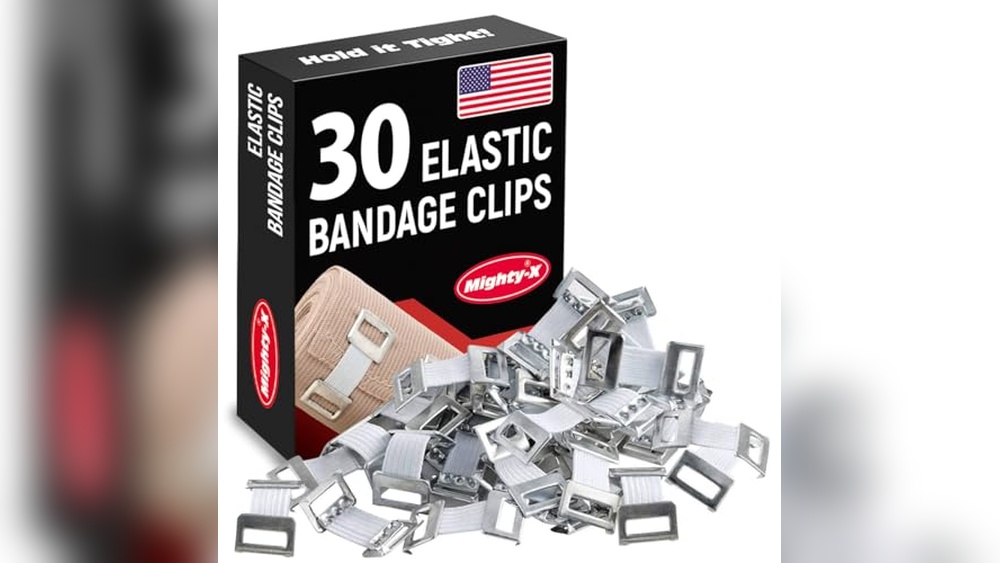
Tools Required
Simple tools make the process easier and faster. You will need pliers to bend and hold the prongs. Scissors or a craft knife help trim any excess material. A ruler or measuring tape ensures the caps fit perfectly. A small hammer can help press the caps securely. Having these tools ready makes the work smooth and neat.

Credit: www.walmart.com
Preparing Your Workspace
Preparing your workspace is the first step to making 2 prong fastener caps. A clean, organized area helps you work faster and avoid mistakes. It also keeps your materials safe and easy to find.
Taking time to set up your workspace well improves your experience. It makes the project more enjoyable and less stressful.
Choosing A Safe Area
Select a spot with good lighting and enough room to spread out your tools. Avoid places with heavy foot traffic to prevent accidents. A flat, stable surface is best for assembling the fastener caps. Keep the area free from liquids or food that could damage your supplies.
Organizing Supplies
Step-by-step Making Process
Making 2 prong fastener caps is a simple process. Follow clear steps to create strong and neat caps. Each part is important for a perfect finish. The steps below explain how to cut, shape, and attach prongs carefully.
Cutting The Base Material
Start with a flat sheet of metal or plastic. Use a ruler and marker to measure the size. Cut out small circles or squares for the cap bases. Use sharp scissors or a metal cutter for clean edges. Smooth rough edges with sandpaper to avoid scratches.
Shaping The Caps
Place each base on a flat surface. Use a round tool to press the edges slightly. This creates a curved shape for a better fit. Make sure the shape matches the fastener size. Keep the caps even and smooth for a neat look.
Attaching The Prongs
Take two thin prongs made of metal wire or strips. Align them in the center of the cap base. Use strong glue or solder to fix the prongs firmly. Hold the parts together until the bond is secure. Check that the prongs stand straight and strong.
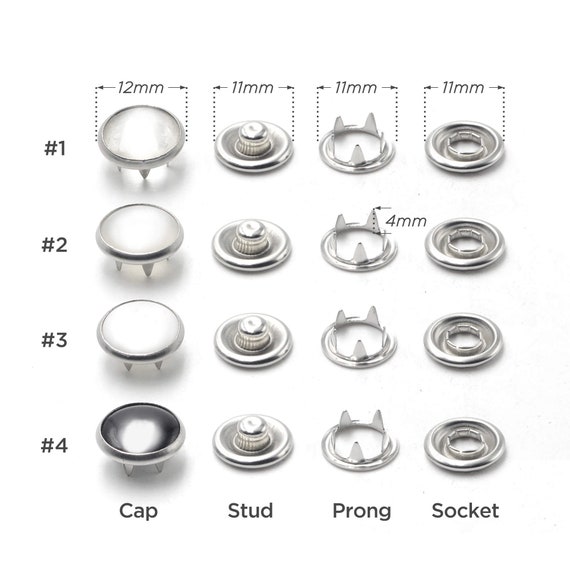
Credit: www.etsy.com
Finishing Touches
Finishing touches make your 2 prong fastener caps look professional and neat. They improve both appearance and durability. Small details matter to create a clean final product.
Focus on smoothing rough edges and adding color. These steps protect the fastener and enhance its look.
Sanding And Smoothing
Start by sanding all surfaces with fine-grit sandpaper. This removes bumps and sharp edges. Smooth caps fit better and are safer to handle. Use gentle, even strokes to avoid damaging the shape. Check for any rough spots and sand again if needed. Clean off dust with a soft cloth before moving on.
Painting And Decorating
Choose paint that sticks well to your material. Acrylic paint works well for most caps. Apply thin, even coats to avoid drips and uneven layers. Let each coat dry completely before adding another. You can add simple designs or colors to match your project. Finish with a clear sealant to protect the paint and add shine. This step helps your caps last longer and look great.
Tips For Durability
Making 2 prong fastener caps that last long needs careful planning. Durability depends on the right materials and proper attachment. These tips help you create strong and reliable fastener caps.
Focus on quality and technique to avoid weak spots. Small steps can make a big difference in how well your fasteners hold.
Choosing Strong Materials
Select materials that resist wear and tear. Metal and heavy-duty plastic are good choices. Avoid thin or brittle materials that crack easily. Also, check if the material stays firm under pressure. Strong materials keep fastener caps intact for a long time.
Proper Attachment Techniques
Attach the prongs firmly to the cap base. Make sure the prongs do not bend or loosen. Use tools like pliers to press prongs tightly. Test the attachment by pulling lightly to check stability. Proper attachment stops fasteners from falling apart quickly.

Credit: www.ebay.com
Common Mistakes To Avoid
Making 2 prong fastener caps requires care and attention. Many beginners make simple mistakes that affect the final product. Avoiding these errors saves time and materials. It also ensures your fasteners work well and last long.
Incorrect Measurements
Measuring parts incorrectly is a common problem. Too large or too small caps will not fit properly. Always use a ruler or measuring tape with clear marks. Double-check your numbers before cutting any materials. Precise measurements keep your fasteners secure and neat.
Weak Attachments
Weak attachments cause fasteners to fall apart quickly. Use strong glue or secure fasteners tightly. Avoid loose fitting parts that can move or slip. Press firmly and let glue dry fully before use. Strong attachments improve durability and reliability.
Creative Variations
Creative variations bring life to basic 2 prong fastener caps. They make each project unique and fun. You can change the look by using different shapes, sizes, and designs. This section explores how to add a personal touch to your fastener caps. Simple tweaks can give your caps a fresh, custom feel.
Different Shapes And Sizes
Fastener caps do not have to be round or plain. Try making square, oval, or star-shaped caps. Each shape gives a new style to your project. You can also create caps in small, medium, or large sizes. This helps fit various paper thicknesses. Mixing sizes adds visual interest and function. Play with shapes and sizes to fit your needs and taste.
Custom Designs
Custom designs let you express your creativity on fastener caps. Paint or draw simple patterns like stripes, dots, or flowers. Use stickers or stamps for quick decoration. You can also add initials or small logos for a personal touch. Custom designs make your fastener caps stand out. They turn plain caps into special, memorable pieces.
Frequently Asked Questions
What Materials Are Needed For 2 Prong Fastener Caps?
You need metal prongs, cap covers, adhesive, and pliers. These materials ensure secure and durable fastener caps for documents or crafts.
How Do You Attach 2 Prong Fastener Caps?
Place prongs through punched holes, then slide the caps over prongs. Press firmly to secure the caps in place.
Can 2 Prong Fastener Caps Be Reused?
Yes, they can be reused if removed carefully without bending prongs. Proper removal maintains cap and prong integrity for multiple uses.
Are 2 Prong Fastener Caps Suitable For Heavy Documents?
Yes, these caps provide strong hold for thick stacks. They keep documents organized and secure without tearing or damage.
Conclusion
Making 2 prong fastener caps is simple with these clear steps. You can create strong, neat caps at home. This saves money and gives you control over your projects. Practice a few times to improve your skill. Soon, making these caps will feel easy and quick.
Keep tools handy and follow safety tips. Enjoy adding a professional touch to your work. Try it today and see the difference yourself.