Are you tired of struggling with those tricky hidden deck fasteners every time you want to repair or replace your deck boards? You’re not alone.
Removing hidden fasteners can feel like a frustrating puzzle, especially when you don’t know the right steps. But what if you could make the process simple, fast, and damage-free? In this guide, you’ll discover easy-to-follow tips that will save you time and effort.
Keep reading, and you’ll learn how to remove hidden deck fasteners like a pro—no stress, no guesswork. Your deck will thank you!

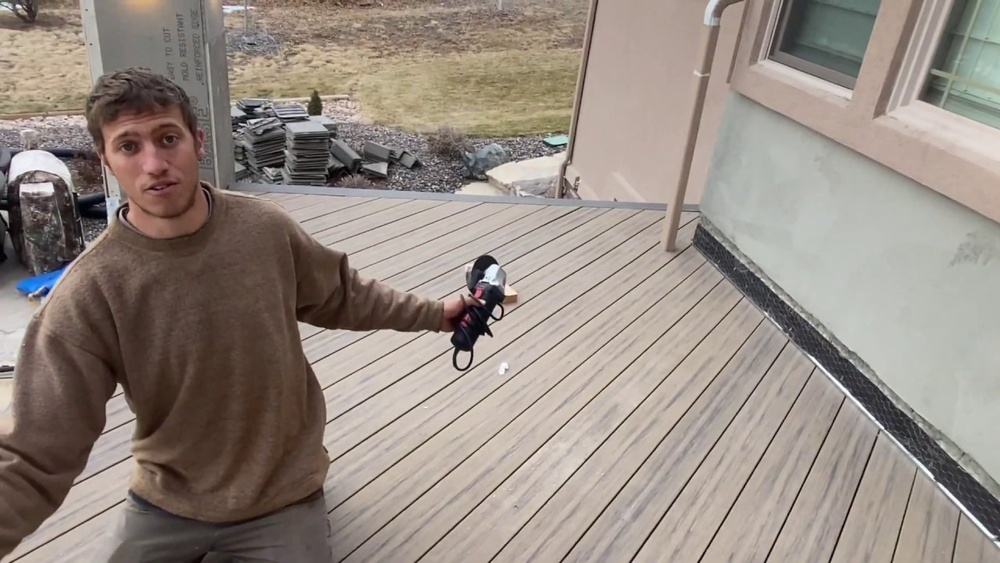
Credit: www.youtube.com
Types Of Hidden Deck Fasteners
Hidden deck fasteners keep your deck boards secure without visible screws or nails. They create a smooth, clean surface. Different types of fasteners use various materials and designs. Knowing these types helps you remove them safely and easily.
Plastic Clips
Plastic clips are common in composite decking. They snap into grooves on the deck boards. These clips hold the boards firmly but allow some movement. You can usually pry them up with a flat tool. They are lightweight and resist rust.
Metal Clips
Metal clips offer strong support and durability. Made from stainless steel or aluminum, they resist corrosion. These clips fit into grooves or holes in the deck boards. Removing them may need a screwdriver or pliers. Metal clips last longer but can be harder to remove.
Spline Systems
Spline systems use a thin strip called a spline between boards. The spline fits into grooves cut in the edges. It locks the boards together without visible fasteners. To remove them, you may need to pull out the spline first. This system allows easy board replacement.
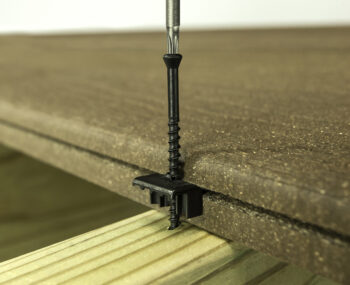
Credit: envisionoutdoorliving.com
Tools Needed For Removal
Removing hidden deck fasteners requires the right set of tools. These tools help you work safely and quickly. Having them ready makes the job easier. The main tools include a pry bar, screwdriver, drill, and rubber mallet. Each tool has a specific role in the removal process.
Pry Bar
A pry bar helps lift and loosen fasteners. It fits under the deck boards to gently pry them up. Use it carefully to avoid damaging the wood. This tool provides the leverage needed to separate tight fasteners.
Screwdriver
A screwdriver is essential for removing screws from fasteners. Choose the right size and type for your screws. A manual or electric screwdriver works well. It helps unscrew fasteners without stripping the heads.
Drill
A drill speeds up the removal of screws and fasteners. Use a drill bit that matches the screw size. It makes the process faster and less tiring. A drill is useful for stubborn or rusted screws.
Rubber Mallet
A rubber mallet helps tap fasteners loose without damaging the deck. It applies gentle force where needed. Use it to avoid marks or dents on the wood. This tool works well to loosen stuck parts safely.
Preparation Steps
Preparing to remove hidden deck fasteners makes the job easier and safer. Good preparation helps avoid damage to the deck boards and tools. It also saves time and effort during removal. Follow these simple steps before starting.
Clear The Deck Area
Remove furniture, plants, and any objects from the deck surface. This gives you space to work freely and reduces the risk of accidents. Cleaning the deck also helps you spot fasteners and any damage.
Inspect Fastener Placement
Look closely at where the hidden fasteners are located. Check for any visible screws or clips between deck boards. Knowing their placement helps you plan the removal without hurting the wood.
Wear Safety Gear
Put on safety glasses to protect your eyes from debris. Use gloves to shield your hands from sharp edges or splinters. Wear sturdy shoes to protect your feet while working on the deck.
Removing Plastic Clips
Removing plastic clips from hidden deck fasteners requires care and patience. These clips hold the deck boards tightly in place. Removing them without damage helps preserve your deck’s look and structure.
Plastic clips fit into grooves beneath the deck boards. You must free the boards slightly to access the clips. This step prevents breaking the clips or boards during removal.
Loosen The Boards
Start by gently lifting the deck boards near the clip area. Use a pry bar or a flat tool for this task. Insert the tool carefully between the boards and the joist.
Lift just enough to create a small gap. Avoid forcing the boards too far up. A slight lift gives space to reach the clips without cracking the wood.
Pry Out Clips Carefully
Slide a flat screwdriver or pry bar under the plastic clip. Work slowly to lift the clip out of its groove. Keep the tool close to the clip to avoid slipping.
Pull the clip out evenly. Twisting or yanking can snap the clip or damage the board. If clips are stuck, wiggle the tool gently to loosen them.
Store removed clips safely if you plan to reuse them. Clean any dirt or debris from the groove before installing new clips or boards.
Removing Metal Clips
Removing metal clips is a key step in taking out hidden deck fasteners. These clips hold deck boards tightly in place. Carefully removing them prevents damage to the wood. The process requires patience and the right tools. Follow clear steps to remove metal clips safely.
Unscrew Fasteners
Start by locating the screws that hold the metal clips. Use a drill or screwdriver to remove these screws. Turn the screw counterclockwise until it comes out completely. Keep the screws in a safe place to reuse or dispose of later. Gently lift the metal clip away from the deck board. Avoid forcing the clip, as it may bend or break.
Handle Rusted Clips
Rusted clips are harder to remove and need extra care. Apply a rust remover or penetrating oil to loosen the rust. Let it sit for a few minutes to work well. Use a wire brush to clean off loose rust before unscrewing. If screws are stuck, use a screwdriver with more grip. Tap the clip lightly with a hammer to help loosen it. Work slowly to prevent damage to the deck.
Dealing With Spline Systems
Hidden deck fasteners with spline systems keep deck boards tight and even. Removing these fasteners needs care to avoid damage. The spline is a thin strip that fits between boards. It locks the boards in place inside grooves. To remove boards, the spline must be cut and the boards separated carefully. This section explains how to deal with spline systems step by step.
Cutting The Spline
Use a sharp utility knife or a fine saw blade. Cut the spline along the length between the boards. Make shallow cuts first to avoid deep damage. Cut slowly and follow the groove line closely. This step frees the spline from its hold. Take your time to keep the boards safe.
Separating Deck Boards
After cutting, gently lift the deck boards apart. Use a pry bar or putty knife to start. Insert the tool carefully under the board edge. Work slowly to avoid cracking the wood. Wiggle the board slightly to loosen the spline. Once free, remove the boards one by one. Keep the spline pieces for reinstallation or disposal.
Tips For Avoiding Deck Damage
Removing hidden deck fasteners can be tricky. Protecting your deck from damage is key. Taking care during removal keeps the wood strong and looking good. Follow these tips to avoid scratches, cracks, or breaks in your deck boards.
Use Proper Tools
Choose tools designed for deck fasteners. A specialized fastener removal tool or a flat pry bar works well. Avoid using sharp or heavy tools that can gouge the wood. Using the right tool helps loosen fasteners without harming the deck surface.
Work Slowly And Gently
Take your time with each fastener. Push or pull gently to prevent sudden pressure on the boards. Rushing can cause splinters or cracks. Patience during removal keeps the deck boards intact and safe for future use.

Credit: www.reddit.com
Replacing Or Upgrading Fasteners
Replacing or upgrading hidden deck fasteners improves your deck’s look and safety. Old fasteners may rust or break, causing damage over time. New fasteners hold the deck boards tighter and last longer. This section guides you through choosing and installing better fasteners for your deck.
Choosing New Fasteners
Select fasteners made for your deck material. Stainless steel resists rust and lasts longer. Some fasteners have special coatings for extra protection. Pick fasteners designed for hidden installation. Check the size and length to fit your deck boards well. Avoid using old or worn-out fasteners again.
Installation Tips
Use the right tools for easy removal and installation. Clean the deck boards before adding new fasteners. Position fasteners evenly to avoid gaps between boards. Drive fasteners straight to prevent wood splitting. Test one board first to ensure proper fit. Tighten fasteners enough to hold boards firmly but not too tight.
Frequently Asked Questions
How Do You Safely Remove Hidden Deck Fasteners?
Use a pry bar or fastener removal tool carefully. Avoid damaging the deck boards by working slowly and gently.
What Tools Are Needed To Remove Hidden Deck Fasteners?
You need a pry bar, screwdriver, hammer, and possibly pliers. These tools help loosen and extract fasteners without harm.
Can Hidden Deck Fasteners Be Reused After Removal?
Usually, no. Hidden fasteners often deform during removal and lose holding strength, so replacing them is recommended.
How To Prevent Damage When Removing Hidden Deck Fasteners?
Work slowly and use the right tools. Apply gentle pressure and avoid forcing fasteners to protect your deck surface.
Conclusion
Removing hidden deck fasteners can be simple with the right steps. Use the proper tools to avoid damage. Take your time and work carefully. This helps keep your deck boards safe. Regular maintenance makes future removal easier. Small efforts now save big repairs later.
Follow these tips to keep your deck strong. Enjoy your outdoor space with confidence.