Have you ever wanted to control two light fixtures with just one switch but didn’t know where to start? Connecting two lights to a single switch can save you space, simplify your wiring, and give your room a cleaner look.
If you’re worried it might be too complicated or risky, don’t be. In this guide, you’ll discover easy, step-by-step instructions to help you get the job done safely and efficiently. Keep reading, and by the end, you’ll have the confidence to brighten up your space exactly how you want.

Credit: diy.stackexchange.com
Tools And Materials Needed
Safety comes first when connecting two light fixtures to one switch. Handling electrical wiring can be dangerous without the right precautions. Taking simple safety steps protects you and your home from harm. Always prepare before starting any electrical work.
Turn Off Power At The Breaker
Always switch off power at the main breaker box. Do not rely on the wall switch alone. Use a voltage tester to make sure power is off. This stops any risk of electric shock while you work.
Use Proper Tools And Equipment
Choose tools made for electrical jobs, like insulated screwdrivers and wire strippers. Avoid using damaged or worn tools. Proper equipment helps you work safely and efficiently.
Wear Safety Gear
Wear rubber-soled shoes to reduce shock risk. Safety glasses protect your eyes from debris. Gloves made for electrical work add another safety layer.
Check Wiring Labels And Colors
Identify wires by their colors before connecting. Black or red wires usually carry power. White wires are neutral. Green or bare wires are ground. Correct connections prevent short circuits.
Follow Local Electrical Codes
Every area has rules for electrical work. Check your local codes before starting. Following rules ensures your work is safe and legal. It also helps when selling your home.

Credit: www.electrical-online.com
Safety Precautions
Turn off the power before starting any electrical work to avoid shocks. Use a voltage tester to confirm the wires are safe to handle. Follow wiring instructions carefully to prevent short circuits and fire risks.
Turn Off The Main Power
Start by turning off the main power to the room or area where you will work. Find the circuit breaker panel in your home. Switch off the breaker that controls the light fixtures.
This step stops electricity flow to the wires. It protects you from electric shocks. Never skip this step before starting any electrical work.
Test The Power Is Off
Use a voltage tester or a non-contact tester to check wires. Touch the tester to the wires inside the fixture box. The tester should show no electricity present.
Testing confirms the power is truly off. Never rely on the breaker switch alone. Always double-check before handling wires.
Inform Others About The Power Off
Let family members or housemates know you turned off the power. Place a note on the breaker panel or switch. This prevents someone from turning the power back on by mistake.
Clear communication keeps everyone safe. It avoids accidents during your work on the light fixtures.
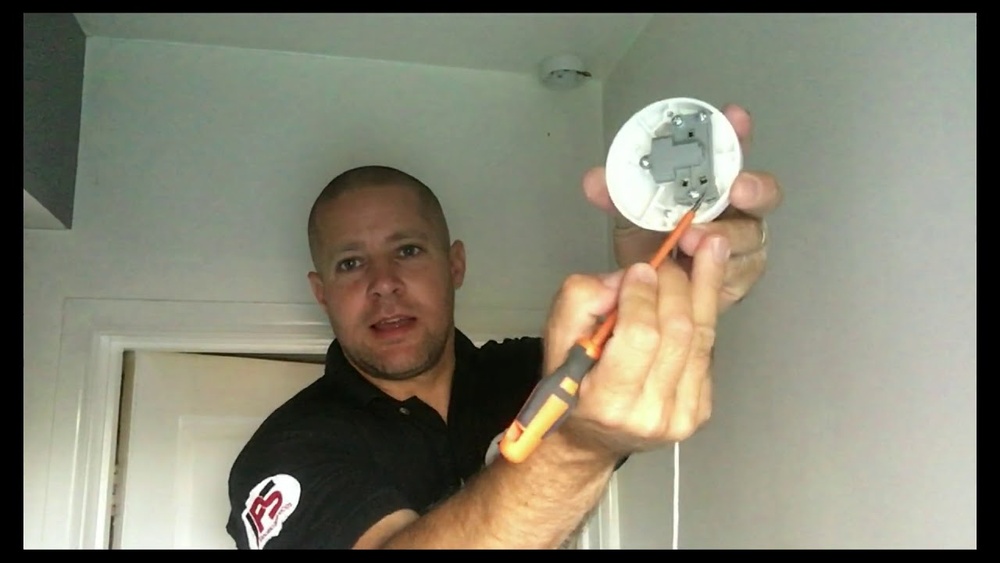
Turn Off Power
Before connecting two light fixtures to one switch, you must identify the wiring setup. This step is important for safety and success. Understanding how wires run in your home helps you plan the connection correctly. It also prevents electrical problems and saves time.
Locate Existing Switch
First, find the switch that controls the current light fixture. Turn off power at the breaker for safety. Remove the switch cover carefully. Check inside the switch box for wires. Notice how many wires enter and leave the box. Typically, you will see a hot wire, a neutral, and a ground wire. Mark the wires to avoid confusion later.
Check Fixture Wiring
Next, examine the wiring at each light fixture. Turn off power before opening the fixture box. Look for black, white, and ground wires. The black wire is usually hot, the white is neutral, and the green or bare wire is ground. See if wires are joined with wire nuts. Note how the wires connect to the fixture. This helps determine how to connect the second fixture.

Credit: www.reddit.com
Identify Wiring Setup
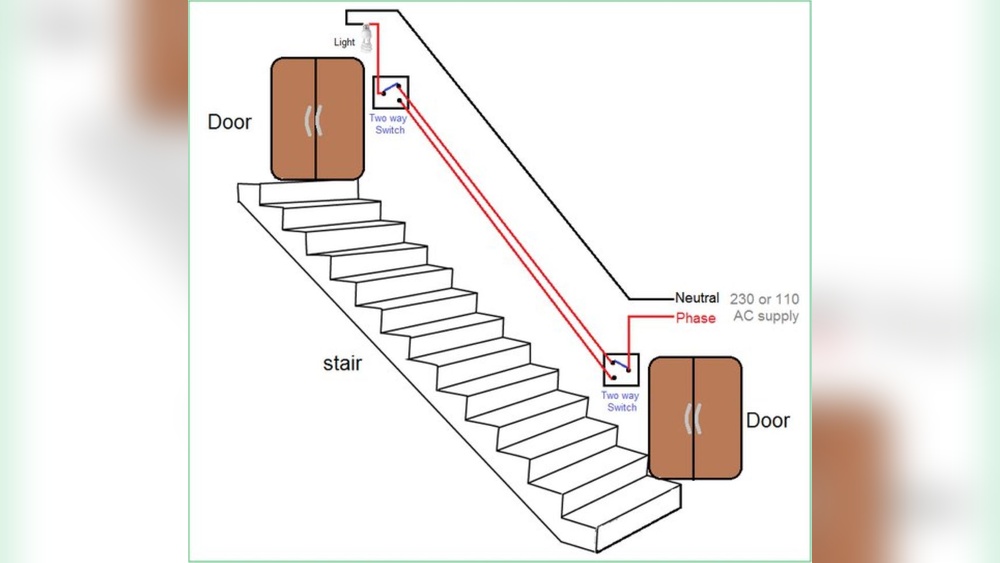
Connecting two light fixtures in parallel allows them to operate from one switch independently. Each fixture receives the same voltage, so they turn on and off together. This setup is common in homes and is safe when done correctly. Follow these simple steps to connect your fixtures in parallel.
Wire Hot Wires Together
Start by joining the hot wires from both fixtures. These wires are usually black or red. Twist the wires together with the hot wire from the switch. Use a wire nut to secure the connection tightly. This step ensures power flows to both fixtures at the same time.
Wire Neutral Wires Together
Next, connect the neutral wires from each fixture. These wires are typically white. Twist the neutral wires together and use a wire nut to hold them firmly. Neutral wires complete the electrical circuit and allow current to return safely.
Connect Ground Wires
Finally, join the ground wires from both fixtures. Ground wires are usually green or bare copper. Connect them together and to the ground wire from the switch box. This step protects against electrical shocks and ensures safety.
Connect Fixtures In Parallel
Restoring power and testing your light fixtures is the final step after wiring two lights to one switch. It confirms that your connections are safe and working correctly. This process helps catch any wiring issues before use.
Always take safety first. Make sure the wiring is secure. Then, turn the power back on at the breaker box. This step powers your switch and lights for testing.
Turn On The Circuit Breaker
Locate the circuit breaker that controls your light fixtures. Flip the switch to the ON position. This restores electrical power to the switch and the connected lights.
Double-check that the breaker is fully on. Partial power may cause flickering or no light at all.
Test The Switch
Flip the light switch to the ON position. Both light fixtures should turn on. If one or both lights do not work, turn off the breaker immediately.
Check all wiring connections. Make sure no wires are loose or touching incorrectly. Only proceed if the lights operate as expected.
Inspect For Safety
Look for any signs of electrical problems. Listen for buzzing sounds or see flickering lights. These can signal wiring issues or faulty fixtures.
If any issue occurs, turn off the power at the breaker. Fix the problem or call an electrician. Safety is the top priority.
Attach Wires To Switch
Troubleshooting is key when connecting two light fixtures to one switch. Problems can happen. Knowing common issues helps fix them fast. This saves time and effort. It also ensures safety during installation.
Below are some useful tips. Follow these to solve common wiring and switching problems.
Check The Power Source
Ensure the power is off before starting work. Use a voltage tester to confirm. Sometimes the breaker might be off. Or the fuse blown. Fix these first to avoid shocks.
Inspect The Wiring Connections
Loose wires cause lights to flicker or not work. Tighten all wire nuts and screws. Match the wire colors correctly. Black wires usually connect to black. White to white. Green or bare wires connect to ground.
Test The Light Fixtures Individually
Test each light fixture alone. This helps find if a fixture is bad. Replace any faulty bulbs or fixtures. This step narrows down the problem source.
Verify The Switch Operation
Check the switch for damage or wear. Use a multimeter to test continuity. Replace the switch if it does not work properly. A broken switch stops the lights from working.
Look For Short Circuits Or Overloads
Short circuits cause breakers to trip. Overloads can burn wires or switches. Check for damaged wires or too many lights on one switch. Reduce the load if needed.
Frequently Asked Questions
How Do I Wire Two Light Fixtures To One Switch?
To wire two fixtures to one switch, connect the switch’s output wire to both fixtures’ live wires. Join the neutral wires and ground wires separately. This setup allows one switch to control both lights simultaneously, ensuring safe and efficient operation.
Can I Use One Switch For Multiple Light Fixtures?
Yes, one switch can control multiple light fixtures if wired correctly. Connect the switch’s hot wire to each fixture’s hot wire. Ensure neutrals and grounds are properly connected. This method saves space and simplifies lighting control in rooms with multiple fixtures.
What Tools Are Needed To Connect Two Lights To One Switch?
You need a screwdriver, wire stripper, voltage tester, wire nuts, and electrical tape. These tools help safely connect wires and secure fixtures. Always turn off power before starting electrical work to prevent shocks and ensure safety.
Is It Safe To Connect Two Light Fixtures To One Switch?
Yes, it is safe if wiring follows electrical codes and guidelines. Proper connections and secure wire nuts prevent shorts and hazards. If unsure, consult a licensed electrician to avoid potential risks and ensure compliance with safety standards.
Conclusion
Connecting two light fixtures to one switch is easier than it seems. Follow the steps carefully and stay safe. Double-check all wires and connections before turning on the power. Using the right tools makes the job smoother. This setup saves space and adds convenience to your room.
Take your time and work patiently. Soon, both lights will shine with one switch. Simple wiring can change how your space feels. Try it yourself and enjoy the bright results.