Have you ever wanted to control two lights with just one switch but weren’t sure how to do it? Connecting two lights to the same switch can save you time, simplify your wiring, and make your space look cleaner.
Whether you’re upgrading your room or fixing a tricky setup, this guide will walk you through the steps clearly and safely. By the end, you’ll know exactly how to make your lights work together with one simple switch—no confusion, no hassle.
Keep reading, and you’ll be ready to tackle this project with confidence.
Tools And Materials Needed
Connecting two lights to the same switch requires certain tools and materials. Having the right items helps ensure a safe and easy installation. Prepare everything before starting the work.
Basic Electrical Tools
You will need a screwdriver set for removing and tightening screws. A wire stripper helps to remove insulation from wires. A voltage tester checks if wires carry current. Pliers assist in bending and holding wires. These tools are essential for handling electrical parts.
Wiring Materials
Use electrical wires rated for your home’s voltage. Copper wires are common and reliable. Wire nuts or connectors secure wire ends together. Electrical tape provides extra insulation and safety. These materials keep the connections safe and stable.
Lighting Fixtures
Select two light fixtures that fit your space and style. Make sure they match the voltage and power requirements. Choose fixtures with easy wiring access for better installation. Proper fixtures ensure good lighting and long service life.
Switch And Mounting Hardware
Pick a single-pole switch to control both lights. Confirm the switch can handle the total electrical load. Use mounting boxes to hold the switch and fixtures securely. Screws and anchors help fix everything in place safely.

Credit: www.reddit.com
Safety Precautions
Safety is the top priority when connecting two lights to the same switch. Electricity can be dangerous. Taking the right safety steps protects you and your home. Always prepare before starting any electrical work.
Read all instructions and understand the wiring plan. Use tools designed for electrical tasks. Wear rubber-soled shoes and avoid wet areas. Turn off the power at the circuit breaker to stop electricity flow. Double-check with a tester to confirm power is off.
Turn Off Power At The Circuit Breaker
Find the correct breaker for the light circuit. Switch it off to cut all power. This stops electric shocks while you work. Do not rely on the wall switch alone. Always confirm power is off using a voltage tester.
Use Proper Tools And Equipment
Choose insulated screwdrivers and pliers. Use wire strippers to avoid damage. Wear safety glasses to protect your eyes. Keep your workspace clean and dry. Avoid using damaged or faulty tools to reduce risks.
Check Wiring And Connections Carefully
Inspect all wires for damage or wear. Replace any frayed or exposed wiring. Connect wires tightly to prevent sparks. Match wire colors correctly: black to black, white to white. Use wire nuts to secure connections and prevent shorts.
Work In A Well-lit And Dry Area
Good lighting helps you see clearly. Avoid working in dark or damp places. Moisture increases the risk of electric shock. Use a flashlight if needed. Keep your hands dry and avoid standing on wet surfaces.
When To Call A Professional
Complex wiring or old electrical systems need expert help. If unsure about any step, hire a licensed electrician. Professionals ensure safe and code-compliant installations. Don’t risk injury or damage by guessing.
Locate Existing Wiring
Finding the existing wiring is the first step to connect two lights to one switch. It helps you understand how the electrical system works in your home. You can avoid mistakes and keep the wiring safe by knowing where wires run.
Start by turning off the power at the breaker. Safety is very important before handling wires. Use a voltage tester to check that the wires have no electricity. This step protects you from electric shocks.
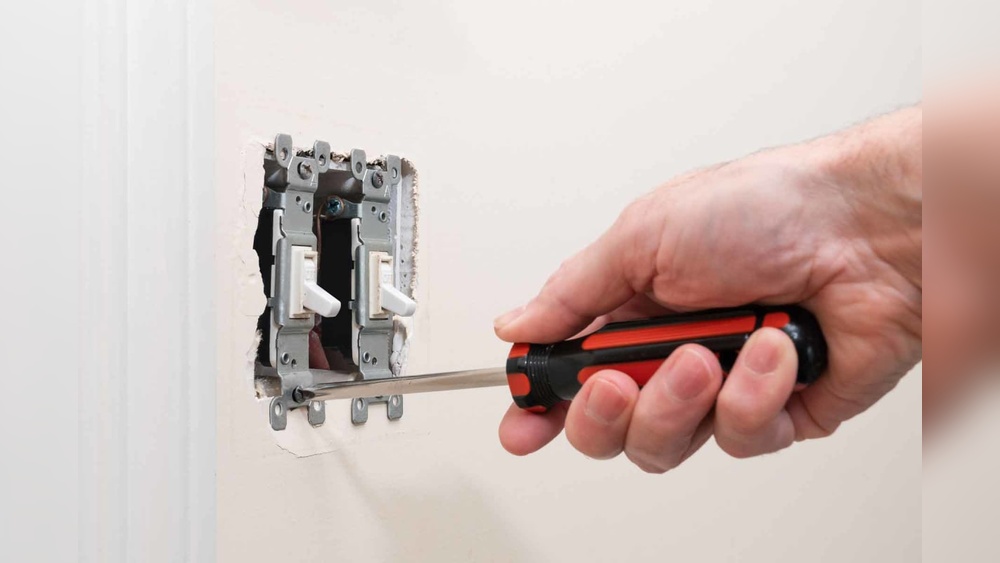
Locate The Switch Box
Find the box where the switch controls the first light. This box holds the wires you need to work with. Remove the switch cover carefully. Look inside to see wires connected to the switch.
Identify The Wires
Look for the black (hot), white (neutral), and green or bare (ground) wires. The black wire carries power to the light. The white wire returns the current back. The ground wire is for safety and is usually connected to the box or switch.
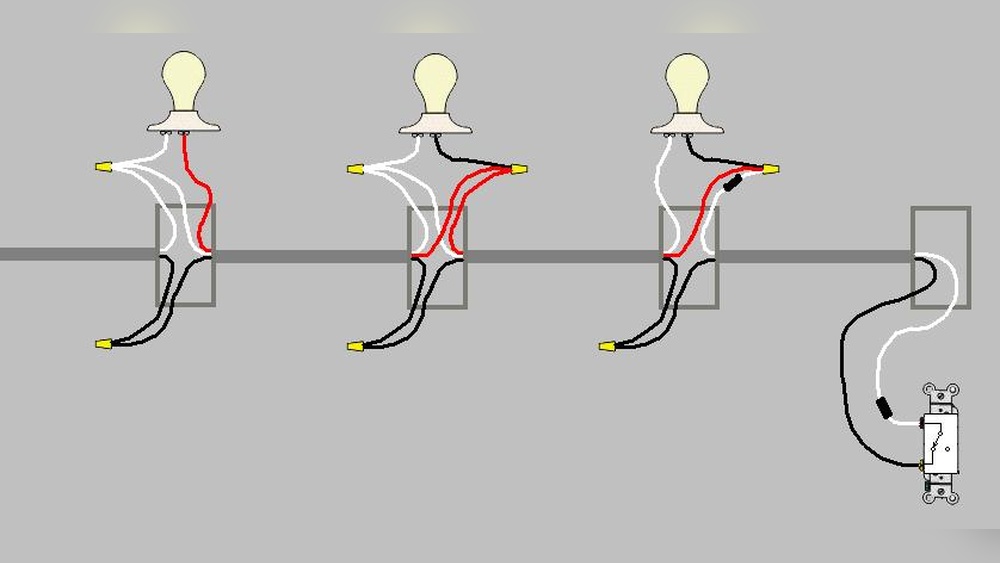
Trace The Wiring Path
Follow the wires from the switch box to the light fixture. Check if the wires run through the walls or ceiling. Use a flashlight and a wire tracer if needed. Knowing the path helps you add the second light correctly.
Use A Wire Map
Draw a simple sketch of the wiring layout. Mark where each wire goes and what it connects. This map guides you during installation. It reduces confusion and saves time.

Credit: www.electrical-online.com
Turn Off Power
Turning off the power is the first step before working on any electrical wiring. It keeps you safe from electric shocks and accidents. Always treat electricity with respect and caution.
Switching off the circuit breaker or removing the fuse stops the flow of electricity. This prevents any current from reaching the light switch or bulbs you want to connect. Safety comes first in all electrical tasks.
Locate The Correct Circuit Breaker
Find the breaker that controls the room or area where the lights are. The breaker box usually has labels to help you. If not, test each breaker by turning it off and checking if the lights go off.
Use A Voltage Tester
After turning off the breaker, use a voltage tester to check the wires. The tester shows if any electricity is still present. This step confirms the power is really off before you start working.
Inform Others
Let others in your home know you turned off the power. This avoids anyone accidentally turning it back on. A simple note on the breaker box can be very helpful.
Identify Switch And Light Wires
Start by locating the switch wires: usually black or red. Light wires often include a white neutral and a black hot wire. Knowing these helps connect two lights to one switch safely and correctly.
Before connecting two lights to the same switch, identifying the wires is key. This step helps you know which wire controls the lights and which powers the switch.
Wires in your home usually come in different colors. Each color has a specific role in the electrical circuit.
Locate The Switch Wires
Turn off the power to the switch at the circuit breaker. Remove the switch cover carefully. Look for wires connected to the switch terminals. The most common wires are black (hot) and white (neutral). The black wire usually carries power to the switch.
Find The Light Wires
Open the light fixture to see its wiring. You will find wires similar to those at the switch. The black wire usually brings power to the light. The white wire completes the circuit back to the panel. Sometimes, a bare copper wire is the ground wire.
Use A Voltage Tester Safely
Use a voltage tester to check which wires have power. This tool helps confirm the hot wires. Always test wires with the power off and on for safety. Do not touch exposed wires with bare hands.
Label The Wires
After identifying, label each wire with tape and a marker. Mark hot wires and neutrals clearly. This makes connecting easier and prevents mistakes later.

Credit: diy.stackexchange.com
Connect Wires To Switch
Connecting wires to a switch is a key step in wiring two lights on the same switch. It involves handling three types of wires: hot, neutral, and ground. Each wire plays a different role in the circuit.
Proper connections ensure the lights work safely and correctly. Follow these steps carefully to complete the wiring.
Connect Hot Wires
Identify the hot wires, usually black or red. These wires carry power from the breaker to the switch. Attach one hot wire to the switch’s input terminal. Connect the other hot wire from the lights to the switch’s output terminal. Tighten the screws firmly to hold wires in place. Do not mix hot wires with other wires.
Join Neutral Wires
Neutral wires are typically white. They do not connect to the switch but must be joined together. Use a wire connector to twist all neutral wires from the lights and power source. Secure the connector tightly. This completes the neutral path for the circuit and keeps it safe.
Attach Ground Wires
Ground wires are green or bare copper. These protect against electrical shocks. Connect all ground wires together using a wire connector. Attach one ground wire to the green grounding screw on the switch. Ensure all ground connections are secure for safety. This step is crucial for proper electrical grounding.
Secure Connections And Mount Switch
Securing connections and mounting the switch are key steps in wiring two lights to one switch. Strong connections keep the circuit safe and work well. Mounting the switch neatly finishes the job and looks good.
Careful wiring prevents loose ends and sparks. Tight connections also stop lights from flickering. A well-mounted switch is easy to use and lasts long.
Check Wire Stripping And Twisting
Strip the wire ends about half an inch. Twist the exposed wires tightly together. Twisting keeps wires from coming apart inside the switch box.
Use Wire Nuts Or Connectors
Cover twisted wires with wire nuts. Turn the nut clockwise until tight. Wire nuts protect connections from air and moisture.
Secure Ground Wires Properly
Attach ground wires to the green screw on the switch. This step prevents electrical shocks. Grounding is very important for safety.
Mount The Switch Firmly
Place the switch in the electrical box. Use screws to hold the switch tight. A loose switch can cause wiring problems later.
Attach The Switch Cover Plate
Snap or screw the cover plate over the switch. This protects wires and improves the look. A cover plate keeps dust and dirt out.
Test The Setup
Testing the setup is a key step after connecting two lights to the same switch. It ensures everything works safely and correctly. This check helps avoid electrical problems or faulty wiring.
Always test the setup before closing any electrical boxes or fixing faceplates. Take time to verify each connection and light function. A careful test saves time and trouble later.
Turn On The Power Supply
Start by turning on the main power supply. This action sends electricity to the switch and lights. Use the circuit breaker or fuse box to restore power carefully.
Flip The Switch
Next, flip the switch to the ON position. Watch both lights closely. Both should light up evenly and without flicker. If one or both lights fail, double-check connections.
Check For Flickering Or Dim Lights
Look for flickering or dim lights during the test. Flicker can mean loose wiring or a bad bulb. Dim lights might show voltage issues or wrong bulb wattage. Fix these issues before finishing.
Test Switch Off Position
Turn the switch OFF and confirm both lights go out. This step ensures the switch controls both lights correctly. If a light stays on, there may be a wiring error to fix.
Inspect For Heat Or Smell
Feel the switch and light fixtures for heat. Smell near the wiring for burning odors. Heat or smell signals a problem. Turn off power immediately and inspect wiring again.
Troubleshooting Tips
Troubleshooting helps fix problems when connecting two lights to one switch. It saves time and avoids frustration. Small errors can stop the lights from working correctly. Checking common issues can quickly solve most problems.
Check The Power Supply
Make sure the power is off before starting. Use a voltage tester to confirm no electricity flows. Turn the breaker off to be safe. Without power, the lights won’t turn on.
Inspect Wiring Connections
Loose wires cause lights to flicker or not work. Check all wire nuts and terminals. Tighten any loose connections. Look for damaged or frayed wires and replace them.
Test The Switch
The switch might be faulty. Use a multimeter to test if it works. Replace the switch if it does not send power. A bad switch stops the lights from turning on.
Verify Light Bulbs
Sometimes the problem is the bulbs. Check both bulbs to see if they are burned out. Replace any dead bulbs with new ones. Use the right wattage for your fixtures.
Confirm Correct Wiring Setup
Follow the wiring diagram step-by-step. Ensure the live, neutral, and ground wires are connected properly. Connecting wires incorrectly can cause failure or hazards. Double-check all connections before turning power back on.
Frequently Asked Questions
How Do I Wire Two Lights To One Switch?
To wire two lights to one switch, connect the switch’s output wire to both light fixtures’ live wires. Use a junction box to safely join the wires. Ensure the neutral and ground wires are properly connected for both lights.
Can I Control Two Lights With One Switch Safely?
Yes, you can safely control two lights with one switch by properly wiring the live wires together. Always turn off power before working, use appropriate wire connectors, and follow electrical codes to prevent hazards.
What Materials Are Needed To Connect Two Lights To One Switch?
You need a single-pole switch, electrical wires, wire nuts, a junction box, and a screwdriver. Use wires rated for your circuit’s voltage and amperage. Safety gear like gloves and a voltage tester is also recommended.
Is It Possible To Add Two Lights To An Existing Switch?
Yes, you can add two lights to an existing switch by running wires from the switch to each light fixture. Ensure the circuit can handle the additional load and follow electrical safety guidelines.
Conclusion
Connecting two lights to the same switch is a useful skill. It saves space and makes control easier. Always turn off power before starting work. Use proper tools and follow safety steps. Double-check your wiring to avoid mistakes. With patience, anyone can do this task.
Enjoy the convenience of controlling two lights with one switch. Keep learning and improving your home projects. Simple changes can make a big difference.