Have you noticed your brake lights acting up or not turning on at all? The problem might be your stop light switch.
Changing this small but crucial part can save you from costly repairs and keep you safe on the road. In this guide, you’ll learn exactly how to change a stop light switch quickly and easily—even if you’re not a car expert.
Keep reading, and by the end, you’ll have the confidence to fix your brake lights yourself.
Credit: subaru.oemdtc.com
Signs Of A Faulty Stop Light Switch
Recognizing the signs of a faulty stop light switch helps keep your car safe. This small part controls the brake lights. When it fails, problems arise quickly.
Knowing what to watch for allows you to fix the issue fast. This prevents accidents and costly repairs. Watch for changes in how your brake lights work.
Common Symptoms
Brake lights that don’t turn on or stay on constantly are clear signs. Sometimes, the lights flicker or work only when pressing the pedal hard. The brake pedal may feel different or stick in some cases. The car might not start if the switch stops sending the right signals. Dashboard warning lights can also appear without other causes.
Safety Risks
Faulty brake lights confuse other drivers. They may not know when you stop or slow down. This raises the chance of rear-end crashes. A broken switch can disable important safety features like cruise control. Driving with bad brake lights is unsafe and illegal in many places. Fixing the switch protects you and others on the road.
Tools And Materials Needed
Changing a stop light switch requires some basic tools and materials. Having the right items ready makes the job easier and faster. Gather everything before you start to avoid interruptions.
Essential Tools
- Screwdriver set – both flathead and Phillips
- Socket wrench with various sizes
- Needle-nose pliers for tight spaces
- Multimeter to test electrical connections
- Flashlight for better visibility
- Gloves to protect your hands
- Safety glasses for eye protection
Replacement Parts
- New stop light switch compatible with your vehicle
- Wire connectors or electrical tape
- Cleaning cloth to wipe dust and dirt
Locating The Stop Light Switch
Finding the stop light switch is the first step in changing it. This switch controls the brake lights and ensures they turn on when you press the brake pedal. Knowing its location helps you replace it quickly and safely.
Typical Switch Location
The stop light switch usually sits near the brake pedal. It is often attached to the brake pedal arm or the brake pedal bracket. The switch is small and rectangular with wires connected to it. Most cars place it just above the pedal, so it activates when the pedal moves.
Accessing The Switch Area
Accessing the switch requires sitting in the driver’s seat and looking under the dashboard. Use a flashlight to see the brake pedal arm clearly. Sometimes, you may need to remove a plastic cover or panel for better access. Be careful with wires and parts around the switch.
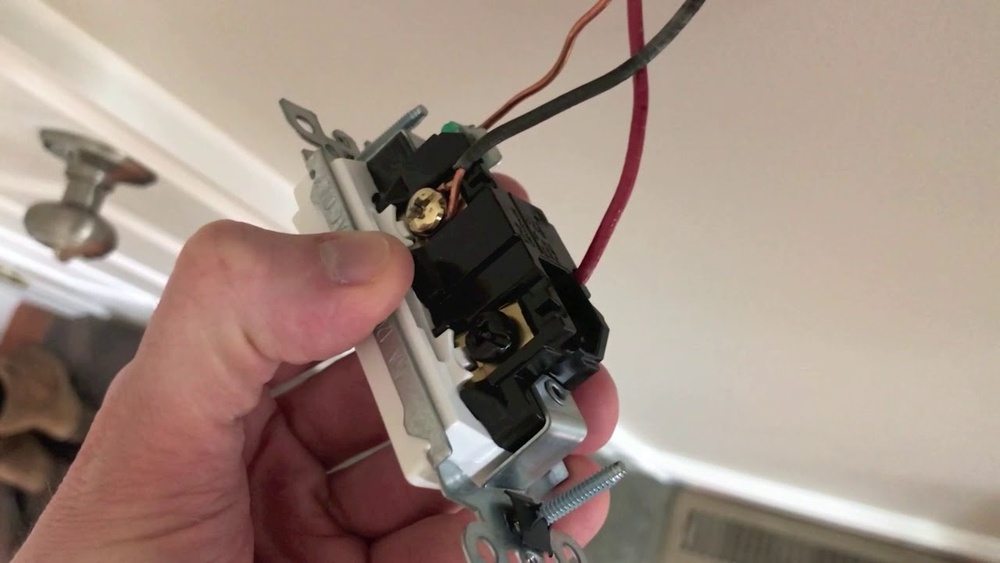
Removing The Old Stop Light Switch
Removing the old stop light switch is the first step in replacing it. This process ensures safety and prevents electrical issues. Follow these simple steps carefully. Take your time and work patiently.
Disconnecting The Battery
Start by disconnecting the car battery. This stops power from flowing. Use a wrench to loosen the negative cable. Remove it and keep it away from the battery terminal. This step prevents shocks and short circuits.
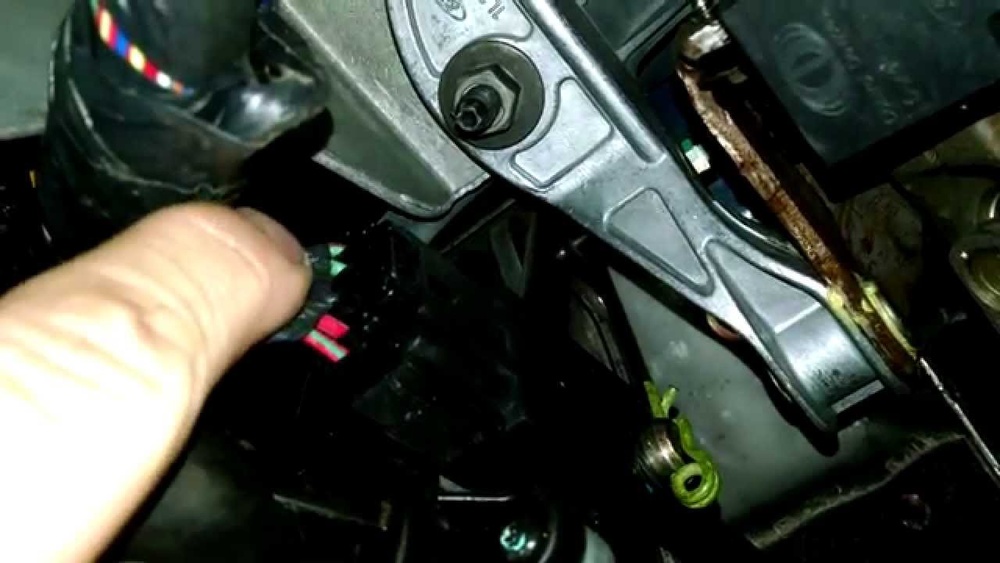
Unplugging The Switch Connector
Locate the stop light switch under the brake pedal. Find the electrical connector attached to it. Press the release tab on the connector. Pull the connector gently to unplug it. Avoid pulling the wires to stop damage.
Detaching The Switch
Look for the mounting clip or nut holding the switch. Use a screwdriver or wrench to remove it carefully. Pull the switch out from its place. Check for any stuck parts and move slowly. The old switch is now ready to be replaced.
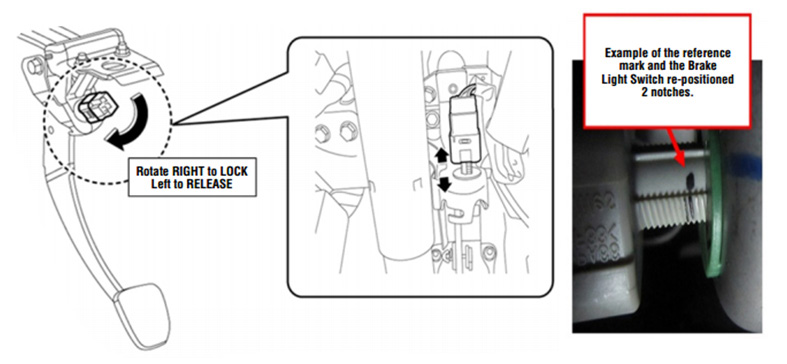
Installing The New Stop Light Switch
Installing the new stop light switch is a simple step. It needs care and attention to fit it correctly. This part controls your brake lights, so proper installation is key for safety.
Positioning The New Switch
First, locate the mounting hole where the old switch was. Align the new switch so the plunger faces the brake pedal arm. The switch must sit straight to work properly. Take your time to position it correctly before moving on.
Securing The Switch
Once in position, use the provided nut or clip to secure the switch. Tighten it by hand first, then use a wrench if needed. The switch should be snug but not too tight. Over-tightening can damage the switch or the mounting area.
Reconnecting The Connector
Next, reconnect the electrical connector to the switch. Push it in until you hear a click. This ensures a solid electrical connection. Check the connector for dirt or damage before attaching. A clean connection helps the switch work without issues.

Credit: www.ebay.com
Testing The New Switch
Maintaining the stop light switch is key to safe driving. A well-kept switch ensures your brake lights work every time. Proper care helps avoid sudden failures that can cause accidents. Simple steps keep the switch in good condition. These tips save you time and money on repairs.
Regular Inspection
Check the stop light switch every few months. Look for loose wires or broken parts. Press the brake pedal and see if the lights turn on. If lights flicker or do not light up, inspect the switch carefully. Clean any dirt or dust around the switch. Early checks catch problems before they grow.
Preventive Measures
Avoid spilling liquids near the stop light switch. Moisture can cause corrosion and damage the switch. Use a silicone spray to protect the switch from rust. Replace worn or cracked wires immediately. Keep the brake pedal area clean and clear. These steps help the switch last longer and work well.

Credit: www.youtube.com
Frequently Asked Questions
What Tools Are Needed To Change A Stop Light Switch?
You need a screwdriver, wrench, and a replacement stop light switch. Safety gloves and a multimeter help ensure correct installation and testing.
How Do I Locate The Stop Light Switch In My Car?
The stop light switch is usually near the brake pedal arm. Check under the dashboard or pedal assembly for a small switch with an electrical connector.
How Long Does It Take To Replace A Stop Light Switch?
Replacing a stop light switch typically takes 15 to 30 minutes. It depends on your car’s make and your experience with basic repairs.
What Are Signs Of A Faulty Stop Light Switch?
Brake lights not illuminating or staying on constantly indicate a bad switch. You may also notice cruise control issues or brake-related warning lights.
Conclusion
Changing a stop light switch is simpler than it seems. Follow the steps carefully and take your time. Double-check your work before testing the brake lights. A working stop light switch keeps you safe on the road. Regular car care helps avoid unexpected problems.
Now, you can fix this issue yourself with confidence. Keep practicing basic repairs to save money and stress. Small fixes make a big difference in your vehicle’s health.