Are you struggling with a stubborn Kwikset deadbolt lock that you need to remove? Whether you’re upgrading your security or fixing a jammed lock, knowing how to take it out quickly and safely can save you time and frustration.
In this guide, you’ll discover simple, step-by-step instructions designed just for you. No confusing jargon or complicated tools—just clear tips that anyone can follow. Keep reading, and you’ll have your Kwikset deadbolt removed in no time.

Credit: diy.stackexchange.com
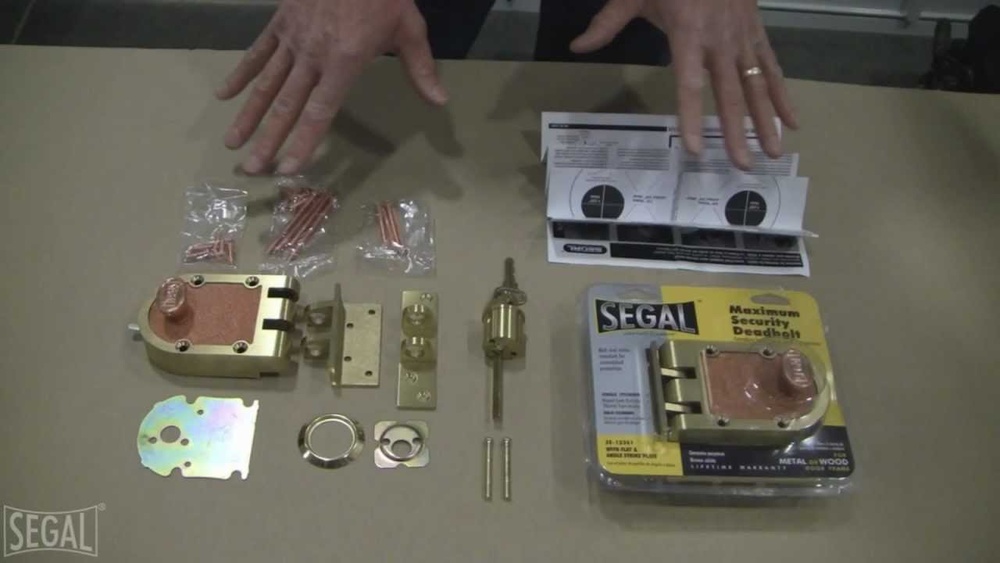
Tools Needed
Removing a Kwikset deadbolt lock requires a few basic tools. These tools help you take apart the lock safely and quickly. Having the right tools makes the job easier and prevents damage to the door or lock parts.
Gather all the tools before you start. This saves time and avoids interruptions. Each tool has a specific role in the removal process.
Screwdriver
A screwdriver is essential for removing screws from the lock. Most Kwikset deadbolts use Phillips head screws. A flathead screwdriver might be needed for some parts too.
Allen Wrench
Some Kwikset models use small set screws. An Allen wrench helps remove these screws. Check your lock to see if this tool is necessary.
Pliers
Pliers help grip and pull out stubborn parts. They also assist in turning small components. Needle-nose pliers work best for tight spaces.
Drill (optional)
A drill is useful if screws are stripped or painted over. Use a drill bit slightly smaller than the screw head. This tool should be a last resort.
Flashlight
A flashlight improves visibility inside the door. It helps you see screws and components clearly. Good lighting prevents mistakes during removal.
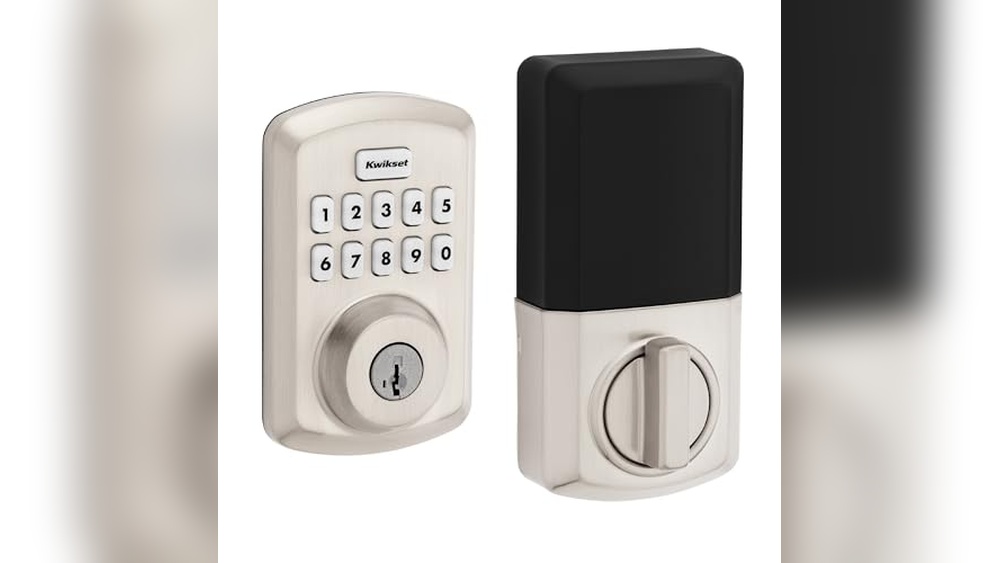
Identify Your Kwikset Deadbolt Model
Start by checking the shape and size of your Kwikset deadbolt. Different models have unique features that affect removal steps. Identifying the model helps you find the right tools and instructions easily.
Removing a Kwikset deadbolt starts with knowing the exact model you own. Each model has a slightly different design and removal process. Identifying your model saves time and avoids damage. It also helps you find the right tools and instructions.
Look closely at your deadbolt for labels or markings. These often show the model number or name. If no label is visible, some features can help identify the type. Recognizing your model ensures you follow the correct steps to remove it safely.
Check The Back Of The Lock
Turn the knob or thumb turn to see the back side of the lock. Many Kwikset models have a small label or stamped number here. This information often includes the model number or series. Use a flashlight if needed to see clearly. Write down any numbers or names you find.
Examine The Lock Faceplate
The faceplate sits on the door edge where the latch extends. Some Kwikset locks have model information engraved here. Look for any text or codes on the metal plate. This can help confirm your lock type. Clean the area if dirt blocks your view.
Compare Design Features
Look at the shape of the knob or thumb turn. Notice the style of the keyhole and latch. Different Kwikset models have unique designs. Search online images of Kwikset deadbolts to find a match. This visual check can help identify your model quickly.
Consult Your Purchase Documents
Check the packaging or receipt if you still have them. Model details often appear on the box or sales slip. This information is reliable and easy to read. Keep these documents for future reference or parts replacement.
Prepare The Door
Preparing the door is the first step in removing a Kwikset deadbolt lock. You need to create a safe and clear workspace. This makes the removal process easier and faster. Take time to organize your tools and clear the door area.
Careful preparation helps avoid damage to the door and lock parts. It also reduces frustration during removal. Follow simple steps to get your door ready.
Clear The Area Around The Door
Remove any objects near the door. Move rugs, furniture, or decorations out of the way. This gives you room to work comfortably. A clear space also prevents accidents.
Gather Necessary Tools
Have a screwdriver, usually a Phillips head, ready. A flathead screwdriver may help with prying parts. Keep a small container nearby to hold screws. This avoids losing small pieces during removal.
Check The Door’s Condition
Inspect the door surface around the lock. Look for cracks, dents, or loose paint. Note any damage that may affect lock removal. This helps you handle the door with care.
Ensure The Door Is Closed
Close the door fully before starting. A closed door stabilizes the lock assembly. It stops the door from moving while you work. This adds safety and precision to the task.
Remove The Interior Thumb Turn
Removing the interior thumb turn is the first step to take off a Kwikset deadbolt lock. This part lets you lock and unlock the door from inside without a key. Taking it off carefully helps you access the lock’s inner parts.
The thumb turn is easy to spot. It looks like a small lever or knob on the inside door panel. Removing it is simple but needs the right steps. Prepare a screwdriver and a small tool before starting.
Locate The Screw Holding The Thumb Turn
Look closely at the thumb turn. Find the small screw on its side or bottom. This screw holds the thumb turn in place. Use a flashlight if the screw is hard to see.
Unscrew The Thumb Turn
Use a screwdriver that fits the screw head. Turn the screw counterclockwise. Keep turning until the screw comes out completely. Put the screw aside safely for later use.
Remove The Thumb Turn From The Door
After the screw is out, gently pull the thumb turn away from the door. It should slide off easily. If it feels stuck, wiggle it a little without forcing it.
Set The Thumb Turn Aside Safely
Keep the thumb turn and screw in a safe place. You may need them again for reinstallation. This step keeps you organized and prevents losing parts.
Unscrew The Exterior Cylinder
Unscrewing the exterior cylinder is the first step to remove a Kwikset deadbolt lock. This part holds the keyhole and connects to the inside locking mechanism. Removing it carefully helps avoid damage and makes the rest of the process easier.
Use a screwdriver that fits the screws well. Loose tools can strip the screws and cause problems. Keep the screws safe once removed. You will need them to install a new lock or put the old one back.
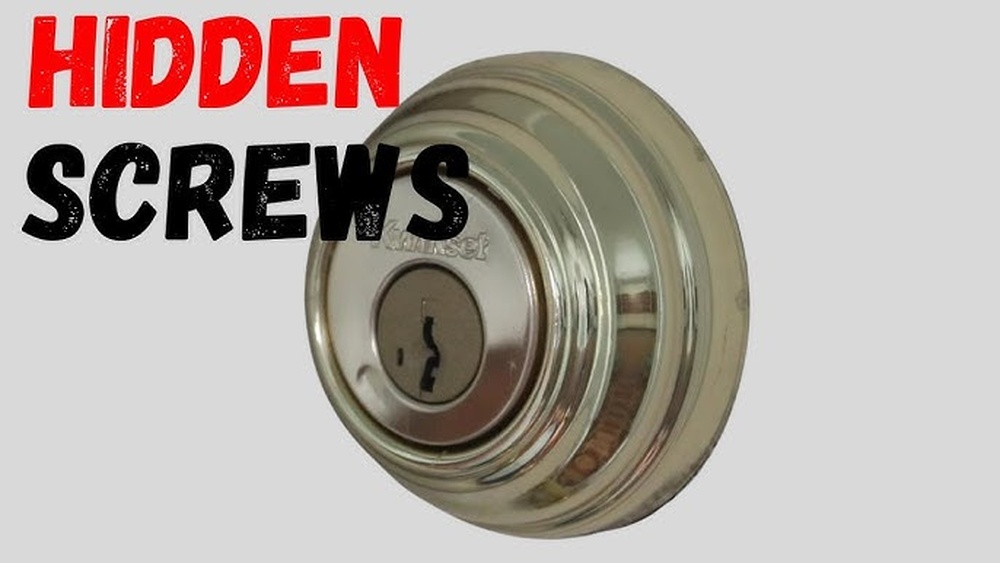
Locate The Cylinder Screws
Look on the edge of the door near the lock. You will find two screws holding the exterior cylinder. These screws run through the door to the interior side. Identifying them correctly saves time and effort.
Choose The Right Screwdriver
Kwikset deadbolts usually use a Phillips screwdriver. Check the screw heads before starting. Using the wrong tool can damage screws or the lock. A good fit makes unscrewing smooth and safe.
Remove The Screws Carefully
Turn the screws counterclockwise to loosen. Apply steady pressure to avoid slipping. Take your time and do not force the screws. Once loose, pull the screws out gently and set them aside.
Pull Out The Exterior Cylinder
After removing the screws, pull the exterior cylinder from the door. It should slide out easily. If it feels stuck, wiggle it slightly while pulling. Avoid using too much force to protect the door and lock parts.

Credit: www.youtube.com
Detach The Deadbolt Mechanism
Detaching the deadbolt mechanism is a key step in removing a Kwikset deadbolt lock. This part controls the locking and unlocking of the door. Removing it carefully helps avoid damage to the door or lock parts.
Follow clear steps to remove the deadbolt mechanism safely. Prepare the right tools and stay organized. Small parts can get lost easily.
Start by unscrewing the screws on the interior side of the lock. These screws hold the thumb turn in place. Use a screwdriver to take them out slowly. Pull the thumb turn off the spindle gently.
Extract The Deadbolt Faceplate
Next, open the door and locate the faceplate on the door edge. Unscrew the screws securing the faceplate. Pull the faceplate and deadbolt out carefully. This may take some wiggling to free the mechanism.
Detach The Lock Cylinder
Remove the screws holding the lock cylinder on the exterior side. Pull the cylinder straight out from the door. Keep a firm grip to avoid dropping small parts. This exposes the internal parts of the deadbolt.
Remove The Strike Plate
Start by unscrewing the strike plate from the door frame using a screwdriver. Gently pull it away once all screws are removed. This step makes it easier to take out the deadbolt lock.
What Is A Strike Plate?
The strike plate is a small metal piece on the door frame. It catches the deadbolt and keeps the door locked. Removing it is key to taking out a Kwikset deadbolt lock.
Tools Needed To Remove The Strike Plate
Gather a screwdriver that fits the screws on the strike plate. Usually, a Phillips head screwdriver works well. Keep a small container ready to hold the screws.
Steps To Remove The Strike Plate
Start by opening the door fully. Locate the screws on the strike plate. Use the screwdriver to turn each screw counterclockwise. Remove all screws carefully and place them in the container.
Check The Door Frame After Removal
Look inside the hole where the strike plate was. Remove any debris or dust. This makes it easier to install a new lock or plate later.
Troubleshooting Common Issues
Troubleshooting common issues can make removing a Kwikset deadbolt easier. Problems can slow you down or cause damage. Knowing how to fix these issues saves time and stress.
Below are solutions to the most frequent problems. These tips help keep the removal process smooth and safe.
Removing A Stuck Deadbolt Cylinder
The cylinder may stick due to dirt or rust. Try spraying a small amount of lubricant. Wait a few minutes before trying again. Gently wiggle the cylinder while pulling it out.
Dealing With Stripped Screws
Stripped screws make removal hard. Use a rubber band over the screw head for extra grip. A flathead screwdriver can sometimes turn them. If not, try pliers or a screw extractor tool.
Handling A Jammed Deadbolt
The bolt might jam inside the door. Check if the bolt moves freely by turning the key. Apply lubricant to the bolt and latch. Tap the bolt lightly with a hammer to loosen it.
Removing The Thumb Turn
The thumb turn can be tricky to remove. Look for a small clip or screw holding it. Press or unscrew carefully to avoid damage. Pull the thumb turn straight out once loose.
Tips For Replacing Or Upgrading Locks
Replacing or upgrading locks can improve home security and add convenience. It requires some care and the right tools. Following simple tips helps avoid mistakes and makes the process smooth.
Choosing the right lock type and size is important. Matching the new lock with your door prevents fitting problems. Understanding basic lock parts helps during removal and installation.
Choose The Right Replacement Lock
Pick a lock that fits the door thickness and style. Check the backset measurement to match the old lock. Select a lock with good security ratings for better protection.
Use Proper Tools For Installation
Gather tools like a screwdriver, drill, and measuring tape. Use the correct screwdriver to avoid damaging screws. Keep tools handy to work faster and reduce errors.
Follow Instructions Step-by-step
Read the manual before starting the replacement process. Remove screws carefully and keep them in a safe place. Install the new lock parts in the order given to avoid confusion.
Test The Lock After Installation
Check the lock’s function before finishing the job. Turn the key and knob to ensure smooth movement. Confirm the lock secures the door properly without sticking.
Consider Professional Help If Needed
Hire a locksmith if unsure about removing or installing locks. Professionals save time and prevent damage to doors. They offer advice on the best lock options for your needs.

Credit: diy.stackexchange.com
Frequently Asked Questions
How Do I Unlock A Kwikset Deadbolt Without A Key?
You can unlock a Kwikset deadbolt using a bump key or lock-picking tools. However, these methods require skill and may damage the lock. For emergencies, contacting a locksmith is safer and more reliable.
What Tools Are Needed To Remove A Kwikset Deadbolt?
To remove a Kwikset deadbolt, you need a screwdriver (usually Phillips), a flathead screwdriver, and sometimes an Allen wrench. These tools help you unscrew the lock plates and detach the deadbolt components easily.
Can I Remove A Kwikset Deadbolt Myself Safely?
Yes, you can remove a Kwikset deadbolt safely by following instructions carefully. Use proper tools, keep screws organized, and avoid forcing parts. If unsure, consult a professional locksmith to prevent damage.
How Long Does It Take To Remove A Kwikset Deadbolt?
Removing a Kwikset deadbolt typically takes 10 to 20 minutes. The process is straightforward if you have the right tools and basic DIY skills. Complex locks or damage may extend the time needed.
Conclusion
Removing a Kwikset deadbolt lock can be simple with the right steps. Take your time and follow each part carefully. Keep your tools close and work patiently. This task does not need special skills or many tools. You can save money by doing it yourself.
Remember, staying safe is important during the process. Practice will make you better at it. Now, you can handle deadbolt removal with confidence.