Are you struggling with a light switch cover that just doesn’t fit right? Maybe it’s too big, too small, or needs to be trimmed for a perfect look.
Cutting a light switch cover might sound tricky, but with the right steps, you can do it yourself easily and safely. In this guide, you’ll learn exactly how to cut your light switch cover to get a clean, professional finish.
Keep reading, and you’ll save time, avoid costly mistakes, and make your switch look just right.
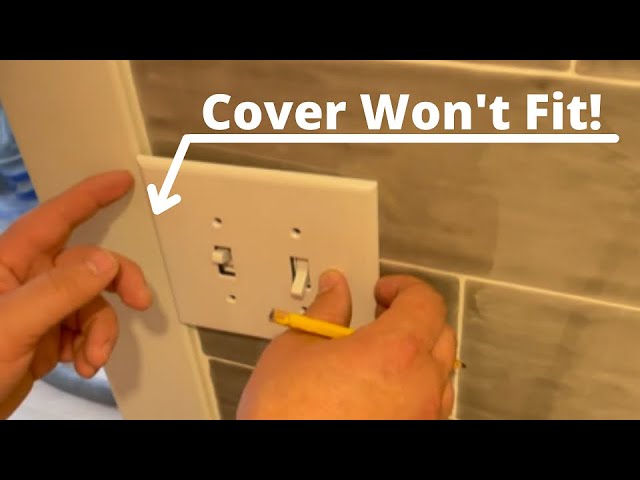
Credit: www.youtube.com
Tools Needed
Cutting a light switch cover requires the right tools. Using proper tools makes the job easier and cleaner. It helps you achieve a perfect fit without damage. Prepare your workspace and gather everything before starting.
Essential Cutting Tools
A utility knife is a must-have. It allows precise trimming of plastic covers. A fine-toothed hacksaw works well for thicker covers. A small hand saw can also help with straight cuts. Use a metal ruler to guide your cuts. A pencil marks the areas to cut clearly. Sandpaper smooths rough edges after cutting.
Safety Gear
Safety is important during any cutting task. Wear safety goggles to protect your eyes from debris. Use gloves to prevent cuts and scrapes. A dust mask stops you from breathing dust particles. Make sure your workspace is well-lit and clean. Keep a first aid kit nearby just in case.

Credit: www.youtube.com
Choosing The Right Cover
Choosing the right light switch cover is important before cutting. The cover must fit well and look good. Picking the proper cover saves time and avoids mistakes. It also helps the switch stay safe and clean. Consider the material and the size first. These two points guide you to the best cover for your needs.
Material Types
Light switch covers come in many materials. Plastic covers are common and easy to cut. They are lightweight and cheap. Metal covers are strong and last long. They need special tools to cut. Wood covers add style but can be hard to shape. Choose a material that fits your tools and style. The right material makes cutting easier and safer.
Size And Shape
Switch covers have different sizes and shapes. Some fit one switch, others fit two or more. Measure your switch plate before buying a cover. Check the shape of the switch opening. Square and rectangular covers are common. Rounded edges may need extra care while cutting. The cover must fully cover the wall opening. A good fit keeps dust and dirt out.
Measuring The Cover
Measuring the light switch cover is the first step to ensure a perfect fit. Accurate measurements prevent mistakes and save time. Take your time to measure carefully. Use a good ruler or tape measure for precision. Marking the cut lines clearly helps guide your cutting. Double-checking the measurements avoids errors and wasted material.
Marking Cut Lines
Start by placing the cover on a flat surface. Use a pencil to draw light lines where you want to cut. Make sure the lines are straight and clear. Mark all sides that need trimming. Use a ruler to keep lines even and accurate. These lines act as your cutting guide. Avoid drawing thick lines that may confuse the cut.
Double-checking Measurements
After marking, measure the lines again carefully. Check the width and height twice. Compare the marks with the switch and wall space. Confirm the cover will fit without gaps or overlaps. If possible, ask someone to verify your measurements. Correct any mistakes before starting to cut. This step saves time and avoids damage.
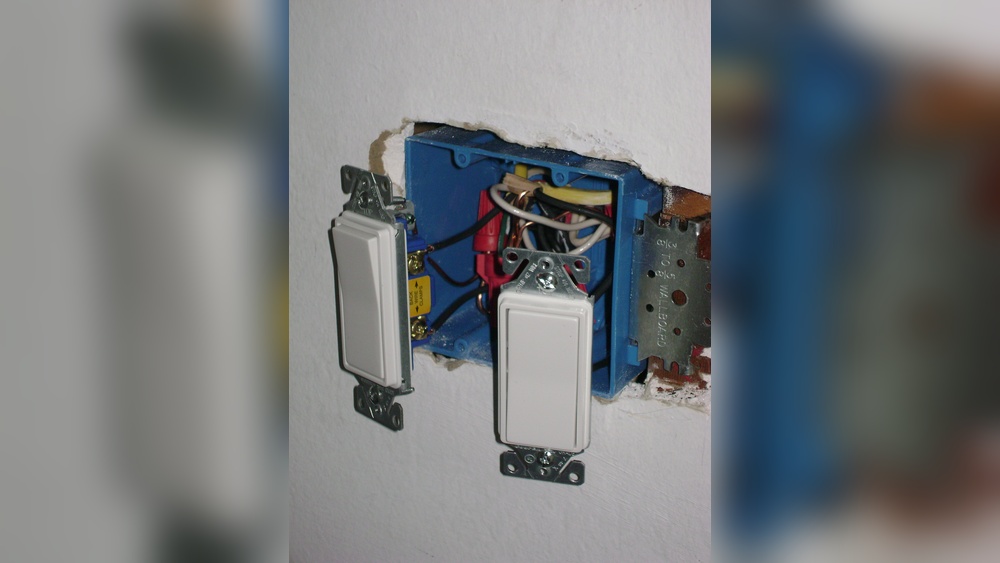
Credit: www.reddit.com
Preparing To Cut
Preparing to cut a light switch cover is a key step. It helps you make a clean and safe cut. Take your time to set up properly. This ensures the cover fits well after cutting. Follow simple steps to get ready.
Securing The Cover
Hold the cover firmly before cutting. Use clamps or a vise to keep it still. This stops slipping and mistakes. Secure the cover on a flat surface. Check that it does not move at all. A steady cover makes cutting easier.
Setting Up Workspace
Choose a clean, well-lit area for your work. Clear away any clutter or tools you do not need. Use a sturdy table or workbench. Make sure you have enough space to move freely. Keep safety gear nearby, like gloves and goggles. A good workspace helps you cut better and safer.
Cutting Techniques
Cutting a light switch cover correctly helps it fit perfectly. Proper cutting techniques make the task easier and safer. Choose the right tool and follow simple steps for clean cuts.
Using A Utility Knife
A utility knife works well for thin plastic covers. Score the cover along the line repeatedly. Use steady pressure and cut slowly for control. Snap the cover along the scored line to break it cleanly. Wear gloves to protect your hands during cutting.
Using A Rotary Tool
A rotary tool offers precision for detailed cuts. Attach a cutting wheel suitable for plastic. Mark your cutting line clearly before starting. Hold the tool firmly and move slowly along the line. Use safety glasses to protect your eyes from debris.
Using A Hacksaw
A hacksaw is good for thicker covers or metal ones. Choose a fine-toothed blade for smoother cuts. Secure the cover in a clamp before sawing. Saw slowly with even strokes to avoid rough edges. Clean the edges with sandpaper after cutting for a neat finish.
Smoothing The Edges
Smoothing the edges of a cut light switch cover is important for safety and appearance. Rough edges can cause cuts or scratches. A smooth finish makes the cover look neat and fits better on the wall.
Take your time with this step. Proper smoothing also helps paint or finish stick well. It gives a clean, professional look to your work.
Sanding Tips
Start with medium-grit sandpaper, about 120 grit. Sand the edges gently in a circular motion. Check often to avoid sanding too much. Switch to fine-grit sandpaper, around 220 grit, for a smooth finish. Use a sanding block or small sponge for better control.
Avoiding Rough Edges
Wear gloves to protect your hands while sanding. Work slowly and carefully near corners. Use a file for sharp or hard-to-reach spots before sanding. Clean dust off the cover after sanding. Inspect edges for any rough spots and sand again if needed.
Fitting The Cover
Fitting the light switch cover is a key step after cutting it to size. This part ensures the cover looks neat and works well. A good fit protects the switch and gives a clean finish to your wall. Take your time to place and adjust the cover carefully.
Test Placement
Place the cover over the switch to see how it fits. Check if the switch and screws line up with the holes. The cover should sit flat against the wall. Look for any gaps or areas that stick out. This test helps you find any issues before fixing the cover in place.
Adjusting For A Perfect Fit
Make small changes to the cover if it does not fit well. Trim edges or enlarge holes slightly to match the switch. Use sandpaper to smooth rough parts. Keep checking the fit after each adjustment. Aim for a cover that fits snugly and looks tidy.
Maintenance Tips
Maintaining your light switch cover ensures it lasts longer and looks good. Regular care keeps dust and dirt away. It also prevents cracks or breaks. Follow these simple tips to keep your cover in top shape.
Cleaning The Cover
Use a soft cloth to wipe the cover. Avoid harsh cleaners that can damage the surface. Warm water with mild soap works best. Dry the cover fully to stop moisture damage. Clean regularly to avoid buildup of dirt and grime.
Preventing Damage
Handle the cover gently during installation or cleaning. Avoid using sharp tools near the edges. Place covers away from direct sunlight to stop fading. Check screws and tighten them carefully to prevent loosening. Regular care helps the cover stay secure and intact.
Frequently Asked Questions
How Do You Measure A Light Switch Cover To Cut?
Measure the cover’s width and height carefully. Use a ruler or tape measure. Mark the cutting lines clearly before cutting. Accurate measurement ensures a perfect fit and neat appearance.
What Tools Are Needed To Cut A Light Switch Cover?
A utility knife, fine-toothed saw, or rotary tool works well. Sandpaper helps smooth edges after cutting. Choose tools based on the cover material for clean cuts.
Can I Cut A Plastic Light Switch Cover Safely?
Yes, plastic covers can be cut safely with a sharp utility knife or fine saw. Work slowly and wear safety gloves to avoid injury. Smooth edges after cutting to prevent sharpness.
How To Avoid Damaging The Light Switch When Cutting Cover?
Turn off power before removing the cover. Remove screws carefully and avoid forcing the cover. Mark and cut the cover away from the switch to prevent damage.
Conclusion
Cutting a light switch cover can be simple and safe. Take your time and measure carefully before cutting. Use the right tools to get clean, smooth edges. Always turn off the power to avoid accidents. A well-cut cover fits perfectly and looks neat.
Practice makes it easier and builds your confidence. Now, you can customize your switch covers with ease. Try it yourself and see the difference it makes.