Are you tired of cluttered walls and messy spaces? Making your own wall hooks at home is easier than you think, and it can add a personal touch to your decor.
Imagine having stylish, sturdy hooks that fit perfectly with your style—and saving money while doing it. In this guide, you’ll discover simple steps to create wall hooks using materials you probably already have. Ready to transform your walls and organize your space like a pro?
Keep reading, because your new favorite DIY project starts here.
Materials Needed
Gathering the right materials is the first step to making wall hooks at home. Having the correct tools and supplies makes the process easier and more fun. This section breaks down everything needed into three key parts. Each part helps you prepare and create hooks that fit your style and needs.
Basic Tools
Start with essential tools for any wall hook project. You will need a hammer, screwdriver, and drill. A measuring tape helps keep hooks even and straight. Sandpaper smooths rough edges on wood or metal. Pliers are useful for bending wire or small parts. These tools set the foundation for a neat, sturdy hook.
Types Of Hooks
Choose hook styles based on your purpose. Simple metal hooks work well for coats and keys. Wooden pegs add a rustic touch to your walls. Wire hooks allow creative shapes like circles or hearts. Magnetic hooks hold small metal items without nails. Pick the style that fits your space and items.
Decorative Supplies
Decorate hooks to make them unique and match your home. Paints and brushes add color and patterns. Stickers or washi tape bring fun designs. Small knobs or beads create texture and charm. Clear varnish protects your work and adds shine. These supplies turn plain hooks into special wall art.

Credit: www.youtube.com
Choosing The Right Wall
Choosing the right wall is key to making strong and useful wall hooks. Not all walls can hold the same weight or type of hook. Knowing your wall type helps you pick the best method to attach your hooks safely. This ensures your hooks last long and hold what you need.
Wall Types And Surfaces
Walls come in many types like drywall, plaster, brick, or concrete. Drywall is common and easy to work with but needs anchors for heavy items. Plaster walls are harder and may crack if you drill carelessly. Brick and concrete walls are very strong but need special tools to drill holes.
Each surface needs a different kind of hook or anchor. Choose hooks made for your wall type. This stops damage and makes sure hooks stay secure over time.
Weight Considerations
Think about what you will hang on your hooks. Light items like keys need less support. Heavy items like coats or bags need stronger hooks and anchors. Check the weight limit of hooks before buying or making them.
Use multiple hooks for heavier items to spread the weight. This reduces the chance of walls cracking or hooks falling off. Proper weight planning keeps your wall and hooks safe and stable.
Simple Wooden Hooks
Simple wooden hooks add charm and function to any room. They hold coats, bags, and keys neatly. Making these hooks at home is easy and fun. Basic tools and wood pieces are all you need. Follow these steps to create your own wooden hooks.
Cutting And Shaping Wood
Start with a small piece of wood. Pine or cedar works well for hooks. Cut wood into rectangles about 4 inches long and 1 inch wide. Use a saw for straight cuts. Smooth edges with sandpaper to avoid splinters. Shape one end into a curve or point. This makes the hook more useful and stylish.
Finishing Techniques
Sand the wood until smooth. This helps paint or stain stick better. Choose a finish that suits your room. Clear varnish keeps the wood natural. Stain adds color and highlights the grain. Let the finish dry fully. Attach the hooks with screws or strong glue. Your wooden hooks are ready for use.
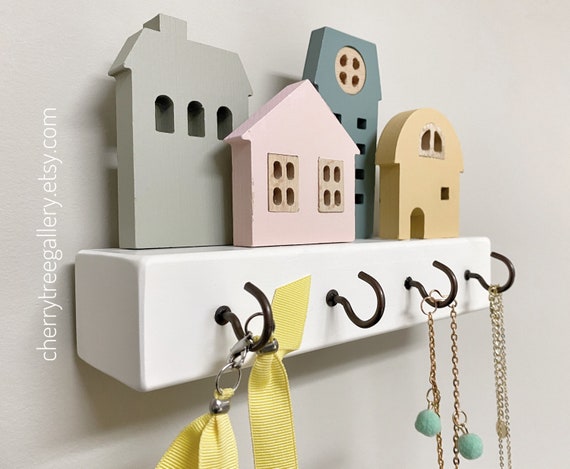
Credit: www.etsy.com
Upcycled Hook Ideas
Upcycled hook ideas turn old items into useful wall hooks. This saves money and helps the environment. Many household objects can become strong, stylish hooks. Creativity is the key. You can give new life to things you no longer use. These hooks fit any room and style. They add charm and personality to your walls.
Using Old Keys And Hardware
Old keys make unique and small hooks. Their shapes hold light items well. Attach keys to a wooden board or directly on the wall. Use strong glue or screws for safety. Rusty or shiny keys both work. Hardware pieces like drawer pulls or hinges also make great hooks. They come in different shapes and sizes. Paint them for a fresh look. These hooks add a vintage or industrial feel to any space.
Repurposing Household Items
Many household items serve as hooks after some change. Spoon handles can become elegant hooks by bending them. Old belt buckles can hold scarves or bags. Broken jewelry pieces create small hooks for keys or jewelry. Even jar lids can be fixed to the wall as hooks. Paint or decorate these items to match your room’s style. Repurposing saves resources and adds a personal touch to your home.
Creative Decorative Hooks
Creative decorative hooks bring charm and style to any room. They turn simple wall hooks into beautiful art pieces. You can make them at home with easy materials.
These hooks do more than hold items. They add color and texture to your walls. Let’s explore two fun ways to decorate your wall hooks.
Painting And Stenciling
Painting your hooks gives them a fresh, unique look. Use bright colors to make them stand out. You can use spray paint or brush paint. Choose colors that match your room’s theme.
Stenciling adds patterns and designs quickly. Use simple shapes like stars, leaves, or stripes. Place the stencil on the hook and paint inside the lines. Remove the stencil carefully to reveal the design.
This method personalizes your hooks and makes them eye-catching. It’s perfect for a creative touch without much effort.
Adding Fabric Or Rope
Wrapping hooks with fabric or rope adds texture and warmth. Use soft fabric strips or natural jute rope. Secure the end with glue or small nails. Wrap tightly for a neat finish.
Try colorful fabrics for a playful look. Natural rope works well for rustic or beach styles. This technique makes plain hooks feel cozy and inviting.
Fabric and rope also protect your walls and clothes from scratches. A simple way to upgrade hooks with everyday materials.

Credit: cascadeironco.com
Installation Tips
Installing wall hooks at home needs care to hold weight safely. Proper installation stops hooks from falling or damaging walls. Follow these tips to fix hooks firmly and neatly.
Mounting Techniques
Choose the right spot on the wall first. Use a stud finder to locate wooden studs behind drywall. Hooks mounted on studs hold more weight. For hollow walls, use wall anchors or toggle bolts. Drill small pilot holes before screwing in hooks. This prevents wall cracks and makes screwing easier. Tighten screws until hooks feel stable but avoid over-tightening. Check hook alignment with a level for a straight look.
Tools For Secure Attachment
Use a power drill for quick, clean holes. A screwdriver helps control screw depth and tightness. Wall anchors need a hammer to tap them in gently. A stud finder saves time by locating studs quickly. A level ensures hooks are straight and balanced. Measuring tape helps place hooks evenly apart. Safety gear like goggles protects your eyes during drilling.
Maintenance And Care
Keeping your homemade wall hooks in good shape helps them last longer. Regular care stops damage and keeps hooks looking nice. Small efforts can protect your work and save money over time.
Cleaning Tips
Dust your wall hooks often with a soft cloth. Use a damp cloth to wipe off dirt and stains. Avoid harsh chemicals that can damage the hook’s surface. Dry the hooks well after cleaning to prevent rust or wood damage. For metal hooks, a little oil can stop rust and keep them shiny.
Repairing Damage
Check hooks regularly for cracks or loose parts. Tighten screws or nails to keep hooks secure. Fill small cracks in wood with wood filler and let it dry. Sand smooth to match the hook’s surface. For metal hooks, use rust remover on rusty spots. Replace hooks that are broken beyond repair to ensure safety.
Frequently Asked Questions
How Do I Make Wall Hooks Using Household Items?
You can create wall hooks using sturdy materials like old keys, wooden knobs, or bent wire hangers. Attach them securely to the wall with screws or strong adhesive for durability and functionality.
What Tools Are Needed To Make Diy Wall Hooks?
Basic tools include a drill, screws, screwdriver, measuring tape, and wall anchors. Optional tools are a hammer and level to ensure hooks are aligned and firmly fixed.
Which Materials Work Best For Homemade Wall Hooks?
Wood, metal, and strong plastic are ideal materials for wall hooks. They provide durability and support for hanging items like coats, bags, and keys effectively.
How Do I Securely Attach Wall Hooks At Home?
Use appropriate wall anchors for drywall or masonry screws for brick walls. Pre-drill holes and ensure hooks are level and firmly tightened for safe hanging.
Conclusion
Making wall hooks at home saves money and adds a personal touch. You can use simple materials found around the house. Each hook reflects your style and creativity. Small projects like this improve your DIY skills step by step. Try different designs and find what fits your space best.
Enjoy the process and the neat results on your walls. Simple, useful, and fun—DIY wall hooks are a great choice.