Are you tired of cluttered walls and lost keys? Creating your own wall hooks is easier than you think—and it can add a personal touch to your space.
Imagine having stylish hooks that fit perfectly with your décor and hold everything you need, from coats to bags. In this guide, you’ll discover simple steps to make wall hooks that are both functional and beautiful. Ready to transform your walls and organize your life?
Keep reading, and you’ll learn how to do it yourself with materials you probably already have.
Credit: shop.homesteadhouse.ca
Materials Needed
Creating wall hooks requires some basic materials. These materials help you build strong and useful hooks. Choosing the right supplies makes the project easier and more fun. Gather everything before starting to save time and avoid interruptions.
Basic Tools
Start with simple tools like a drill and screwdriver. A hammer can help with nails or small pins. Use a measuring tape for exact placement. Sandpaper smooths rough edges. A pencil marks where to place hooks. Safety gear like gloves and glasses protect your hands and eyes.
Types Of Hooks
Select hooks that fit your needs. Metal hooks are strong and durable. Wooden hooks offer a natural look. Plastic hooks are lightweight and come in many colors. Choose between single hooks or double hooks for more hanging space. Make sure hooks match the weight of items you plan to hang.
Decorative Elements
Decorate hooks to make them unique. Paint adds color and style. Use stickers or stencils for patterns. Add small knobs or beads for detail. Natural elements like shells or stones create a rustic feel. Keep decorations light to avoid making hooks less sturdy.
Credit: www.antiquefarmhouse.com
Choosing The Right Wall
Choosing the right wall is key to creating strong, useful wall hooks. It affects how well the hooks hold and how safe they are. Picking the best spot means checking the wall type, the weight it can hold, and where it fits in your space.
Assessing Wall Material
Different walls need different hooks and tools. Drywall is common but weak alone. It needs anchors or studs for strong support. Brick and concrete are tough and hold heavy hooks well. Wood walls are easy to drill into and hold hooks firmly. Know your wall type before starting.
Finding The Perfect Spot
Choose a spot that suits your needs. Think about what you want to hang and how you use the space. Avoid places near switches or vents. Look for clear, flat areas. Make sure the hooks won’t block doors or windows. The right spot keeps hooks practical and neat.
Considering Weight Limits
Every wall and hook has a weight limit. Check how heavy your items are. Match the hook and wall strength to that weight. Heavy items need strong walls and hooks. Light items can use simple hooks on drywall. Knowing weight limits keeps hooks safe and lasting long.
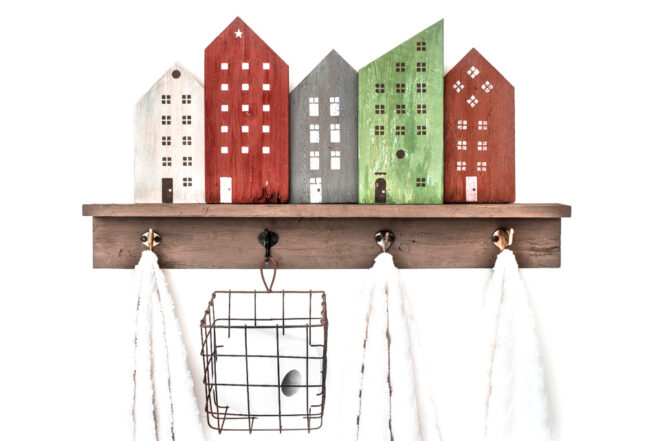
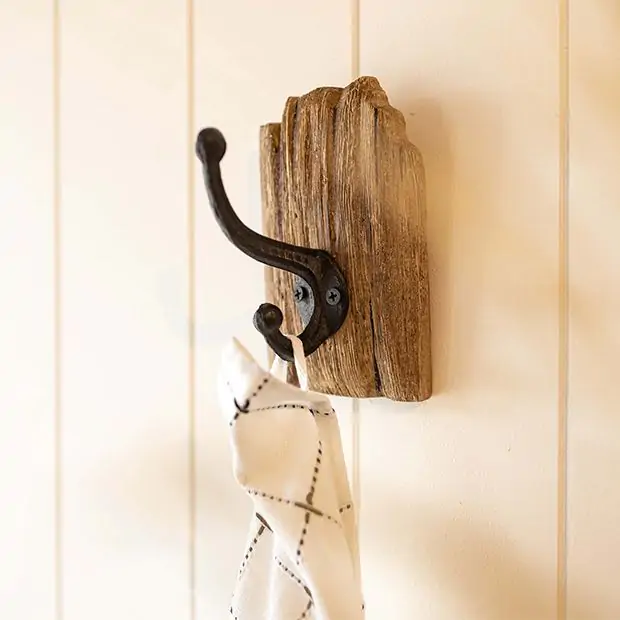
Simple Wooden Hooks
Simple wooden hooks are a great way to add function and style to any wall. They are easy to make with basic tools and materials. These hooks suit many rooms, from the kitchen to the bedroom. The natural wood look fits most home styles. You can customize the size and finish to match your decor.
Cutting And Sanding
Start by choosing a piece of wood. Pine or oak works well. Cut the wood into small blocks or shapes. Use a saw to get the size you want. After cutting, sand each piece smooth. Sanding removes rough edges and splinters. Smooth wood looks better and is safer to touch.
Adding Finishes
Choose a finish to protect the wood. Paint gives color and style. Stain enhances the wood’s natural grain. Use a brush or cloth to apply the finish. Let each coat dry fully before adding another. Finishing the wood helps it last longer on your wall.
Mounting Tips
Pick the right screws or nails for your wall type. Use a drill to make pilot holes in the wood. This stops the wood from splitting. Find wall studs for stronger support. If no studs are available, use wall anchors. Attach the hooks firmly to avoid falling. Space hooks evenly for a neat look.
Credit: www.thetatteredpew.com
Upcycled Hook Ideas
Upcycled hook ideas are a smart way to reuse old items. They save money and help the environment. These hooks give a fresh look to your walls. You can make unique and useful hooks with simple things.
Try different objects that you no longer need. Turn them into strong and stylish wall hooks. It is a fun and creative project for any home.
Using Old Keys
Old keys make great wall hooks. Their shape is perfect for hanging light items. Clean the keys and paint them if you want. Attach them to a wooden board with screws. Mount the board on the wall. These hooks add vintage charm to any room.
Repurposed Handles
Old drawer or cabinet handles work well as hooks. Choose sturdy handles with a nice shape. Screw them directly into the wall. They can hold heavier items like bags or coats. Handles come in many styles and finishes. This gives you many design options.
Creative Attachments
Use unusual objects as hook bases. Forks, spoons, or even small branches can be hooks. Bend or cut metal items to create a hook shape. Attach these pieces firmly to a backing board. Paint or decorate for a personal touch. These hooks bring character and fun to your walls.
Metal Wire Hooks
Metal wire hooks are a simple and useful way to organize your space. They hold items securely and add a touch of style. Making them yourself is easy and requires just a few tools and materials.
Wire hooks are strong yet flexible. You can shape them to fit your needs. They work well in kitchens, bathrooms, or entryways. Creating your own lets you customize size and design.
Bending Techniques
Start with a metal wire of medium thickness. Use pliers to bend the wire carefully. Create smooth curves to avoid sharp edges. Make a hook shape with a small loop at one end. This loop helps hold the item firmly. Practice bending on scrap wire first. This improves your control and precision.
Securing To Walls
Choose the right wall anchors or screws for your wall type. Drill small holes to fit the wire loops. Insert anchors if needed for extra strength. Hang the wire hooks by placing loops onto screws. Ensure hooks sit tight against the wall. Test by gently pulling to check stability.
Finishing Touches
Smooth any rough wire ends with a file or sandpaper. Paint or coat hooks to match your decor. Use rust-resistant spray for durability. Add rubber tips on ends to protect walls and items. These small steps increase hook safety and lifespan.
Decorative Hooks With Resin
Decorative hooks made with resin add a unique touch to any wall. Resin allows you to create hooks that are both useful and beautiful. You can embed small objects inside the resin for a personalized look. These hooks work great in bedrooms, kitchens, or bathrooms. They also make great handmade gifts.
Mixing Resin
Start by mixing clear resin with its hardener. Follow the instructions on the packaging carefully. Use a clean container and stir slowly to avoid bubbles. Mix for the recommended time until the resin is clear and smooth. This step is important for a strong and clear finish.
Embedding Objects
Choose small items like dried flowers, beads, or glitter. Place them carefully into the resin mixture in your mold. Arrange objects to create a nice pattern or design. Make sure objects are fully covered by resin. This step adds color and texture to your hooks.
Curing And Installing
Let the resin cure in a dust-free place. It usually takes 24 to 48 hours to harden completely. After curing, remove the resin from the mold. Attach a metal hook base using strong glue or screws. Finally, mount the decorative hook securely on your wall.
Painting And Personalizing
Painting and personalizing wall hooks lets you make them unique. This step adds charm and style to plain hooks. Choose colors and designs that fit your room and taste. Personal touches make hooks more than just functional items.
Color Choices
Pick colors that match your room’s theme. Bright colors bring energy and fun. Soft tones create a calm, cozy look. Use paint types suited for wood or metal hooks. Try mixing colors for a lively effect. Simple color blocks also look clean and neat.
Patterns And Stencils
Patterns give hooks a creative edge. Use stencils to paint shapes or designs easily. Stripes, dots, or flowers work well. Tape can help make straight lines. Try small details for subtle style. Let your imagination guide you here.
Protective Coatings
Coatings protect paint from scratches and wear. Use clear varnish or sealant after painting. This keeps colors bright for longer. Water-resistant coatings help if hooks are in damp areas. Apply two thin layers for best results. Let each layer dry fully before next.
Safety And Maintenance
Safety and maintenance are key to keeping your wall hooks strong and lasting. Proper care helps avoid accidents and keeps hooks looking good. Small efforts in installation and cleaning make a big difference over time.
Proper Installation
Fix wall hooks in solid spots like wall studs. Use the right tools such as drills and screws. Avoid weak places like drywall alone. Tighten screws well to prevent wobbling. Check hooks after installation to ensure they hold firm.
Weight Testing
Test how much weight your hook can hold. Start with light items before hanging heavy things. Gradually increase weight to find the limit. Stop if the hook bends or feels loose. Knowing weight limits prevents damage and accidents.
Cleaning Tips
Keep hooks clean to avoid rust and dirt build-up. Wipe them gently with a damp cloth. Avoid harsh chemicals that can damage finishes. Dry hooks well after cleaning. Regular cleaning keeps hooks safe and looking nice.
Frequently Asked Questions
What Materials Are Best For Diy Wall Hooks?
Wood, metal, and sturdy plastic are ideal materials for DIY wall hooks. They provide durability and support for hanging items. Choose based on your decor style and the weight of items you plan to hang.
How Do I Securely Mount Wall Hooks?
Use wall anchors or screws drilled into studs for secure mounting. This ensures hooks hold heavy items without pulling out or damaging the wall.
Can I Customize Wall Hooks To Match My Decor?
Yes, you can paint, stain, or decorate wall hooks to fit your style. Customizing hooks adds a personal touch and enhances room aesthetics.
What Tools Are Needed To Create Wall Hooks?
Basic tools include a drill, screwdriver, measuring tape, and level. Depending on the design, you might also need a saw, sandpaper, or paint supplies.
Conclusion
Creating wall hooks is simple and useful. You can choose materials you like. Follow easy steps to make strong hooks. These hooks help keep your space neat. Try making your own hooks today. Enjoy a tidy and organized room. Crafting your hooks saves money too.
Small projects bring big satisfaction. Start your wall hook project now.