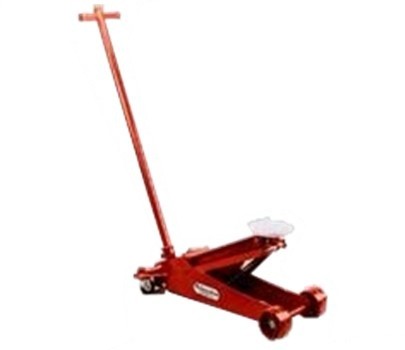
If your Milwaukee floor jack isn’t lifting like it used to, you don’t have to buy a new one just yet. You can bring it back to life with a simple rebuild.
Imagine saving money, avoiding downtime, and getting your trusted tool working like new again—all by yourself. In this guide, you’ll discover clear, step-by-step instructions that anyone can follow, even if you’ve never rebuilt a floor jack before. Ready to take control of your repairs and keep your projects moving smoothly?
Let’s dive in and get your Milwaukee floor jack back in top shape.
Tools And Materials Needed
Rebuilding a Milwaukee floor jack requires the right tools and materials. Having everything ready makes the job easier and safer. This section lists all essentials for a smooth rebuild process.
Basic Hand Tools
Start with common hand tools. Wrenches, screwdrivers, and pliers are must-haves. These help remove and install parts quickly. Use a socket set for bolts and nuts. An adjustable wrench fits various sizes.
Replacement Parts
Get genuine Milwaukee parts or reliable alternatives. Replacement seals, O-rings, and gaskets prevent leaks. Check the hydraulic fluid for quality. A new pump assembly may be needed for heavy wear.
Cleaning Supplies
Clean parts before reassembly. Use brake cleaner or degreaser. Clean rags or shop towels help remove dirt. A small wire brush removes rust and grime.
Lubricants And Fluids
Proper lubrication ensures smooth operation. Use hydraulic oil specified by Milwaukee. Light machine oil helps moving parts. Grease protects joints from wear.
Safety Gear
Protect yourself during the rebuild. Wear safety glasses to shield eyes. Gloves keep hands safe from sharp edges. Work in a well-ventilated area for fumes.
Safety Precautions
Always wear safety glasses and gloves to protect your eyes and hands. Work on a flat surface and keep the jack stable. Check for leaks and avoid using the jack if parts look damaged.
Wear Protective Gear
Always wear safety glasses to protect your eyes from debris. Use gloves to avoid cuts and bruises. Closed-toe shoes protect your feet from falling parts. Dress in clothes that fit well and cover your skin.
Work In A Clean Area
Keep your workspace tidy and free from clutter. A clean area reduces the risk of accidents. Good lighting helps you see small parts clearly. Avoid slippery floors to prevent falls.
Use Proper Tools
Choose the right tools for each step of the rebuild. Using wrong tools can damage parts or cause injury. Check tools for damage before use. Keep tools organized to find them quickly.
Release Pressure Safely
Before starting, release all hydraulic pressure in the jack. This step prevents sudden movements during repair. Follow the manufacturer’s instructions carefully. Never force parts to move if stuck.
Secure The Floor Jack
Place the jack on a flat, stable surface. Use wheel chocks to prevent rolling. Keep the jack lowered when not working on it. This prevents accidental drops or shifts.
Preparing The Floor Jack
Preparing the floor jack is the first step in rebuilding it safely and effectively. This stage helps remove dirt and old fluid that can block parts. A clean and empty jack is easier to work with and lasts longer. Taking time to prepare the jack ensures better results during the rebuild process.
Cleaning The Jack
Start by wiping off all dirt and grease from the jack’s surface. Use a clean rag and some mild cleaner. Avoid harsh chemicals that can damage the paint or metal. Clean areas around the wheels, handle, and lifting arm carefully. Remove any loose debris inside the jack. A clean jack helps you spot worn parts or damage easily.
Draining Hydraulic Fluid
Locate the hydraulic fluid fill plug on the jack. Place a container under the jack to catch the old fluid. Unscrew the plug slowly to let the fluid drain out. Move the handle to help the fluid flow faster. Drain all fluid to avoid mixing with new oil later. Properly dispose of the old fluid following local regulations.
Credit: www.phjjacks.com
Disassembling The Jack
Disassembling the Milwaukee floor jack is the first step in rebuilding it. This process lets you check each part for wear and damage. Careful disassembly helps avoid breaking small parts. Work slowly and keep all pieces organized. Follow these steps to take the jack apart safely and correctly.
Removing The Handle
Start by lowering the jack completely. Find the pin or bolt that holds the handle. Use a wrench or pliers to remove it. Pull the handle out gently. Set the handle aside in a safe place. This step frees the handle for further disassembly.
Taking Apart The Hydraulic Cylinder
Locate the hydraulic cylinder at the jack’s base. Unscrew the retaining bolts with a socket wrench. Carefully lift the cylinder out. Watch for oil inside the cylinder. Drain any oil into a container. Keep the cylinder parts together to avoid confusion.
Extracting The Pump Assembly
Identify the pump assembly connected to the handle. Remove the screws or clips holding it. Pull the pump assembly away from the main body. Inspect the pump for dirt or damage. Clean or replace parts as needed. Handle the pump parts carefully to prevent damage.
Inspecting Parts For Wear
Inspecting parts for wear is a key step in rebuilding a Milwaukee floor jack. It helps find damaged or worn pieces that need fixing or replacing. Careful checks keep the jack safe and working well. This process takes time but saves money and effort later.
Checking Seals And O-rings
Seals and O-rings stop oil from leaking. Look for cracks, hard spots, or breaks. Old seals lose their shape and cause leaks. Replace any seal that looks worn or damaged. Use the right size and type for your jack.
Examining The Ram And Cylinder
The ram and cylinder lift the load. Check the ram for scratches, rust, or dents. The cylinder should be smooth inside and clean. Dirt or damage can stop the jack from working properly. Clean parts carefully and replace if needed.
Assessing The Pump Components
The pump moves hydraulic fluid to lift the jack. Check the pump piston and valves for wear or dirt. Look for bent parts or broken springs. Clean all pieces and test the pump’s action. Replace parts that do not move smoothly.
Replacing Worn Or Damaged Parts
Replacing worn or damaged parts is key to rebuilding a Milwaukee floor jack. Old parts reduce the jack’s strength and safety. Swapping out these parts restores the jack’s performance. It also helps avoid accidents caused by failing components.
Checking each part carefully is important. Look for cracks, leaks, or worn edges. These signs mean replacement is needed. Focus on seals, O-rings, and pump parts. These usually wear out first in a floor jack.
Ordering Replacement Parts
Identify the exact model of your Milwaukee floor jack. Use the model number to find correct parts. Choose parts made specifically for your model. This ensures a perfect fit and smooth function.
Buy parts from trusted suppliers. Avoid cheap, low-quality pieces. Quality parts last longer and keep your jack safe. Always check part numbers before ordering to avoid mistakes.
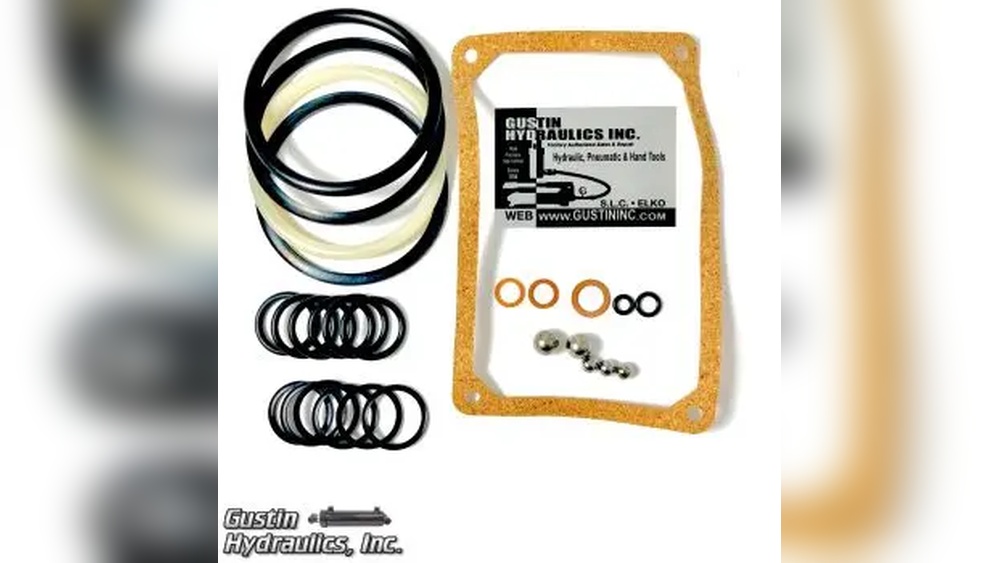
Installing New Seals And O-rings
Remove old seals and O-rings carefully. Use a small tool to avoid damage. Clean the grooves and surfaces before installing new seals. Dirt or old grease can cause leaks.
Lubricate new seals lightly with jack oil. This helps them slide into place easily. Press seals gently but firmly into their spots. Make sure they sit evenly without twists or gaps.
Reassembling The Pump And Cylinder
Align the pump and cylinder parts correctly. Insert pistons and valves according to the manual. Tighten screws and bolts securely but not too tight.
Double-check all connections and seals. Test the pump action by moving the handle. Smooth, firm movement means proper assembly. No leaks or unusual noises should appear.
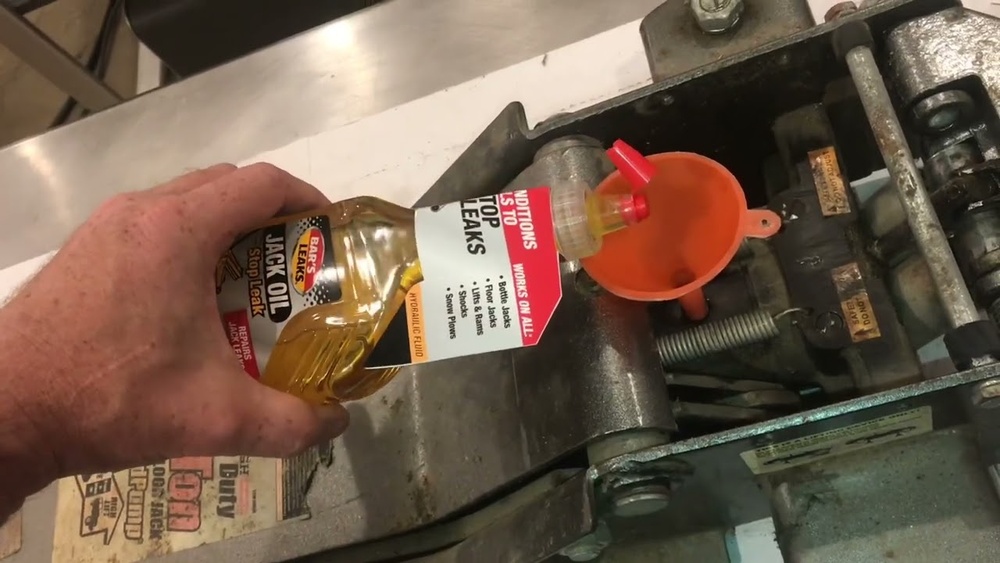
Refilling Hydraulic Fluid
Refilling the hydraulic fluid is a key step in rebuilding your Milwaukee floor jack. The fluid helps the jack lift heavy loads smoothly and safely. Using the right fluid and filling it properly keeps the jack working well. Avoid air bubbles in the system to maintain strong lifting power.
Choosing The Right Fluid
Select a hydraulic fluid that matches your floor jack’s specifications. Most Milwaukee jacks use high-quality jack oil or hydraulic fluid. Avoid using motor oil or other lubricants. These can damage seals and reduce performance. Check your owner’s manual for the recommended fluid type. Using the correct fluid prevents leaks and extends the jack’s life.
Filling And Bleeding The System
Start by removing the fill plug on the jack’s reservoir. Slowly pour the hydraulic fluid in until it reaches the proper level. Do not overfill. Air trapped inside can cause lifting problems. To remove air, pump the jack slowly several times with the release valve closed. Then, open the valve to let air escape. Repeat this until the jack moves smoothly without jerking.
Testing The Rebuilt Floor Jack
Testing the rebuilt Milwaukee floor jack is a key step. It ensures your work is safe and the jack works well. Skipping tests can cause accidents or damage.
Start by checking for leaks. This step shows if seals and parts fit tightly. Then, verify the lifting performance. Confirm the jack can lift and hold weight properly.
Checking For Leaks
Inspect the jack carefully for oil leaks. Look around seals and joints. Use a clean cloth to spot any wet areas. Small leaks can lead to failure under load. Fix leaks before using the jack again.
Pressurize the jack by pumping the handle. Watch for any drops in oil level or fresh leaks. Tighten or replace parts if needed. Leak-free operation keeps the jack safe and efficient.
Verifying Lifting Performance
Test the jack with a heavy, stable object. Pump the handle slowly to lift the load. The jack should lift smoothly without jerks or noise. It must hold the weight without lowering.
Lower the load carefully and check for smooth descent. If the jack struggles or slips, check the hydraulic system. Proper lifting performance means the jack is ready for use.
Maintenance Tips For Longevity
Proper care extends the life of your Milwaukee floor jack. Regular maintenance keeps it safe and working well. This section shares simple tips to help your jack last longer.
Check Hydraulic Fluid Levels
Low hydraulic fluid causes poor lifting performance. Open the fill plug and inspect the fluid. Add the correct fluid type if the level is low. Clean any spills to avoid dirt buildup.
Clean And Lubricate Moving Parts
Dirt and rust slow down moving parts. Wipe off dust and grease regularly. Apply light oil to joints and wheels. This reduces friction and prevents wear.
Inspect For Leaks And Damage
Look for oil leaks or cracked seals. Damaged parts reduce safety and function. Replace faulty seals or worn components immediately. Early fixes avoid costly repairs later.
Store Properly In A Dry Place
Keep the jack away from moisture and dirt. Store it on a flat surface with the handle down. Cover it to protect from dust. Proper storage stops rust and corrosion.

Credit: www.gustininc.com

Credit: www.youtube.com
Frequently Asked Questions
How Do I Start Rebuilding A Milwaukee Floor Jack?
Begin by cleaning the jack thoroughly. Remove all oil and dirt. Disassemble carefully, noting each part’s placement for reassembly.
What Tools Are Needed To Rebuild A Milwaukee Floor Jack?
You’ll need wrenches, screwdrivers, pliers, and a jack seal kit. Keep a clean workspace to organize small parts during rebuilding.
How Often Should I Rebuild My Milwaukee Floor Jack?
Rebuild your jack every 2-3 years or when it shows signs of leaking or poor lifting performance. Regular maintenance ensures safety and longevity.
Can I Replace The Hydraulic Fluid Myself?
Yes, draining old fluid and refilling with fresh hydraulic oil is straightforward. Use manufacturer-recommended fluid to maintain jack efficiency.
Conclusion
Rebuilding a Milwaukee floor jack takes time and care. Follow each step slowly and carefully. Check all parts for wear and clean them well. Replace damaged pieces to keep the jack safe. Test it after rebuilding to ensure it works right.
Keep your jack in good shape to last longer. Simple maintenance helps avoid big problems later. Now, you can fix your jack with confidence.