Adding a light switch might seem tricky, but with the right steps, you can do it yourself and save money. Imagine turning on a new light with just a simple flick of a switch you installed.
You don’t need to be an expert or spend hours figuring it out. In this guide, you’ll learn exactly how to add a light switch safely and quickly. Ready to brighten up your space and take control of your home lighting?
Keep reading, and you’ll see how easy it can be.

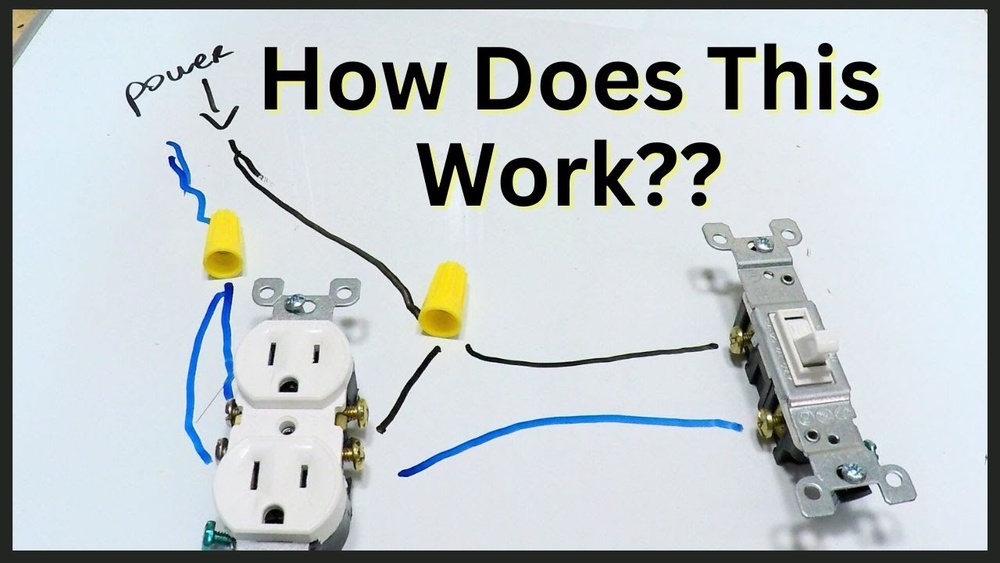
Credit: diy.stackexchange.com
Tools And Materials Needed
Before starting to add a light switch, gather all tools and materials. Having the right items makes the job easier and safer. This section helps you know what to prepare.
Essential Tools
Use a screwdriver set with flathead and Phillips heads. A voltage tester checks if wires carry electricity. Wire strippers remove insulation from wires. Needle-nose pliers help bend and twist wires. A drill with bits may be needed to make holes.
Choosing The Right Switch
Select a switch that matches your home’s wiring and style. Single-pole switches control one light from one place. Three-way switches control lights from two spots. Make sure the switch’s voltage and amperage fit your circuit.
Safety Gear
Wear insulated gloves to protect from electric shock. Use safety glasses to shield your eyes from dust and debris. Turn off the power at the circuit breaker before starting. A non-contact voltage tester adds extra safety.
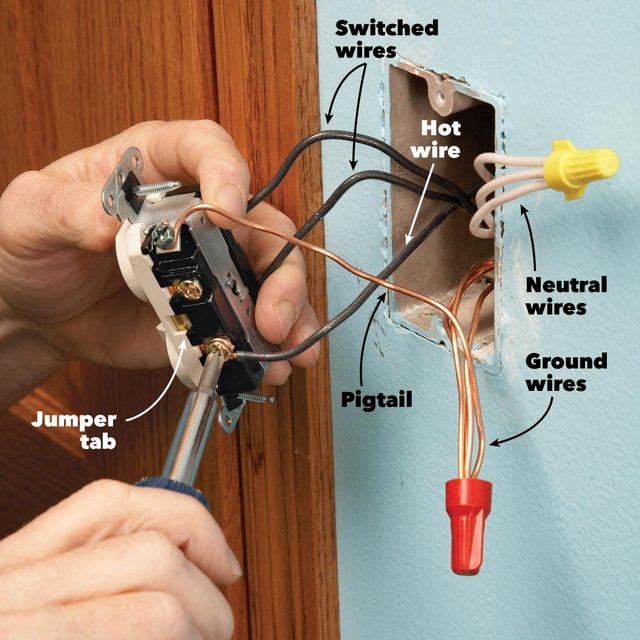
Credit: www.familyhandyman.com
Preparing The Workspace
Preparing the workspace is the first step in adding a light switch safely. This stage helps prevent accidents and makes the process smoother. Taking time to prepare keeps you safe and confident throughout the work.
Turning Off Power
Start by turning off power to the area where you will work. Find the circuit breaker that controls the room’s electricity. Switch it off to stop the current flow. This step is crucial to avoid electric shocks. Always treat wires as if they are live until confirmed safe.
Clearing The Area
Clear the workspace around the switch box. Remove furniture, rugs, or objects that block access. A tidy area prevents tripping and gives enough room to work. Good lighting helps you see wires and tools clearly. Keep tools close by for easy reach.
Testing For Live Wires
Use a voltage tester to check if wires carry electricity. Test each wire carefully after turning off the power. A tester that shows no current means it is safe to touch. This step confirms the power is off. Never skip this safety check.
Wiring Basics
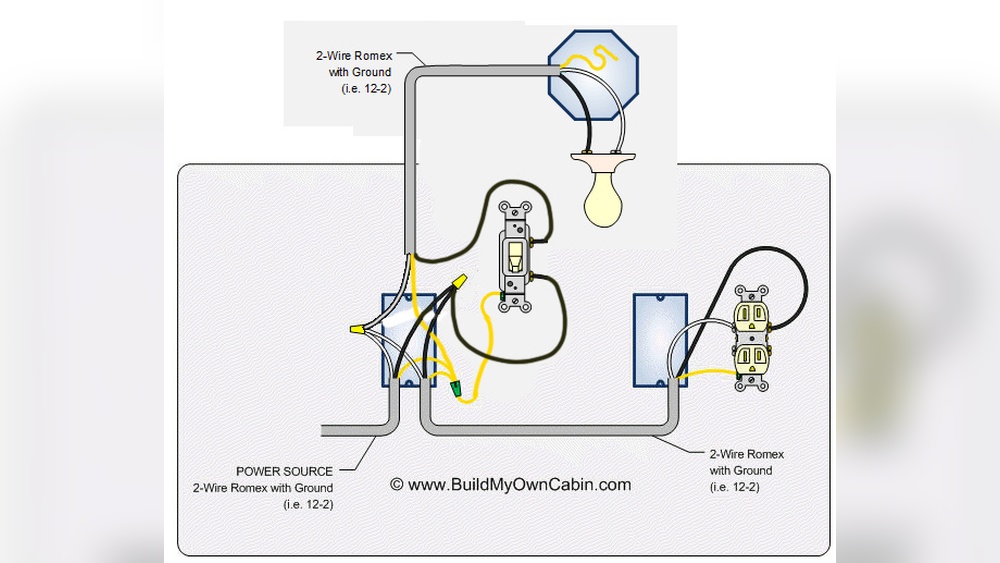
Wiring is the heart of installing a light switch. It connects power from the source to the switch and then to the light fixture. Understanding wiring basics makes the task safer and easier. Knowing wire types, connections, and handling electrical boxes helps avoid mistakes and accidents.
Identifying Wire Types
Wires come in different colors and sizes. Black or red wires carry power. White wires are neutral and return current. Green or bare wires are ground wires for safety. Always check wire colors before working. Correct identification prevents dangerous wiring errors.
Understanding Wire Connections
Wire connections join wires to switches and outlets. Use wire nuts or terminal screws to secure wires. Connect black (hot) wires to the switch terminals. White (neutral) wires usually connect together, not to the switch. Ground wires must attach to the green screw or box. Tight connections ensure good electrical flow.
Handling Electrical Boxes
Electrical boxes hold wires and switches inside the wall. Choose a box size that fits the wires and switch. Turn off power before opening the box. Pull wires out carefully without damaging insulation. Secure the box firmly to the wall. Proper handling keeps wiring organized and safe.
Installing The Light Switch
Installing a light switch is a straightforward task that can improve your home’s lighting control. This guide breaks the process into simple steps. Follow these to safely and correctly install your new light switch.
Removing Old Switch
Turn off the power at the breaker box to ensure safety. Use a screwdriver to remove the switch cover plate. Unscrew the old switch from the electrical box. Gently pull the switch out to expose the wires. Take note of how the wires connect to the switch. This helps when attaching the new switch.
Connecting Wires To The New Switch
Identify the wires: usually, black is live, white is neutral, and green or bare is ground. Attach the ground wire to the green screw on the new switch. Connect the live wire to one of the brass screws. Attach the neutral wire to the silver screw if your switch requires it. Tighten all screws securely to avoid loose connections. Double-check that wires are correctly placed and firmly connected.
Securing The Switch In Place
Carefully push the wires back into the electrical box. Position the switch so the screw holes align with the box. Use screws to secure the switch to the box tightly. Replace the switch cover plate and screw it in place. Turn the power back on at the breaker box. Test the switch to make sure it works properly.
Testing The Installation
Testing the installation is a key step after adding a light switch. It ensures the switch works safely and correctly. This process involves turning the power back on, checking if the switch controls the light properly, and fixing any problems found. Follow these steps to confirm your new switch is ready to use.
Restoring Power
First, go to your circuit breaker panel. Turn the switch back on for the circuit you worked on. Make sure the power is fully restored to the room. Use a voltage tester to confirm the wires have power. Safety is important. Never touch wires before power is off.
Checking Switch Functionality
Flip the new light switch on and off several times. Watch if the light turns on and off each time. Check both the switch and light fixture for any flickering or delays. Test all connected lights to ensure full control. If the light works smoothly, the installation is good.
Troubleshooting Common Issues
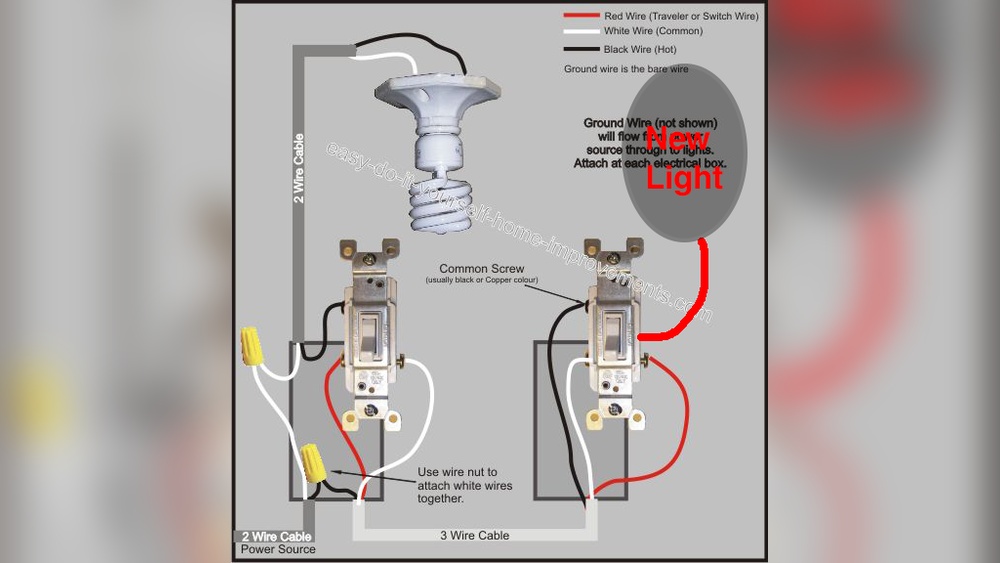
If the light does not turn on, check the wiring connections. Loose or wrong wires cause most problems. Use a screwdriver to tighten any loose screws. Confirm the switch is wired correctly based on your wiring diagram. Replace the bulb if it is burnt out. Call a professional if you cannot fix the issue safely.

Credit: www.do-it-yourself-help.com
Finishing Touches
Finishing touches make your light switch look neat and complete. These final steps ensure safety and a professional look. Take your time to do them carefully.
Attaching The Cover Plate
Pick the right cover plate for your switch. Align it carefully over the switch box. Use a screwdriver to tighten the screws. Do not overtighten to avoid cracking the plate. Check that the plate sits flush against the wall. This step protects the wires and gives a clean look.
Cleaning Up The Workspace
Remove any tools and debris around the switch. Use a cloth to wipe dust and dirt off the wall. Sweep or vacuum the floor to clear small particles. Proper cleanup prevents accidents and keeps your home tidy. A clean workspace shows your work is done well.
Safety Tips For Future Projects
Working with electricity needs care and attention. Safety must be the top priority in every project. Following good safety tips helps avoid accidents and damage. It also ensures your electrical work lasts longer and works well. Here are important safety tips for your future electrical projects.
When To Call A Professional
Some electrical tasks require expert knowledge and tools. If you feel unsure or the job is complex, call a professional. Handling high voltage wires or circuit breakers needs experience. A licensed electrician can prevent mistakes that cause fires or shocks. Do not risk your safety by guessing or rushing.
Maintaining Electrical Systems
Regular checks keep your electrical system safe and efficient. Look for signs like flickering lights or warm switches. Turn off power before inspecting or cleaning outlets and switches. Replace damaged wires or parts quickly to avoid hazards. Keep your electrical panel clear and labeled to avoid confusion. Proper maintenance helps catch problems early and saves money.
Frequently Asked Questions
How Do I Safely Turn Off Power Before Adding A Light Switch?
Always switch off the circuit breaker connected to the switch. Use a voltage tester to confirm no power. This prevents electrical shock and ensures safety during installation.
What Tools Are Needed To Add A Light Switch?
You need a screwdriver, wire stripper, voltage tester, and wire nuts. A drill may help for mounting. These tools make installation easier and safer.
Can I Add A Light Switch To Any Wall?
Yes, if there’s access to electrical wiring inside the wall. Avoid walls with plumbing or load-bearing beams. Check local codes and use proper wiring methods.
How Do I Connect Wires To A New Light Switch?
Connect the hot wire to the switch terminal. Attach the neutral and ground wires as per instructions. Secure connections with wire nuts and ensure no exposed wires.
Conclusion
Adding a light switch can be simple and safe with the right steps. Always turn off power before starting work. Follow instructions carefully and use proper tools. Take your time to connect wires correctly. Double-check your work before turning power back on.
A working light switch improves your home’s comfort and safety. Small projects like this build useful skills. Try it yourself and see the difference it makes. Stay safe and enjoy your new switch!