Have you ever wanted to control a light from a spot where there’s only an outlet? It might sound tricky, but you can actually run a light switch from an outlet with just a few simple steps.
Imagine the convenience of turning your lamp or fixture on and off with a switch, without rewiring your whole room. In this guide, you’ll discover exactly how to do this safely and easily—even if you’re not an expert. Keep reading, and you’ll be surprised how straightforward it can be to add that extra switch to your space.
Tools And Materials Needed
Before starting to run a light switch from an outlet, gather all necessary tools and materials. Having everything ready makes the job easier and safer. This section lists the key items you will need.
Essential Tools
- Screwdriver set (flathead and Phillips)
- Wire stripper and cutter
- Voltage tester
- Drill with bits
- Measuring tape
- Needle-nose pliers
- Electrical tape
- Level
Required Materials
- Single-pole light switch
- Electrical outlet (if replacement needed)
- Romex cable (14/2 or 12/2, depending on circuit)
- Wire nuts
- Switch box
- Outlet cover plate
- Switch cover plate
Safety Gear
- Insulated gloves
- Safety goggles
- Dust mask
- Closed-toe shoes

Credit: diy.stackexchange.com
Planning Your Wiring
Planning your wiring is the first step to run a light switch from an outlet. It helps you avoid mistakes and ensures safety. Careful planning saves time and effort later. You need to understand the parts and how they work together. This section guides you through important factors before starting your wiring project.
Choosing The Right Outlet And Switch
Select outlets and switches that match your needs and local codes. Use outlets rated for the voltage and current of your circuit. Choose switches designed for lighting control, not just any switch. Ensure the switch fits the space and style of your setup. Picking the right parts makes the wiring easier and safer.
Understanding Circuit Layout
Know where your power source, outlet, and switch are located. Visualize the path your wiring will take between these points. Avoid crossing wires or creating long loops. Keep wiring neat and organized inside walls or boxes. A clear circuit layout prevents confusion and future problems.
Checking Power Capacity
Check the total power your circuit can handle. Add the wattage of all devices on the circuit. Make sure the outlet and switch support this load. Overloading circuits causes breakers to trip or wires to overheat. Confirm your setup stays within safe power limits for long-term use.
Turning Off Power Safely
Working with electricity requires care. Turning off power safely prevents shocks and injuries. Always take time to cut power before starting any electrical work. Follow simple steps to ensure your safety.
Locating The Circuit Breaker
Find the main circuit breaker panel. It is often in a basement, garage, or utility room. Look for a metal box with a door. Inside, you will see switches labeled for different parts of the house. Identify the switch that controls the outlet you will work on. This step is key for safety.
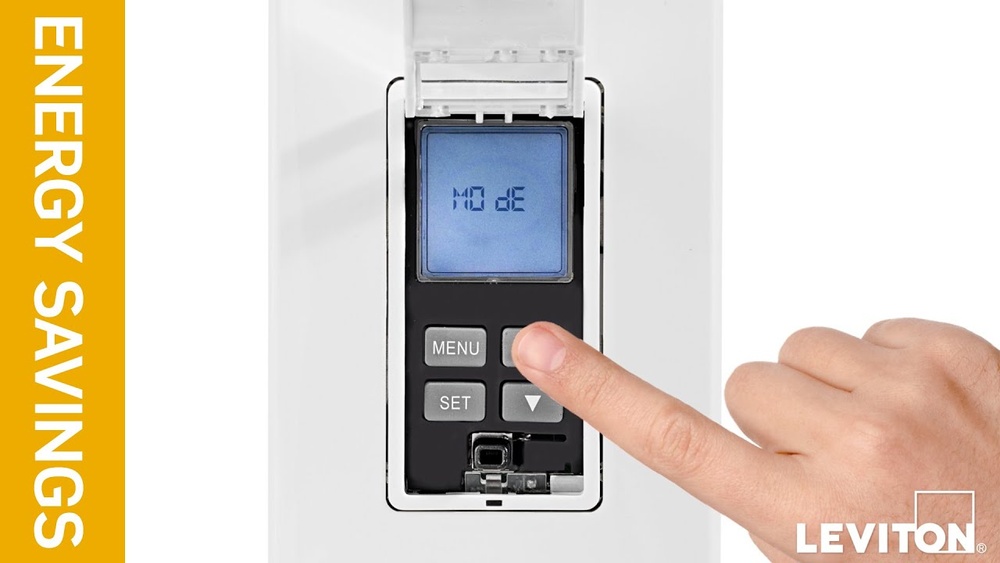
Verifying Power Is Off
After switching off the breaker, check the outlet’s power. Use a voltage tester or plug in a small device like a lamp. If the device does not turn on, power is off. Test multiple times to be sure. Never trust only the breaker switch without checking.

Credit: www.do-it-yourself-help.com
Removing The Outlet Cover
Removing the outlet cover is the first step in running a light switch from an outlet. It gives you access to the wiring inside the outlet box. This step must be done carefully to avoid any damage or injury.
Unscrewing The Outlet
Start by turning off the power at the circuit breaker. Use a screwdriver to remove the screws holding the outlet cover. Place the screws somewhere safe. Gently pull the cover away from the wall. Be careful not to pull too hard to avoid damaging the wires.
Inspecting Existing Wiring
Look inside the outlet box to see the wiring. Identify the hot, neutral, and ground wires. Check for any signs of damage or loose connections. Confirm the wires are properly connected to the outlet terminals. This step helps ensure safety before adding a switch.
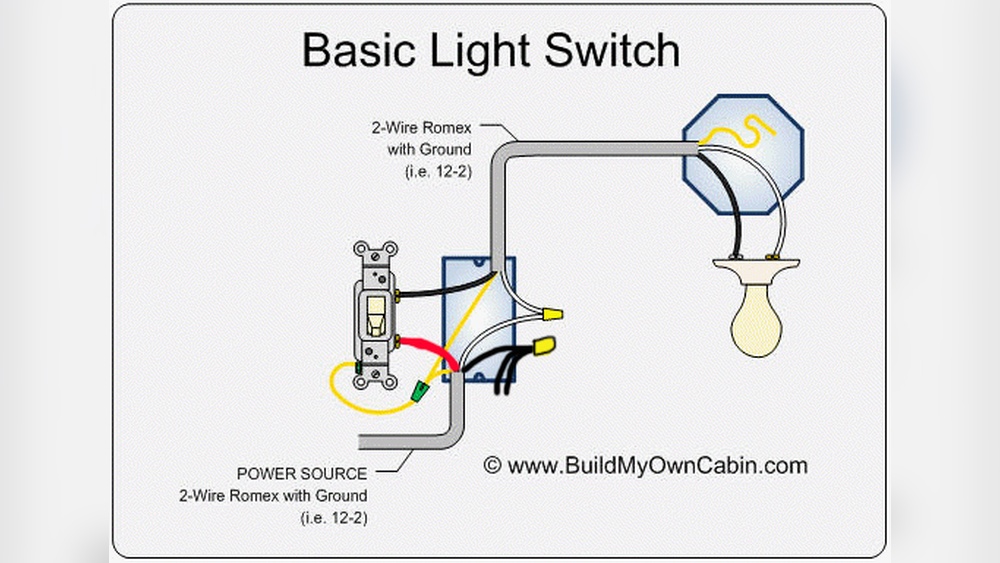
Wiring The Switch To The Outlet
Wiring the switch to the outlet is a key step to control power safely. It needs careful attention to detail. Understanding the wires and connections helps avoid mistakes. This section guides through each part clearly.
Identifying Hot, Neutral, And Ground Wires
First, find the hot wire. It usually has black or red insulation. This wire carries power from the outlet to the switch.
Next, locate the neutral wire. It is typically white and completes the circuit.
The ground wire is bare copper or green. It protects against electric shock by directing power safely to the ground.
Connecting The Switch Wires
Connect the hot wire from the outlet to one terminal on the switch. Use a screwdriver to tighten the connection.
Then, attach the wire going to the light fixture to the other switch terminal. This wire will carry power when the switch is on.
Do not connect the neutral wire to the switch. It should bypass the switch and go directly to the fixture.
Securing All Connections
Wrap each terminal with electrical tape for extra safety. This prevents accidental contact with other wires.
Use wire nuts to join wires firmly. Make sure no bare wire is exposed outside the nuts.
Push the wires gently into the outlet box. Avoid bending or damaging them during this process.
Mounting The Switch
Mounting the switch is a key step to control power from an outlet. A well-mounted switch looks neat and works safely. This section guides you through picking the spot, installing the box, and fixing the switch.
Choosing Switch Location
Pick a spot near the outlet for easy wiring. Make sure it is at a comfortable height to reach. Avoid places behind furniture or in damp areas. The switch should be visible and easy to access.
Installing The Switch Box
Use a switch box that fits your wall type. Mark the wall where you want the box. Cut the hole carefully with a drywall saw. Push the box into the hole until it fits snugly. Secure the box with screws to keep it steady.
Attaching The Switch
Connect the wires from the outlet to the switch terminals. Tighten the screws to hold the wires firmly. Push the switch into the box carefully. Screw the switch plate to finish the installation. Test the switch to ensure it works properly.
Testing Your Work
Testing your work after running a light switch from an outlet is important. It helps ensure everything is safe and works correctly. This step saves you from future problems and makes sure your wiring is done right.
Turning Power Back On
Before testing, restore power to the circuit. Go to your main electrical panel and switch the breaker back on. Make sure the area is dry and safe before proceeding. Never touch wires without power off.
Checking Switch Functionality
Flip the switch to see if the light turns on and off. Test it a few times to confirm it works smoothly. Check the outlet as well to ensure it still functions. Both should work without flickering or delay.
Troubleshooting Tips
If the light does not turn on, check your connections again. Make sure all wires are tight and properly connected. Use a voltage tester to check if power reaches the switch. Replace any damaged parts or faulty switches.
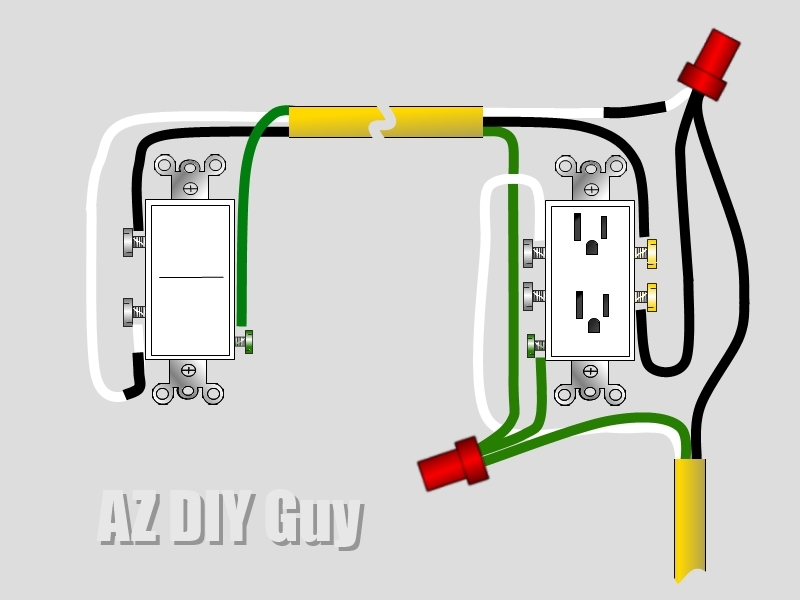
Credit: www.azdiyguy.com
Safety Tips And Precautions
Working with electricity requires care. Safety is the top priority when running a light switch from an outlet. Mistakes can cause shocks, fires, or damage. Follow safety tips to protect yourself and your home.
Turn off power at the circuit breaker before starting any work. Use a voltage tester to confirm no power flows. Wear insulated gloves and use tools with insulated handles. Keep your work area dry and well-lit.
Avoiding Common Mistakes
Do not assume wires are color-coded correctly. Test each wire to know its purpose. Avoid overloading the outlet by adding too many devices.
Never connect a switch to the neutral wire. Always connect to the hot wire to control the light properly. Do not skip grounding the switch or outlet; grounding prevents shocks.
Secure all wire connections with wire nuts or electrical tape. Loose connections cause sparks and fire hazards. Follow local electrical codes to ensure safe installation.
When To Call A Professional
Call an electrician if you see damaged wires or outlets. Complex wiring or old electrical panels need expert handling. If unsure about any step, don’t risk it.
Professionals have tools and knowledge to work safely. They can ensure the switch installation meets safety standards. Protect your home and family by choosing expert help when needed.
Frequently Asked Questions
How Do You Wire A Light Switch From An Outlet?
To wire a light switch from an outlet, turn off power first. Connect the switch to the outlet’s hot wire using a pigtail. Run a cable from the switch to the light fixture. Ensure proper grounding and secure all connections.
Can I Control A Light From An Electrical Outlet?
Yes, you can control a light from an outlet by wiring a switch in series. The switch interrupts the hot wire feeding the light fixture. This setup allows the light to be turned on or off via the switch connected near the outlet.
What Tools Are Needed To Run A Switch From An Outlet?
You need a voltage tester, wire stripper, screwdriver, electrical tape, wire nuts, and a cable with appropriate gauge. These tools help safely connect the switch and outlet, ensuring a secure and code-compliant installation.
Is It Safe To Add A Switch To An Existing Outlet?
Yes, adding a switch to an existing outlet is safe if done correctly. Always turn off power, follow local electrical codes, and use proper wiring techniques. If unsure, consult a licensed electrician to avoid hazards.
Conclusion
Running a light switch from an outlet is a simple task anyone can do. It saves time and adds convenience to your space. Always follow safety rules and turn off power before starting. Use the right tools and check your work carefully.
With patience and care, you can complete this project without trouble. Try it yourself and enjoy the benefits of easy lighting control.