Are you looking to control your lights with a simple flip of a switch? Connecting a switch to a light fixture might seem tricky, but it’s easier than you think.
With the right steps, you can take charge of your lighting and add convenience to any room. In this guide, you’ll discover clear, step-by-step instructions that anyone can follow—even if you’re not an expert. Keep reading to learn how to safely and effectively connect a switch to your light fixture and brighten up your space on your own terms.
Tools And Materials Needed
Connecting a switch to a light fixture needs the right tools and materials. Using proper equipment makes the job safer and easier. Prepare everything before starting the installation.
Essential Tools
You need a few basic tools to connect a switch to a light fixture. A screwdriver set is important for removing and attaching screws. Wire strippers help remove insulation from wires cleanly. A voltage tester checks if wires have power. Pliers assist in bending and twisting wires. A drill may be needed to make holes for mounting.
Required Materials
Gather the right materials before you begin. Electrical wire connects the switch to the light fixture. A light switch controls the power flow. Wire nuts secure wire connections safely. Electrical tape adds extra insulation. A light fixture or lamp holder is necessary if you don’t have one installed. Wall boxes hold the switch and keep wires neat.
Safety Gear
Safety gear protects you during electrical work. Wear insulated gloves to avoid electric shock. Safety glasses protect your eyes from dust and debris. Use a face mask if you work in dusty areas. Non-slip shoes help maintain balance on ladders or uneven floors. Turn off power at the breaker box before starting any work.

Credit: community.smartthings.com
Preparing The Work Area
Preparing the work area is the first step to safely connect a switch to a light fixture. It helps avoid accidents and makes the process smoother. You need to create a safe and clean space before starting any electrical work.
Turn Off Power
Always turn off power at the circuit breaker before starting. This stops electricity from flowing to the switch and light fixture. Use the breaker panel to switch off the correct circuit. Double-check to ensure power is off to avoid shocks.
Clear The Space
Remove any furniture or objects near the work area. A clear space gives you room to move and work comfortably. It also prevents damage to your belongings. Keep tools and materials organized and within reach.
Test For Electricity
Use a voltage tester to check if the power is really off. Test wires and terminals at the switch and light fixture. If the tester shows no electricity, it is safe to proceed. Testing twice adds extra safety to your work.
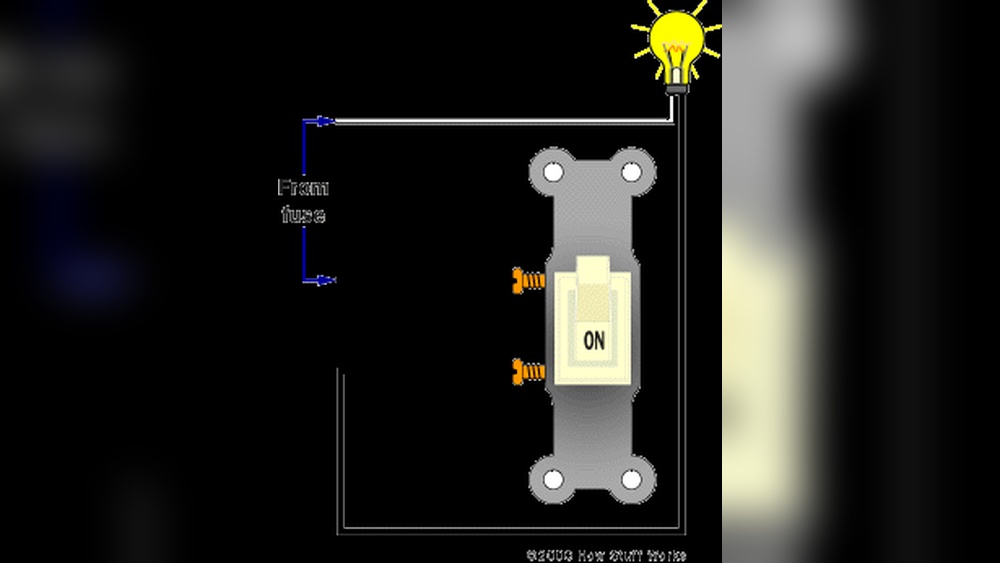
Identifying Wiring Types
Before connecting a switch to a light fixture, you must identify the wiring types. This step is important for safety and proper installation. Knowing the wires helps you avoid mistakes and electrical hazards. It also makes the connection process easier and faster.
Common Wire Colors
Electric wires often come in standard colors. These colors tell you the wire’s purpose. The most common colors are black, white, and green or bare copper.
Black wires usually carry power. White wires often serve as neutral wires. Green or bare copper wires are ground wires. These colors help you recognize each wire’s role quickly.
Function Of Each Wire
The black wire carries current from the power source to the switch or light. This is the “hot” wire. The white wire returns the current back to the electrical panel. This is the neutral wire.
The green or bare copper wire connects to the ground. It protects you from electric shocks. Proper grounding is vital for safety in any electrical system.
Wiring The Switch
Wiring the switch is a key step in connecting a switch to a light fixture. It controls the flow of electricity to the light. Proper wiring ensures the switch works safely and reliably. Follow these steps to wire your switch correctly.
Connecting The Hot Wire
Identify the hot wire in the electrical box. It usually has black insulation. Attach this wire to the switch terminal. Tighten the terminal screw firmly. This connection allows the switch to control power to the light.
Attaching The Ground Wire
Find the ground wire, often bare copper or green. Connect it to the green grounding screw on the switch. This step protects against electrical shock. Secure the wire under the screw tightly.
Securing The Switch
Push the wired switch back into the electrical box carefully. Align it with the screw holes. Use the mounting screws to fasten the switch to the box. Ensure it is flush and tight. This keeps the switch stable and safe to use.
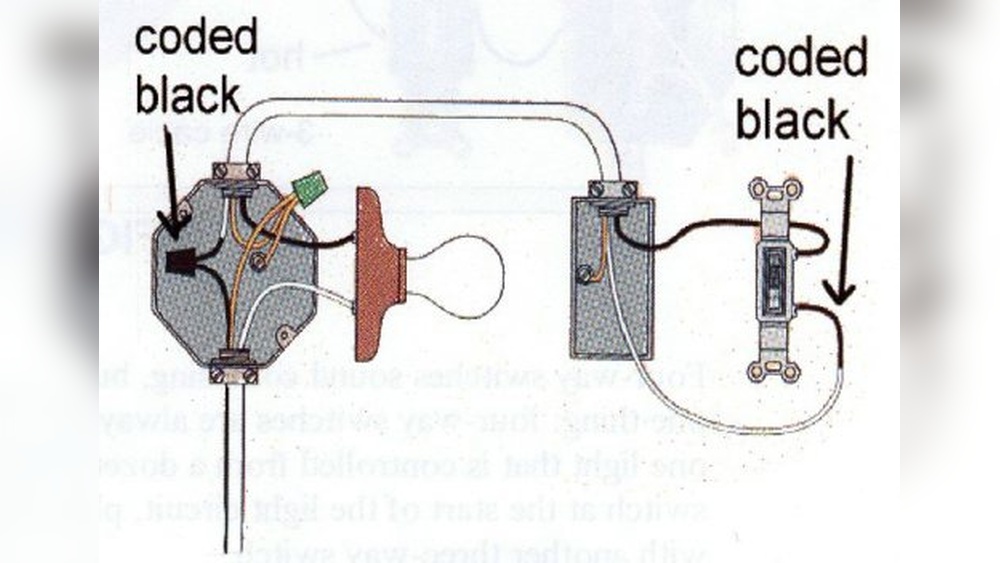
Wiring The Light Fixture
Wiring the light fixture is an important step in connecting a switch to a light. It involves joining the wires from the fixture to the house wiring safely. This process ensures the light works correctly and stays secure. Take your time and follow each step carefully.
Connecting Fixture Wires
Start by matching the wires from the light fixture with the wires in the ceiling box. Usually, black or red wires are hot and connect together. White wires are neutral and connect together. The green or bare copper wire is the ground wire. Connect ground wires to each other or to the metal box if it has a ground screw.
Using Wire Nuts
Twist the wires together neatly. Then, screw on wire nuts to hold them tight. Wire nuts keep the wires from touching each other or falling apart. Make sure no bare wire shows outside the nut. Pull gently on the wires to confirm they are secure.
Mounting The Fixture
Once the wires are connected, tuck them into the electrical box carefully. Align the light fixture with the mounting bracket or screws. Use a screwdriver to fasten the fixture firmly. Check that the fixture is stable and does not wobble. This keeps the light safe and looking good.

Credit: diy.stackexchange.com
Testing The Connection
Testing the connection is an important step after wiring a switch to a light fixture. It ensures everything works safely and correctly. This process helps find any problems before you finish the job. Follow simple steps to check the connection and fix common issues.
Restore Power
Turn the power back on at the circuit breaker. Make sure the switch and light fixture are ready. Avoid touching wires or terminals while restoring power. This step activates the electrical flow to the switch and light.
Check Switch Operation
Flip the switch on and off slowly. Watch if the light turns on and off with the switch. Test the switch several times to confirm it works. If the light does not respond, double-check your wiring connections.
Troubleshooting Common Issues
No light? Check if the bulb is working. A loose bulb or a burnt-out bulb can cause problems. Inspect the switch wiring for loose or disconnected wires. Tighten any loose screws on terminals. Use a voltage tester to verify power flow if needed.
Safety Tips And Best Practices
Working with electrical wiring can be risky without the right care. Follow safety tips and best practices to avoid accidents. These guidelines help protect you and ensure your project goes smoothly.
Avoiding Electrical Hazards
Turn off power at the circuit breaker before starting any work. Use a voltage tester to confirm no electricity is flowing. Wear insulated gloves to protect your hands. Avoid working in wet or damp areas. Keep metal tools away from live wires. Use wire nuts and electrical tape to secure connections. Check all wiring for damage before use. Never overload circuits with too many devices.
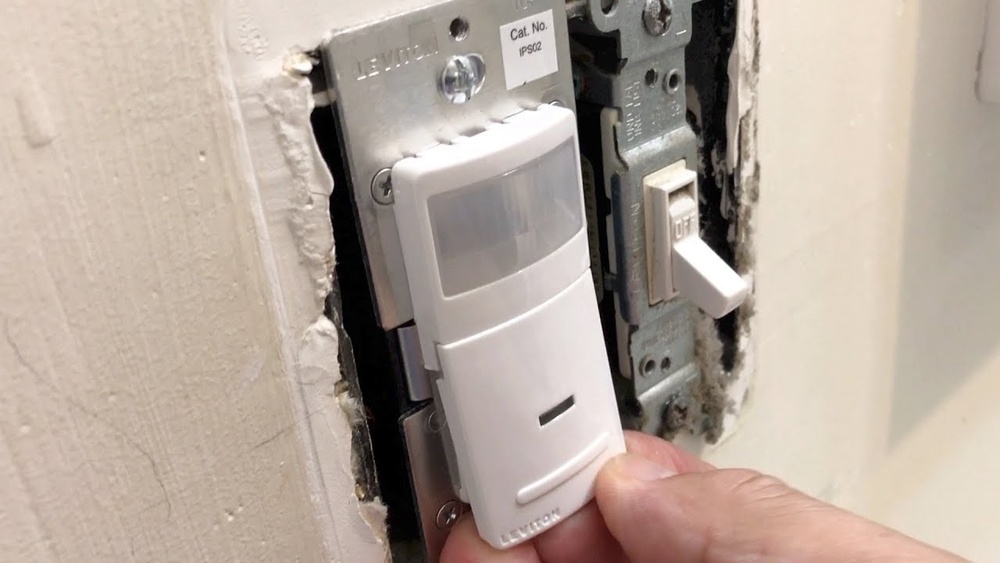
When To Call A Professional
Call an electrician if you see damaged wiring or sparks. Complex wiring or unclear instructions need expert help. Avoid guessing or making quick fixes. Professional electricians have the right tools and knowledge. They ensure connections meet local electrical codes. A small mistake can cause fire or shock. Trust experts to keep your home safe and sound.

Credit: www.youtube.com
Frequently Asked Questions
How Do I Connect A Switch To A Light Fixture Safely?
Turn off power at the breaker before starting. Use proper wiring tools and follow electrical codes. Connect the switch’s live wire to the fixture’s live wire. Secure all connections with wire nuts and mount the switch properly.
What Tools Are Needed To Connect A Switch To A Light?
You need a screwdriver, wire stripper, voltage tester, wire nuts, electrical tape, and a drill. These tools help ensure safe and accurate connections. Always check tool condition before use to avoid accidents.
Can I Connect A Light Fixture Without An Electrician?
Yes, if you follow safety rules and local codes. Turn off power, use correct wiring, and test connections. If unsure, consult an electrician to avoid hazards and ensure compliance.
How Do I Identify The Live Wire For The Switch?
Use a voltage tester to find the live wire. It usually has black or red insulation. The live wire carries current from the power source to the fixture and switch.
Conclusion
Connecting a switch to a light fixture is easier than it seems. Follow safety steps and use the right tools. Always turn off the power before starting work. Double-check your connections to avoid problems later. With patience, you can complete the task yourself.
This small project can save money and time. Enjoy the satisfaction of fixing your own home wiring. Keep learning and stay safe with every project you try.