Are you worried about drafts or cold spots around your light switches? Insulating a light switch is a simple fix that can make your home more comfortable and energy-efficient.
You don’t need to be an expert or spend a lot of money to do it right. In this guide, you’ll learn easy steps to properly insulate your light switches, saving you money on heating bills and preventing annoying chills.
Keep reading, and you’ll discover how a small change can make a big difference in your home’s comfort.

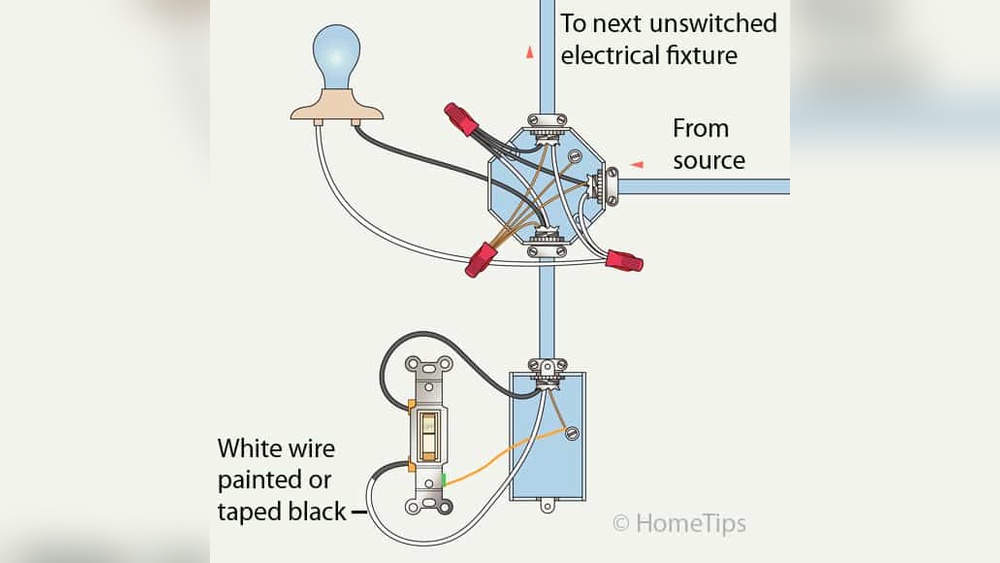
Credit: www.reddit.com
Why Insulate A Light Switch
Insulating a light switch is a small step that brings big benefits. Many people do not think about the space behind a switch plate. This area can let cold or hot air pass through walls. Adding insulation here helps keep the indoor temperature steady. It also protects your home in other important ways.
Benefits For Safety
Insulation reduces the risk of electrical fires. It stops dust and moisture from reaching wires. Moisture near electrical parts can cause shorts or sparks. Insulating around a switch adds a layer of protection. It keeps electrical components dry and safe. This simple step lowers chances of accidents at home.
Impact On Energy Efficiency
Light switch insulation helps stop air leaks in walls. Air leaks let heat escape in winter and enter in summer. This makes heating and cooling systems work harder. Insulating switches keeps warm or cool air inside rooms. It reduces energy use and lowers utility bills. A small fix with a big effect on comfort and cost.
Tools And Materials Needed
Before starting to insulate a light switch, gather all necessary tools and materials. Having everything ready makes the job easier and safer. This section lists the key items you will need.
Essential Tools
- Screwdriver (flathead and Phillips) to remove switch cover
- Voltage tester to ensure power is off
- Wire cutters for trimming wires if needed
- Wire strippers to remove insulation from wires
- Utility knife for cutting insulation materials
- Flashlight or headlamp for better visibility
- Safety gloves to protect your hands
Recommended Insulation Materials
- Foam gaskets designed for light switches
- Electrical tape for securing wires and insulation
- Caulking or sealant to block air leaks
- Plastic or rubber switch covers for added insulation
- Fire-resistant insulation foam for behind the switch box
Preparing The Switch Area
Preparing the switch area is the first step in insulating a light switch safely. This process helps protect you from electric shock and makes the task easier. Careful preparation sets the stage for a smooth installation of insulation materials.
Turning Off Power
Start by turning off the power to the switch. Go to your home’s main circuit breaker panel. Find the switch that controls the light switch you want to insulate. Flip the breaker to the off position. Double-check that the power is off by trying to turn the light on. No light means the power is off and you can continue safely.
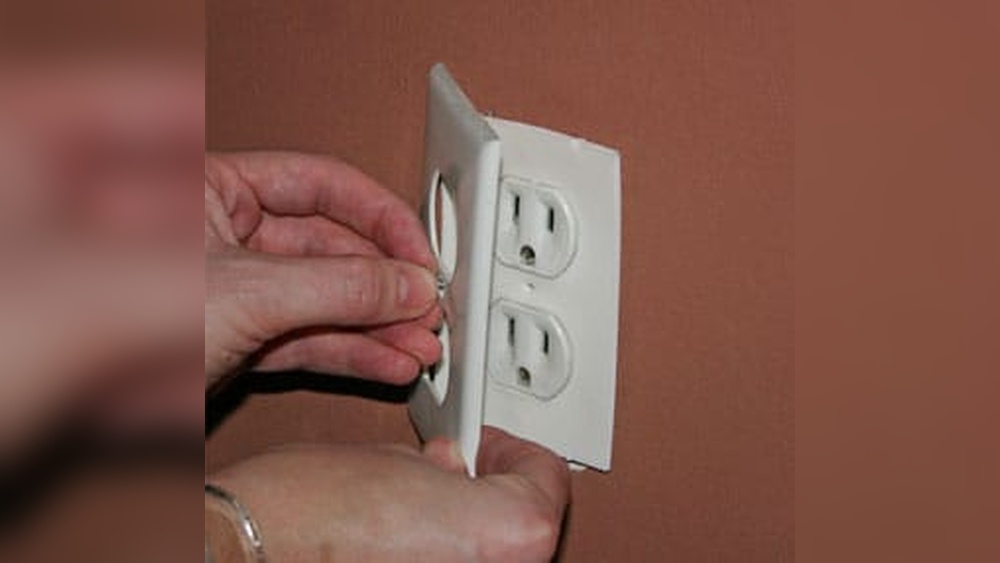
Removing The Switch Cover
Next, remove the switch cover plate. Use a flathead or Phillips screwdriver. Unscrew the screws that hold the cover in place. Carefully pull the cover away from the wall. Set the screws and cover aside in a safe place. This exposes the switch and wiring for insulation.
Credit: craftboxgirls.com
Step-by-step Insulation Process
Insulating a light switch helps prevent drafts and saves energy. This process is simple and fast. Follow these steps for a safe and effective insulation job.
Cleaning The Surface
Start by turning off the power to the switch. Use a dry cloth to wipe away dust and dirt. Clean surfaces help the insulation stick better. Make sure the area is dry before moving on.
Applying Insulation
Choose the right insulation material, like foam or rubber pads. Cut it to fit the switch plate size. Gently place the insulation behind the switch cover. Press it firmly so it stays in place.
Securing The Switch Cover
Put the switch cover back on carefully. Tighten the screws just enough to hold the cover. Avoid overtightening, which can crack the cover. Turn the power back on and test the switch.
Testing For Safety And Functionality
Testing for safety and functionality is a key step after insulating a light switch. It ensures the switch works well and is safe to use. This part helps avoid electrical problems and keeps your home secure.
Restoring Power
Start by turning the power back on at the circuit breaker. Make sure the switch is ready for use. Never touch the switch or wires before restoring power. This step allows you to test the switch’s function safely.
Checking For Proper Operation
Flip the switch on and off several times. The light should turn on and off smoothly. Listen for any unusual sounds like buzzing or crackling. If the switch feels loose or doesn’t work, turn off the power and check the wiring again.
Common Mistakes To Avoid
Insulating a light switch might seem simple. Yet, many make mistakes that cause problems later. Avoiding common errors saves time and keeps your home safe. Focus on key areas to get the best results.
Using Incorrect Materials
Choose the right materials for insulation. Avoid using regular tape or cloth. These materials do not stop moisture or heat well. Use foam gaskets or special insulating covers instead. They fit light switches perfectly and protect better. Wrong materials can cause damage or reduce insulation effect.
Ignoring Electrical Safety
Never skip safety steps when working with switches. Turn off the power before starting any work. Use a voltage tester to be sure the power is off. Avoid touching wires directly. Wear insulated gloves if possible. Ignoring safety can cause shocks or fires. Safety is the most important part of the job.
Additional Tips For Long-term Efficiency
Keeping a light switch well insulated helps save energy and avoid drafts. Small efforts today mean better comfort tomorrow. Simple care and smart upgrades keep insulation effective for years. The following tips help maintain switch insulation and improve its performance over time.
Regular Maintenance
Check your light switches often for cracks or gaps. Dust and dirt can reduce insulation quality. Clean around switches gently with a soft cloth. Tighten any loose screws to keep the cover snug. Replace worn-out insulation materials quickly. Regular checks prevent energy loss and keep rooms cozy.
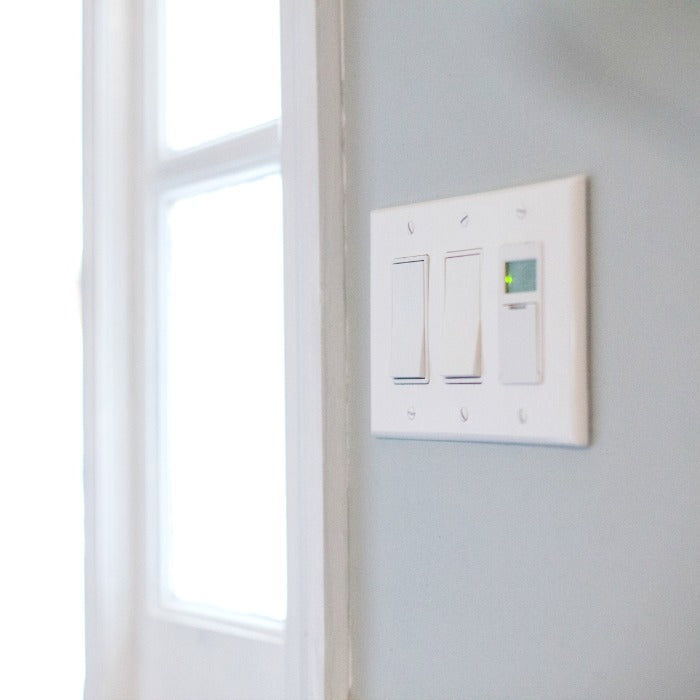
Upgrading Switch Components
Switch to modern, energy-efficient switch plates. Foam or rubber gaskets provide extra insulation. Consider installing insulated switch covers for colder rooms. Newer switches use better materials that reduce heat loss. Upgrading parts is a smart way to improve insulation. It also enhances safety and switch durability.

Credit: diy.stackexchange.com
Frequently Asked Questions
How Do I Insulate A Light Switch Safely?
Turn off the power at the circuit breaker before starting. Use foam gaskets behind the switch plate. Seal gaps with caulk to prevent drafts and improve insulation.
What Materials Are Best For Insulating Light Switches?
Foam gaskets, weatherstripping, and fire-resistant caulk work best. These materials reduce air leaks and maintain safety. Avoid flammable or non-approved insulation products.
Can Insulating A Light Switch Reduce Energy Bills?
Yes, sealing gaps around switches prevents heat loss. This helps maintain room temperature and reduces heating or cooling costs. It’s a simple energy-saving step.
Is It Necessary To Hire A Professional For Insulation?
For basic gasket installation, a DIY approach is fine. For electrical work beyond this, hiring a professional ensures safety and code compliance. Always prioritize electrical safety.
Conclusion
Insulating a light switch helps keep your home safe and energy-efficient. You protect wires and reduce drafts around the switch. Simple steps make a big difference in comfort and safety. Always turn off power before starting any work. Use the right materials for the best results.
Small fixes like this save money on energy bills. Take your time and follow instructions carefully. A well-insulated switch adds to a cozy, secure home. Try it yourself and feel the difference.