Looking to boost your home’s security quickly and easily? Installing a one-sided deadbolt might be the perfect solution for you.
It’s a simple upgrade that can make a big difference in protecting your space. In this guide, you’ll find clear, step-by-step instructions that anyone can follow—even if you’re not a DIY expert. By the end, you’ll have the confidence and know-how to install your deadbolt right the first time.
Ready to make your home safer? Let’s get started.
Tools And Materials Needed
Preparing the door is the first step to install a one-sided deadbolt. This step ensures the lock fits perfectly and works smoothly. Proper preparation saves time and prevents mistakes during installation.
Measuring And Marking
Start by measuring the height on the door where the deadbolt will go. Most deadbolts fit about 6 to 12 inches above the door handle. Use a pencil to mark the exact spot for the lock.
Next, mark the center of the door edge for the bolt. This helps align the deadbolt correctly. Double-check your measurements before drilling any holes.
Drilling The Holes
Use a drill with the right size hole saw to cut through the door. Drill the hole on the face of the door first, following your marks. Then drill the hole on the door edge for the bolt.
Drill slowly to avoid splintering the wood. Clean out any wood chips from the holes. This keeps the lock parts fitting smoothly during installation.

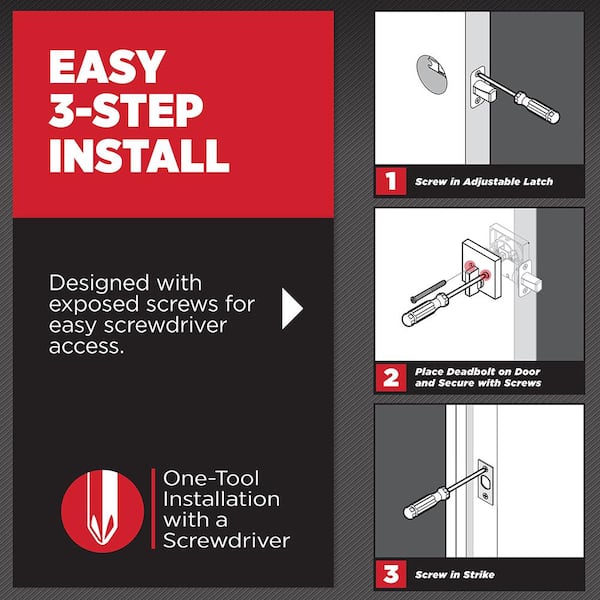
Credit: www.amazon.com
Preparing The Door
Installing a one sided deadbolt is a simple process. It adds security to your door with minimal effort. This guide will explain how to install the deadbolt step by step. Follow carefully to ensure a strong and secure lock.
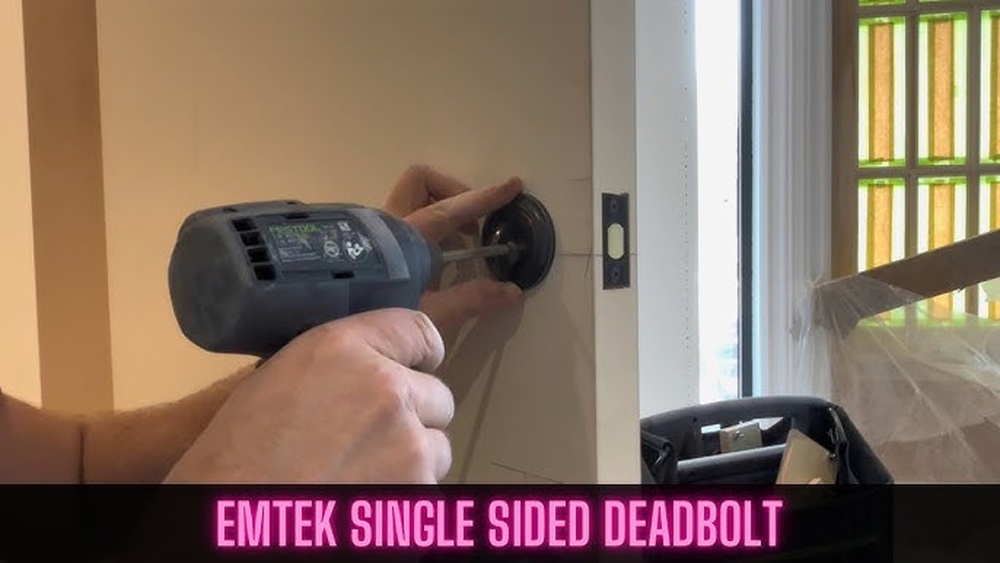
Mounting The Exterior Side
Start by placing the exterior side of the deadbolt on the door. Align it with the hole you drilled earlier. Make sure the keyhole or thumb turn faces the outside. Use screws provided in the kit to fix it in place. Tighten screws evenly to avoid misalignment. Check that the deadbolt moves smoothly by turning the key or knob.
Securing The Interior Plate
Next, attach the interior plate on the inside of the door. Align it with the exterior piece and the bolt mechanism. Insert screws through the interior plate into the exterior side. Tighten screws firmly, but do not overtighten to avoid damage. Test the deadbolt by turning the thumb turn or key inside. The bolt should slide in and out without resistance.
Installing The Deadbolt
After installing your one sided deadbolt, adjusting and testing are important steps. These ensure the lock works smoothly and safely. Proper alignment and checking prevent future issues. Take time to make small changes for best results.
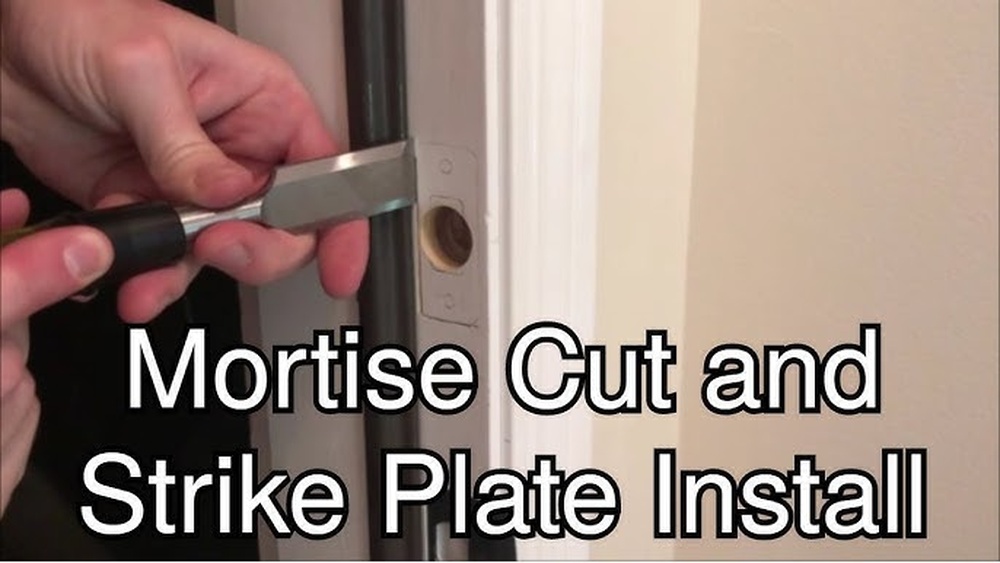
Aligning The Strike Plate
The strike plate must line up with the deadbolt. Check if the bolt fits easily into the hole. If not, move the strike plate slightly. Use a screwdriver to loosen screws and shift the plate. Tighten screws once the bolt slides without force. Proper alignment keeps the door secure and easy to lock.
Checking The Lock Functionality
Test the lock by turning the key or thumb turn. The bolt should move smoothly without sticking. Lock and unlock several times to confirm. Make sure the door closes fully with the bolt extended. If the lock feels hard to turn, adjust the strike plate again. Smooth operation ensures your deadbolt works well every time.
Credit: www.homedepot.com
Adjusting And Testing
Maintaining your one sided deadbolt is key to keeping it working well. Regular care helps avoid problems and extends the lock’s life. Small steps can make a big difference in how smoothly it operates.
Lubrication And Cleaning
Keep the deadbolt moving smoothly by applying lubricant every few months. Use a graphite or silicone spray, not oil-based products. These can attract dirt and cause jams.
Clean the keyhole and bolt area with a soft brush or cloth. Remove dust and grime that build up over time. Avoid using water or harsh chemicals that may damage the lock.
Troubleshooting Common Issues
If the deadbolt sticks or is hard to turn, check for dirt or rust inside the mechanism. Lubricate and clean the lock to solve this problem. Tighten any loose screws that may affect alignment.
The key may not insert or turn easily if it is bent or damaged. Try using a spare key instead. If problems persist, the lock may need professional repair or replacement.

Credit: www.youtube.com
Frequently Asked Questions
What Tools Are Needed To Install A One Sided Deadbolt?
You need a drill, screwdriver, measuring tape, pencil, and a one sided deadbolt kit. These tools ensure precise and secure installation.
How Long Does It Take To Install A One Sided Deadbolt?
Installation typically takes 30 to 45 minutes. Time depends on your experience and door type. Follow instructions carefully for best results.
Can I Install A One Sided Deadbolt On Any Door?
Most wooden and metal doors can support one sided deadbolts. Ensure your door thickness matches the deadbolt specifications for proper fit.
Is A One Sided Deadbolt More Secure Than A Regular Lock?
Yes, it offers enhanced security by locking from one side only. This prevents unauthorized access and adds an extra layer of protection.
Conclusion
Installing a one sided deadbolt can improve your door’s security quickly. Follow each step carefully for best results. Take your time and check the lock works smoothly. You don’t need special tools or skills to do this. A strong deadbolt helps keep your home safe and secure.
Trying it yourself saves money and builds confidence. Remember, proper installation is key to good protection. Keep your home safer with this simple upgrade today.