Are you tired of struggling with loose screws and unstable wall hangings? Knowing how to install anchors into your wall can make all the difference in keeping your shelves, pictures, and decorations secure.
Whether you’re a beginner or just need a quick refresher, this guide will walk you through simple steps that anyone can follow. By the end, you’ll feel confident tackling your next wall project with ease and precision. Let’s get started and turn your walls into a strong foundation for everything you want to display!
Choosing The Right Anchor
Choosing the right anchor is key to a strong hold in your wall. Different walls need different anchors. Picking the correct one keeps your items safe and secure. It also prevents damage to your walls. This guide helps you select the best anchor for your project.
Types Of Wall Anchors
There are many types of wall anchors. Plastic expansion anchors are common for light loads. They expand as you tighten the screw. Metal anchors offer more strength for medium loads. Toggle bolts have wings that open behind the wall. These hold very heavy items. Molly bolts create a strong grip inside drywall. Choose based on the weight and wall type.
Matching Anchors To Wall Material
Different walls need different anchors. Drywall requires anchors that spread load over a wide area. Concrete and brick need anchors that can be hammered in. Hollow walls like plaster need anchors that expand behind the wall. Match anchor type to your wall for best results. Using the wrong anchor risks wall damage and failure.
Weight Capacity Considerations
Check the weight your anchor can hold. Light anchors handle small items like picture frames. Medium anchors support shelves and mirrors. Heavy-duty anchors work for cabinets and large mirrors. Always pick an anchor with a capacity higher than your item’s weight. This ensures safety and durability. Overloading anchors can cause falls and damage.
Tools And Materials Needed
Installing anchors into walls needs specific tools and materials. Choosing the right ones makes the job easy and safe. This section covers what you need before starting.
Essential Tools
Start with a drill to make holes in the wall. Use drill bits that match the anchor size. A screwdriver helps to insert or tighten the anchors. A hammer may be useful for some anchor types. A tape measure ensures correct placement. A pencil marks the spots where you drill.
Anchor Types And Sizes
There are many anchor types for different walls and weights. Plastic expansion anchors work well for light loads. Metal anchors hold heavier items securely. Toggle bolts are good for hollow walls. Pick the anchor size based on the weight of the item. Match the anchor size to the drill bit for a snug fit.
Safety Gear
Wear safety glasses to protect your eyes from dust and debris. Gloves protect your hands from sharp edges and tools. A dust mask keeps you from breathing in particles. Keep your work area clean and well-lit to avoid accidents.
Preparing The Wall
Preparing the wall is the first step before installing anchors. It ensures a strong hold and prevents damage. Proper preparation makes the installation easier and safer. Follow these simple steps to get your wall ready.
Locating Studs And Marking Spots
Find the studs behind the wall using a stud finder or tapping method. Mark the spots where you want to place the anchors. Avoid drilling directly into studs if the anchors require drywall. Correct marking helps place anchors in the best position for support.
Cleaning The Surface
Clean the wall area where you will install anchors. Remove dust, dirt, and grease with a damp cloth. A clean surface helps anchors stick better and keeps the hole clear. Let the wall dry completely before drilling.
Drilling Pilot Holes
Use the right drill bit size for pilot holes. Drill slowly and straight into the marked spots. Pilot holes guide the anchor and prevent wall cracks. Stop drilling as soon as you reach the needed depth.

Credit: www.uglyducklinghouse.com
Installing Different Anchors
Installing anchors in walls requires choosing the right type for your project. Different anchors suit different wall materials and weights. Knowing how to install each type helps secure your items safely and firmly.
Below are common anchors and how to install them correctly.
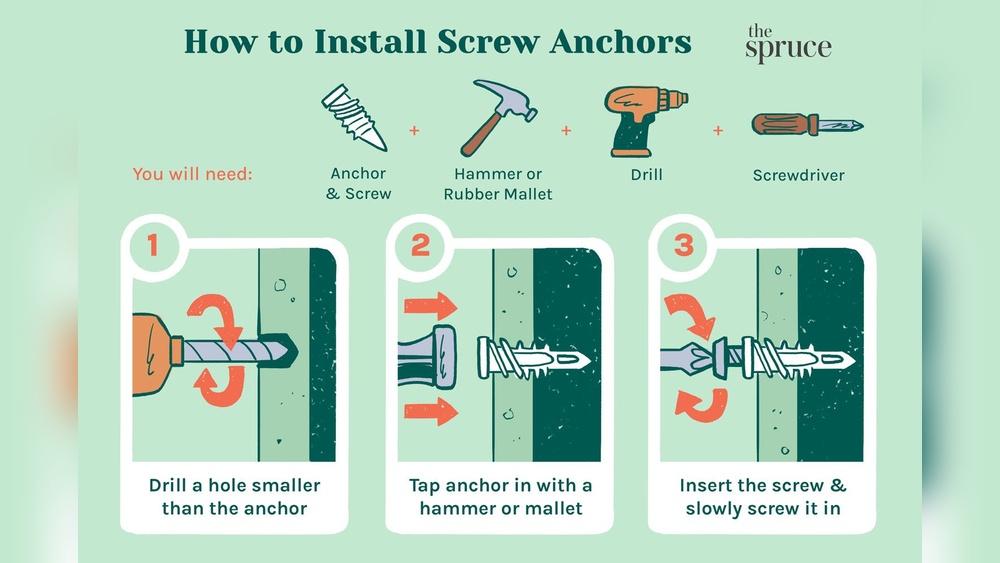
Plastic Expansion Anchors
Plastic expansion anchors work well in drywall and light materials. First, drill a hole matching the anchor size. Push the anchor into the hole until flush with the wall. Insert the screw and tighten slowly. The anchor expands inside, holding the screw firmly.
Toggle Bolts
Toggle bolts are best for hollow walls. Drill a hole large enough for the folded toggle. Push the toggle through the hole; it opens inside the wall. Pull back gently while tightening the screw. The toggle grips the wall securely from behind.
Molly Bolts
Molly bolts fit drywall and thin walls. Drill a hole slightly smaller than the bolt sleeve. Insert the molly bolt and tap it in gently. Tighten the screw to expand the sleeve inside the wall. This creates a strong hold for medium-weight items.
Self-drilling Anchors
Self-drilling anchors need no pre-drilling. Twist the anchor directly into drywall using a screwdriver. Stop when the anchor is flush with the wall. Insert the screw and tighten. These anchors are quick and good for light to medium loads.
Testing Anchor Strength
Testing the strength of wall anchors is vital for safety. It ensures the anchor holds the weight it needs to support. Without testing, the anchor might fail and cause damage or injury. Simple checks help confirm the anchor’s grip inside the wall.
Ensuring Secure Fit
Start by checking the anchor fit in the hole. It should be snug and not wiggle. Gently push and twist the anchor to feel its hold. A loose anchor needs a different size or type. Make sure the wall material suits the anchor style. Tight fit means better strength and safety.
Load Testing Tips
Apply a small force to the anchor gradually. Use a weight or pull carefully by hand. Watch for any movement or loosening. Increase the load slowly but stay within the anchor’s limit. Stop testing if the anchor shifts or pulls out. Test multiple anchors for consistent results. This method ensures the anchor can hold real weight.
Common Mistakes To Avoid
Installing anchors into a wall seems simple. Yet, many make common mistakes that cause problems. These errors can weaken the hold or damage your wall. Avoiding these mistakes saves time and effort. Here are key errors to watch out for.
Overdrilling Holes
Drilling a hole too large is a frequent error. A big hole means the anchor won’t fit tightly. The anchor may slip or fail to hold weight. Drill only as deep and wide as the anchor size requires. Use a drill bit that matches the anchor diameter.
Using Wrong Anchor Types
Choosing the wrong anchor can ruin your project. Different walls need different anchors. Drywall anchors differ from masonry anchors. Using the wrong type can cause the anchor to pull out easily. Check the wall material and pick the right anchor type for it.
Ignoring Weight Limits
Every anchor has a weight limit. Exceeding this limit risks the anchor pulling out. Heavy objects need stronger anchors. Always check the packaging for weight capacity. Do not guess the strength. Safety depends on using the proper anchor for the load.
Maintenance And Removal
Maintaining wall anchors is important for safety and durability. Over time, anchors can loosen or get damaged. Checking them regularly helps avoid accidents and keeps your walls strong. Removing anchors carefully prevents wall damage and makes space ready for new fixtures.
Inspecting Anchors Over Time
Look at your anchors every few months. Check for cracks, rust, or any movement. Press gently around the anchor to see if it feels loose. If the anchor wiggles, it needs fixing or replacing. Clean any dust or debris near the anchor to keep it secure.
Safe Removal Techniques
Start by unscrewing any attached screws. Use pliers to pull the anchor out slowly. For plastic anchors, push them into the wall cavity if pulling causes damage. If the anchor is metal, try twisting it out carefully. Fill holes with spackle or putty to restore the wall surface.
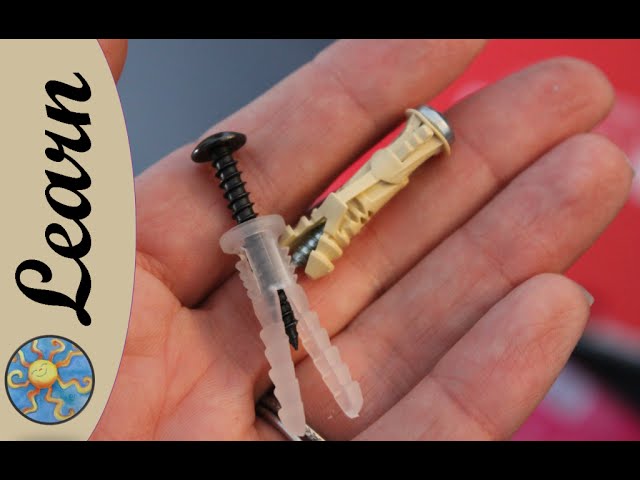
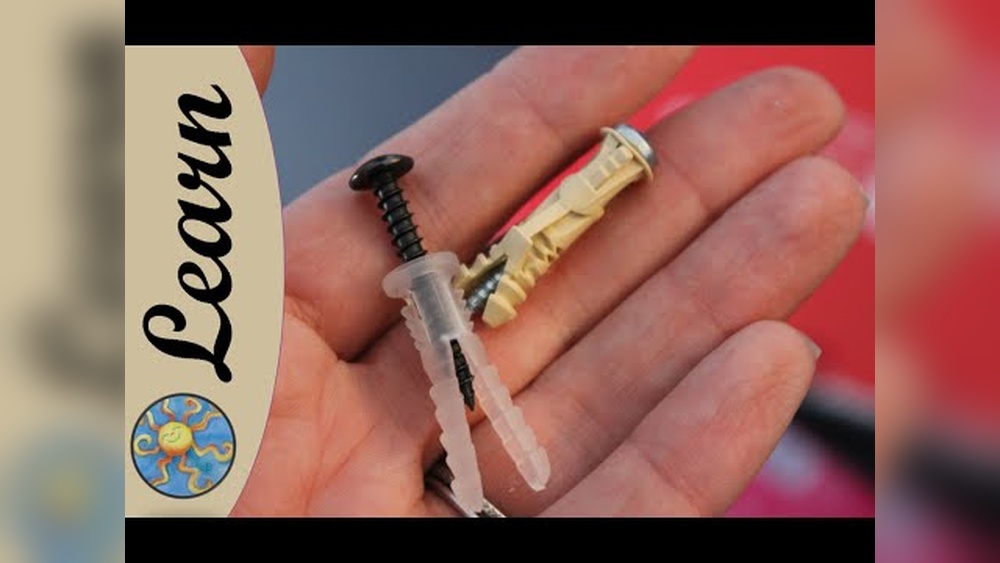
Credit: www.youtube.com

Credit: www.do-it-yourself-help.com
Frequently Asked Questions
What Types Of Wall Anchors Are Best For Drywall?
Plastic expansion anchors are common for drywall. They hold lightweight items securely. For heavier loads, use toggle or molly bolts. Choose anchors based on weight and wall type to ensure stability.
How Do You Install A Wall Anchor Step-by-step?
First, mark the spot and drill a pilot hole. Insert the anchor gently and tap it flush. Finally, screw in the screw until secure. Follow instructions specific to the anchor type for best results.
Can Anchors Be Used On Concrete Walls?
Yes, use masonry anchors for concrete. Drill a hole with a masonry bit first. Insert the anchor and tighten the screw. This ensures a strong hold in hard surfaces like concrete.
How Do I Know What Size Anchor To Use?
Check the weight of the object to hang. Match the anchor size to the screw and load. Use packaging guidelines or manufacturer recommendations for proper sizing. Correct sizing prevents wall damage and improves safety.
Conclusion
Installing anchors into a wall is simple with the right steps. Choose the correct anchor type for your wall material. Drill a hole, insert the anchor, and then secure your item. Take your time to measure and align everything properly.
This ensures your anchor holds strong and lasts long. Practice makes perfect, so don’t worry if it feels tricky at first. With these tips, your wall anchors will support shelves, pictures, or other items safely. Keep your tools ready and follow each step carefully for the best results.