Are you ready to build a strong and lasting cinder block wall that stands firm against time and weather? Whether you’re improving your garden, creating a boundary, or adding a new feature to your property, knowing how to build and anchor a cinder block wall is a skill that will save you time and money.
In this guide, you’ll discover simple, step-by-step instructions that anyone can follow—even if you’ve never laid a single block before. By the end, you’ll have the confidence to create a wall that’s not only sturdy but also built to last.
Let’s get started and turn your project into a success you’ll be proud of!

Credit: theclaims-group.co.uk
Materials And Tools Needed
Building and anchoring a cinder block wall needs the right materials and tools. These help make the wall strong and long-lasting. Preparation is key. Knowing what to use makes the job easier and safer.
Choosing The Right Cinder Blocks
Select cinder blocks that fit your wall’s purpose. Standard blocks are good for most walls. Hollow blocks allow for filling with concrete for more strength. Check the size and weight to match your design. Quality blocks have no cracks or chips. This ensures durability and stability.
Essential Tools For The Job
Use a trowel to spread mortar evenly. A level keeps blocks straight and true. A hammer and chisel help shape blocks. Mixing tools are needed for mortar preparation. A measuring tape ensures accurate placement. Gloves protect your hands. Safety goggles keep eyes safe from dust.
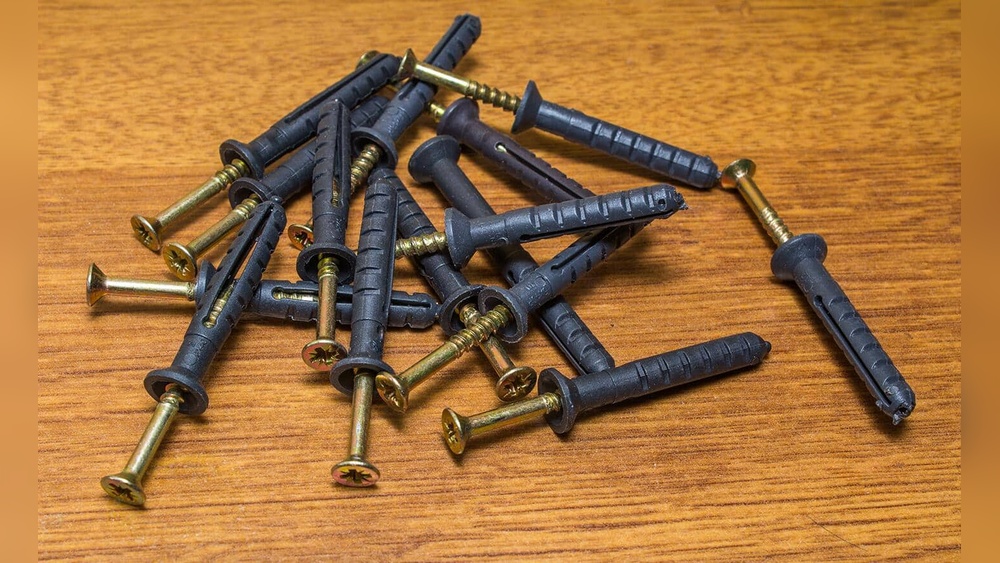
Selecting The Proper Anchoring Materials
Anchoring materials hold the wall firmly in place. Use metal ties or straps for secure anchoring. Anchor bolts fix the wall to concrete footings. Choose corrosion-resistant materials for outdoor walls. Proper anchors prevent shifting and cracking. Match anchor size to wall thickness for best results.

Credit: www.youtube.com
Preparing The Site
Preparing the site is the first step in building and anchoring a cinder block wall. A well-prepared site makes the project easier and the wall stronger. It involves clearing the area, marking the layout, and setting a firm foundation. These tasks help ensure the wall stays straight and lasts long.
Clearing And Leveling The Ground
Start by removing grass, rocks, and debris from the site. Clear the entire area where the wall will stand. Use a shovel or a rake to make the ground even. Level the soil to avoid any dips or bumps. A flat surface prevents blocks from shifting or tilting later.
Marking The Wall Layout
Next, mark the wall’s shape on the ground. Use stakes and string to outline the wall’s edges. Check the lines for straightness with a level or a tape measure. This step guides your work and keeps the wall aligned. Accurate marking saves time and effort during building.
Setting A Solid Foundation
A strong foundation supports the entire wall. Dig a trench along the marked lines, deep and wide enough for the base. Fill the trench with gravel for drainage. Then, pour concrete to create a stable base. Allow the concrete to dry fully before placing any blocks. This foundation prevents cracks and sinking over time.
Building The Wall
Building a cinder block wall requires patience and careful work. Each step matters to ensure the wall is strong and looks good. Follow the right process to avoid mistakes and save time.
Mixing The Mortar Correctly
Start by mixing the mortar properly. Use clean water and the right amount of mortar mix. The mixture should be thick but easy to spread. Avoid making it too wet or too dry. This helps the blocks stick together well.
Laying The First Course
Place the first row of blocks carefully on the foundation. This row sets the base for the whole wall. Use a level to check that each block is flat and straight. Take your time to get this step right.
Stacking And Aligning Blocks
Stack the blocks in a pattern that locks them together. Stagger the joints by starting the next row with half a block. Keep the blocks close and push them into the mortar. This makes the wall stronger.
Maintaining Level And Plumb
Use a level to keep the wall even from side to side. Check the wall’s vertical alignment often with a plumb line. Adjust blocks as you go. A straight wall looks better and lasts longer.
Anchoring The Wall
Anchoring a cinder block wall is vital for its strength and safety. Proper anchoring keeps the wall stable during strong winds, ground movement, or heavy loads. It also prevents cracks and shifts over time. Anchors connect the wall firmly to the foundation or other structures. This section explains how to choose and install anchors correctly. Follow these steps for a durable cinder block wall.
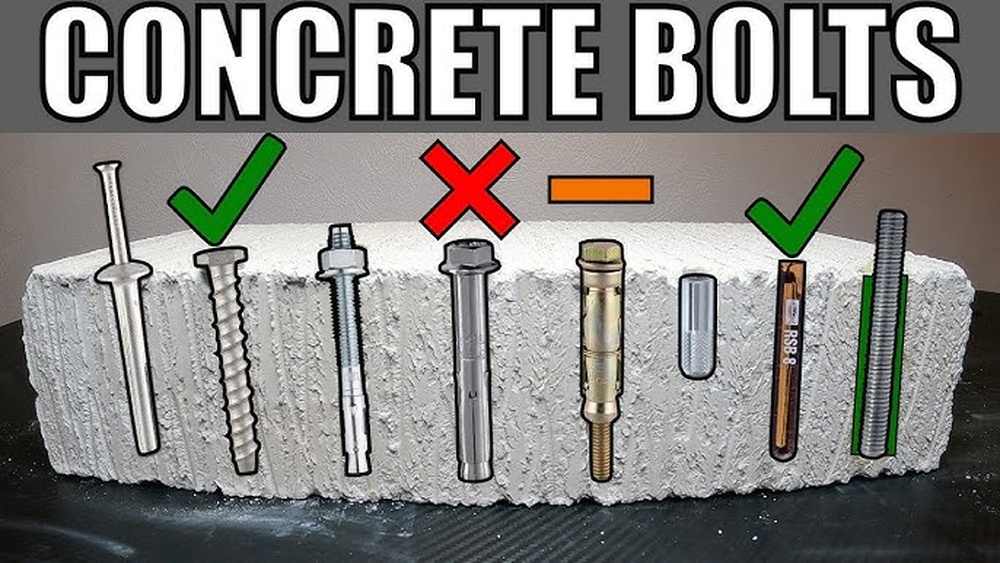
Types Of Anchors For Cinder Block Walls
Several anchor types suit cinder block walls. Expansion anchors fit into drilled holes and expand to hold tight. Sleeve anchors provide strong support for heavy walls. Wedge anchors are ideal for solid block walls. Tapcon screws work well for lighter loads and quick fixes. Choose anchors based on wall size and expected pressure.
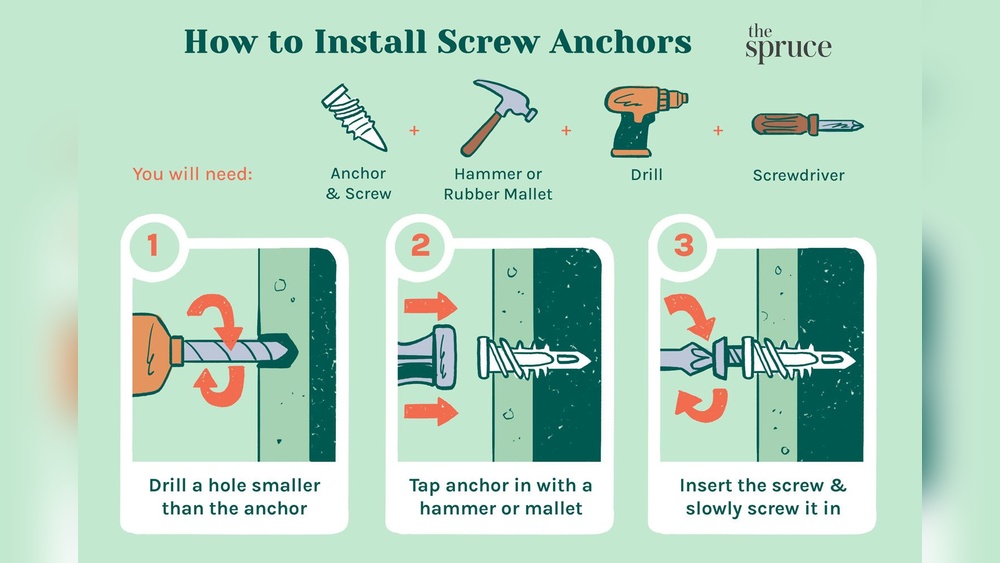
Installing Anchors Securely
Drill holes that match anchor size exactly. Clean dust from holes for better grip. Insert anchors fully and tighten carefully. Avoid overtightening, which can crack blocks. Use a level to keep anchors straight. Secure anchors evenly along the wall for balanced support.
Integrating Anchors With The Wall Structure
Place anchors at regular intervals within mortar joints. Tie anchors to steel reinforcement bars if possible. This combination boosts wall strength significantly. Cover anchors with mortar for a neat finish. Check alignment often during construction. Proper integration reduces movement and increases wall lifespan.
Finishing Touches
Finishing touches give your cinder block wall a polished, durable look. These steps protect the wall from weather and wear. They also improve the wall’s appearance. Taking time on these details ensures your wall lasts longer and looks better.
Filling Joints And Cleaning Excess Mortar
Fill the joints between blocks with mortar for strength. Use a pointing trowel to press mortar deep into the gaps. This seals the wall and stops water from entering. Clean off any extra mortar before it hardens. Use a stiff brush and water to remove residue. A clean wall looks neat and professional.
Applying Sealant Or Paint
Sealants protect the wall from moisture and cracks. Choose a sealant made for masonry surfaces. Apply it evenly with a brush or roller. Let it dry fully before touching the wall. Paint can add color and extra protection. Use paint designed for concrete blocks. Paint also helps resist dirt and stains.
Regular Maintenance Tips
Check your wall often for cracks or damage. Repair small cracks quickly to prevent bigger problems. Clean the wall yearly to remove dirt and moss. Reapply sealant every few years to keep protection strong. Regular care keeps your wall sturdy and looking good.
Credit: www.cablebullet.com
Frequently Asked Questions
What Materials Are Needed To Build A Cinder Block Wall?
You need cinder blocks, mortar, rebar, gravel, a trowel, and a level. These materials ensure a strong, durable wall.
How Do You Anchor A Cinder Block Wall Properly?
Embed vertical rebar into the foundation and fill blocks with mortar or concrete. This secures stability and prevents movement.
What Is The Best Foundation For A Cinder Block Wall?
A poured concrete footing below frost level is ideal. It supports weight and prevents shifting over time.
How Long Does It Take To Build A Cinder Block Wall?
Building time varies by size and skill. Typically, a small wall takes one to two days.
Conclusion
Building and anchoring a cinder block wall takes careful steps. Follow each part closely for strong results. Use the right tools and materials to keep the wall stable. Check measurements often to ensure everything fits well. Take your time and work safely throughout the process.
A solid wall adds value and durability to your space. Practice makes perfect. Keep learning and improving your skills. You can create a sturdy wall that lasts for years. Simple steps lead to great results.