Are you tired of fumbling for the light switch when you enter a room? Adding a second light switch can make your space much more convenient and user-friendly.
Whether you want to control your lights from two different spots or simply upgrade your home’s functionality, this simple change can make a big difference. In this guide, you’ll discover easy, step-by-step instructions to add a second light switch safely and effectively.
Keep reading, and you’ll be lighting up your home in a whole new way before you know it.

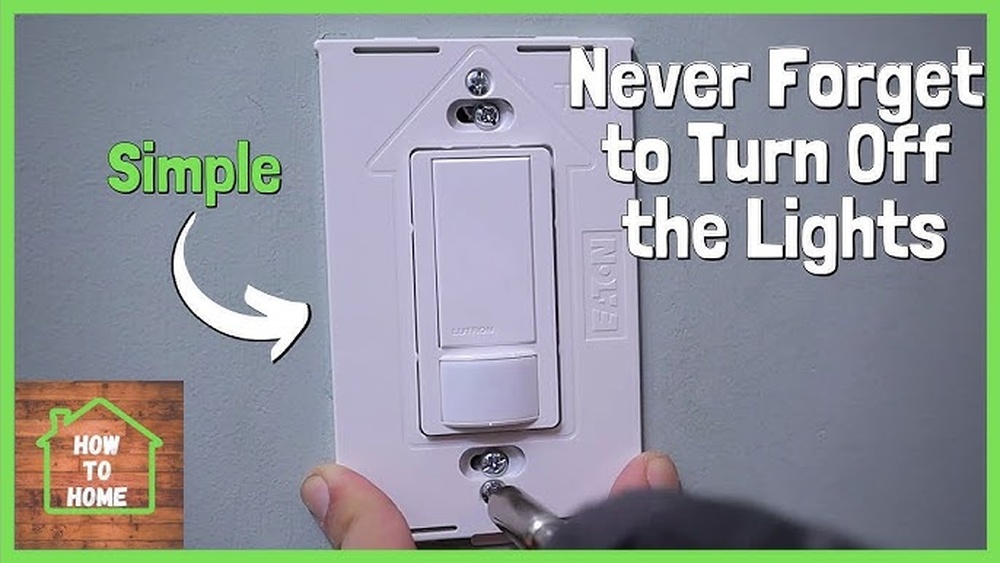
Credit: www.youtube.com
Tools And Materials Needed
Adding a second light switch needs the right tools and materials. This makes the job easier and safer. Preparing everything before starting helps you work smoothly. Here is a list of what you will need.
Basic Electrical Tools
You need some basic tools for this project. A screwdriver set helps remove and install screws. Wire strippers cut and strip electrical wires safely. A voltage tester checks if wires have electricity. Pliers help twist wires together. A drill may be needed to make holes for new switch boxes.
Switch Types And Compatibility
Choose the correct switch type for your setup. A single-pole switch works for one switch controlling one light. A three-way switch lets two switches control the same light. Make sure your switches match your home’s wiring. Check the voltage rating on the switch to match your circuit.
Safety Gear
Protect yourself with safety gear. Wear insulated gloves to avoid electric shocks. Use safety glasses to protect your eyes from dust and debris. A headlamp or flashlight helps you see in dark spaces. Always turn off power before starting any electrical work.

Credit: www.youtube.com
Preparing The Work Area
Removing the existing light switch is the first step in adding a second one. It helps you understand the current wiring setup. You need to work carefully to avoid damage and stay safe. Follow clear steps to remove the switch properly.
Unscrewing The Switch Plate
Start by turning off the power at the circuit breaker. Use a screwdriver to remove the screws holding the switch plate. Gently pull the plate away from the wall. This reveals the light switch and wires behind it.
Identifying Wire Connections
Look closely at the wires attached to the switch. Usually, there are black, white, and green or copper wires. Black wires carry the current. White wires are neutral. Green or copper wires are ground. Note how these wires connect to the switch terminals.
Taking Safety Precautions
Double-check that the power is off using a voltage tester. Wear insulated gloves to protect yourself. Avoid touching exposed wires with bare hands. Work in a dry area to reduce shock risks. Safety is key to prevent accidents.
Removing The Existing Switch
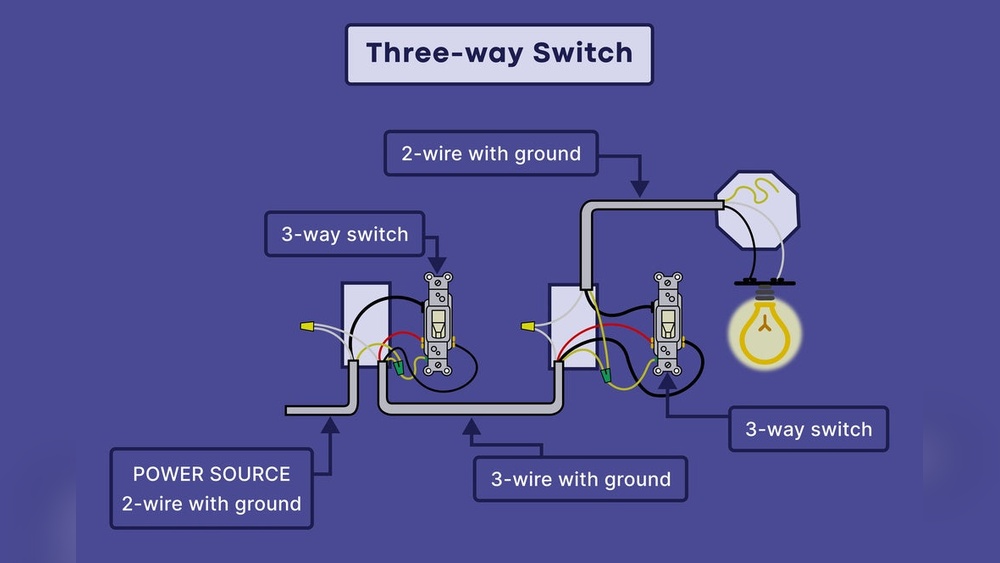
Wiring the second switch is the key step in adding a functional second light control. It involves connecting wires properly to ensure the light works from both switches. Understanding the wiring process helps avoid mistakes and keeps the setup safe.
Understanding Three-way Switch Wiring
A three-way switch allows one light to be controlled from two locations. Unlike regular switches, it has three terminals instead of two. These terminals include one common and two travelers. The common terminal connects to power or the light, while travelers carry current between switches. Knowing these parts helps in wiring the second switch correctly.
Connecting Traveler Wires
The traveler wires link the two switches together. Usually, these wires are black or red. Connect each traveler wire to the traveler terminals on both switches. This connection allows the switches to communicate and control the light from either location. Double-check the wire colors and connections for safety and function.
Securing Ground And Neutral Wires
Ground wires provide safety by preventing shocks. Connect the ground wires from both switches to the grounding terminal or box. Neutral wires complete the electrical circuit. Often, neutral wires are joined in the electrical box and do not connect to the switch. Keep all wire connections tight and secure to avoid hazards.

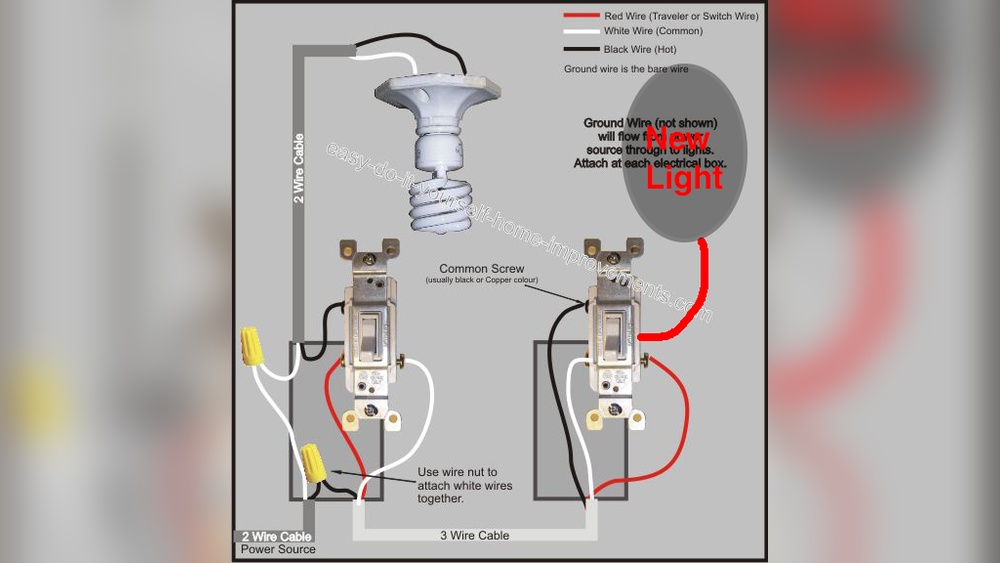
Credit: diy.stackexchange.com
Wiring The Second Switch
Installing the new switch is a key step in adding a second light switch. It involves securing the switch properly and ensuring all connections are safe and correct. This step will help your new switch work smoothly and safely.
Mounting The Switch In The Box
Place the new switch carefully inside the electrical box. Make sure the wires are not pinched or twisted. Align the switch’s mounting holes with the holes in the box. Use screws to fasten the switch firmly. The switch should sit flush and not move.
Attaching The Switch Plate
Once the switch is mounted, attach the switch plate over it. Position the plate so that it covers the box completely. Secure the plate with screws, tightening them gently. Avoid overtightening, which can crack the plate. The plate must fit snugly against the wall.
Double-checking Connections
Check all wire connections again before finishing. Ensure each wire is connected to the correct terminal. Look for loose or exposed wires. Tighten any loose screws on the terminals. Safe and secure connections prevent electrical problems.
Installing The New Switch
Working with electrical wiring can be risky without proper care. Safety should be the top priority when adding a second light switch. Taking the right steps keeps you and your home safe. Understanding simple rules can prevent accidents and damage.
Follow clear safety tips to handle wiring correctly. Learn when to ask for expert help. Avoid mistakes that could cause hazards. Keep safety in mind at every step.
When To Call A Professional
Some tasks need expert knowledge. Complex wiring or unclear circuits require a licensed electrician. If you feel unsure, do not continue. Calling a professional prevents accidents and costly repairs. Trust the experts to handle difficult jobs safely.
Avoiding Common Mistakes
Never skip turning off the power at the breaker. Use a voltage tester to confirm no current flows. Avoid mixing wire colors incorrectly. Tighten all connections firmly to stop sparks. Keep wires neat and organized inside the box. Mistakes can cause short circuits or fires.
Maintaining Electrical Safety
Wear insulated gloves and use tools with insulated handles. Work in a dry area to avoid shocks. Keep children and pets away from the workspace. Double-check all connections before restoring power. Follow local electrical codes and rules strictly. Safety habits protect you and your family every time.
Frequently Asked Questions
How Do I Wire A Second Light Switch?
To wire a second light switch, run a three-wire cable from the first switch to the second. Connect the travelers and common wires correctly to control the same light fixture from two locations safely.
Can I Add A Second Switch To An Existing Circuit?
Yes, you can add a second switch to an existing circuit. Ensure the power is off, use the correct wiring method, and follow electrical codes for safety. It’s best to use a three-way switch setup.
What Tools Are Needed To Install A Second Light Switch?
You need a voltage tester, wire stripper, screwdriver, electrical tape, and a three-wire cable. These tools help safely install and connect the second light switch to the circuit.
Is It Safe To Add A Second Switch Myself?
Adding a second switch can be safe if you follow safety rules. Turn off power, use proper tools, and follow wiring instructions carefully. When unsure, consult a licensed electrician to avoid hazards.
Conclusion
Adding a second light switch can improve your room’s lighting control. It makes turning lights on and off easier from different spots. Follow safety steps and use the right tools for the job. Taking your time helps avoid mistakes and keeps you safe.
This simple upgrade brings more comfort to your home every day. Give it a try, and enjoy the convenience it offers.