Have you ever wished you could control your lights with a simple switch, without fumbling for the plug or relying on complicated gadgets? Adding an on-off switch to your light can make your daily routine easier and more convenient.
Whether you want to save energy, improve safety, or just make your space smarter, this small change can have a big impact. In this guide, you’ll learn exactly how to add an on-off switch to your light—step by step and without confusion.
Keep reading, and you’ll be surprised how simple it is to take control of your lighting.

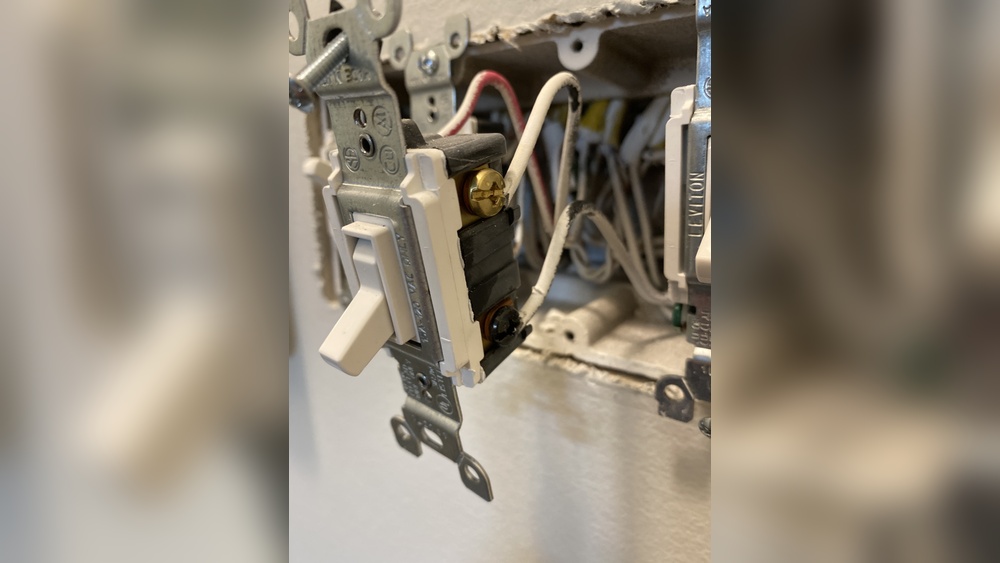
Credit: diy.stackexchange.com
Tools And Materials Needed
Adding an on-off switch to a light is a simple project. Having the right tools and materials makes it easier and safer. Gather everything before starting to avoid interruptions.
Basic Tools
Use a screwdriver to open light fixtures and secure wires. Wire strippers help remove the insulation from wires safely. A voltage tester checks if power is off before working on wires. Needle-nose pliers help bend wires and hold small parts.
Materials For The Switch
Choose a switch designed for lighting circuits. A single-pole switch works for most home lights. Make sure the switch matches your home’s voltage and current. Use electrical wire that fits your switch and light setup.
Safety Gear
Wear insulated gloves to protect from electric shock. Safety goggles protect your eyes from debris or sparks. Use a flashlight if the area is dark after turning off power.
Safety Tips Before Starting
Adding an on/off switch to a light can be a simple project. Safety is the top priority before starting any electrical work. Taking the right safety steps helps avoid accidents and damage. Follow these tips carefully to protect yourself and your home.
Turn Off Power At The Circuit Breaker
Always switch off the power at the circuit breaker before working on any electrical wiring. This stops electricity from flowing to the light fixture. Use a voltage tester to double-check the power is off. Never rely on the wall switch alone.
Use Proper Tools And Equipment
Use insulated tools designed for electrical work. Avoid using old or damaged tools. Wear rubber-soled shoes to reduce the risk of electric shock. Keep your workspace dry and clean to prevent slips or accidents.
Understand The Wiring Setup
Study the wiring layout before cutting or connecting wires. Identify the live, neutral, and ground wires correctly. Wrong connections can cause short circuits or shocks. Label wires if needed to avoid confusion.
Work In A Well-lit Area
Good lighting helps you see wires and components clearly. Avoid working in dim or dark places. Use a portable lamp if necessary. Clear visibility reduces mistakes and improves safety.
Wear Safety Gear
Protect your eyes with safety goggles. Wear gloves to avoid cuts and shocks. Use clothing that covers your arms and legs. This gear shields you from sparks and sharp edges.
Choosing The Right Switch
Choosing the right switch is key to a simple light setup. The right switch ensures safety and easy use. It also matches your light fixture and style. This section helps you pick the best switch for your needs.
Types Of Light Switches
Several types of switches exist for lighting control. The common toggle switch flips up or down to turn lights on or off. Rocker switches press on a flat surface for easy operation. Dimmer switches adjust light brightness smoothly. Push-button switches use a simple press to toggle power. Each type fits different preferences and uses.
Switch Compatibility With Fixtures
Not all switches work with every light fixture. Check the switch’s voltage rating to match your fixture. Some lights need special switches, such as dimmable LEDs. Make sure the switch can handle the fixture’s electrical load. Proper matching prevents damage and ensures long-lasting use.
Preparing The Wiring
Preparing the wiring is an important step before adding an on/off switch to a light. It ensures safety and helps the installation go smoothly. Careful preparation reduces risks and saves time.
Start by understanding the electrical setup. This knowledge helps you work confidently and avoid mistakes.
Locating The Power Source
Find the power source that feeds the light fixture. It is usually inside the ceiling or wall box. Look for the main wires connected to the light.
Use a flashlight if needed. Check the wires for color codes: black or red for live, white for neutral, and green or bare for ground. Knowing these helps you identify the wires for the switch.
Turning Off The Circuit
Safety first. Turn off the circuit breaker that controls the light. This stops electricity from flowing to the wires.
Double-check with a voltage tester. Touch the tester to the wires to confirm no power is present. Never skip this step.
Once power is off, you can start wiring the switch safely. Proper preparation protects you and your home.
Installing The Switch
Installing the switch is a key step in adding an on/off switch to your light. It controls the flow of electricity, turning the light on or off easily. This step requires careful handling of wires and proper mounting of the switch. Follow the instructions below to ensure a safe and secure installation.
Connecting Wires To The Switch
First, turn off the power at the circuit breaker. This stops any chance of electric shock. Next, identify the live wire and the neutral wire in the cable. The live wire connects to the switch’s terminal marked “L” or “Live.” The neutral wire usually bypasses the switch and connects directly to the light fixture.
Strip about half an inch of insulation from the wire ends. Insert the wires into the switch terminals. Tighten the screws firmly to hold the wires in place. Double-check that no bare wire is exposed outside the terminals. Loose or exposed wires can cause short circuits or shocks.
Mounting The Switch
After wiring, place the switch into the wall box carefully. Align it so that the switch fits snugly. Use screws to fix the switch securely to the box. Do not overtighten screws to avoid cracking the switch plate.
Once mounted, attach the switch cover plate. This hides the wiring and gives a clean look. Finally, restore power and test the switch. Flip it on and off to make sure the light responds correctly.
Testing The Installation
Testing the installation is a vital step after adding an on/off switch to your light. It ensures the switch works correctly and safely. This step helps catch wiring mistakes before using the light daily. Follow these checks carefully to confirm your new switch functions as expected.
Check Power Supply
First, restore the power at the circuit breaker. Use a voltage tester to confirm the power reaches the switch. Never touch wires if the power is still off. Confirming power prevents surprises and possible shocks.
Operate The Switch
Flip the switch on and off several times. Observe if the light turns on and off smoothly. If the light flickers or does not respond, recheck your wiring connections. Smooth operation shows a successful installation.
Inspect For Loose Connections
Turn off the power again before inspecting. Check all wire nuts and terminals for tightness. Loose wires can cause failures or hazards. Secure any loose connections before restoring power.
Test For Safety
Use a non-contact voltage tester to ensure no wires are live outside terminals. Make sure the switch plate is properly installed and covers wires. Proper insulation reduces risk of shocks or shorts.
Troubleshooting Common Issues
Adding an on-off switch to your light can sometimes lead to small problems. Troubleshooting helps fix these issues quickly. This section covers common problems and how to solve them. Follow these tips to make your switch work smoothly.
Check The Power Source
First, ensure the power is turned off before working on wiring. Use a tester to confirm no electricity flows. A loose connection in the power source can stop the switch from working. Tighten all wires and check the circuit breaker if needed.
Inspect The Switch Wiring
Incorrect wiring is a common issue. Match the wires to the switch terminals carefully. The live wire should connect to the switch’s input terminal. The output terminal goes to the light fixture. A wrong connection can cause the light not to turn on.
Test The Switch Functionality
The switch itself might be faulty. Use a multimeter to check for continuity. Press the switch and watch for changes in the meter reading. No change means the switch needs replacement. Always buy switches rated for your light’s voltage.
Check The Light Bulb
A burnt-out bulb is a simple but common cause. Replace the bulb with a new one and test. Sometimes the bulb fits loosely. Make sure it is screwed in tightly. This can restore proper light operation quickly.
Look For Loose Connections
Loose connections cause flickering or no light. Inspect all wire nuts and terminal screws. Tighten any loose parts carefully. Wiggling wires can help find weak spots. Secure all wiring to avoid future problems.

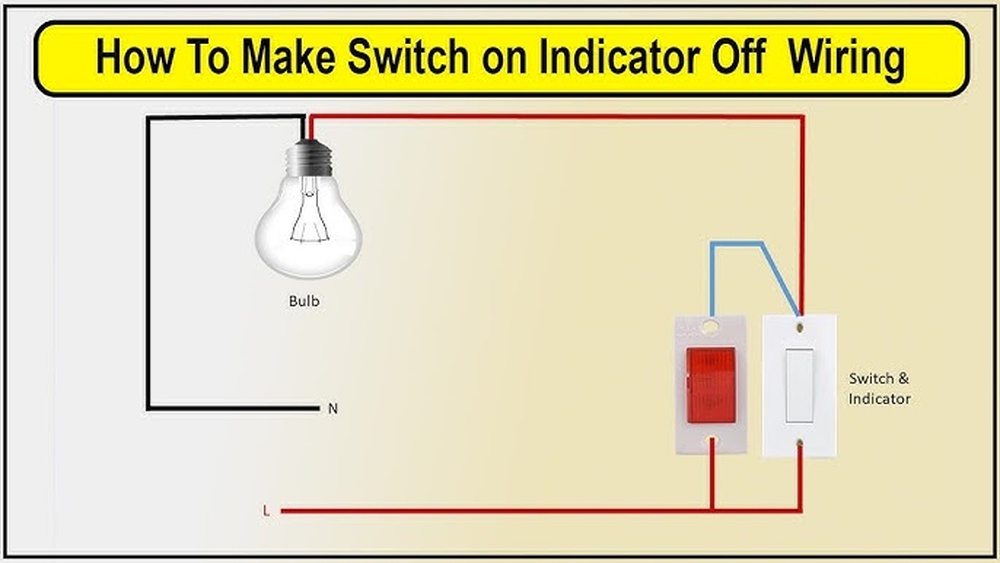
Credit: www.pearedcreation.com
Tips For Maintaining Your Switch
Maintaining your light switch keeps it working smoothly and safely. Regular care helps avoid faults and extends its life. Simple steps can prevent common problems and save money on repairs.
Cleaning The Switch Surface
Turn off the power before cleaning the switch. Use a dry cloth to wipe dust and dirt gently. Avoid wet cloths or sprays that can cause damage. Clean the switch regularly to keep it looking new.
Checking For Loose Connections
Loose wires can cause flickering or no light at all. Turn off the power and remove the switch cover. Tighten any loose screws or wires carefully. Make sure all connections are secure before closing.
Testing The Switch Function
Flip the switch on and off to check if it works well. Listen for any unusual sounds like buzzing or crackling. Replace the switch if it feels sticky or does not move smoothly. A smooth switch ensures safe operation.
Avoiding Overloading The Circuit
Do not connect too many devices to one switch. Overloading can cause the switch to heat up and fail. Use switches designed for your light’s power needs. This prevents damage and keeps your home safe.
Scheduling Regular Inspections
Check the switch every few months for wear and tear. Early detection helps fix problems before they get worse. Call a professional electrician if you find any damage or smell burning. Safety comes first with electrical parts.

Credit: www.youtube.com
Frequently Asked Questions
How Do I Add An On/off Switch To A Light Fixture?
To add an on/off switch, first turn off power at the breaker. Then, cut the live wire and connect the switch wires in series. Secure connections with wire nuts and mount the switch properly. Finally, restore power and test the switch for proper function.
Can I Install A Switch Without Professional Help?
Yes, if you have basic electrical knowledge and safety tools. Always turn off power before starting. Follow wiring diagrams carefully. If unsure, consult a licensed electrician to avoid hazards and ensure proper installation.
What Tools Are Needed To Install A Light Switch?
You will need a screwdriver, wire stripper, voltage tester, wire nuts, electrical tape, and the switch itself. These tools help safely cut, strip, and connect wires for a secure installation.
Is It Safe To Install A Switch On A Ceiling Light?
Yes, it is safe if you turn off the power and follow wiring instructions. Use a voltage tester to confirm no current is present. Properly secure all wire connections to avoid electrical hazards.
Conclusion
Adding an on-off switch to your light is simple and useful. It helps save energy and gives you control over lighting. Always follow safety steps and use the right tools. Double-check your work before turning power back on. With patience and care, anyone can do this project at home.
Enjoy the convenience of switching your lights easily anytime.