Are you struggling to remove your Kwikset deadbolt with a key? Whether you’re changing locks or fixing a jammed deadbolt, knowing the right steps can save you time and frustration.
In this guide, you’ll discover simple, clear instructions that anyone can follow—no special tools or skills needed. By the end, you’ll feel confident handling your Kwikset deadbolt like a pro. Keep reading to unlock the secrets to removing your deadbolt quickly and easily!

Credit: www.youtube.com
Tools Needed
Removing a Kwikset deadbolt with a key needs the right tools. These tools help you work safely and quickly. Having them ready makes the task easier. No extra trips to the store.
Each tool has a simple job. Together, they help take out the deadbolt without damage. Knowing what to use is the first step.
Flathead Screwdriver
A flathead screwdriver helps remove screws on the deadbolt. It fits into the slot of the screw head. This tool loosens screws without stripping them. A small or medium size works best.
Phillips Screwdriver
Some screws need a Phillips screwdriver. It has a cross shape tip. This tool fits better for certain Kwikset models. It removes screws tightly fixed in place.
Kwikset Key
The key is essential to unlock the deadbolt. It turns the lock cylinder. Using the key allows safe removal of the lock parts. Keep the key handy before starting.
Pliers
Pliers help grip small parts or pull out stubborn pieces. They give extra strength when needed. Needle-nose pliers work well in tight spaces. Use them carefully to avoid damage.
Flashlight
A flashlight lights up dark areas inside the door. It helps see screws and small parts clearly. Good lighting prevents mistakes and speeds up work.
Locate The Screws
Locating the screws is the first step to remove a Kwikset deadbolt with a key. These screws hold the lock firmly in place. Finding them helps you understand how the lock is attached to the door. This step makes the removal process easier and safer.
Check The Interior Side Of The Door
Start by opening the door. Look at the interior side where the thumb turn is. Most Kwikset deadbolts have screws visible here. These screws hold the interior and exterior parts together. Use a flashlight if the area is dark.
Look Near The Deadbolt Faceplate
Next, look at the edge of the door. The deadbolt faceplate covers the bolt. Sometimes, screws are near this plate. These screws secure the bolt mechanism inside the door. Remove any screws you find here to free the bolt.
Remove Screws Carefully
Use a screwdriver that fits the screws well. Turn the screws counterclockwise to loosen them. Keep the screws safe for reinstallation. Do not force the screws; this may strip them. Proper screw removal helps prevent damage to the door.
Insert The Key
Inserting the key into your Kwikset deadbolt is the first step to removing it properly. This action allows the lock to align internally, making it easier to take apart. Pay close attention to how the key fits and turns to avoid damage.
Insert the key gently into the keyhole. Do not force it. The key should slide in smoothly. If it resists, check for dirt or debris inside the lock. A clean lock helps the key turn without trouble.
Once the key is fully inserted, turn it slowly to the unlocked position. This step releases the internal latch. Turning the key is necessary before you can remove the deadbolt from the door.
Insert The Key Fully
Push the key all the way into the keyhole. A partially inserted key will not work. Full insertion ensures the pins inside the lock align correctly.
Turn The Key To Unlock Position
Rotate the key gently until the lock clicks open. This unlocks the deadbolt, allowing the next steps to work. Avoid forcing the key past this point.
Keep The Key Turned While Removing
Maintain the key in the turned position during removal. This holds the lock parts aligned. It prevents jamming and helps remove the deadbolt smoothly.

Credit: diy.stackexchange.com
Remove The Thumb Turn
Start by locating the small screw on the side of the thumb turn. Unscrew it carefully to remove the thumb turn from the deadbolt. This step makes it easier to access the lock mechanism.
Locate The Thumb Turn
The thumb turn is the small lever on the inside of the door. It controls the deadbolt lock without a key. Finding it is the first step to removing the deadbolt.
Remove The Screws Holding The Thumb Turn
Look for screws near the thumb turn. Usually, two screws hold it in place. Use a screwdriver to carefully remove these screws. Keep them safe for reassembly.
Pull The Thumb Turn Away From The Door
After removing the screws, gently pull the thumb turn away. It should come off easily. If it feels stuck, wiggle it slightly to loosen.
Check For Hidden Clips Or Pins
Some Kwikset models use clips or pins to secure the thumb turn. Look closely for any small parts. Remove these carefully to avoid damage.
Unscrew The Deadbolt
Unscrewing the deadbolt is the key step in removing a Kwikset deadbolt with a key. This step frees the lock from the door. It allows you to take off the entire deadbolt assembly. The process is simple but requires the right tools and care.
Focus on the screws holding the deadbolt in place. These screws connect the lock’s interior and exterior parts. Removing them lets you separate the lock from the door easily. Keep the screws safe for later use or replacement.
Locate The Mounting Screws
Look at the edge of the door and inside the lock faceplate. You will see two or three screws. These screws hold the deadbolt firmly. Use a flashlight if the screws are hard to see.
Choose The Right Screwdriver
Pick a screwdriver that fits the screws perfectly. Most Kwikset deadbolts use a Phillips head screwdriver. Using the wrong tool can strip the screws.
Turn Screws Counterclockwise
Turn each screw slowly to the left. This loosens them without damage. Remove all screws completely before pulling the deadbolt apart.
Handle Screws Carefully
Place the screws in a small container or magnetic tray. This prevents loss. Keep them nearby for reinstallation or future use.
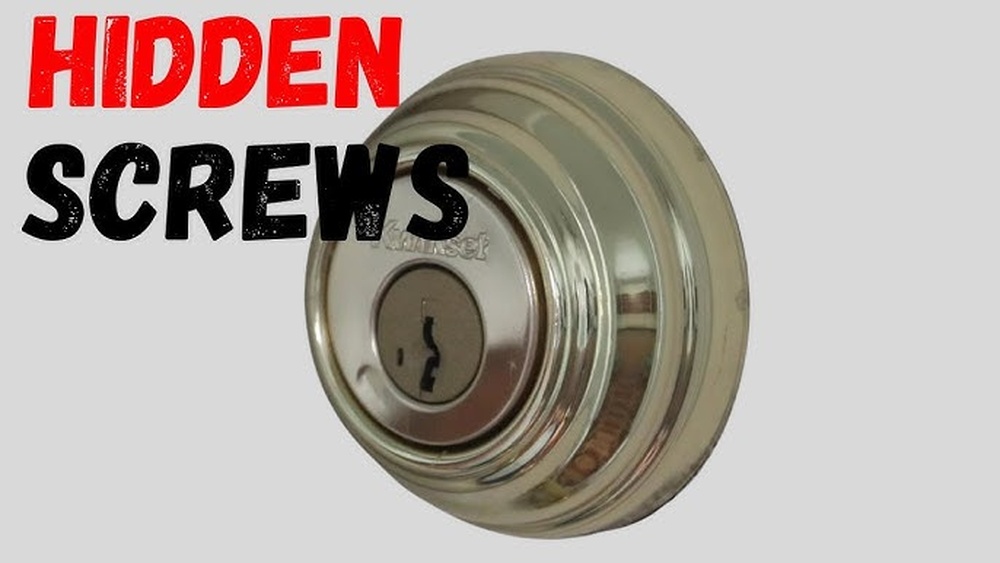
Take Out The Lock Cylinder
Removing the lock cylinder from a Kwikset deadbolt is a key step in the process. The lock cylinder is the part where you insert the key. Taking it out allows you to replace or repair the lock easily. This section explains how to remove the lock cylinder safely and quickly.
Locate The Cylinder Retaining Screw
Start by opening the door. Look on the side edge of the door. Find the small screw that holds the cylinder in place. This screw is usually near the deadbolt. Use a screwdriver to remove it. Keep the screw safe for later use.
Insert The Key And Turn
Put the key into the lock cylinder. Turn the key slightly to the left or right. This action aligns the cylinder so it can slide out. Do not force the key or the cylinder. Gentle turning is enough to unlock the mechanism.
Pull Out The Lock Cylinder
Hold the key firmly and pull the cylinder out of the door. It should slide out smoothly. If it feels stuck, check the key position again. Avoid using tools to pry it out. Pulling carefully prevents damage to the lock and door.
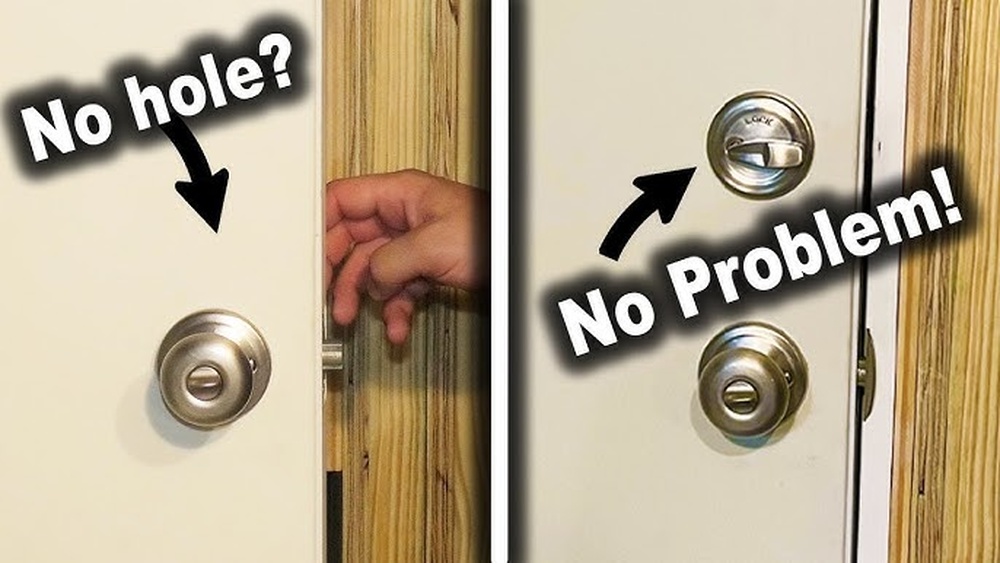
Remove The Deadbolt From The Door
Removing a Kwikset deadbolt from a door is a simple task. It requires only a few tools and some basic steps. You need to follow each step carefully to avoid damage to the door or lock. This guide will help you remove the deadbolt quickly and safely.
Gather The Necessary Tools
Start by collecting a screwdriver, usually a Phillips head. Sometimes, a flathead screwdriver may be needed. Have a key for the Kwikset deadbolt ready. These tools make the process easier and faster.
Unlock The Deadbolt Using The Key
Insert the key into the deadbolt on the outside. Turn the key to unlock the deadbolt. This step ensures the lock is open and ready to be removed. Keep the key in place during removal.
Remove The Interior Thumb Turn
Locate the screws on the interior side of the door. Use the screwdriver to remove these screws. Gently pull the thumb turn away from the door. This part controls the deadbolt from inside.
Unscrew The Exterior Keyed Side
Hold the exterior part of the deadbolt firmly. Remove the screws securing it to the door. Pull the exterior side out carefully. Keep the key inserted to avoid locking it.
Take Out The Deadbolt Mechanism
Open the door fully to access the bolt inside the door edge. Unscrew the faceplate covering the deadbolt. Pull the bolt mechanism straight out. The deadbolt is now free from the door.

Credit: diy.stackexchange.com
Troubleshooting Common Issues
Troubleshooting common issues can make removing a Kwikset deadbolt easier. Some problems block the process. Knowing how to fix these can save time and stress.
Key Won’t Turn
The key may not turn due to dirt or rust inside the lock. Spray a small amount of lubricant into the keyhole. Try turning the key gently back and forth. Avoid forcing the key to prevent damage.
If the key still won’t turn, check if the key is worn or bent. Use a spare key if available. Sometimes, cold weather can cause the lock to freeze. Warming the key can help.
Screws Are Stripped
Stripped screws make removing the deadbolt tricky. Use a rubber band for extra grip on the screw head. Press the rubber band between the screwdriver and screw. Turn slowly to avoid further damage.
If this fails, try using a screw extractor tool. These tools are designed to remove damaged screws. Another option is to use pliers to twist the screw out.
Deadbolt Stuck
A stuck deadbolt can stop the lock from coming apart. Lubricate the bolt mechanism with graphite powder or a silicone spray. Avoid oil-based lubricants as they attract dust.
Tap gently on the bolt with a small hammer to loosen it. Try moving the key while pulling the bolt out. Patience is key to avoid breaking the lock.
Frequently Asked Questions
How Do I Remove A Kwikset Deadbolt With A Key?
Insert the key and turn it to unlock. Remove the interior screws with a screwdriver. Pull off the interior and exterior assemblies carefully.
Can I Remove A Kwikset Deadbolt Without Damaging It?
Yes, use the key to unlock first. Unscrew gently to avoid damage. Handle all parts with care for reinstallation.
What Tools Are Needed To Remove A Kwikset Deadbolt?
You need a flathead or Phillips screwdriver and the correct key. No special tools are required for basic removal.
How Long Does It Take To Remove A Kwikset Deadbolt?
Removing a Kwikset deadbolt usually takes about 5 to 10 minutes. It depends on your familiarity with the lock and tools.
Conclusion
Removing a Kwikset deadbolt with a key is simple and quick. Follow the steps carefully to avoid damage. Keep your tools ready and work patiently. This process helps with lock replacement or repair. Always double-check your work before finishing. Now, you can handle this task with confidence and ease.