Are you wondering where to place hardware on your Shaker cabinets to get the perfect look? You’re not alone.
The right hardware placement can completely transform the style and feel of your kitchen or bathroom. But with so many options and styles, it’s easy to feel confused or overwhelmed. You’ll discover exactly where to put knobs and pulls on your Shaker cabinets to make them look balanced, functional, and stunning.
Keep reading, and you’ll learn simple tips that will make your cabinets stand out and make your space feel just right.

Credit: truepositiontools.com
Choosing The Right Hardware
Choosing the right hardware for Shaker cabinets is key to enhancing their simple, clean look. Hardware adds style and function. It helps cabinets open smoothly and look complete. Picking hardware that fits the cabinet style is important. It should match the design without overpowering it. Consider the type, material, and finish to create the perfect balance.
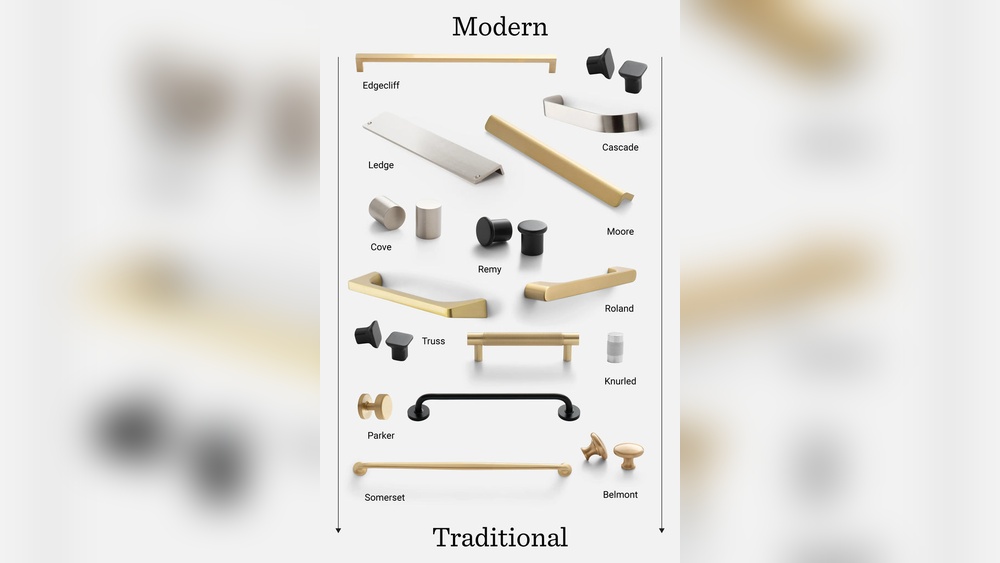
Types Of Hardware For Shaker Cabinets
Shaker cabinets often use knobs and pulls. Knobs are small and round, easy to grip. Pulls are longer and give a modern touch. Bar pulls and cup pulls are popular choices. Each type changes the cabinet’s feel. Knobs keep the look classic and simple. Pulls add a sleek, contemporary edge. Choose based on how you want the cabinet to look.
Materials And Finishes
Hardware comes in many materials. Metal is common, like stainless steel, brass, or bronze. Each metal gives a unique look. Brass offers a warm, vintage feel. Stainless steel looks clean and modern. Finishes also matter. Matte finishes hide fingerprints well. Shiny finishes add brightness and shine. Pick a material and finish that fits your kitchen’s mood.
Matching Hardware With Cabinet Style
Shaker cabinets have a simple, timeless style. Match hardware that keeps this look. Avoid overly ornate or fancy pieces. Simple, clean lines work best. Choose hardware that blends with the cabinet color. Light cabinets go well with brushed nickel or chrome. Dark cabinets look great with oil-rubbed bronze or black. The right hardware makes Shaker cabinets stand out subtly.
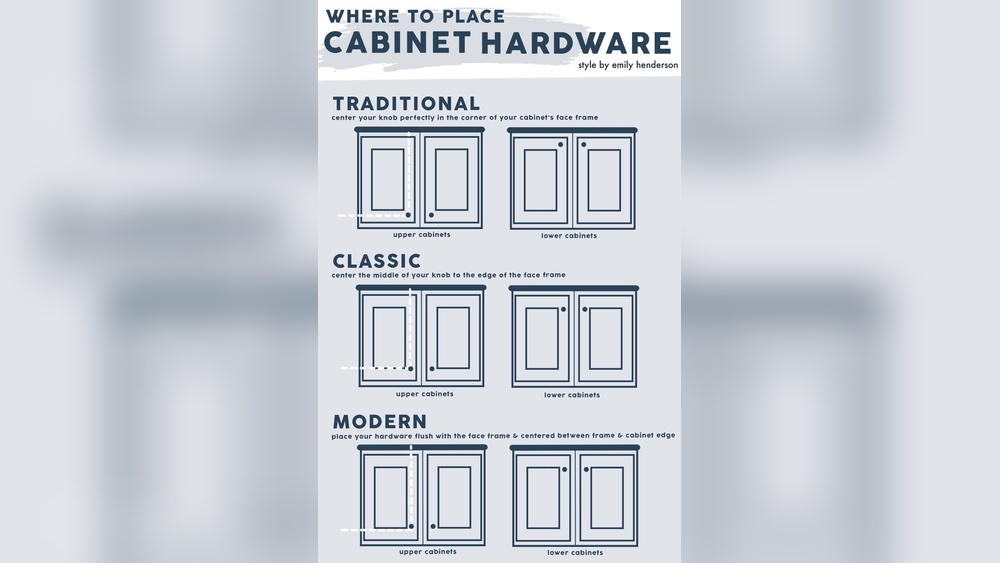
Common Hardware Placement Options
Choosing the right hardware placement on Shaker cabinets affects both style and function. Different options suit various cabinet types and personal preferences. This guide explains common hardware placements to help you decide.
Centering Knobs And Pulls
Centering knobs and pulls creates a balanced look on cabinet doors. Place knobs in the middle of the door panel for a classic style. Pulls go in the center horizontally, making them easy to grab. This placement suits both small and large doors.
Top Vs. Bottom Placement For Drawers
Drawers can have hardware placed at the top or bottom edge. Top placement makes opening quick and natural. Bottom placement offers a clean look and may help avoid wrist strain. Choose the spot that feels most comfortable for daily use.
Side Placement For Doors
Placing hardware on the side edge of doors is common for Shaker cabinets. Knobs or pulls go near the outer corner, allowing easy access. This placement keeps the door panel clear and highlights the cabinet’s simple design.
Measuring And Marking For Accuracy
Measuring and marking hardware placement on Shaker cabinets requires care. Accurate marks ensure the hardware looks balanced and fits well. This step helps avoid errors that waste time and materials. Follow clear guidelines and use the right tools for the best results.
Tools Needed For Precise Placement
Use a tape measure to get exact distances. A pencil works well for light, erasable marks. Try a ruler or straight edge to draw clean lines. A level helps keep marks straight and even. Consider a marking jig for repeated hardware placement.
Standard Measurements To Follow
Place pulls 2 to 3 inches from the cabinet edge. Knobs usually sit in the center of the door or drawer. Measure from the bottom or top edge for consistency. Keep the height the same across all cabinets for a uniform look. Follow manufacturer instructions for specific hardware sizes.
Tips To Avoid Mistakes
Double-check all measurements before marking. Mark lightly to allow easy corrections. Use a scrap piece to test drill holes first. Work slowly and do not rush the process. Have a friend check your marks for accuracy.
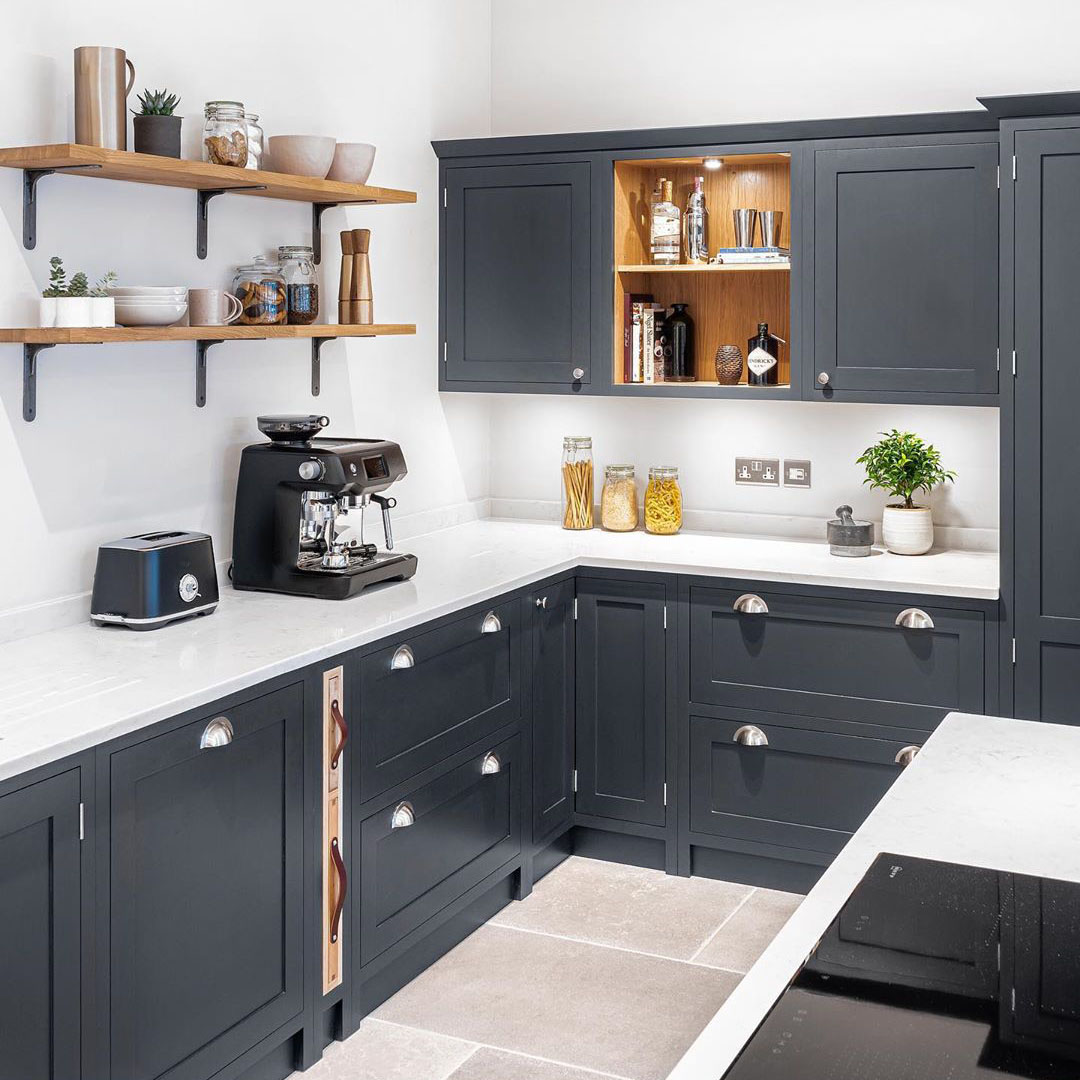
Credit: www.dowsingandreynolds.com
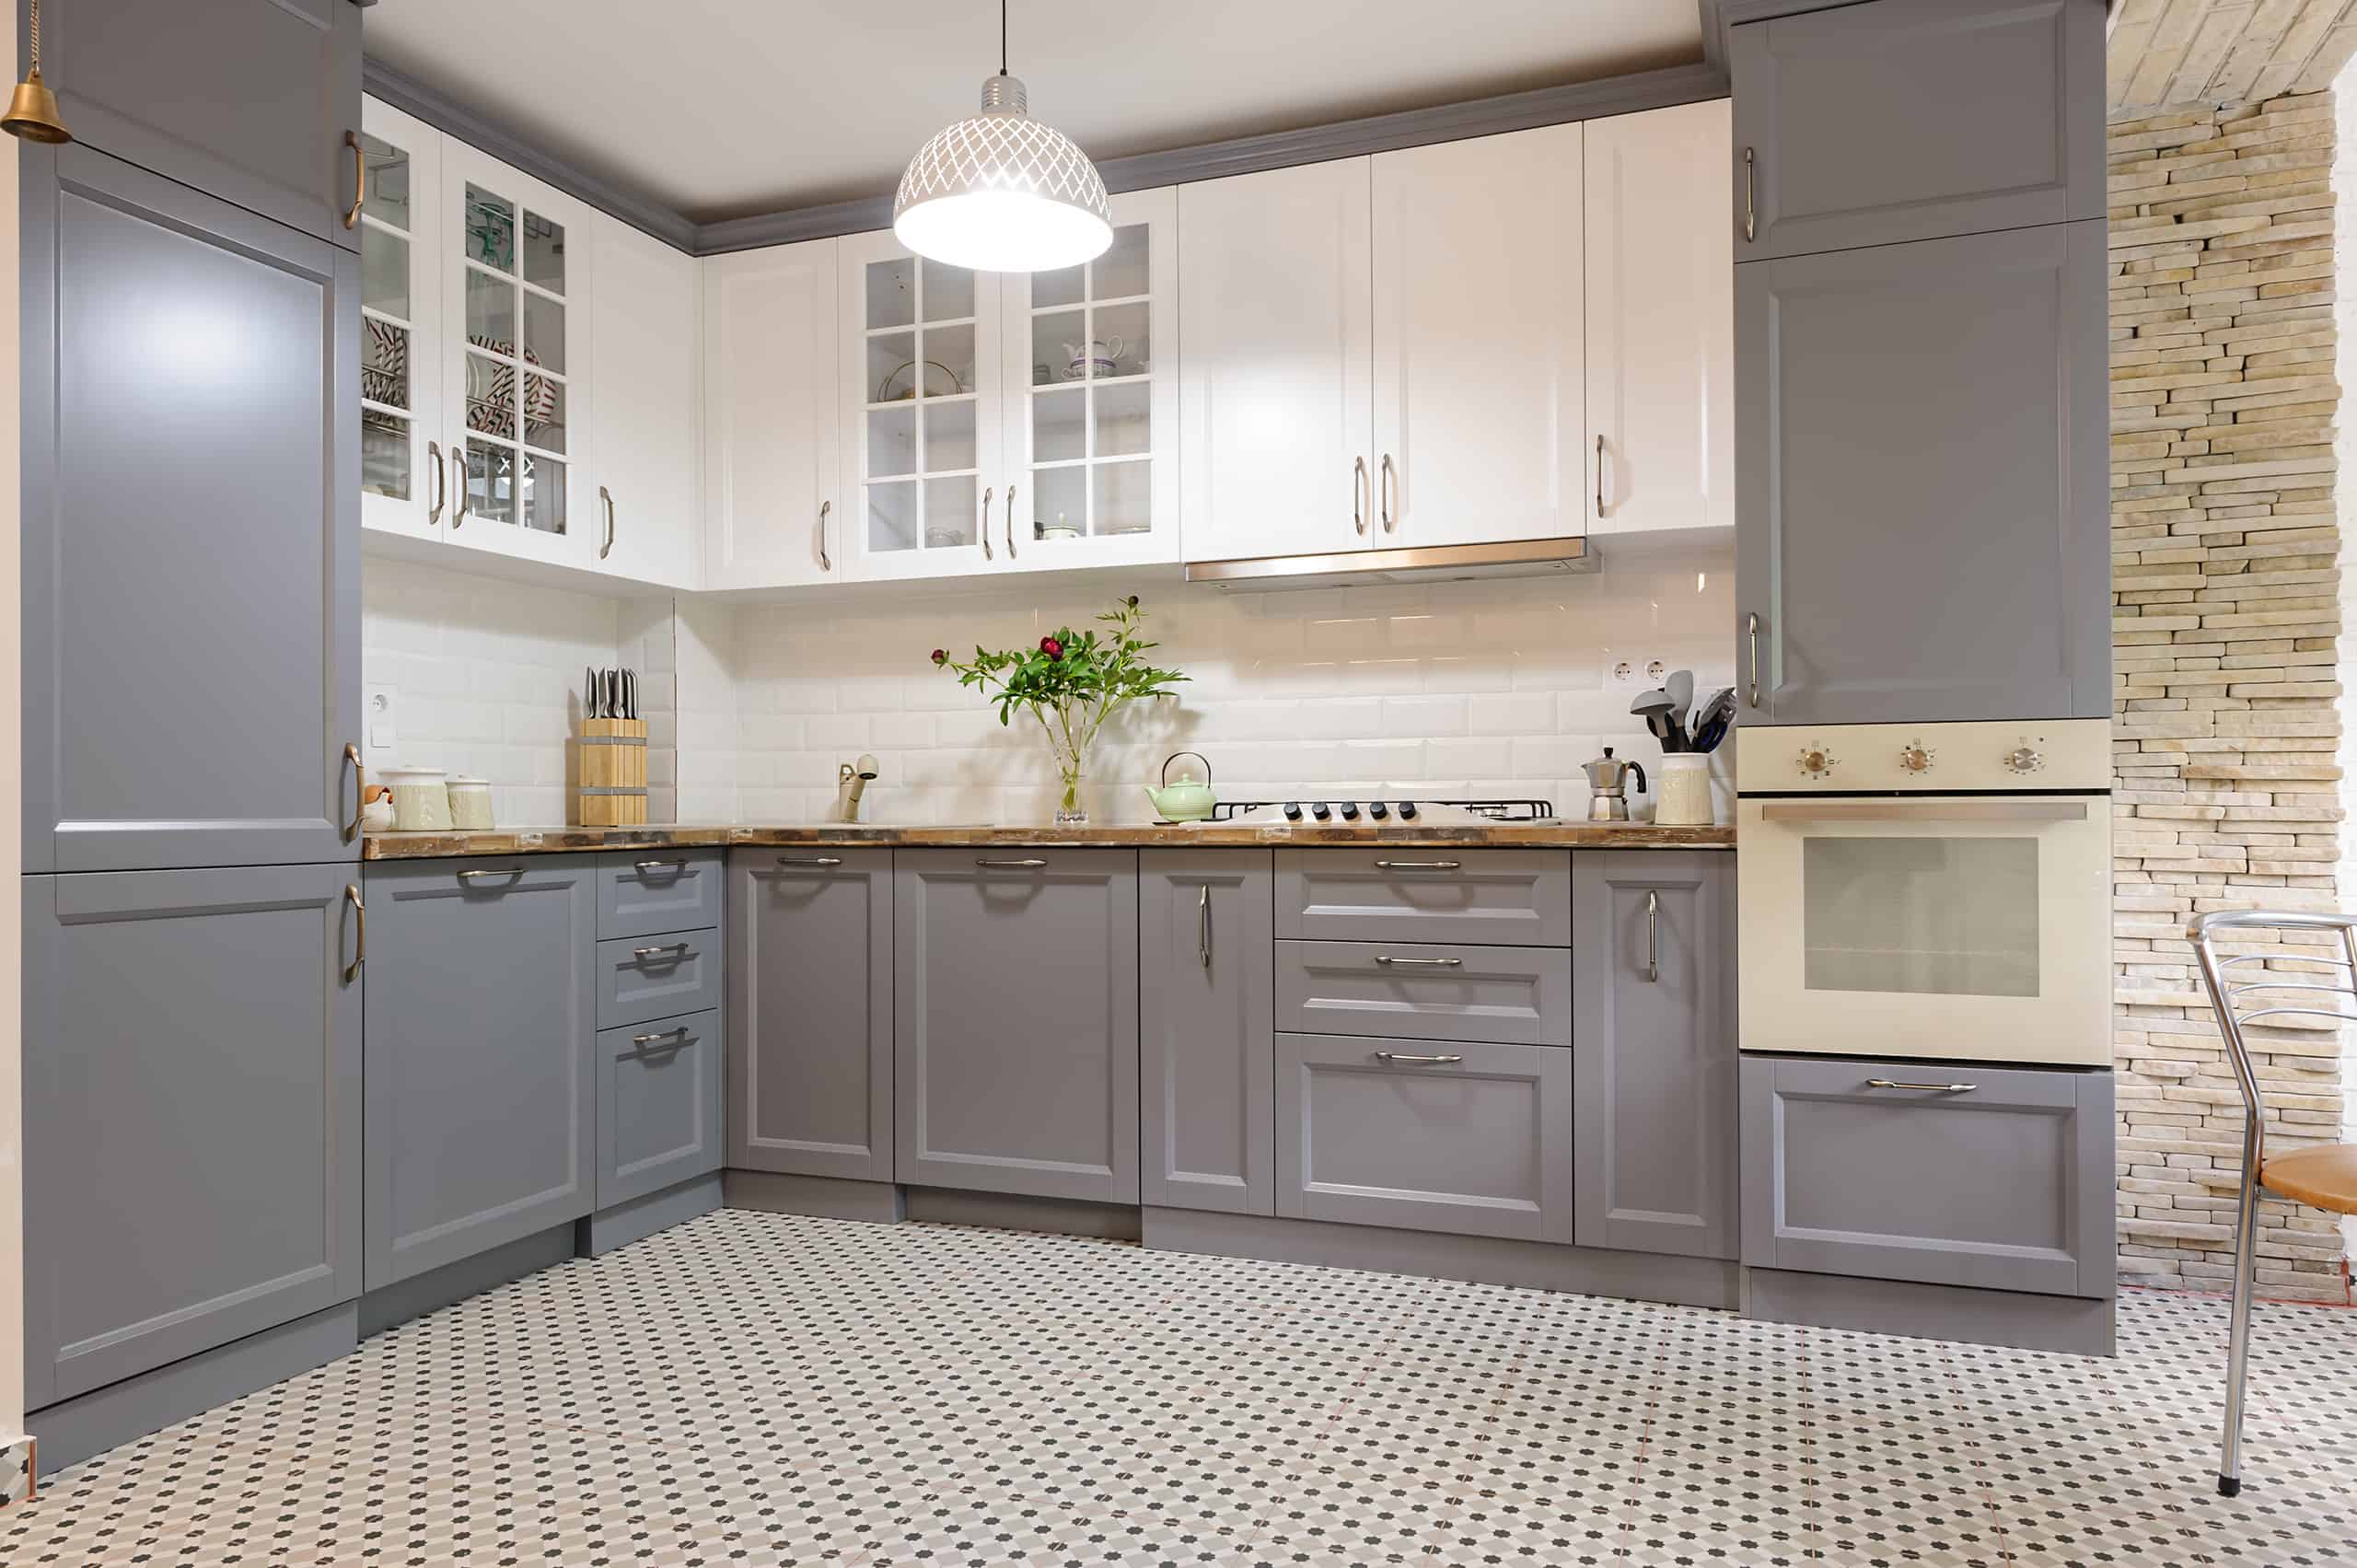
Installation Techniques
Installing hardware on Shaker cabinets requires care and precision. The right techniques ensure the hardware looks good and works well. Follow clear steps for a smooth installation process. This helps avoid mistakes and saves time.
Drilling Pilot Holes
Start by marking the spot for the hardware. Use a pencil or tape to mark the exact points. Drill small pilot holes before inserting screws. These holes guide the screws and prevent wood from splitting. Use a drill bit slightly smaller than the screws.
Securing Hardware Firmly
Place the hardware on the pilot holes. Insert screws carefully and tighten them evenly. Avoid overtightening to protect the cabinet surface. Check that the hardware sits flush and does not wobble. Firm hardware lasts longer and feels sturdy.
Adjusting For Alignment
Step back and check the hardware alignment. Ensure handles and knobs are straight and level. Use a ruler or level tool for accuracy. Slight adjustments may be needed before fully tightening screws. Proper alignment improves the cabinet’s look and usability.
Design Tips To Enhance Appearance
Designing the placement of hardware on Shaker cabinets can change the whole look of your kitchen or room. Small changes in hardware position can make cabinets look balanced and neat. Choosing the right spot for handles and knobs adds style and helps cabinets work well. Follow these tips to make your Shaker cabinets stand out with smart hardware design.
Balancing Symmetry And Function
Place hardware to keep a balanced look on each cabinet door. Symmetry helps cabinets appear tidy and well-planned. Handles and knobs should be easy to reach and use. For drawers, center the hardware horizontally. For doors, place knobs or handles near the edge. Keep the height the same on all cabinets for a uniform look.
Creating Visual Flow With Hardware
Arrange hardware to guide the eye across the cabinets smoothly. Use the same style and finish for all handles and knobs. This creates a sense of flow in the kitchen. Align hardware on all doors and drawers at the same height. Consistent placement helps the room feel calm and organized.
Using Hardware To Highlight Cabinet Features
Choose hardware that matches the style of the Shaker cabinets. Simple, clean lines work well with their classic look. Use larger handles on bigger drawers to balance size. Place knobs on raised panels or near decorative details. This draws attention to the cabinet’s design. Hardware can add contrast or blend in, depending on your style.
Troubleshooting Common Issues
Installing hardware on Shaker cabinets can sometimes cause issues. Small problems like loose handles or uneven surfaces may occur. These problems can affect the look and function of your cabinets.
This section helps you fix common hardware problems. Simple steps can make your cabinets look neat and work well again.
Fixing Loose Or Misaligned Hardware
Loose hardware can wobble and feel weak. Tighten screws with a screwdriver to stop movement. If holes are too big, use toothpicks and glue to fill them. Let dry, then reattach the hardware.
Misaligned handles spoil the cabinet’s look. Remove the hardware and mark new spots carefully. Use a level to keep handles straight before drilling new holes.
Replacing Hardware Without Damage
Remove old hardware slowly to avoid cabinet damage. Use a screwdriver to loosen screws gently. If stuck, apply a little oil to ease removal.
Match new hardware holes with old ones. If they do not match, fill old holes with wood filler. Sand smooth before drilling new holes to prevent splitting.
Dealing With Uneven Cabinet Surfaces
Uneven surfaces make hardware sit crooked. Sand the area lightly to create a flat surface. Test hardware placement before final attachment.
Use washers behind screws to level handles on uneven wood. This balances the hardware and keeps it secure.
Credit: truepositiontools.com
Frequently Asked Questions
Where Should Hardware Be Placed On Shaker Cabinet Doors?
Hardware on Shaker cabinet doors is usually centered vertically and horizontally on the rail. For drawers, place knobs or pulls in the center or aligned with the edge for easy access.
What Is The Ideal Height For Shaker Cabinet Hardware?
The ideal height for installing hardware on Shaker cabinets is about 2. 5 to 3 inches from the edge. This ensures comfortable grip and maintains a balanced, clean look.
Should Hardware Placement Differ On Drawers Vs. Doors?
Yes, hardware on drawers is typically centered, while on doors it’s placed near the outer edge. This placement enhances functionality and keeps the Shaker design visually appealing.
How Do You Align Hardware On Shaker Cabinets?
Align hardware by measuring equal distances from edges and ensuring consistent height. Use a template or jig to maintain precise and uniform hardware placement across cabinets.
Conclusion
Choosing the right spot for hardware on Shaker cabinets makes a big difference. Handles and knobs should feel easy to reach and use. Usually, placing them near the cabinet edges works best. This keeps your kitchen looking neat and simple.
Remember, the hardware should match your style but stay practical. Small changes can improve both look and function. Try different positions to find what suits your kitchen best. Keep it clean, clear, and comfortable. That’s how you make your Shaker cabinets shine.