Are you tired of struggling to hang shelves, pictures, or heavy items on your walls? Knowing how to drill an anchor into a wall can make all the difference.
It’s a simple skill that ensures your items stay secure and your walls stay intact. In this guide, you’ll discover easy, step-by-step instructions that anyone can follow. By the end, you’ll feel confident tackling your next home project without worry.
Ready to learn the secret to strong, reliable wall anchors? Let’s dive in and get started!
Credit: www.protoolreviews.com
Choosing The Right Anchor
Choosing the right anchor is key to a strong and safe hold. The wrong anchor can cause damage or fail to support weight. Knowing the types, wall materials, and sizes helps you pick the best anchor for your project. This guide breaks down what you need to know.
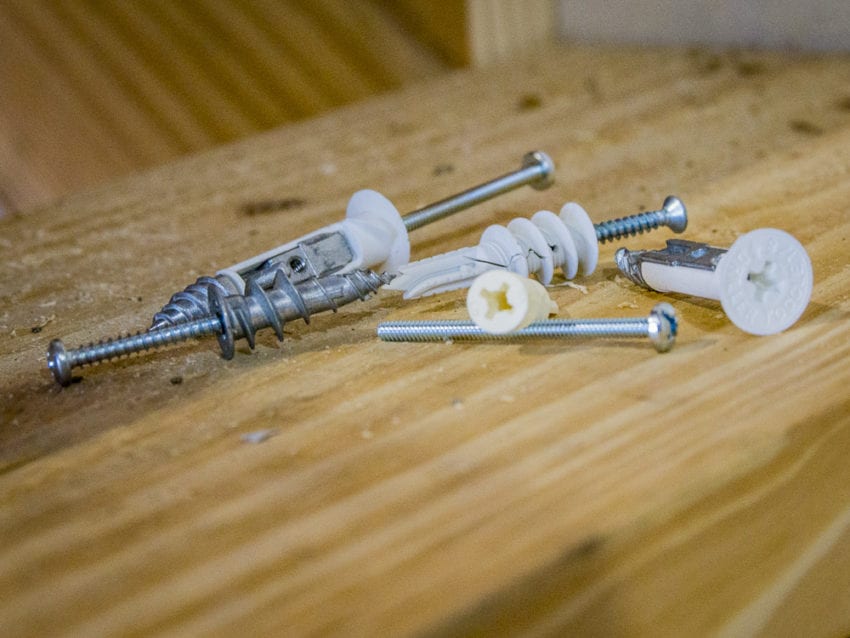
Types Of Wall Anchors
Wall anchors come in many types. Plastic expansion anchors are common for light loads. They spread inside the wall to hold tight. Toggle bolts work well for hollow walls. They open inside the wall for strong support. Molly bolts expand behind the wall for a firm grip. Choose anchors based on the weight and wall type.
Matching Anchors To Wall Material
Different walls need different anchors. Drywall requires lightweight anchors like plastic or toggle bolts. Concrete and brick need stronger anchors such as sleeve or wedge anchors. Hollow walls use anchors that expand inside, like molly bolts. Always match the anchor to the wall for best results.
Selecting Anchor Size
Anchor size matters. Bigger anchors hold more weight. Check the weight of the item you hang. Pick an anchor that supports this weight with extra safety. Also, choose the right drill bit size for the anchor. This ensures a tight fit and strong hold.
Gathering Necessary Tools
Gathering the right tools is the first step to drill an anchor into a wall. Having the proper equipment makes the job easier and safer. It also helps to get better results. Prepare your workspace and check your tools before you start.
Drill And Drill Bits
Choose a drill that fits your project size. A cordless drill is easy to handle. Pick drill bits that match the anchor size. Use masonry bits for concrete or brick walls. Wood bits work for wooden walls. Sharp bits make clean holes and prevent wall damage.
Measuring Tools
Measure carefully to place the anchor correctly. Use a tape measure or a ruler. Mark the spot with a pencil before drilling. A level helps to keep anchors straight. Accurate measurements avoid mistakes and wasted effort.
Safety Equipment
Protect your eyes with safety goggles. Wear gloves to protect your hands. Use a dust mask to avoid breathing dust. Keep your work area clean and well-lit. Safety equipment prevents injuries and keeps you focused.
Preparing The Wall
Preparing the wall is the first step before drilling an anchor. This step ensures that the anchor will hold firmly. Proper preparation helps avoid damage to the wall and makes the job easier.
Taking time to prepare the wall saves effort later. It helps place the anchor in the right spot. Careful preparation leads to a strong and safe fixing.
Locating The Fixing Spot
Find the exact place where you want to install the anchor. Choose a spot that can support the weight of the item. Avoid areas near edges or corners to prevent cracks.
Check if the spot is flat and clean. This helps the anchor fit well and hold tight. Pick a spot that is easy to reach with your tools.
Marking Drill Points
Use a pencil to mark the exact drill points on the wall. Mark the center of the anchor location clearly. Accurate marks guide the drill and prevent mistakes.
Measure twice to ensure the marks are in the right place. Use a level tool to keep marks straight if needed. Clear marks help drill holes that line up perfectly.
Checking For Obstacles
Look for pipes, wires, or studs inside the wall before drilling. Use a stud finder or wire detector to avoid hitting them. Drilling into obstacles can cause damage or danger.
Tap the wall lightly to listen for hollow or solid spots. Avoid areas with hidden wiring or plumbing. Safe drilling protects your home and tools.
Credit: www.homedepot.com
Drilling The Hole
Drilling the hole is a key step when installing an anchor into a wall. It sets the base for a strong hold. Doing it right helps the anchor fit snugly and support weight safely.
Careful drilling prevents damage to the wall and ensures the anchor stays secure. This section covers three important points: choosing the correct drill bit, drilling at the right speed, and maintaining drill stability.
Choosing The Correct Drill Bit
Select a drill bit that matches the anchor size. The hole must be slightly smaller or the same size as the anchor. For drywall, use a standard twist bit. Masonry walls need a masonry bit. Using the wrong bit can cause the hole to be too big or too small.
Drilling At The Right Speed
Start drilling slowly to create a guide hole. Increase speed once the bit grips the wall. High speed works well for drywall but use a slower speed for brick or concrete. Fast drilling can crack the wall or wear out the bit quickly. Keep control over the drill speed for a clean hole.
Maintaining Drill Stability
Hold the drill steady and straight against the wall. Avoid tilting the drill, which can widen the hole unevenly. Use both hands if needed to keep balance. Press gently but firmly. A shaky hand can cause the drill bit to slip or the hole to be off-center.
Installing The Anchor
Installing the anchor correctly is important to hold objects safely on a wall. This step ensures the anchor stays strong and stable. Follow these simple steps to make sure the anchor fits well and holds tight.
Cleaning The Hole
After drilling, remove dust and debris from the hole. Use a small brush or blow air inside. A clean hole helps the anchor fit better. Dust can stop the anchor from gripping the wall well.
Inserting The Anchor Properly
Place the anchor straight into the hole. Push it gently until it is flush with the wall. Do not force it too hard to avoid damage. Use a hammer lightly if the anchor is tight. Make sure it sits evenly for the best hold.
Ensuring A Secure Fit
Check that the anchor does not move in the hole. It should feel firm and stable. If loose, remove and clean the hole again. Try a slightly bigger anchor if needed. A secure fit keeps the mounted object safe and steady.
Fixing The Fixture
Fixing the fixture is the next important step after drilling the anchor into the wall. This step secures the item you want to hang or attach. Proper fixing ensures the fixture stays stable and safe to use. Follow each part carefully for a strong hold.
Aligning The Fixture
Place the fixture over the drilled anchor. Make sure the holes in the fixture line up with the anchors. Check the position twice before moving on. Proper alignment prevents damage to the wall or fixture.
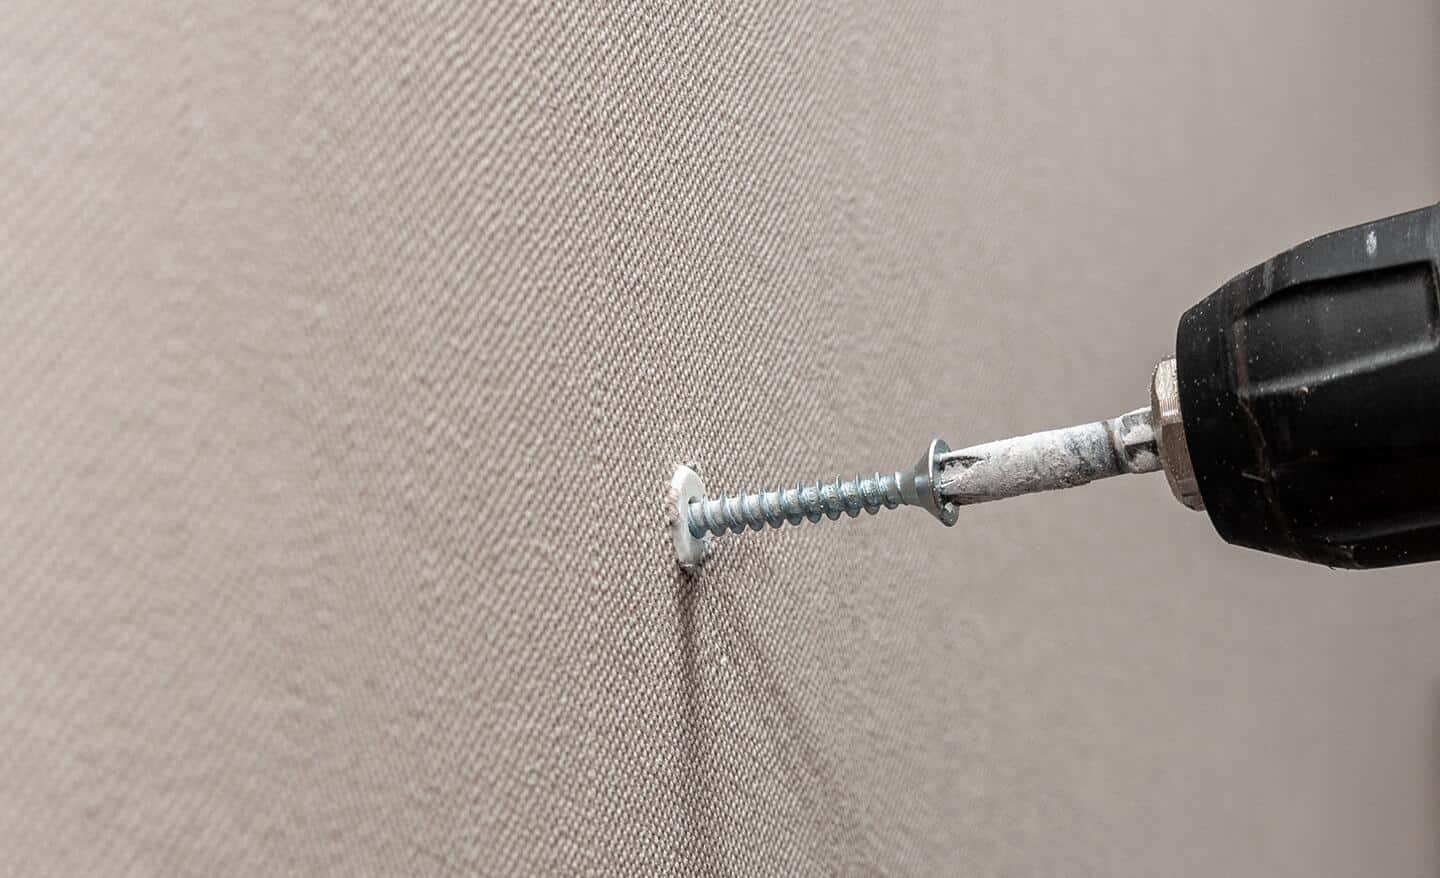
Screwing Into The Anchor
Insert the screw through the fixture into the anchor. Use a screwdriver or drill to tighten the screw slowly. Do not force it too much to avoid breaking the anchor. Tighten until the fixture feels secure against the wall.
Testing Stability
Gently pull or push the fixture to check its hold. It should not move or wiggle. A loose fixture means the screw or anchor needs adjustment. Tighten or reposition if necessary for maximum stability.
Troubleshooting Common Issues
Troubleshooting common issues is key to a smooth drilling process. Problems like cracked walls, loose anchors, or misaligned holes can cause frustration. Knowing how to fix these issues saves time and effort.
Dealing With Cracked Walls
Cracks in walls may get worse if you drill carelessly. Avoid drilling near large cracks. Use smaller anchors to reduce pressure on the wall. Fill small cracks with wall putty before drilling. Let the putty dry fully for a solid base.
Handling Loose Anchors
Loose anchors fail to hold weight properly. Remove the loose anchor gently. Use a larger anchor size or a different type. If the hole is too big, fill it with a mixture of drywall compound and water. Let it dry, then drill a new hole for a tight fit.
Correcting Misaligned Holes
Misaligned holes cause uneven hanging and weak support. Avoid drilling multiple holes close together. Use a filler to cover the wrong hole. Wait for it to dry, then sand it smooth. Measure carefully before drilling the new hole to ensure accuracy.
:max_bytes(150000):strip_icc()/how-to-use-and-discard-anchor-screws-1822671_04_3225-fb61b874b829410e8ef26f3453ef35f0.jpg)
Credit: www.thespruce.com
Frequently Asked Questions
What Tools Do I Need To Drill An Anchor Into A Wall?
You need a drill, appropriate drill bit, wall anchors, a screwdriver, and a hammer. Choose the drill bit size based on the anchor type for a secure fit.
How Do I Choose The Right Wall Anchor?
Select anchors based on wall material and weight load. Plastic anchors suit light loads; metal anchors hold heavier items. Always check packaging recommendations for proper use.
Can I Drill Anchors Into Drywall Safely?
Yes, use drywall anchors designed for drywall. Avoid heavy loads on drywall without studs. Ensure anchors are installed properly to prevent damage or falling.
What Drill Bit Size Is Best For Wall Anchors?
Match the drill bit size to the anchor’s diameter. Too large a hole weakens grip; too small makes insertion difficult. Follow anchor packaging for exact drill bit size.
Conclusion
Drilling an anchor into a wall is simple with the right steps. Use the correct drill bit size to avoid damage. Always check the wall type before starting. Take your time to drill straight and steady. Tighten the anchor carefully for a strong hold.
This method keeps your items secure and safe. Practice makes the process easier and quicker. Follow these tips, and your wall anchors will hold well. Ready to hang with confidence? You’ve got this!