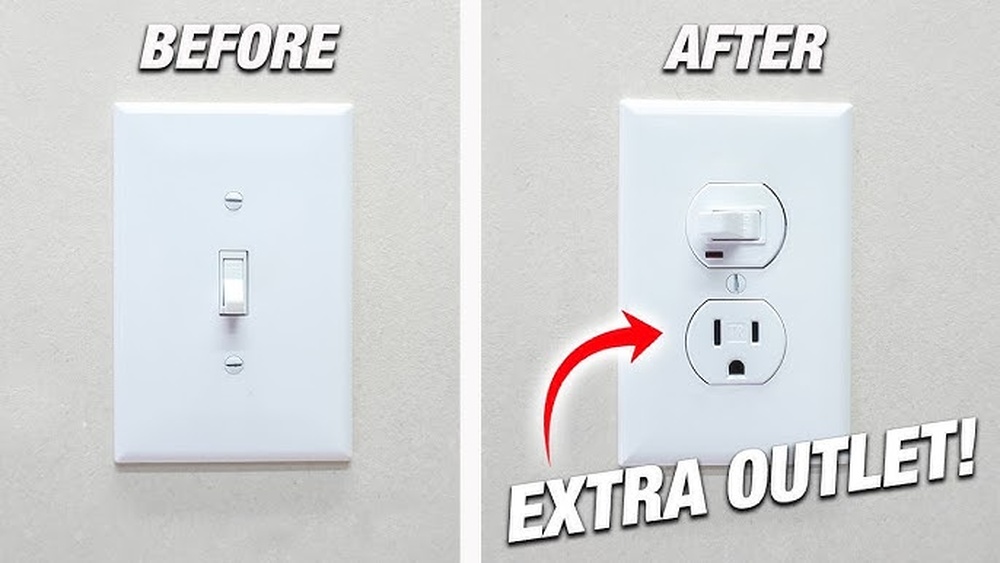
Have you ever wished you could control a lamp or light fixture right from an outlet? Adding a light switch to an outlet can make your space more convenient and safe.
Imagine turning your lights on and off without unplugging anything or fumbling in the dark. If you think this sounds complicated, don’t worry—you can do it yourself with the right steps. Keep reading, and you’ll learn exactly how to add a light switch to an outlet quickly and safely, even if you’re not an expert.
Your home will thank you for it!
Tools And Materials Needed
Before adding a light switch to an outlet, gather all tools and materials. Having everything ready saves time and keeps the work safe. This section lists what you need for this project.
Essential Tools
- Screwdriver (flathead and Phillips)
- Wire stripper
- Voltage tester
- Needle-nose pliers
- Drill (optional, for new holes)
- Electrical tape
- Utility knife
Required Materials
- Single-pole light switch
- Electrical box (if adding new switch box)
- Wire nuts
- 14/2 or 12/2 electrical wire (depending on circuit)
- Outlet cover plate
- Light switch cover plate
Safety Equipment
- Insulated gloves
- Safety goggles
- Rubber-soled shoes
- Flashlight (if power off)
- Mask (to avoid dust)
Safety Precautions
Safety is the top priority when adding a light switch to an outlet. Electricity can be dangerous if you do not follow the right steps. Taking proper safety measures helps avoid shocks and accidents.
Before starting, understand the risks. Always treat wires as if they are live. Use tools and gear designed for electrical work. Staying cautious protects you and your home.
Turning Off Power
Switch off the power at the circuit breaker. Do not rely on the wall switch alone. Confirm the right breaker controls the outlet. This step stops electricity from flowing.
Testing For Live Wires
Use a voltage tester to check wires. Touch the tester to each wire carefully. If the tester lights or beeps, the wire is live. Test twice to be sure all wires are dead.
Using Protective Gear
Wear insulated gloves to protect your hands. Use safety goggles to shield your eyes. Avoid loose clothing or jewelry near wires. Proper gear lowers the risk of injury.
Planning The Wiring
Planning the wiring is the first step before adding a light switch to an outlet. It helps you work safely and avoid mistakes. Good planning saves time and money. Understanding what to do and where to connect wires is very important. This section guides you through the basic steps of planning your wiring.
Locating The Outlet And Switch
Find the outlet where you want to add the switch. Check if it has enough space for extra wiring. Choose a spot for the switch near the outlet. The switch should be easy to reach and use. Make sure the wall can hold the switch box safely. Mark the locations clearly before starting the work.
Understanding Wiring Basics
Know the types of wires inside your walls. Usually, there are black (hot), white (neutral), and green or bare (ground) wires. The hot wire carries electricity to the light. The neutral wire completes the circuit back to the power source. The ground wire protects from electrical shocks. Never mix these wires. Always turn off the power before handling any wires.
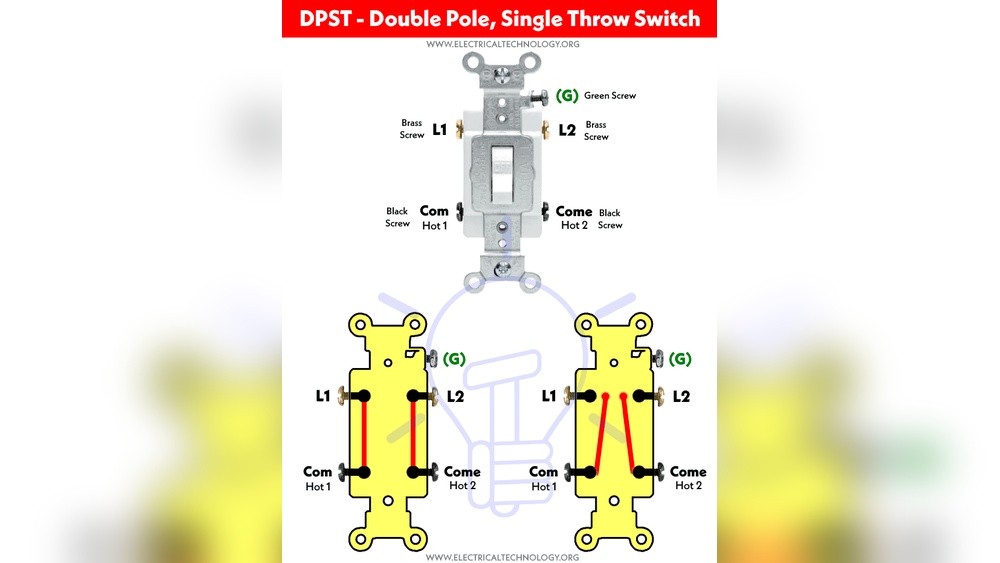
Choosing The Right Switch Type
Select a switch that fits your needs. A single-pole switch works for one light and one switch. A three-way switch controls a light from two places. Dimmer switches adjust light brightness. Check the switch’s voltage and current ratings. Pick a switch that matches your outlet and light fixture. Using the right switch keeps your system safe and efficient.
Removing The Existing Outlet
Removing the existing outlet is the first step in adding a light switch to it. This step requires care and attention to avoid any electrical hazards. Taking proper safety measures is key before starting the work.
Turn off the power at the circuit breaker to ensure no electricity flows to the outlet. Use a voltage tester to double-check the power is off. Only then, proceed to remove the outlet safely.
Unscrewing The Outlet Cover
Start by unscrewing the outlet cover plate. Use a flathead or Phillips screwdriver, depending on the screw type. Keep the screws in a safe place for later use.
Remove the cover plate gently to avoid damage. This exposes the outlet and wiring behind it. Check the outlet for any signs of damage or wear.
Disconnecting Wires Safely
Next, unscrew the outlet from the electrical box. Pull the outlet out carefully to access the wires. Note the position of each wire before disconnecting.
Loosen the terminal screws holding the wires. Disconnect each wire slowly to avoid pulling or damaging them. Use electrical tape to cover wire ends if needed for safety.
Keep the wires organized and ready for the new light switch installation. This step ensures a clean and safe setup for the next phase.
Wiring The New Switch
Wiring the new switch is a key step in adding a light switch to an outlet. This part connects the switch so it controls the light properly. Follow each step carefully to ensure safety and proper function.
Connecting The Switch To The Outlet
First, turn off the power at the breaker. Confirm power is off with a tester. Next, identify the hot wire in the outlet box. This wire usually has black insulation. Connect the switch’s input terminal to the hot wire. Then, connect the switch’s output terminal to the wire that leads to the light. Use wire nuts to join wires securely. Make sure no bare wire is exposed after connections.
Securing Wire Connections
Twist wires tightly before applying wire nuts. Check each connection by pulling gently on the wires. Tight connections prevent sparks and shorts. Wrap electrical tape around wire nuts for extra safety. Arrange wires neatly inside the box. Avoid crowding the box to prevent damage.
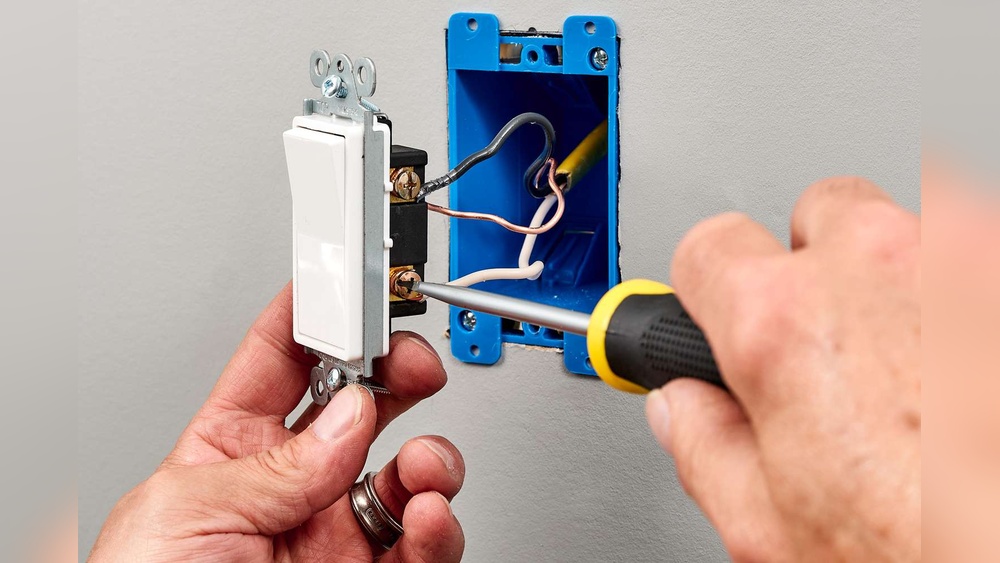
Mounting The Switch
Carefully fold wires back into the outlet box. Align the switch with the mounting holes. Use screws to secure the switch firmly. Do not overtighten screws to avoid cracking the switch. Attach the switch cover plate last. Restore power and test the switch operation.
Credit: www.reddit.com
Testing The Installation
Testing the installation is a key step after adding a light switch to an outlet. It ensures everything works safely and correctly. This step helps avoid electrical problems and confirms your work is done right.
Restoring Power
First, turn the circuit breaker back on to restore power. Check the outlet and switch for any signs of power. Use a voltage tester to confirm electricity flows to the outlet.
Be careful during this step. Make sure your hands are dry and tools are insulated. Safety is very important when working with electricity.
Checking Switch Functionality
Next, test the switch by turning it on and off several times. The connected light or device should respond immediately. If the light turns on and off as expected, the installation is successful.
Try the switch with different devices if possible. This confirms the switch controls the outlet correctly. Listen for any unusual sounds from the switch, like buzzing.
Troubleshooting Common Issues
If the switch or outlet does not work, check your wiring again. Look for loose connections or incorrect wire placement. Tighten any loose screws on the switch and outlet terminals.
Use the voltage tester to find where power stops. This helps locate wiring problems. If problems continue, turn off the breaker and review each step carefully.
Finishing Touches
Finishing touches are important after installing a light switch to an outlet. They make the work look neat and keep everything safe. Small steps here ensure your installation lasts long and works well.
Replacing Outlet Covers
Start by putting back the outlet covers. Use covers that fit well and match your room’s style. Tighten the screws just enough to hold the cover without cracking it. Clean the covers before installing for a fresh look. This step protects wires and keeps dust away.
Ensuring Safety Compliance
Check that all wiring follows local electrical codes. Use a voltage tester to confirm no current flows before touching wires. Make sure the switch and outlet are properly grounded. If unsure, hire a licensed electrician to inspect your work. Safety is key to avoid shocks or fire risks.

Credit: www.do-it-yourself-help.com

Credit: www.youtube.com
Frequently Asked Questions
How Do I Safely Add A Light Switch To An Outlet?
Turn off the power at the circuit breaker first. Use a voltage tester to confirm no electricity flows. Connect the switch to the outlet’s hot wire with proper wire connectors. Follow electrical codes and consult a professional if unsure.
What Tools Are Needed To Add A Switch To An Outlet?
You need a screwdriver, wire stripper, voltage tester, electrical tape, wire nuts, and a light switch. A drill may be required for new mounting holes. Always use insulated tools for safety when working with electricity.
Can I Control An Outlet With A Light Switch?
Yes, by wiring the switch to the outlet’s hot wire, you can control power flow. This setup lets you turn devices on or off from the switch. Ensure wiring follows local electrical codes for safety and compliance.
Is It Difficult To Install A Light Switch On An Outlet?
Installation difficulty varies by experience. Basic electrical knowledge helps, but beginners should follow guides carefully or hire an electrician. Mistakes can cause hazards, so prioritize safety and code compliance during installation.
Conclusion
Adding a light switch to an outlet is simple with the right steps. Always turn off power before starting any work. Use the correct tools and follow safety rules carefully. Double-check your wiring to avoid mistakes. This small change can make your space more convenient and functional.
Take your time and work patiently. Soon, you will enjoy easy control of your lights. Don’t rush, and always put safety first. A little effort brings big benefits.