Have you ever wanted to control a single light from two different switches? Imagine turning your hallway light on at the bottom of the stairs and off at the top—without walking back and forth.
Learning how to do a 2 way light switch can make your home more convenient and save you time every day. In this guide, you’ll find simple, step-by-step instructions that anyone can follow, even if you’re not an expert. Ready to take control of your lighting and impress yourself with a quick DIY project?
Let’s get started!
Credit: www.youtube.com
Tools And Materials Needed
Before starting a 2 way light switch installation, gather all tools and materials. Having everything ready saves time and avoids frustration. The right tools ensure safety and a smooth process. Use quality materials for a reliable switch connection.
Essential Tools
- Screwdriver set (flathead and Phillips)
- Wire stripper
- Voltage tester
- Needle-nose pliers
- Electrical tape
- Drill (optional for mounting)
- Flashlight or headlamp
Required Materials
- Two 2-way light switches
- Electrical wires (live, neutral, and earth)
- Wire connectors (wire nuts or terminal blocks)
- Switch box or mounting plate
- Wall plates or switch covers
- Circuit breaker or fuse (for safety)
Safety Precautions
Safety comes first when working with electrical switches. Taking the right precautions helps prevent accidents and injuries. Always prepare before starting the wiring or installation. A small mistake can cause serious harm or damage.
Power Off Checklist
Turn off the main power supply before beginning. Double-check that the circuit is not live using a voltage tester. Never rely on the switch’s off position alone. Remove any metal jewelry or watches that might conduct electricity. Keep children and pets away from the work area. Use a lock or tag on the breaker to avoid accidental power return.
Using Protective Gear
Wear insulated gloves designed for electrical work. Safety goggles protect your eyes from sparks or debris. Use rubber-soled shoes to reduce shock risk. Avoid working in wet or damp places. Keep tools insulated and in good condition. Protective gear reduces the chance of injury significantly.
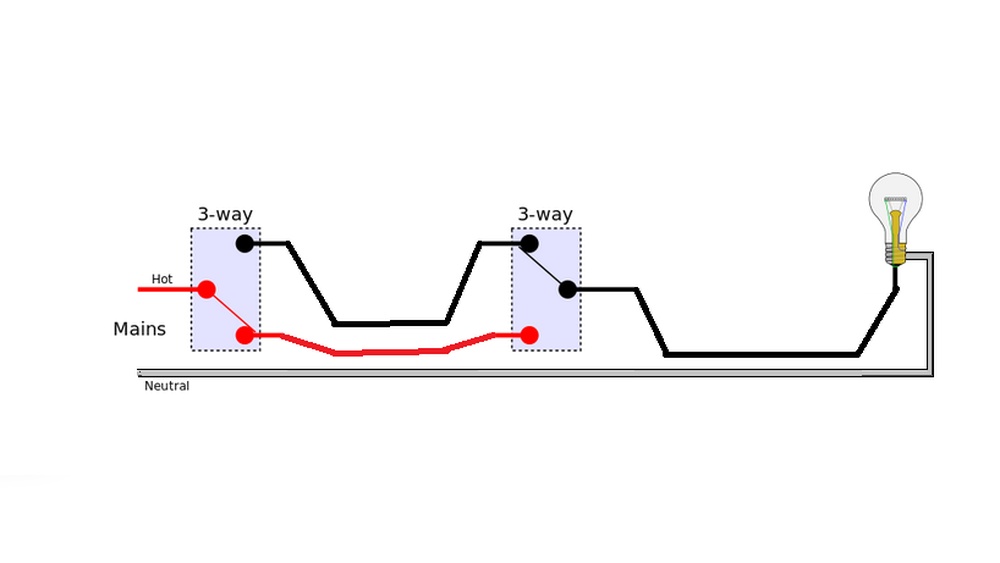
How A 2 Way Switch Works
A 2 way light switch allows control of one light from two different locations. It is common in hallways, staircases, and large rooms. Understanding how it works helps in wiring and troubleshooting. The system uses two switches connected by wires to control the same light.
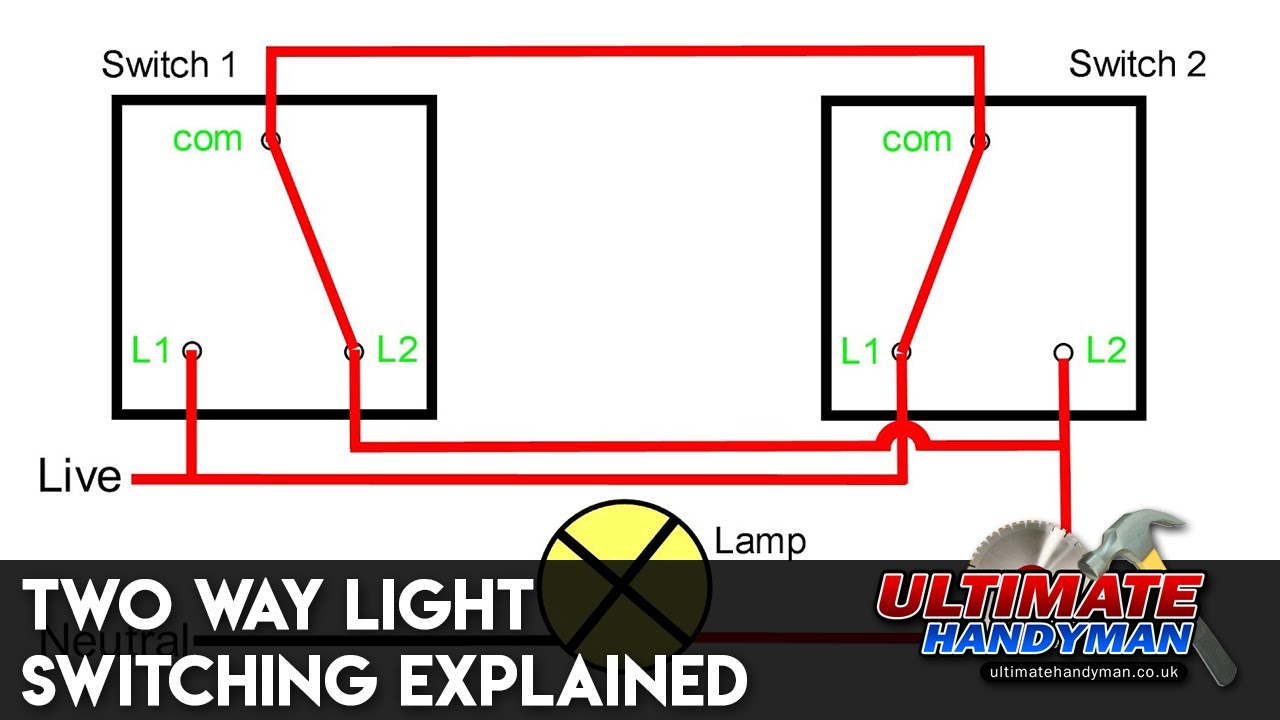
Basic Wiring Concept
The 2 way switch system has three main parts: two switches and one light. Each switch has three terminals. Two are for traveler wires. The third is for the common wire.
Traveler wires connect the two switches. The common wire connects the switch to the power source or light. Electricity flows through these wires to turn the light on or off.
Switch Operation
Each switch changes the path of electricity. Flipping a switch moves the connection from one traveler wire to the other. This either completes or breaks the circuit to the light.
Both switches work together. Changing the position of either switch can turn the light on or off. This allows control from two different places easily.

Credit: www.realpars.com
Preparing The Wiring Setup
Preparing the wiring setup is a key step before installing a 2 way light switch. This step ensures the electrical connections are safe and work properly. Taking time to prepare helps avoid mistakes and makes the installation smooth.
Start with understanding the wires in your switch box. Know their roles and colors. Then, plan how the circuit will connect both switches to control the light from two places.
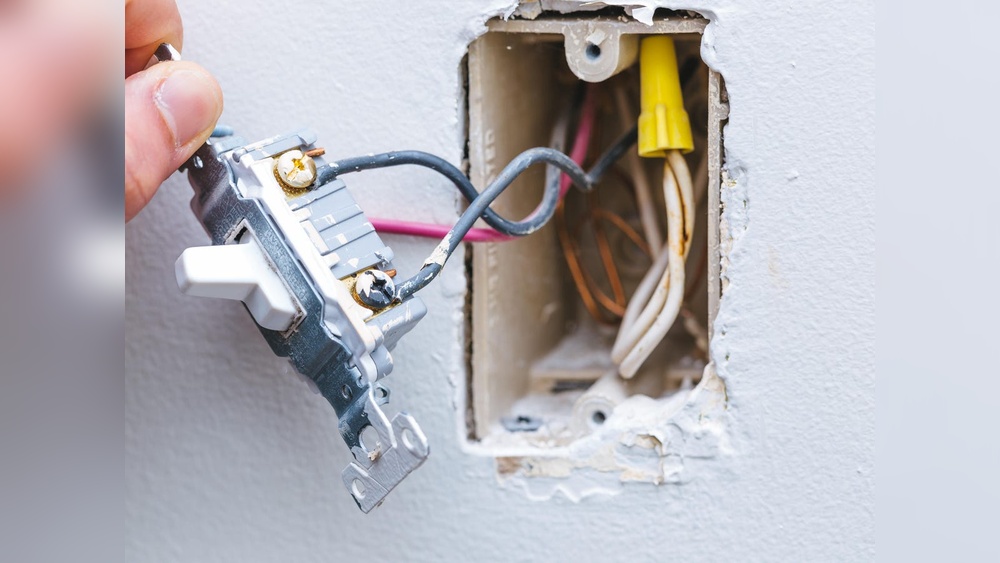
Identifying Wires
Look inside the switch box to find all wires. Typically, there are three types: live, neutral, and earth wires. The live wire carries current, usually red or brown. The neutral wire returns current and is blue or black. The earth wire is green or yellow-green for safety.
Also, find the traveler wires. These connect the two switches and allow control from both. Traveler wires are often black or gray. Use a voltage tester to check which wire is live. Label each wire with tape to remember their purpose.
Planning The Circuit
Draw a simple diagram of the wiring setup. Show the live wire going to the first switch. Then, plan two traveler wires connecting both switches. Finally, the second switch connects to the light fixture.
Decide where each wire will run and how to secure them. Make sure switches are in easy reach. The plan helps avoid confusion during installation. Check if the wires are long enough to reach each switch comfortably.
Step-by-step Installation
Installing a 2 way light switch can save time and money. It lets you control one light from two places. Follow these simple steps to replace your old switches with new ones. Safety is important. Always turn off the power before starting work.
Removing Old Switches
Start by unscrewing the switch cover plate. Use a screwdriver to remove the screws. Gently pull the switch from the wall box. Take note of how the wires connect to the switch. Use a voltage tester to check there is no power. Carefully disconnect the wires from the old switch.
Connecting The New Switches
Identify the terminals on the new switch. Attach the wires to the correct terminals. Usually, the common wire goes to the common terminal. Connect the traveler wires to the traveler terminals. Make sure all connections are tight and secure. Double-check wiring for any loose or exposed wires.
Securing The Switches
Push the wired switch back into the wall box. Align it properly to avoid pinching wires. Screw the switch firmly into place. Replace the cover plate and secure it with screws. Restore power and test both switches to confirm they work. Adjust if the light does not respond correctly.
Testing The Switches
Testing the switches is an important step in setting up a 2 way light switch. It ensures the wiring is correct and the switches work well. Testing helps avoid future problems and keeps your home safe.
Powering On
First, turn the power back on at the circuit breaker. This restores electricity to the switches. Make sure to switch on the main power carefully. Never touch wires with wet hands or metal tools. Safety comes first.
Verifying Functionality
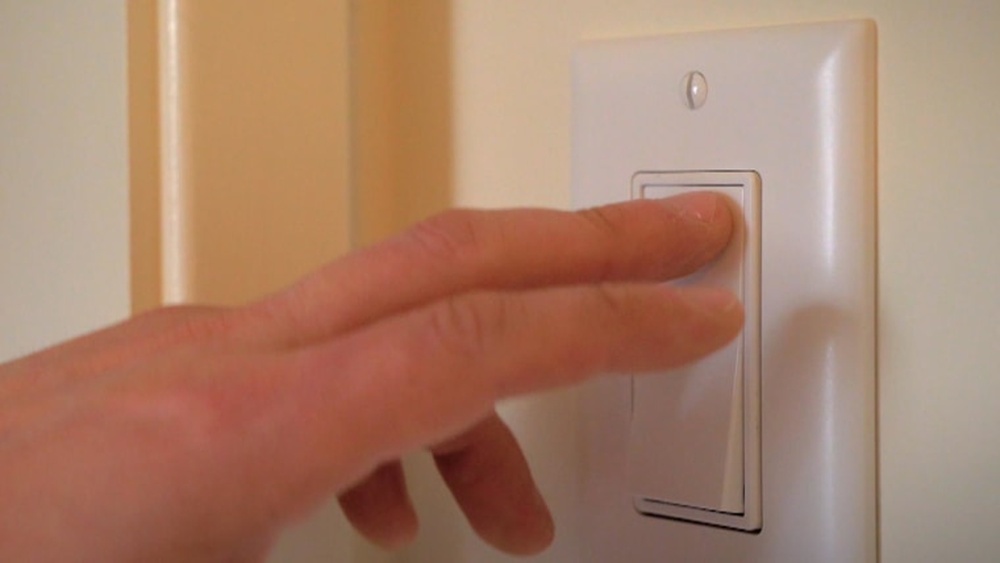
Check if the light turns on or off using each switch. Flip one switch and watch the light. Then flip the other switch and observe again. Both switches should control the light independently. If the light does not respond, recheck your wiring. Proper testing confirms your 2 way switch works correctly.
Troubleshooting Tips
Troubleshooting a 2 way light switch can be simple with the right tips. Small problems often cause switches to fail or not work properly. Knowing common issues helps you fix the problem faster. This saves time and avoids calling an electrician for minor faults. Read on to learn about common problems and quick fixes for your 2 way switch.
Common Issues
One common issue is the light not turning on from both switches. This usually means a wiring problem or a loose connection. Another issue is a switch that feels loose or does not click properly. Sometimes, the light flickers or goes off unexpectedly. This can happen due to a bad bulb or faulty wiring. Switches may also hum or buzz, which points to electrical problems inside the switch.
Quick Fixes
Start by turning off the power at the breaker box to stay safe. Tighten any loose screws on the switch and check the wire connections. Replace the light bulb with a new one to rule out bulb issues. Swap the switch with a new one if it feels loose or damaged. Use a voltage tester to confirm electricity flow before and after the switch. Clean the switch and surrounding area to remove dirt and dust. These steps solve most problems quickly and easily.

Credit: socketstore.co.uk
Frequently Asked Questions
What Is A 2 Way Light Switch And How Does It Work?
A 2 way light switch allows control of one light from two locations. It uses two switches connected via traveler wires. Flipping either switch turns the light on or off, enabling convenient control in rooms with multiple entrances.
Can I Install A 2 Way Light Switch Myself?
Yes, with basic electrical knowledge and safety precautions, you can install a 2 way switch. Turn off power before working. Follow wiring diagrams carefully. If unsure, consult a professional electrician to avoid hazards.
What Tools Are Needed For A 2 Way Switch Installation?
You need a screwdriver, wire stripper, voltage tester, and electrical tape. A drill may help for mounting. Having a wiring diagram handy ensures correct connections and a smooth installation process.
How Do I Troubleshoot A 2 Way Switch Not Working?
Check if the power is off before inspecting. Test wiring connections for looseness or damage. Ensure traveler wires are correctly connected. Replace faulty switches if needed. Use a voltage tester to verify power flow.
Conclusion
Doing a 2 way light switch is easier than it seems. Follow each step carefully and take your time. Double-check your wiring before turning the power back on. Safety is very important with electrical work. Once done, you can control your light from two places.
This setup adds convenience to any room. Practice makes perfect, so don’t rush. Keep learning and trying new projects safely. Simple skills like this make your home better. Give it a try and enjoy the results.